We’ve Moved!


If you aren’t redirected here is the link:


Remodelaholic!


THANKS!

Showing posts with label Reupholstery. Show all posts

The HOT Seat! Chair Transformation!

21 October 2011

The HOT Seat! Chair Transformation!

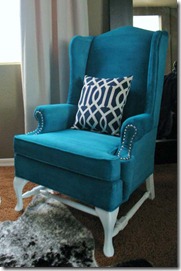
I picked up these little girls at an estate sale a year or so ago, and I just recently got around to changing them up.

I painted and recovered most of the chair, except the removable cushions. I stumbled upon a sweet lady who recovered them in record speed and for a great price, which equals a happy lady right here!

Did I fail to mention the awesome job she did? Well, awesome was the job she did...I think I'm in love, I have so many 'projects' for her ;)

In our past home the chairs were in our bedroom, now they are in the entry way. (The mister pointed out how many seating areas we have in our casa the other day....nice!)

They needed a totally different look and a friend pointed out how comfy they were, that's a plus!

Read more...

Amazing Chair Reupholstry! From Old-looking to Brand-New!

06 October 2011

Amazing Chair Reupholstry! From Old-Looking to Brand-New!

This project rates... out of anything I've ever done.... as the one I disliked the MOST while I was doing it!
BUT, this project also rates as the one I enjoy the MOST.... out of anything I've ever done.... EVERY SINGLE DAY!

Would you believe that I turned these:


Read more...

A Dining Room Chair Makeover

28 September 2011

A Dining Room Chair Makeover

Remember these Louis XVI style square back chairs I snagged from Craigslist for only $125 for all four?

They have slowly but surely been receiving updates on a weekly basis and they are finally complete! They went from this...

Read more...

Wingback Chair Reupholstering Tutorial

27 August 2011


Wingback Chair Reupholstering Tutorial 

 It is done! Done! Done! Done!


I mentioned earlier this week that I started the actual upholstering part of my wingback reupholstering this weekend and finished it in two days!!!!  It was on my "list of things to finish before my parents get here" so I thought once I start I have to get this done.

I started this project over 3 months ago {see first post here} and like many things in design it never turns out exactly the way you think it is going to go.  I first started out {in May}wanting to write a really detailed tutorial about how to reupholster a piece of furniture; even though at that point I had NEVER actually upholstered anything before... I thought if I can do it anyone can.  BUT I was not as detailed as I thought I was going to be at documenting my progress... and in the end {with a great chair but not a great "How To" post} that is the best advice I am going to give you.... BE DETAILED!!!

I started with this:

Read more...

Carver Chair Before and After Upgrade

06 July 2011


Carver Chair 
Before and After Upgrade
Submitted by Raine and Sage

Here is a lovely Carver Chair. It needed a bit of TLC as you will see, but I am pleased with the results.

Read more...

Updated Bench (Stylish Spot for the Dogs!!)

20 June 2011

Best Seat in the House: Bench Remodel


Our dogs LOVE to look out the window. I’m assuming this is a normal dog behavior, but I swear that Ranger and Cullen take it to abnormal levels.
They did it in our old apartment…
Note: this photo was taken before we lived together, which would be why it’s so messy in that house.
And when we moved to our duplex, they continued to do it, only it was even worse because our duplex faces a street, and the apartment didn’t.
It’s annoying, to say the least, but there’s not much we can do about it.
On a seemingly unrelated note (I promise I’ll link it all back together), Cullen has suddenly decided that for some unknown reason he can’t jump up on our bed. Never mind the fact that he had zero problem with it for the first 6 months we lived here, and when we’re giving Ranger lots of love on the bed he doesn’t seem to struggle too much to get up there and get some love for himself.
But when it’s time for bed? He’ll spend hours (seriously, HOURS) jumping up and down next to the side of the bed, barking at us to help him up. I work with kids with behavior issues for a living, so it’s putting it mildly to say that I get a bit stubborn when it comes to these things. I absolutely refuse to let him learn that if he barks at us, we’ll let him up, so if we don’t catch him and toss him up on the bed before the barking starts, it’s unlikely we’ll get any sleep that night.
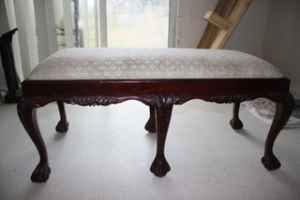
So, the other day when I was browsing Craigslist and I saw something that could be a solution to our problem, I knew I absolutely had to have it.
I’d been tossing around the idea to get a bench for the end of our bed in the new house (since our master bedroom is SO BIG), and this one fit what I wanted exactly.
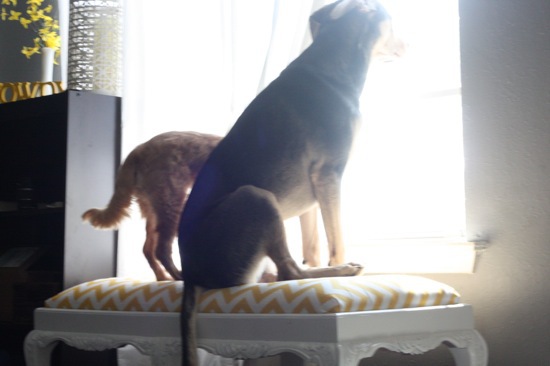
And of course, in the meantime, it totally doesn’t hurt that we can put it next to our front window (since it doesn’t fit into our current tiny bedroom) and the dogs can hang out on it to look outside. See? I told you it would all make sense in a minute.
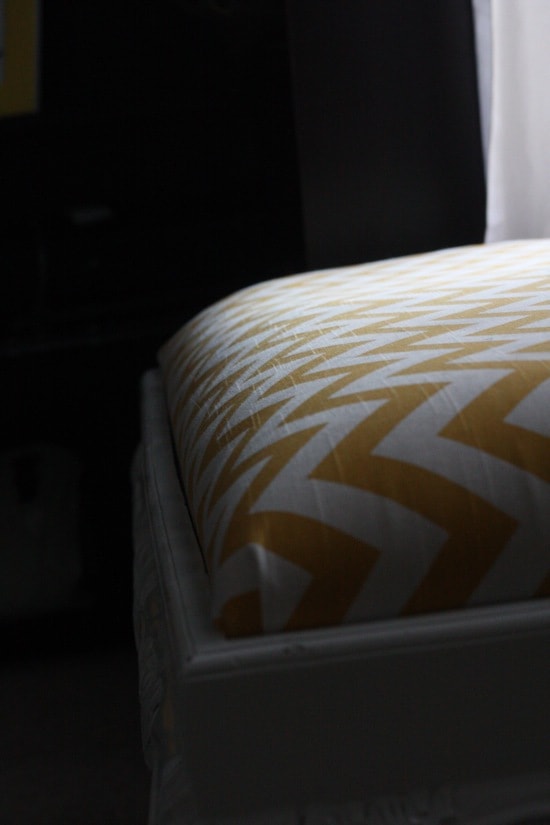
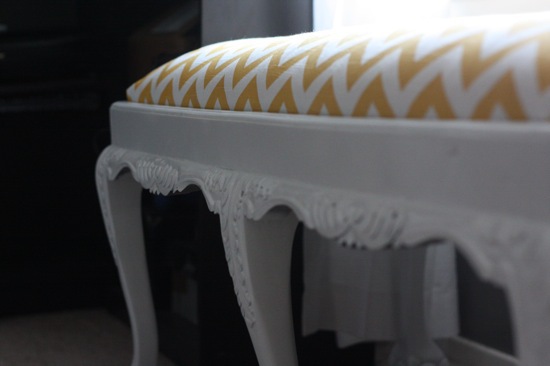
As soon as I got the bench back home, I had a vision in mind of exactly what I wanted for it. Glossy white paint and a modern, yellow fabric. I’m a big fan of mixing unexpected patterns and colors with more traditional pieces, and I was super excited to see how this one turned out.
I got it all painted within a few days of getting it, but then we had to wait for the fabric to arrive. So, for several days we had this sitting in our living room:
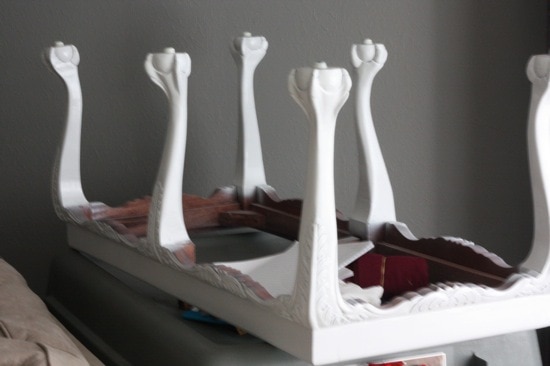
Lovely, right?
Well, the fabric finally came in a couple of days ago and I got the bench reupholstered and ready for our new master bedroom!
I tried to take photos of the finished product right after I was done, but there was a minor problem.
For the first few days, I literally could not get the dogs off of the bench long enough to take photos of it. They are in LOVE. One of them is almost constantly on it, and Cullen is very happy that he no longer has to stand on his hind legs to look out of the window.
Once the bench had been around for a few days, I finally caught a few minutes where neither of the dogs was one it (probably because they were outside or something) so I managed to snap a few photos of the bench by itself.


I’m absolutely in love with it, and I can’t wait to see how it looks in our room at the new house. And I can’t wait to know what it’s like to have a dog that can get up on the bed by himself again.
Oh, and don’t worry – the windows in the new house go almost down to the floor, so hopefully the dogs won’t be too upset when there isn’t a bench by the front window anymore.
Have you ever bought or modified anything in your house to make life easier for your dogs? Or am I the only crazy/pathetic one that does crap like this?


Read more...

Amazing Armchair Makeover

18 April 2011

Amazing Armchair Makeover by That's My Letter

“J” is for Jaime – Today I’m the guest blogger here at Remodelaholic. I jumped at the chance to
be part of Cassity’s great collection, thank you for asking.

My blog, That’s My Letter,
has evolved into a make this, change that, do-it-yourself virtual scrapbook for my
little hobby of working with my hands.  The title came from my kids, when they were
younger they’d always point out the first letter of their name and say ‘that’s my letter’ mom so I
went with it. And now I title every post with a letter and one word to describe the project. It has
become my signature.

I’m a Midwestern girl born and raised in Minnesota but married to a New Yorker so we're
here on the East Coast. All my life I’ve been creating, I was a studio art major in college and
worked a bit for an interior designer. Now I have three young kids and life is busy but I love the
challenge and always search for the best way to make it work.
My recent project, an armchair makeover, is the focus of today’s post. A quick before and
after:


Read more...
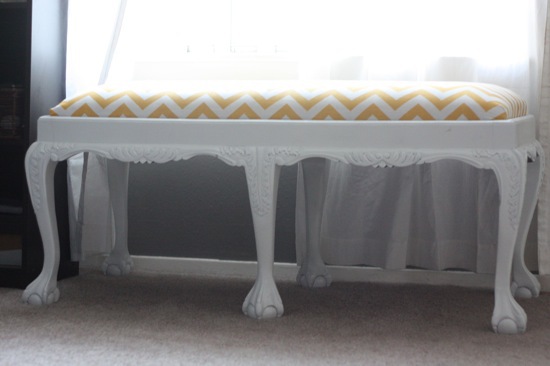
Slipcover Instructions!

24 March 2011


Hi! I'm Rachelle from the blog Adventures In Creating where I do everything from sewing to welding. I am thrilled to be guest posting on one of my favorite blogs. Thank you so much Cassity for this opportunity!


Today I'm going to share one of my recent sewing projects where I reupholstered this old lounge chair. It first belonged to my parents who bought it when they got married. They gave it to me when I got married and needed furniture for our new home. I always thought I'd reupholster it or slipcover it.


Well, after almost 5 years I finally got around to slipcovering it! And ended up with this:

Read more...

A New Look for and Old Chair: Painted Upholstery

23 March 2011

A New Look for and Old Chair: Painted Upholstery

Cassity asked me to guest blog and I was so excited. What a great blog to get to guest blog on! This was my FIRST time to be asked to guest blog.  I’m new to blogging.  I haven’t been blogging for a full month yet!  So, thank you, Cassity; Too kind.

My current ongoing project is my master bedroom.  I have documented the process on my blog from the conception of ideas to making it happen.  I’m in the final stages now – just waiting to make some art and get the final table.  Then, I’ll be ready to reveal!   As part of the process, I painted the upholstery on a chair!  Crazy, I know… but I do think this risk was worthwhile.   Follow me as I explain the process below!

How do you get a chair to go from drab to fab?

I recently painted an upholstered chair that I purchased.   Below are before and after photos.  Walk with me as I explain why I did this and how it was done.

IMG_4609   IMG_4793 (465x640)

Read more...

Refinished Dining Room Table and Chair Re-upholstery Tutorial

08 March 2011

Refinished Dining Room Table and 
Chair Re-upholstery Tutorial
Special Guest Feature by  


I'm thrilled to be here at Remodelaholic today to share my dining room and a
simple upholstery tutorial with you!

I'm a new blogger over at Natty by Design where I share the ins and outs of my
furniture refinishing business and the S-L-O-W transformation of my new home.  I
thrive on the adrenaline of a good challenge and I have a passion for learning new things.
I am an incurable DIYer. If I can do it myself - then I'm going to do it by myself.  So without further ado, my dining room...


Prepare yourselves for the fabulous before and after of my table and chairs!
Nothing is more exciting than a great "before and after"...agreed?


This picture doesn't do the
complete nastiness of the table justice.  The previous owners had two very large
dogs that had done some serious damage to the legs and a couple of the cushions.
Something else you can't see are the atrocious seashell details on the table legs - my
husband, Zac, took the grinder to those.  I wasn't digging the heart shaped
backs either, so I made a template out of cardstock similar to the Pottery Barn chairs
here and he cut them out with his trusty
jigsaw.


Ahhh, so much better.


Read more...

DIY Chair Makeover Under $50

22 February 2011

DIY Chair Makeover Under $50
contributed by Daniele Oakey Interiors

i finally finished my chair makeover.
it sure is harder than it looks.
i started this makeover about 4 months ago.
i quickly painted, removed the existing fabric, and began to re-upholster.
then i got frustrated, so i stopped.
the torn up chair sat in the corner of my living room piled high with fabric and batting.
it haunted me daily.

then my mom arrived and 3 hours later, it was DONE!
what a relief.


i still need to finish stuffing the seat and back cushion but i am SO excited to be almost done i couldn't wait to share.

Read more...

Re-upholstered Side Chair

26 January 2011

Re-upholstered Side Chair


Here it is folks, my first attempt at this re-upholstery business.  It wasn't has hard as I imagined it to be.  Mostly just physically demanding.  My back was very sore from pulling so hard at the staples.  But over all it is just common sense.  Just put new fabric where ever the old fabric was.  I will be giving a full tutorial soon, maybe tomorrow.  Without further ado.... 


Read more...
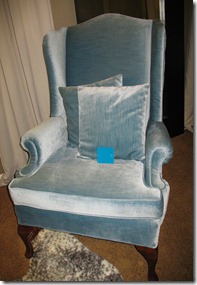
Using Custom Made Slipcovers to Unify Your Room

09 December 2010

Using Custom Made Slipcovers to Unify Your Room


So the other day, when my kids started school I decided to scrape all the junk off the kitchen floor and mop and wash my slipcovers. My three boys make things pretty gross. Anyhow I realized I have never posted what my furniture looks like underneath my slipcovers. SO here it is.


Front room before


Here is a photo of my room without slipcovers. My nice peach velvet tufted couch I picked up for $13 from Savers (local thrift store). My nice green loveseat is from a yardsale for $20. They two toile arm chairs I picked up from DI (local thrift store) for $10 each and had to have the springs fixed and the legs reglued. My upholsterer told me I might as well reupholster them...it would be the same price. So I hurried to the fabric store and chose this black and white toile. I still wanted to slipcover the chairs to protect them from my little ones.


couch before

Here is a close up of the couch. I really love the tufting and while the slipcovers were washing I was trying to figure out some color scheme that would make the peach color look "cool". Then I gave up because I was remembering my childhood bedroom that my mother decorated in peach and light green. I think I'll stick to the tan slipcover.


loveseat before


This loveseat's fabric is really slick and when you'd sit on the slipcovered loveseat the slipcover would pull and shift way more than normal, so I sewed some velcro onto the seam allowance of the top inside back. Then I staple gunned the other side of velcro to the loveseat itself, now it stays in place perfectly. I love the arms on this piece.


velcro on outside back of loveseat

Muslin slip for couch to keep the velvet from sticking and pulling the slipcover funny

I got tired of the slipcover sticking to the velvet and pulling weird, so I made this underslip out of scraps of muslin.


Front room after


The couch and loveseat are slipcovered in a tan cotton fabric. The chairs are out of white duck cloth. I always like to finish a room off with pillows, so I used some white pottery barn linen napkins to back most of the pillows and pieced the ones on the chairs out of scraps.


couch after


I ended up replacing all the cushions with down. The couch and loveseat are down envelopes  with a foam core (extra support). The chairs are solid down with no foam.


Loveseat after


I did gathered skirts on the couch and loveseat...they are completly different shapes but with the same fabric and skirts they look like a set.


chairs after


I decided to do a short kick pleat skirt on the chairs and let the legs show.

IF you are interested in learning to make slipcovers yourself click on the button (HOW TO SLIPCOVER DVD)to purchase.

Photobucket

Read more...
Related Posts with Thumbnails
Emealz - Easy Meals for Busy People!
Home & Garden Blogs Home & Garden Blogs - Blog Rankings

Blogging  tips, tutorials and SEO

From Here to Eternity

  © Blogger template On The Road by Ourblogtemplates.com 2009

Back to TOP