We’ve Moved!


If you aren’t redirected here is the link:


Remodelaholic!


THANKS!

Showing posts with label Downing House. Show all posts

Master Bath; Retro Remodel Asheville House

01 January 2010

In Asheville North Carolina we had a really small house barely 1,000 square feet and no budget to speak of.  So, when Justin's office all but shut down and laid off over 20 people we had to find a job, and fast... which also meant that we had a ton of remodeling to do in about a month.  This project was one of them, our tine master bath it was about 5 feet wide by 8 ft long.  It seemed even smaller with the tiny 1 sink cabinet and large storage closet, so we had to do a bit of deconstruction, and I love how it turned out.

Like I said we had almost no budget and a few things got left out of the remodel, but it is still lovely.

Here are the before images:


First long before we actually began the remodel, we removed the base cabinet under the sink.  We reused it in the kitchen.  (Just rebuilt the whole body and just used the face frame and doors, don't worry we cleaned it really well and painted it!). This is a picture of him removing it and installing it in the kitchen,
here is a link to the full kitchen remodel story.


Here is the room in the midst of cleaning it out completely
(besides the shower, which I would have like to tile, but we didn't get the chance)
Notice the large mirror.  We got this on Asheville freecycle!  I love freecycle

did the tiling.  It was a hot day, so I set up a little oasis for cutting the tile.  I think it is pretty funny!

I decided to do a brick pattern which I think is much more interesting than just regular tile.  It wasn't any harder either, and it made the floor look a little more custom.  The most exciting part about the tile was that I found it on clearance at the Home Depot for $1.65 a BOX!!!  (11 sq feet each box!)

The bathroom cost us about 5.00 total for the tile!
Justin built our new cabinet base.  I LOVE it!  I wanted t to be open and tall, and he filled my requests perfectly.  We actually were able to use all recycled wood.  Our church was being remodeled and the old window casings were removed and we asked the man in charge, and he let us take them.  Free!!! Doesn't that just sound beautiful. 
I patched sanded and painted the whole table.  Then we bought a double sink top it was just a plain white one from home depot for about 200.00?  I think...
Here is the room painted a light tan, and the ceiling is a robin egg blue. 
The base moldings were just installed and we still have the crown and the fixtures to install.

Okay one quick reminder of the before:


Final:
If I had more time I would have framed in the mirror at least.

So, What do you think?
Do you have any questions?  Let me know!

Read more...

Make like a tree...

26 October 2008

And leaf.

And so we left. Here are some randoms of the move. I always forget to photograph the actual moving of the boxes, probably because I am in the middle of the moving van, explaining- "yes, I know this looks like crap, but I like this piece of furniture more than that one. so more furniture covers please..."

This is mostly for my sake, so sorry if this blog is especially boring!

The Empty ABF Van

Buddy's wondering "What's going on?"
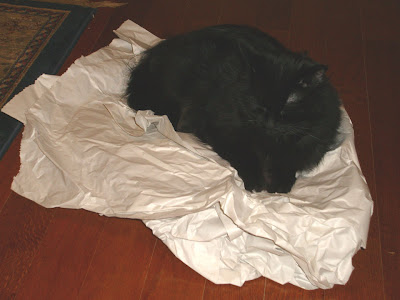
Happiness is a piece of paper on the ground that you can sleep on.

Boxes, Boxes, BOXES
Kitty- packed herself up all nice and tight!
How is all this junk supposed to fit in that van thingy?
Just hold it, perfect! Now don't move!
The empty house, SAD!

Read more...

And now, the rest of the story.

22 August 2008

I just keep not having time to post our most recent changes and thought I ought to do so now. We have our first showing tomorrow, so I am feeling a lot of relief. It is just so hard to think about what are plans are when the house hasn't sold, but that is not the point of this blog. So I will move on.

Front Room
_________________________


First of all we had to remove all the old carpeting and base molding. Let me just take the time to say that I hate staples. There are always a million staples and yuck it took forever just getting them out before we could even think about beginning.
(Buddies eyes look especially freaky, like they are bugging out of his head)


So after we had finished returning all our kitchen appliances to their original location, we moved everything from the front room to the kitchen. After it was all in there Justin was like, "See, we can live in 200 sq feet like those little houses that are set up in Ikea", uh- yeah, sure.

We had to prime the floor first and let it dry for a night. Then we got started on the gluing. Justin put down the glue and I cut and installed the wood.


We had to get really creative for weights to hold down the floor, while it set. There were bags of sugar, flour, soda, stacks of books, large cans of pinto beans... The list goes on, so I had to get a picture of it all.


The first few things go back into the space! (after about 3 full days of it all a mish-mash pile in the kitchen) Oh, and be sure to notice the new base molding we installed too.

We had to finish installing the crown molding on the front wall.
We never actually finished this corner ( I masking taped it in the mean time and painted so it didn't look awful but was a little po-dunk). When we removed the kitchen wall and opened it up to the front room we left the wall unfinished with the intentions of moving the front door over and adding a long window next to the front door.
Later we decided not to make the effort to change it, which is sad. It would have added a lot of good square footage to the front room. Right now that space can only be used as a pathway. But oh well its done right?!!


This picture may be repeat, but the focus in this one is the finally finished corner in the front room, not the kitchen.


I don't know why, but I really like to place things together randomly and do it as unstudied-ly as possible. I like it to feel like they just kind of ended up there, like someone set the thing down and it has lived there ever since. Before the remodel I had a bunch of stuff up on the armoire that I really liked but have moved most of it to make it feel less crowded. So here is a picture, but I still liked it better when it was over stuffed and a little more random.


The finished product. I will have to take a few other pictures later. For now in the opposite corner, I have a lot of boxes of randoms to pack and haven't moved them out yet. Maybe by tomorrow....


Master Bathroom
______________________________________________________

So you've already seen the beginning of the master bath a month or so ago, here is the final project. And by the way, this project makes me the most sad about leaving this house.

Here, Justin is figuring out the wiring. He is also wearing my pink bandanna as a sweat band and I had to get a picture of his cute little head band!

The floor is finished, the wall are drywalled the new plumbing installed, the base is in, walls are painted, next the crown will be installed and then all the fixtures and wall-ah!

OH - IT IS JUST SO BEAUTIFUL!
More to come, (yet again I did not finish) we have got to run to a friends house for dinner!

Read more...

Kitchen of my dreams

17 August 2008

Almost! Okay, so it isn't quite the kitchen of my dreams, but it is pretty much as close as our budget can get us at the moment. I won't bore you with a big long explanation, I'll just put captions under the pictures for those that want to read them.

The original before (or click on the links for the full story!)

Before
The Plans
During 1
During


So, without further adieu, I'd like to introduce you to my new Kitchen (with a capital K):


We enlisted the local missionaries for more than their share of work, but they have been a dream in our time of desperate need! Thanks SOOO much Elder Crandall and Elder Bennion! They ripped out the second layer of vinyl after my shoulder and arms were so messed up that I couldn't hold a hammer any longer (before this I removed about 2000 staples from the first layer of vinyl and plywood, and each had to be hammered to loosen then ripped out with pliers the rest of the way)


The floor all cleaned off and ready for the new layer of junk we are about to install.


Here is the view into the living room, I think it is too funny! Our best Friends in college always though that we were mad for being able to live with the mess that remodeling makes, but it is a high that can't be explained. Besides when you've lived through this for 4 or 5 days when you finally get everything in order it is like a dream come true!


About 5 or 6 hours later we had all the cement board cut and screwed in place. If you look at the pictures you will notice that it has to be screwed about every 8 inches, and I think we went through about 15 screw heads, they just kept snapping off! Annoying!


Buddy is such a good helper! I think that he really likes how cold the tile is. As soon as I laid it down he came and made himself comfortable on the tile and didn't move for like 6 hours!

I have to get proof every once in a while that I work on the house. I am the informal, not so professional, self assigned documentor of our house remodeling projects so that means I am never in the pictures unless I take one of myself or request one. This one if funny because if you notice the bottom of my shirt is soaked. The tile saw soaked me and I was freezing the entire time I was laying the tile.
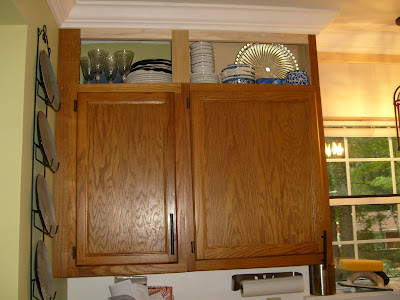
This is the before picture of the upper cabinets before I tried staining them to match the other cabinets to match the existing oak.
This was almost immediately after staining. At first it looked great! But then the poplar got all wavy and irregular. (yes, I conditioned the wood before applying, but to no avail, it did nothing whatsoever)
So here we are prepping the doors for paint, actually Justin is. I sanded and painted the body of the cabinets inside, while he faced the mosquito filled tropics of our carport. But while I had to use a brush he got to use our brand spankin' new spray painter.
Oh and by the way, I got this great idea for painting the doors off of This Old House (I LUV TOH)- You put small screws in the top of the upper cabinet doors and in the bottom of the lower cabinet doors then you attach wire to the screws and you can hang them so they don't get knocked and you can paint both sides at once.


Justin rigged a rope with a hook that got more elaborate as the day went on with more and more tarps to catch the over spray from the painter.

Now please don't focus on the mess inside my cabinets. (alas, you all just looked at it again) About a week before this project, I took down my extra, sort of ghetto looking, pantry shelves from the laundry room and shoved everything haphazardly back into my cabinets and anywhere else they could fit, ah, the joys of food storage. So normally they do not look this bad, but yet again this is just another example of what I can deal with in order to get a project done!


I thought it would be fun to take a few pictures of details. I may add another post later when I have more time and more finishing touches ready to photograph in the house.


Hey Mom- check out the cool piece of pottery you bought me! I love the color!


The view from the front room of the new improved cabinetry!


The full Kitchen!


Finally it is done! I can hear the heavenly host singing!

p.s.  I thought I should give you an idea of cost.
flooring :
tile: A total score at $1.56 a box,
plus 2 free boxes (from the day before) because they couldn't find the price in the inventory
Cement board about $100 with screws, a million new screw heads etc.
Grout and thin-set : $50.00

Cabinets:
Reused master bath cabinet free.
Cut several cabinets in half, free.
boxes above cabinets, recycled wood from a local church, free.
Paint, Ace hardware water based enamel 2 gallons about $60.00
Hinges and handles, clearance approx. 100.00

Lighting:
above sink, Habitat for humanity $10.00
Above Table Lowe's Clearance 8.00 a piece

Counter tops
Prefab (ran out of time) approx $200.00

Paint on walls,
Back-splash left over from other projects
Green wall color, mis mixed 5.00 gallon

Valance:
I made from approx 1 yard of $5.00 fabric.

Faucet:
Lowe's approx $80.00

Sink:
Habitat for Humanity $75.00

Grand Total: Approx $715.00

I guess that doesn't include the price of the microwave, which I think was about 150.00 or less?

Read more...
Related Posts with Thumbnails
Emealz - Easy Meals for Busy People!
Home & Garden Blogs Home & Garden Blogs - Blog Rankings

Blogging  tips, tutorials and SEO

From Here to Eternity

  © Blogger template On The Road by Ourblogtemplates.com 2009

Back to TOP