We’ve Moved!


If you aren’t redirected here is the link:


Remodelaholic!


THANKS!

Showing posts with label Coffee and End Tables. Show all posts

Coffee Table Face-lift! Adding Bead Board!

27 September 2011

Coffee Table Face-lift! Adding Bead Board!
                
If you’re a regular reader, you know that we’ve been making over our little old war-era bungalow one diy project at a time for the last several months. Unfortunately, I tend to bounce around a bit and not finish one room entirely before moving onto another project (I clean like that too, a little here, oh look that’s dirty, a little there). Things like the right light fixture for the kitchen and painting the hallway ceiling are still left undone.
It’s no different with the living room mini-makeover. I started out wanting to paint our pine tv armoire (apparently 92% of our readers wanted us to paint it to!). As soon as I had a coat of paint on it, I realized our old-school country coffee table needed a pick me up even more. (Yes, that is a heart cutout you see. Oh, the decorating sins I have committed.)

Read more...

French Twist- Giving a Table a Vintage French Look!

07 June 2011

French Twist- Giving a table a vintage French Look! by Korrie

I am tickled to be writing a guest post for Remodelaholic! Thank you, Cassity, for asking me.

I write a little blog called Red Hen Home. Why "Red Hen"? Well, my husband thinks I have a little bit of a "red hen" complex--that is, I have a "Well, then I'll do it MYSELF!" kind of attitude.

I don't really disagree with him. ;-)
I started blogging close to a year ago so I would have someone to share my little projects (mostly furniture, a little decorating, and even sometimes...knitting) with...my husband tries, but he just isn't able to generate a lot of enthusiasm for my obsession!

I have a definite love for typography...letters, numbers, symbols, whatever! When I saw a beautiful piece of clip art at The Graphics Fairy, I used it to turn this table:


into this table!

You can see the whole "how-to" in my post A Little French Chocolate.
It was such a fun (although back-breaking) project
that I wanted to see if I could do it again!
Shall we see??
I found this little table at Deseret Industries (that's Utah's "Goodwill"). It was only $5! Do you see those legs?? I love that barley twist!


Oh...here's why it's only $5...the finish on the top is shot, and one of the planks is completely unglued.


I couldn't be happier!
The first order of business was to sand down the table top to remove the old finish--but I didn't worry about any dings or scratches. That's just character!

I re-glued the plank back with it's brothers. This is the first time Liquid Nails has failed me. Gorilla Glue came to the rescue!


Then I spent a happy couple of hours searching for just the right graphic at the Graphics Fairy again. This is the one I chose.

And no, I have no idea what it means! I even tried an on-line translator, and all I can tell you is that it may have something to do with hardware, and the last line says "of all kinds & all styles."

Works for me!
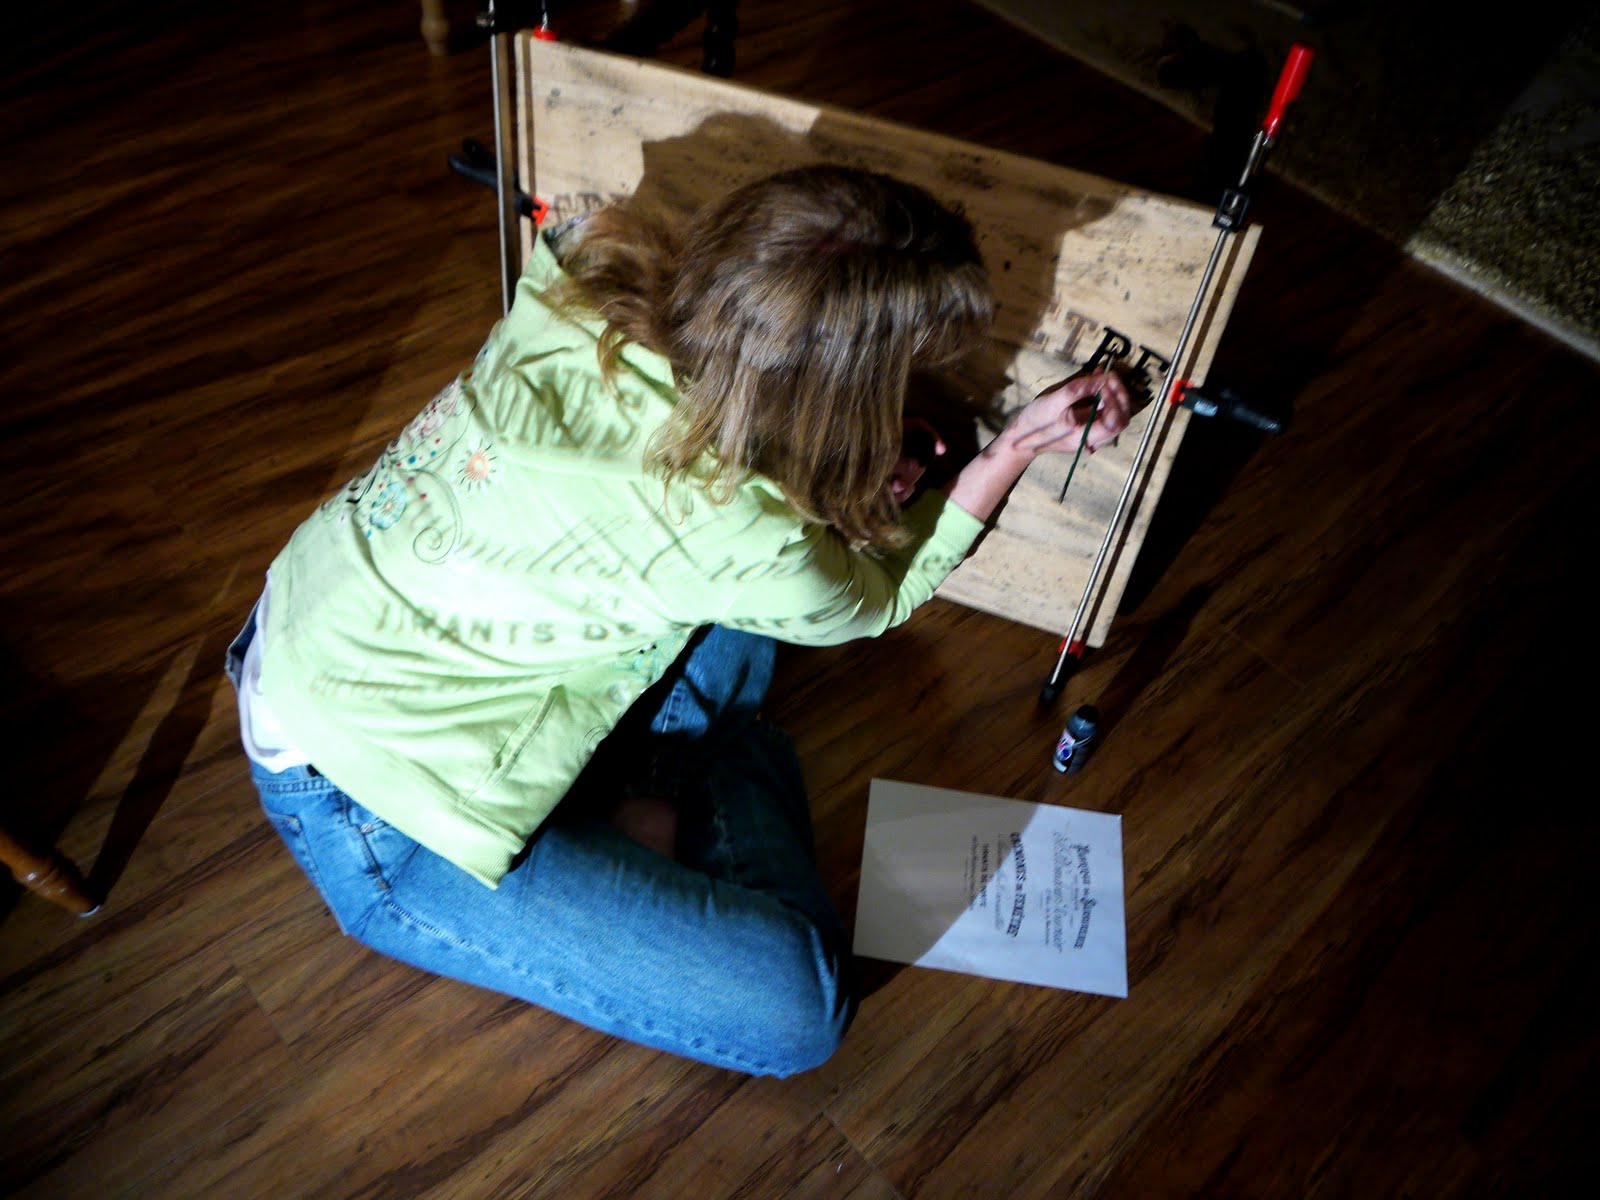
After printing my image, I took it to Office Max and had it copied onto overhead transparency film. Using a borrowed overhead projector, I set up shop on my kitchen floor after my little ones had been sent to bed!


A smart person, a wiser person, a less-impatient person, would have figured out how to raise this setup off of the floor after the first table.
I...am not that person.
So I planted myself on the floor with my little bottle of acrylic paint and a brush, and spent the next couple of hours in all sorts of contortions on the floor.


It's another sign of impatience that I painted with the clamps still on!

Here's the initial result:

Next day I painted the bottom with Sherwin Williams Creamy paint, distressed the black lettering on top of the table, and applied a coat of Minwax Antique Walnut with an old rag.


Later I distressed the paint and glazed the table legs with Minwax Jacobean stain.

And here's what it looks like now!


I moved the table into my front room to get some additional shots. I have two arm chairs in there with one of the first tables I ever painted in between them (painted in the days before I knew about distressing or glazing). I moved the old table (that looks newer) out, and put the new table (that looks older) in...


It may never leave!

Hope you enjoyed your peek into Red Hen Home.
Come visit soon!


Read more...

From Desk to Ottoman

18 May 2011

From Desk to Ottoman by Kat

Hey there guys! This is Kat from Maple Leaves & Sycamore Trees where we're renovating our home (all 950 sq ft of it) little by little and trying to do it on the cheap. We just recently redid our kitchen, and are in the process of renovating our garage into more usable living space. And today I'm going to share our latest DIY project with you, so thanks for having me, Cassity!

Like many of you, I love checking out blogs and magazines soaking up design inspiration along the way. That being said, I know that I simply can't afford to furnish my home with those same designer items while living on a shoe-string budget. So how do you get the look without breaking the bank? Improvise. And that's exactly what my husband and I did with this DIY ottoman project. First, I bought this table at Goodwill several months ago for ten smackaroos:


And just recently turned it into this ottoman (while saving ourselves some serious cash):


And this is how we did it:
First, my husband, Mitch, cut down the legs for me with his miter saw.


Next I sprayed the legs with a glossy black spray paint.


We took foam from a former couch cushion and cut it to size. Reuse whatcha got!


 It was way to thick to use as is, so I cut it in half with my bread knife. 


Then used an electric bread knife to finish up the job. Who knew kitchen utensils would come in handy with this project!


Next, we attached the foam to the top of the table with spray adhesive.


Covered it with batting


Then Mitch cut boards (from a skid) to length and I wrapped them with batting and fabric.


We covered the foam with fabric while stapling it to the underside of the tabletop. 


Mitch adhered the sides with screws from the inside while I made sure the print lined up as evenly as possible.


Mitch then added the nailhead trim. (Have you noticed yet that he did all the tedious things? Having a partner really helps!)


We tufted the top with  fabric covered buttons. 


This is what the underside of the ottoman looks like. Once we pulled the string taut, I threaded a button on the string and tied several knots to keep it that way. 


And here ya go--the finished product!


So if a guy and a girl who know nothing about upholstering can do this project, so can you! I have found that if you have the vision, you can make pretty much anything happen.

Thanks again, Cassity, for having me today. Come on over to Maple Leaves & Sycamore Trees for some more thrifty inspiration.

Read more...

Pedestal Style Kitchen Table, Cut Up And Turned Into A Coffee Table.

11 April 2011

Pedestal Style Kitchen Table, Cut Up And Turned Into A Coffee Table.

I was too excited to wait until next week to share this little project I have been working on all weekend.

For a few years, I have been searching for a pedestal style kitchen table to cut up and turn into a round coffee table for my family room.

I have a lot of little kids, the idea of a coffee table with no sharp corners makes me happy.

It was going to be a tricky redo, because, as it turns out, people don't want to sell their nice wood tables for cheap. Even thrift stores would mark them much more than I ever wanted to spend on an item that I was ultimately going to cut up and paint. I just happened to be driving past a local thrift shop that sets of its goods out to suck you in, and there it was.

A pedestal table. I stopped on a whim, and checked the price. $75. I was hoping they would come down on the price, when the guy running it said that everything was 50% off that day. Sweet! With tax, it ended up being just under $40, which I was more than willing to pay.

Now, this puppy isn't solid wood. The pedestal is, as are the feet, but the tabletop is just veneer. Which, for me, is fine. This isn't an heirloom piece. The great thing about it being MDF on the inside is that it is a great deal thicker and sturdier than an all wood table, which means my kids can lean on it without fear of tipping.

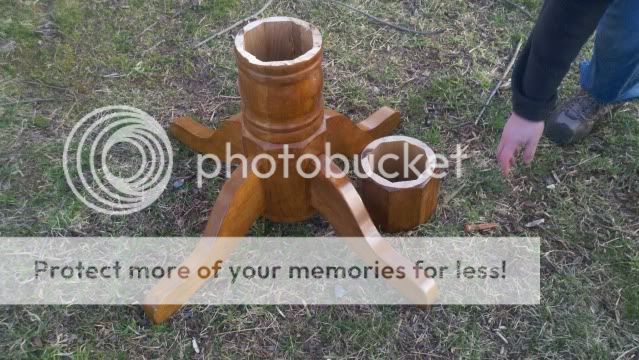
I didn't get a good "before" pic, because my hubby decided to just take the top right off of it almost as soon as I got it out of the car. So here is a before of the pedestal at least:

with some of the pedestal cut off. He got it all cut, the screws replaced, and then when we got it inside, we decided to cut it down a little bit more, so it isn't as tall as it is here:

Read more...

Beach Inspired End Table Redo; and Beach Pictures

22 December 2010

Beach Inspired End Table Redo; and Beach Pictures

Alright, it's been awhile since my last post. I was away last week on vacation in Lake Michigan where I got some major inspiration! Rocks on the seashore, shabby furniture on the beach, and driftwood laying all over! It was paradise. Here are a few inspiration shots I snapped:


Yes, that is a huge log of driftwood you see! I wanted so badly to take it with me, but it would have been impossible to get home. I did pick up some other peices of driftwood though. Here are some incredibly-less-artistic shots of those:


Aren't they amazing?! Haven't decided exactly what to do with them yet, but I'm really excited to use them.

Alright, now on the the main event.

This side table has been sitting in the guest room for awhile now:

I haven't done anything with it, because there wasn't really any room for it in the house, but after coming home from vacation and not having done anything creative for 4 whole days, I just couldn't wait to get my hands on a piece of furniture, so the one above got redone, even though I don't really have room for it. (I will make room :D )

Here is the after:


I'm really pleased with how it came out. I had some troubles along the way, but it all panned out in the end!

Here is a shot of it in-process:


Originally I sanded the top, stained it walnut, and then washed over it with gray paint. It ended up having an almost pinkish finish, which I didn't like, so I stained over the wash with the walnut which made it look LOADS better, but I still wasn't happy with it. I decided that because of the shape of the piece (the bottom has a piece that's the same width as the top) a wood top threw off the balance, so I just sanded it back down and painted over it. After that I decided to wash some white paint over the whole thing, which gave the piece more interest. Then I just distressed away with my electric sander and a 320 grade sandpaper.


Don't you love this knob? I took it off a beat up, old dresser we had sitting in our basement. I think it has a very anthropologie feel to it.


The color is a bit hard to decipher from these pictures. For some reason my camera kept capturing it all different ways. It's actually a light robin's egg blue which I mixed myself using a variety of old paints.


The above is probably the most accurate to the actual color.

Also, I thought I'd show off the picture frame I recently re-did which is sitting on the end table in the above pictures. Here are some close ups:


I'm really thrilled with how this frame came out. I forgot to take a before picture (doh!) but it did have a nasty gold finish, pink matting and a grandma-ish flower picture. I sanded it down, and then washed it with white paint. I think all the little details are awesome, and the washing really made them stand out.

Alright, I'm finally at the end now, even though I have several other projects I could share with you. :P To quote Father Christmas from The Lion the Witch and the Wardrobe "Things do pile up, when you've been gone a hundred years" (or one week, in my case) Thank you all so much for reading!

Read more...
Related Posts with Thumbnails
Emealz - Easy Meals for Busy People!
Home & Garden Blogs Home & Garden Blogs - Blog Rankings

Blogging  tips, tutorials and SEO

From Here to Eternity

  © Blogger template On The Road by Ourblogtemplates.com 2009

Back to TOP