


Pedestal Style Kitchen Table, Cut Up And Turned Into A Coffee Table.
11 April 2011
Pedestal Style Kitchen Table, Cut Up And Turned Into A Coffee Table.
contributed by 2 Parents, 5 Kids, 365 Days
I was too excited to wait until next week to share this little project I have been working on all weekend.
For a few years, I have been searching for a pedestal style kitchen table to cut up and turn into a round coffee table for my family room.
I have a lot of little kids, the idea of a coffee table with no sharp corners makes me happy.
It was going to be a tricky redo, because, as it turns out, people don't want to sell their nice wood tables for cheap. Even thrift stores would mark them much more than I ever wanted to spend on an item that I was ultimately going to cut up and paint. I just happened to be driving past a local thrift shop that sets of its goods out to suck you in, and there it was.
A pedestal table. I stopped on a whim, and checked the price. $75. I was hoping they would come down on the price, when the guy running it said that everything was 50% off that day. Sweet! With tax, it ended up being just under $40, which I was more than willing to pay.
Now, this puppy isn't solid wood. The pedestal is, as are the feet, but the tabletop is just veneer. Which, for me, is fine. This isn't an heirloom piece. The great thing about it being MDF on the inside is that it is a great deal thicker and sturdier than an all wood table, which means my kids can lean on it without fear of tipping.
I didn't get a good "before" pic, because my hubby decided to just take the top right off of it almost as soon as I got it out of the car. So here is a before of the pedestal at least:

with some of the pedestal cut off. He got it all cut, the screws replaced, and then when we got it inside, we decided to cut it down a little bit more, so it isn't as tall as it is here:

Then came the sanding. Oh my word, it was raining the two days I did the bulk of the work on this, which means that it all got done in my living room. Now I am actually going to have to dust this week...
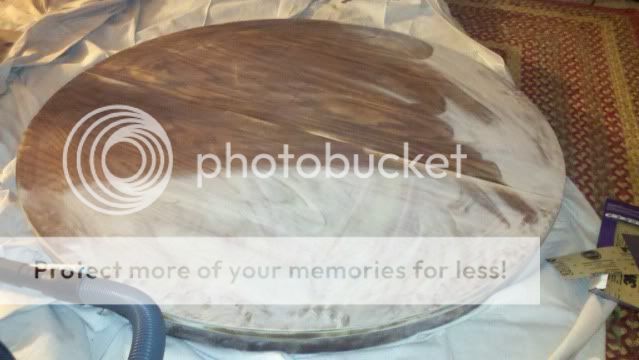
Next was the primer/white coat. Two thin coats worked really well for me:


(at this point, my kids thought the tabletop was a fabulous stage and Beyblade arena. Also, some Ninja Zhu Zhu Pets might have had a battle here)
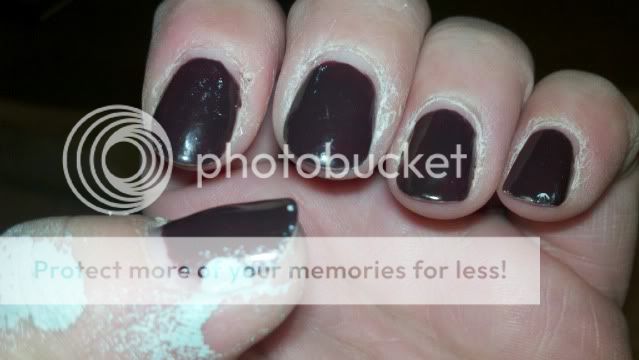
I now interrupt this show-n-tell for a commercial announcement. (Ok, not really, the people who came up with this nail polish system have no clue who I am. I am just some nail biting cuticle abuser who got a manicure) This is theShellac manicure that I got last Friday--not this past Friday, but the one before--and through all of the sanding and painting, it stayed perfect. Once I washed my hands, it even went back to being shiny. Clearly I am no hand model, so I am not showing it to you in the best circumstances on the prettiest hands, but it was seriously worth the money!
Ok, now back to our program...
I decided to do the table this seaglass green/blue color instead of just plain white. It is a nice color without being overwhelmingly bright for what is going to end up being right smack dab in the middle of the family room.


I was so excited that I got it done today that I haven't rubbed it with wax yet, so the top looks like it is unevenly painted. But I promise it isn't. It was all sanded and painted and smooth, but of course where I distressed it a little on the top, it looks extra sanded. So a little bit of wax paste should help even that out and make the finish nice and soft looking.
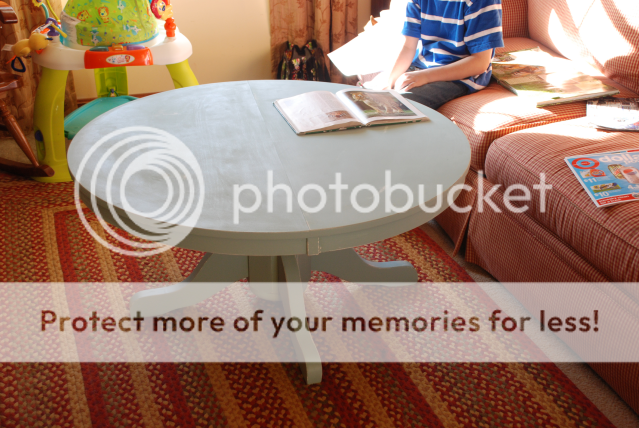
(this is actually my living room, and I have big plans for that couch! I am going to keep the table upstairs until after a dinner I am hosting at my house this coming Saturday, then it will be moved downstairs. Or maybe not...)
I am SO happy with the finished product, it is exactly what I envisioned I wanted when I started looking for a victim...uh, I mean, table all that long while ago.
Final Project Cost: $40 for the table, $3 for sandpaper. I already had the paint, sander, and other various painting supplies on hand. So it was a frugal project as well!
I worked so hard on this, I am linking up with Craft-O-Maniac Monday
Can't wait to see all the other goodies everyone is showing off!
 Labels:
Before and After,
Coffee and End Tables,
Kitchen Tables,
Table
Labels:
Before and After,
Coffee and End Tables,
Kitchen Tables,
Table


18 comments:
I love this!!!! Nice work!
Very lovely!! Great job!
oh wow that turned out SO cute!
Seriously...I couldn't even see that possibility if it were right in front of me. Great creative eye!
This looks really great! Worth all the hard work:)
Beautiful! I'm gonna look at pedestal tables with new eyes this summer while at yard sales!
That's gorgeous. I have a table I was thinking of painting white but am now thinking maybe it should be another colour.
Wow I wish we Knocked our projects off as quickly as you do! Awesome job.
Sarah
Looks good!
This has made up my mind, I am doing this to my table. It's a small table so it would be perfect. Thanks for sharing. 8>)
Awesome story to go along with the re-do. ALthough sanding in your living room!!!!??? Oh my! You DO have some ducting.... lol Looks great.
Lesley
thehomelessfinch.blogspot.com
Thanks for the kind words, y'all! I know it was crazy. To sand indoors, but it had to be don't asap for a couple of reasons. I draped as much as I could with canvas a.d plastic and dusted and vacuumed several times during those two days. But I definetly don't recommend it if you can avoid it! Lol
If you decide to do a table, I would love for you to stop by and leave me a link or a picture, I love seeing other people's projects!! :)
And clearly I wrote that on my phone, lol sorry about the mistakes!!
That is one cute coffee table! Great idea on just shortening the legs. I am wondering why you sanded if you planned to just paint it? Wouldn't a good primer have worked? (I'm still learning about this whole refinishing furniture business). :)
That is a great question! I have redone several pieces of furniture, and have painted some without sanding. This particular piece had actually been someone's dining table, so the top was shiny and smooth from being wiped down over and over. That is a great surface quality to have when you are using it as a dining table, but when it comes to painting, especially a piece that is going to get knocked around a lot like a coffee table or end table (I have a lot of kiddos, so chances are high it will be pounded on. lol) you really need to sand to get that shininess off the top and make the surface more receptive to both primer and paint.
Also, since it had been a loved table, the base had some buildup on it that had to be sanded off. And I didn't sand extensively down to the bare wood (MDF on the top) I just sanded enough to take the shiny coat off. :)
Fabulous! I love it and I want to do this too!
Nancy
Nice job! How did you re-attach pedestal? I'm curious as I bought a side that I'd like to cut down, but unsure how I would re-attach.
Thanks!
Cynthia, my husband reattached the tabletop, and it was really easy. All he did was remove the double ended screws from the pedestal itself (once the top was off) and after the pedestal was cut down to coffee table height, he redrilled the holes for the screws and screwed them back in. Then it was just a matter of reassembly. :)
Post a Comment