We’ve Moved!


If you aren’t redirected here is the link:


Remodelaholic!


THANKS!

Showing posts with label Doors. Show all posts

The Difference Some Color Makes: (and a New Front Door)

24 June 2011

The Difference Some Color Makes: (and a New Front Door)

I thought this submission was timely considering the post I wrote about curb appeal just a few days ago! 


Saturday morning, I woke up and decided to paint the front door.  I kinda envisioned getting it painted that day, but deciding on a color took an entire day.  I have been pinning yellow doors like crazy lately because I think they look so cheerful, but once I got the swatches up, I just wasn't feeling it.  And then I told Chris, "I know that I want green."  The top one on the right is called Lemongrass by Behr and I thought it looked great with the gray brick, but I started worrying that it would be lost with all of our green shrubs.  So, I declared once more that I definitely wanted a red door.  Specifically the red right underLemongrass, Bijou Red.  Red is classic.  Red definitely doesn't blend in, and if you didn't know it--I am a total sucker for red.


Earlier this week, you learned that we bought a new door and Monday night I got to work.  I thought I would be done by the time the Bachelorette was over--wrong. 


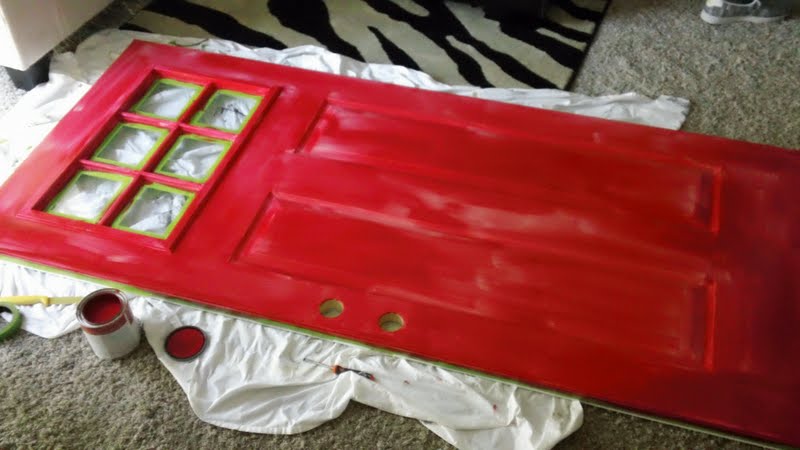
After two coats, it looked like this, and I settled in for the long haul.  The long haul being 11 coats of high gloss paint in Bijou Red.  And although I got frustrated and shed a few tears along the way, I honestly couldn't be happier with the results.  Let's check out some befores and afters:


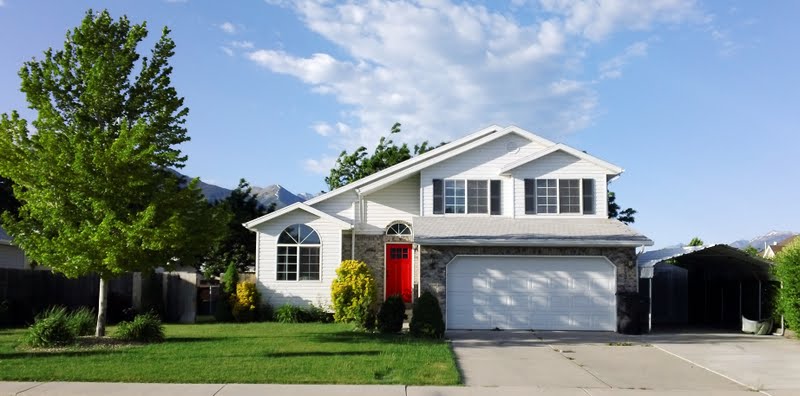
 What a difference, right?  Gah!  We love it.  And an added bonus that we didn't even think about was the extra light we gained indoors:

So my advice to anyone with a white/boring/dull front door--why not paint it?  If you are going to use high gloss paint, leave 90 minutes in between coats at least.  If you are itching for a red front door (how could you not?) plan on lots of coats--but also count on a big pay off. 

Speaking of pay, this whole project definitely cost more than we anticipated because we bought a new front door, but here's the rundown just in case you are planning on tackling your own door soon:

Front door: $197
1 quart of high gloss exterior Behr paint in Bijou Red: $12
4 new house numbers: $5.99 each
(these first three items I had a 10% off coupon for--score!)
New doormat: $6.97

Grand total: $200.47 (plus tax)

...and worth every penny in my opinion.  What do YOU think? 


Check out these posts for more exterior update ideas:


Read more...

Making a Screen Door for Your Pantry

10 May 2011

Making a Screen Door for Your Pantry by Ashley

Hello all you fantabulous readers! This is Ashley from The Handmade Home. I couldn't be more thrilled to be here, and when sweet Cassity asked me, I was so excited. In case you have no clue who in the bloggy world we are, we're also the artists formerly known as Pure + Lovely: a site that documents our family's progress + crazy fun as we forget the "rules" and simply go for it, with DIY design, art, room redos, and inspiration...that is, when we're not enjoying the challenge of parenting three little munchkins. As lots of you know, sometimes that's all a job in itself. {Whew!}
Today, I have the fun honor of sharing a little about our fun screen door project we just tackled, as a result of our kitchen revamp. We had a basic, kinda ho-hum kitchen. And we decided to take a leap of faith, and make a change. There was nothing wrong with our kitchen. We just wanted to switch it up a bit, and make it feel more...us.


TADA! We had some kind of a gross builder's grade door going on in the pantry department. And the brass doorknob was kind of bumming me out {and burning my corneas} every time I looked at it. So we decided to give it a little somethin' to breathe some character into our cookie cutter bungalow.

And we couldn't love it more.

Read more...

Easy Faux Carriage Door Tutorial!

27 April 2011

Easy Faux Carriage Door Tutorial!  By Terry

I am honored to be doing a guest post for Cassity at Remodelaholic. It's a pleasure to introduce myself. I am Terry and I live in western Illinois. I am married and have two grown children and we are recent empty nesters. I am also fairly new to blogging since November, 2010 with my blog foreverdecorating.blogspot.com.
It has been a learning curve and I have begun to train myself to think about my projects with blogging  in mind; ie: before pictures and tutorials.

I was raised with parents that made everything they possibly could and forced to sew all my clothes at the age of eight (now I am thankful). So it comes natural to me that, I could and would, tear into any home renovation or make anything I could (or maybe it's because I am cheap). It's a hobby, a lifestyle and a joy for me to do these things. I believe that if you want it bad enough you will figure out a way to have it. I am blessed with a God given creative gene that I am very thankful for.

I recently posted on my painted carriage house garage doors, but with this guest post, I would like to give more of a tutorial of how I did this and why.


Read more...

Black Interior Doors PR 4

25 April 2011

I did this a month or so ago, and we LOVE it!  I told you back in ancient history how we had a plan to paint all the interior doors black (it all started with the front door).  I bought the gallon of paint and... moved on to other things like I am good at! Ha!

Well then, when I was bored one day, I had an easy ready to go project.  We have a bunch more doors to paint another day too, lucky me!  Projects galore!

It is amazing what this project has done for our cheap ugly doors.  Just your plain flat doors, with a big hideous faux wood grain (a very unfortunate feature...)  But the truth is they look absolutely beautiful now.  I just can't tell you enough how much I love the look.  I am not sure that I will ever paint my doors the same color as the trim again.

And so here is the little hall in our upstairs before and after.


I think black paint is addicting... beware!


Remodelaholic is written by Cassity and Justin.  Cassity has a degree in interior design and Justin is a landscape architect, so we adore everything that makes up a HOME!  We love to share home remodeling ideas and projects we’re working on. From huge kitchen renovation ideas to small bathroom remodels, there isn’t anything we won't try to tackle (at least once!).  We are in the midst of our third whole home renovation, so there should be a lot more inspiration coming your way.  We hope that you will stop by often for home design inspiration, tutorials, interior design tips, delicious recipes and what is going on in our family life.

Read more...

Old Barn Door Recycled into Kitchen Table

11 January 2011

Old Barn Door Recycled into Kitchen Table
contributed by Mason Bay


Hinges, and latches adorn my kitchen table. An old barn door, attached to some legs, and perfection. 

The door became a beautiful kitchen table. 

The plain wood legs, and base needed something, so a white wash, and paint stained clothes was a must.


Read more...

Dutch Split Door

28 December 2010

Dutch Split Door
party highlight by It's The Little Things


Remember way, way back, when I first posted about the awesome, old door that we found on the side of the road?

If not, I don't blame you. It was way back in March, but I'll give you a quick abbreviated rundown to catch you up...


Last March I was lucky enough to spot a "Free Stuff" pile just outside of our neighborhood. And in it, was a solid wood, 8 panel door.

I thought it was perfect.

Will thought I was crazy.

But he knew if he didn't help me load it into the car that I would do whatever it took to get it in there myself. So, reluctantly, he helped me load the door, and it became mine!

You can read all about it, along with my original plan for the door, here:
"Look What I Found"

But before I made any final decisions on how to transform it, I wanted to see what all of you thought about how the door should be used. You all are an opinionated bunch (which is exactly what I was hoping for) and, in the end, you made the decision an easy one for me!

You can read all about that here:
"Your Opinions On The Door"


So what did we end up doing with it?

Well, here she is
...

Not only did we cut out the top four panels and replace them with glass, but we turned it into a Dutch Door and I could not be happier with the end result!


The process was a bit tricky. We weren't entirely sure how well the door would hold up to cutting out panels and sawing it in half, but luckily for us, it was in great condition.

The first step was to cut out the panels...


So far, so good!


Next, we sawed the door in half to create our Dutch Door...


and added a new doorknob...


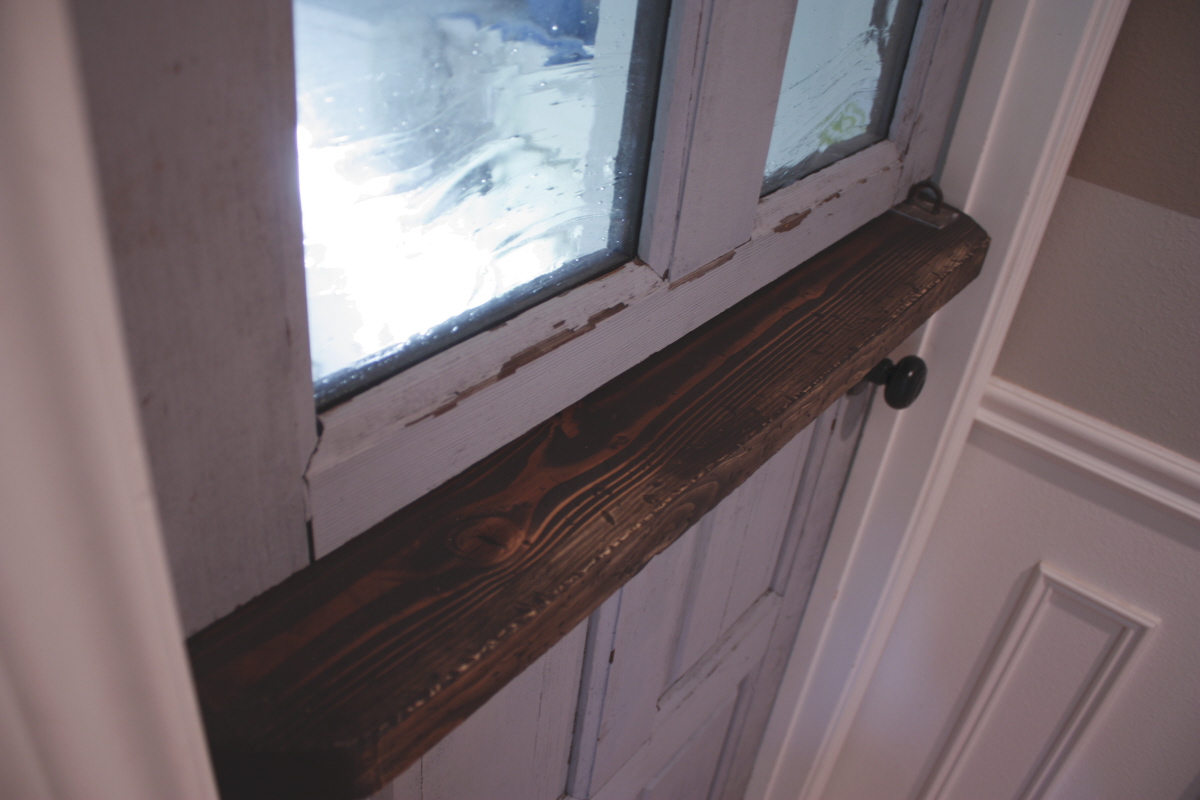
Then we added a ledge onto the bottom half of the door. The original door was a few inches shorter than the doors in our house, so we had to fill that gap. Nothing a simple 2x4 couldn't fix...


Originally, we thought we would use plexiglass to create the windows in the top half of the door. But the more we thought about it, the more we felt like it could (and should) be a bit classier, maybe a little more permanent than that. We knew that we could find a piece of glass that not only suited our aesthetic, but one that would make the door that much more unique.

We headed to Tacoma and found the coolest glass shop. Our heads were spinning with all of the ideas that were floating through our heads. They had glass in shades and textures that we never could have imagined. Beautiful!

My only requirements for the glass we chose were that it let every bit of possible light through, and that it would have texture so that the picture we saw in the laundry room would be scattered and diffused. No need for our guests to see "Mt. Laundrius", as the boys so affectionately call it!

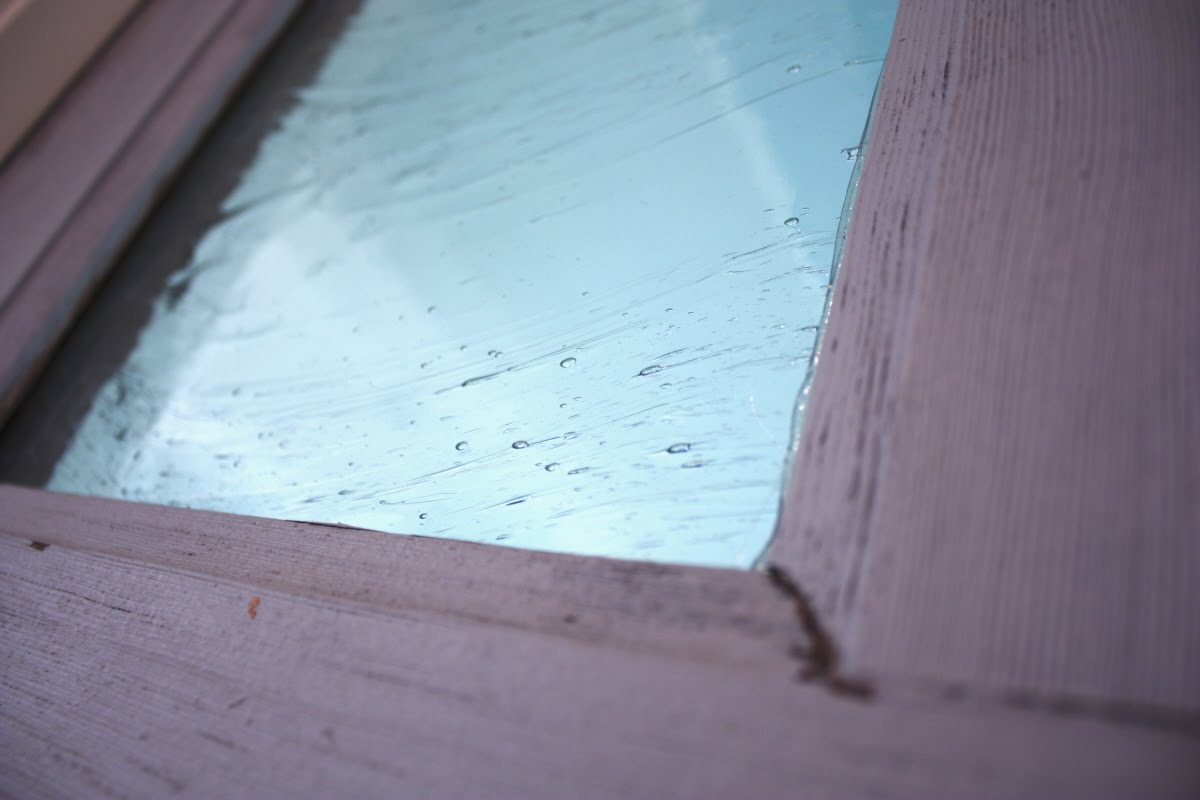
We settled on a piece of glass called "Falling Rain". You get the picture - a little streaky and bubbly. But since I would rather think outside of the box than stay inside it, I decided to flip the glass sideways so that the streaks run from side to side, instead of top to bottom. I have to say, the little, old man at the glass shop looked at me like I was crazy, but...ultimately, the customer is always right. Right?


The glass fit perfectly and we held it in place with a bead of silicone...

Will cut strips of wood to frame in and secure the glass on the back side of the door...


The stain that we used for the glass trim is also what we ended up using for the ledge on the bottom half of the door...

We also repositioned a small piece of hardware that was on the door when we first picked it up. I have no idea what it was used for, but it's old and aged and I like it...


I was giddy when it was all said and done!

And 8 months later...I still am!


It lets light into our hallway, which was what I had always wanted. What is the point of having a window in a bright, light-filled laundry room if you never, ever see it anyway?

Now, we see the light!


I definitely owe Will a big, huge Thank You for helping me make this happen!

And, for the record, he loves it too. I knew he would!

:)


Have you found any cool "Free Stuff" lately?

Read more...
Related Posts with Thumbnails
Emealz - Easy Meals for Busy People!
Home & Garden Blogs Home & Garden Blogs - Blog Rankings

Blogging  tips, tutorials and SEO

From Here to Eternity

  © Blogger template On The Road by Ourblogtemplates.com 2009

Back to TOP