We’ve Moved!


If you aren’t redirected here is the link:


Remodelaholic!


THANKS!

Showing posts with label Garage. Show all posts

Easy Faux Carriage Door Tutorial!

27 April 2011

Easy Faux Carriage Door Tutorial!  By Terry

I am honored to be doing a guest post for Cassity at Remodelaholic. It's a pleasure to introduce myself. I am Terry and I live in western Illinois. I am married and have two grown children and we are recent empty nesters. I am also fairly new to blogging since November, 2010 with my blog foreverdecorating.blogspot.com.
It has been a learning curve and I have begun to train myself to think about my projects with blogging  in mind; ie: before pictures and tutorials.

I was raised with parents that made everything they possibly could and forced to sew all my clothes at the age of eight (now I am thankful). So it comes natural to me that, I could and would, tear into any home renovation or make anything I could (or maybe it's because I am cheap). It's a hobby, a lifestyle and a joy for me to do these things. I believe that if you want it bad enough you will figure out a way to have it. I am blessed with a God given creative gene that I am very thankful for.

I recently posted on my painted carriage house garage doors, but with this guest post, I would like to give more of a tutorial of how I did this and why.


Read more...

Old Garage Converted To A Cottage Rental House

09 September 2010

There is more then a lot of talent over at Ten Talents.  This couple shows us what they did with a little space that was once a garage converted into a living space, then they remodeled it to it's final state.


I've been meaning to do this for quite some time, so I thought I'd show you the cottage remodel that my husband did for this week's DIY Monday.  I don't think I mentioned this before, but our house (the one from 1889) had a mother-in-law cottage next to it.  It had been built in the 1980's, and it was really just a garage converted into a living space without heat, air, etc.  We knew we couldn't really afford a mortgage, so we bought this property knowing that my husband could convert the MIL cottage into an apartment we could rent out to help cover the mortgage.  So....here are the BEFORE pics of the cottage:


Front of the cottage

Old kitchen (Shark @ 2 mos.)
Cottage living room
                        
 Old bathroom

pic on left -- old bedroom
pic on right -- not sure...this was a long hallway/room @ back of cottage (I'm not sure what it was for)


They ended up knocking everything down except for the four walls, and here is what it looked like when it was finished!  (I would show the pics of what it was like during the remodel , but I think this post is getting kind of long!) 


                                                                    New Kitchen


                                                     New bathroom...above and below


New Living Room


1 of 2 new bedrooms...this is a junky picture, sorry :(  I should not be allowed to take the pictures :)

I truly cannot believe what they were able to do with this place (and all for such a great price too!).  These pictures really do not do it justice either.  I wanted to move in!  I am so thankful that God gave me such a talented husband...he's really the total package :)

We've taken some new pics of the house remodel, so I'll try to upload some before and durings of those!  Only a few more months to go and we'll creep out of my in-law's basement to our new home!


What a great garage conversion to cottage rental transformation!  Way to go with the great projects you two!

Read more...

Old Workbench With A New Look: Guest

14 June 2010

Suzanne at Meridian Road, found a great workbench and gave it a new look.  


My 100% free table is finished. For now. I'll probably change it again sometime within this lifetime. :)

It's raining again today. I was going to take this outside and do a for real photo shoot. But the garage will have to do.  And I am not happy with the photos.

Here is where we started.

All cobwebby and gross.
And here we are now.

Beautiful!
I stained the top.
It's about the same color as the underside of the table.


We had to use those brackets~one of the planks is cracked and this firmed it up a lot.


Since the grain on the wood is raised, it was easy to distress.


I didn't want to make this look like anything but what it is~a old workbench. I did want it to look better than it did when I found it, though.


Look how worn the edge of the table is.


The top is pretty scarred up. It's one of the things I love about it. I put one coat of satin polyurethane on the top. I didn't coat the botton. I'll tell you a secret~I didn't even really paint the bottom. That's primer.
I got the priming done, and I could still see a lot of the wood grain. It was like it the darkness of the wood was bleeding through. I really liked how it looked, and I like how flat the primer is, so I decided to leave it. If I want to paint over it later, it's just that much easier since it's already primed.

So here we have "before"


And "after"


Here's the really sad part. I had planned on putting this in our spare bedroom so I'd have a place for my sewing machine.  But it won't fit.  The door is too narrow.  So we either have to take off the top (and I really don't want to do that. For as old as it is, this table issturdy and I am reluctant to do anything to it that would make it less sturdy.)take out the whole door frame (ugh. Just thinking about that makes me tired), or use it somewhere else.


How about that!  Nice fix up huh?  I need to find one of these for my garage shop!

Read more...

Barn Dance! Garage Update; Guest

15 May 2010

As a wanna be farmer / country girl, when I got this little garage makeover, I thought it would be fun to share.  And Shannon from Altic Quiver did it all on a very tight budget!  Great Job!  This is what Shannon said:

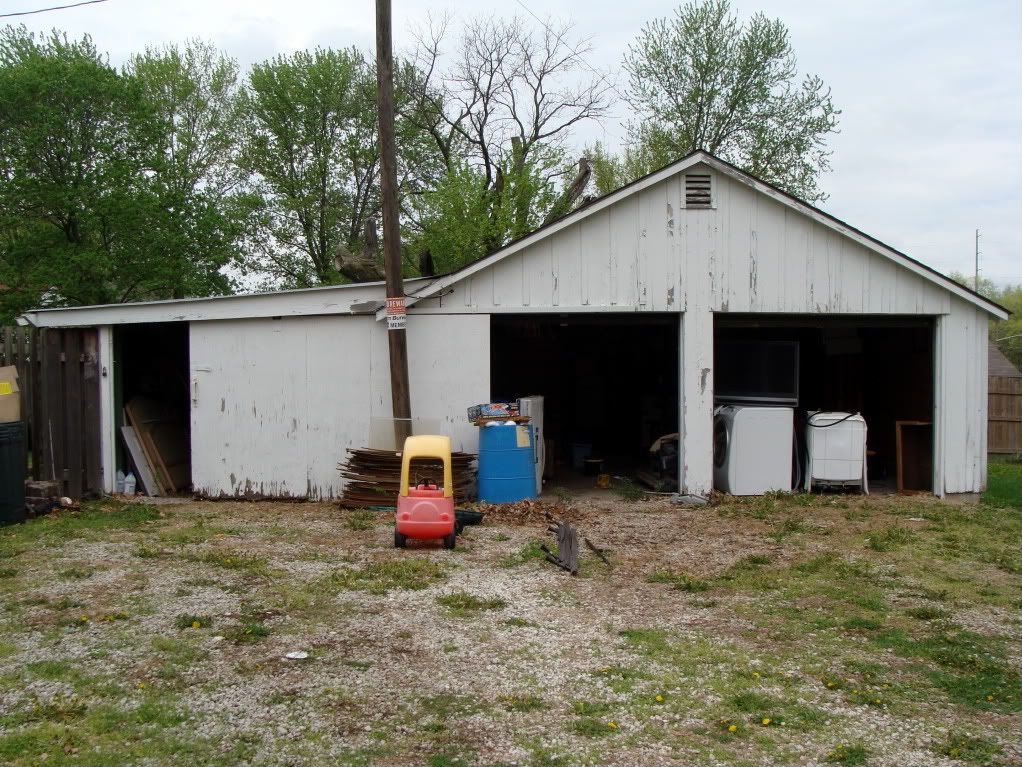
This is our nasty garage. It's gross and that's all about to change.

I have great plans for the eyesore. It all started this morning when Ms. Jess backed up a beautiful Dodge pickup to the open doors. We removed 90% of the junk in the main stalls and now I'm cleaning and organizing.

We have pounds and pounds of cans that will make their way to the recycling station this next week. I plan to use the money to purchase RED paint. This garage is going to get a full barn makeover including 1 x 2 's in the shape of an X on the utility stall (far left door).

Sweet Richard has agreed to help me with the power washer. We are going to clean it inside and out (removing flaking paint). Jared and I have a goal of concreting the drive way in front of the main stalls and installing a basketball goal.

FINALLY, after 6 years it will look as if it belongs with the property :)

Stage two is prepping the garage for paint. I would honestly rather drink bleach than do this part. First of all there's a ton to do. Second of all I don't have the tools or the know how when it comes to replacing rotten boards.

I got up early this morning and took the power washer to the garage to remove loose paint. I would just like to let you all know what a waste of time this was. I guess it cleaned the exterior which was needed but good ol' hand scraping is definitely the way to go.

Photobucket
Garage before power washer:
Photobucket
After (with some hand scraping):
Photobucket
After Hand scraping:
Photobucket

I need help. I need someone with some basic home improvement skills to come over and give me a list of boards needed. We have a ton of random lumber in our garage and I assume there's quite a bit of what we need in there. I need a Lowe's list of the boards I need that we don't have. The back (West) side of the garage has large sheets of some kind of boards/paneling for the exterior walls that are completely rotten on the bottom.

We have termites. We were told a year ago that the garage had active termites and termite damage. Due to the $3000 price tag to treat the house and garage we have yet to exterminate the nasty creatures. We are currently in talks with Joe S. and Richard. We're forming a plan that will hopefully take place in the next few weeks.

It is my goal to have an attractive building that will serve some purpose. In the 6 years we've lived here anything that was stored out there has been ruined. The roof leaks and it's an eyesore. My goal was to paint at the end of the week after it has some time to dry (due to the power washer).

Let's take a minute a reflect on the before:
Photobucket

And savor the after!!
Photobucket

This is it! It took a lot longer and a lot more work than I ever thought. I wanted to be done about 4 hours into it but I pushed through and now look!!!

I haven't blogged a whole lot in the last few days simply because I've been working diligently on this huge building. It's taken the better part of 3 days and I did the work primarily on my own with my 5 little helpers.

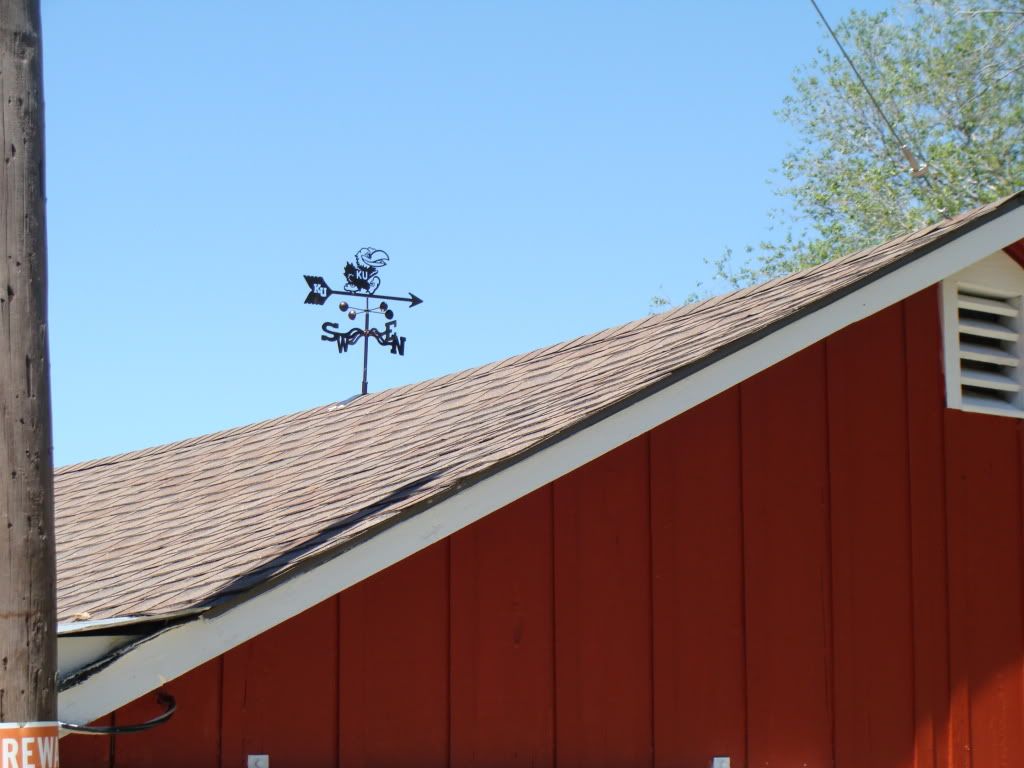
I would really like to find a galvanized wash tub on a stand to put between the two main stalls as a planter. The pile of wood at the base of the street lamp will be leaving soon. I have dreams of a weather vane at some point.  (Which I got for Mother's day!!) 

Photobucket

Several of our neighbors have stopped by to give their nod of approval. It's awesome what a difference some paint and super hard work can do.

I think she did a great job!  
It look 100 times better, don't you'all agree?

Read more...
Related Posts with Thumbnails
Emealz - Easy Meals for Busy People!
Home & Garden Blogs Home & Garden Blogs - Blog Rankings

Blogging  tips, tutorials and SEO

From Here to Eternity

  © Blogger template On The Road by Ourblogtemplates.com 2009

Back to TOP