We’ve Moved!


If you aren’t redirected here is the link:


Remodelaholic!


THANKS!

Showing posts with label Windows. Show all posts

Ombre Painted Chevron Curtains Tutorial

03 October 2011


Ombre Painted Chevron Curtains Tutorial

Thank you so much Cassity for having me!  I am delighted to be here today.  I blog over at Owen's Olivia, where I focus on design, fabric, DIY, and anything else that catches my eye.  It has been a wonderful creative outlet for me, so it makes me happy that others are enjoying reading about my journey.  I have only been blogging for three months now, so I am truly honored that Remodelholic has noticed my work!  
My husband attends NCSU for electrical engineering (B-O-R-I-N-G :) while I stay at home with our son, Owen.  I am very blessed to be able to dabble in my creative affairs and tend to Owen while my husband is off doing all the dirty work.  He is awesome.

  It has been a sloooow process converting our guest bedroom into a room for Owen.  Seriously, he'll be 15 by the time I am done with it.  Curtains were the first thing on my to-do list.  I knew that I did not want to make curtains (though I do like to sew), and Ikea is not within driving distance.  I needed something fun and playful (but not too baby like) that blocked out light.
 
Hard work aside, painting these curtains are incredibly easy to do!!  ANYONE can paint these curtains and make them look custom.  You can even take this process and do a completely different design.  The sky is the limit.  Do not let all my pictures and steps trick you into thinking there is much to do or painting curtains is cumbersome.  I just take a lot of pictures, and I am literally walking you through every step!  If you are visual person like me, you can probably get by just by looking at the pictures.

Items needed for chevron curtains:

Curtain panels
Painter's tape ~ 1, 2 or 3 inch wide (my chevrons are 2 inches wide)

Speed square or some other form of a template (if making a template you will want your corner to be a perfect square or 90 degree angle)
Paint (I bought 4 sample cans from Lowe's)


Please note that there are many different ways to apply a chevron design to fabric.  This is a way that works best for me for this particular project.  You may find a faster way to apply the design. 

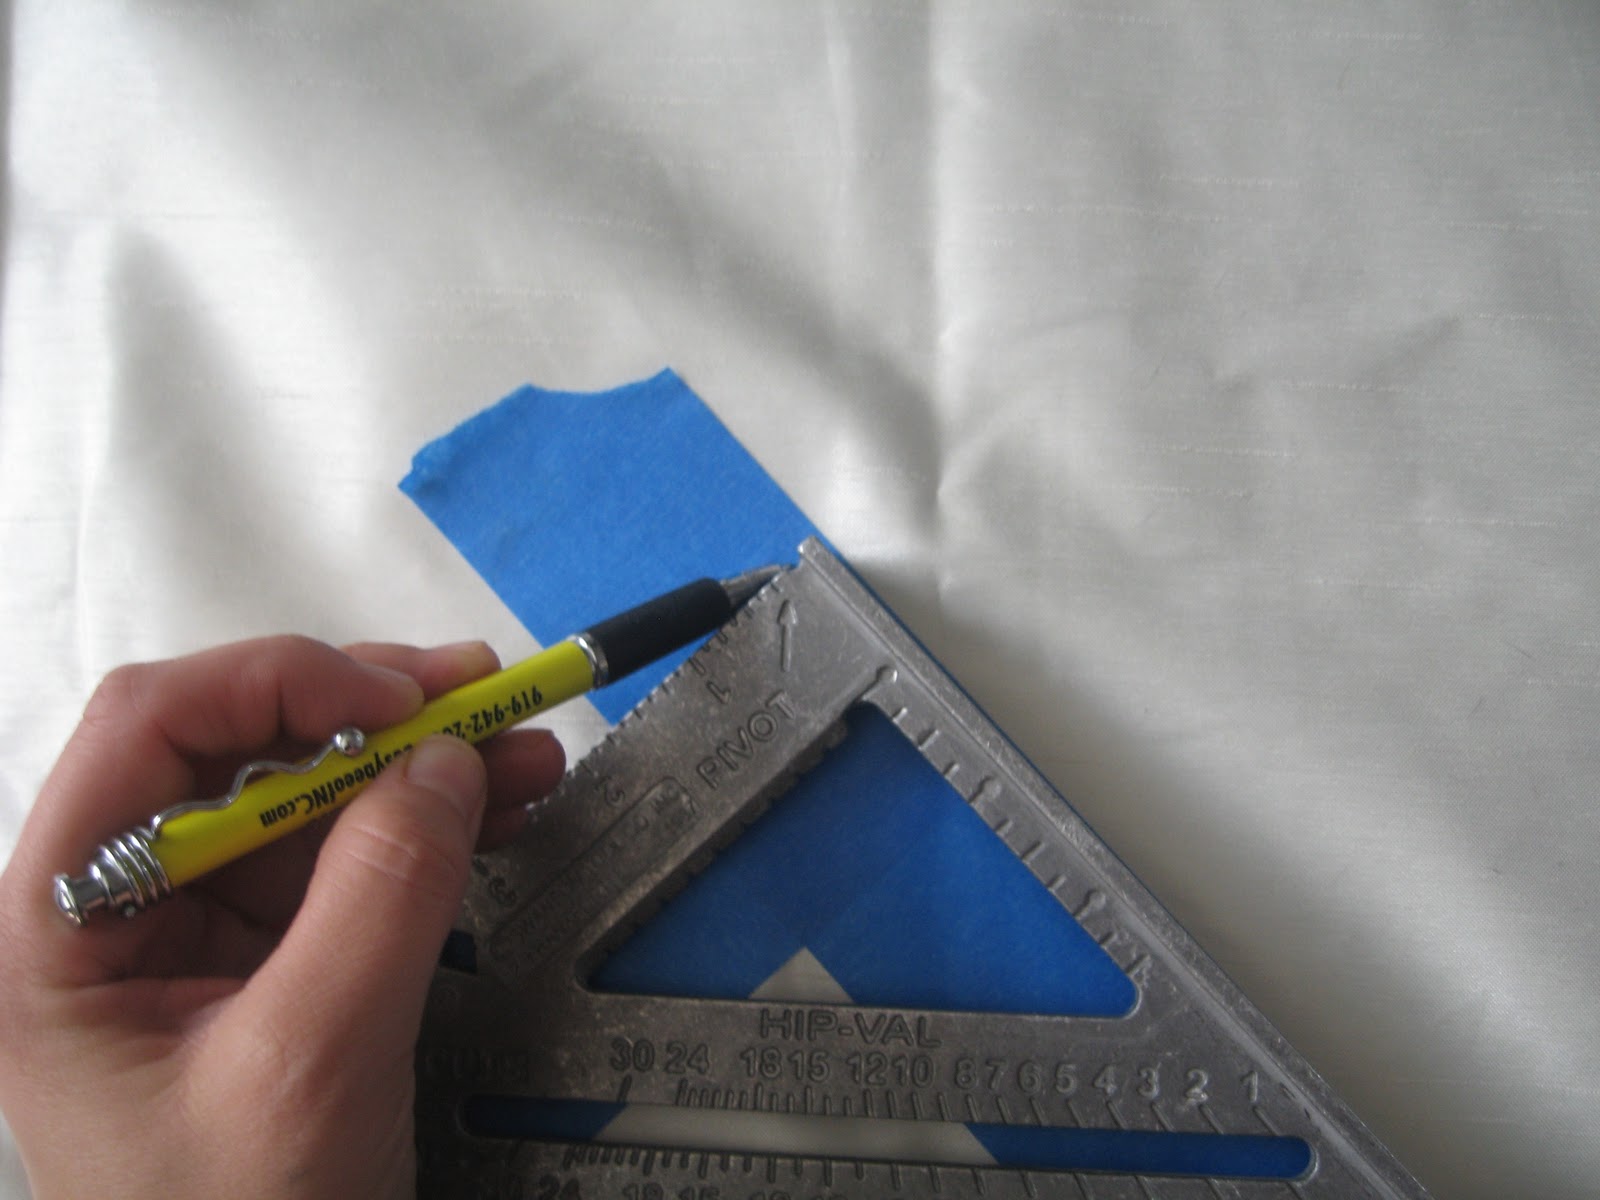
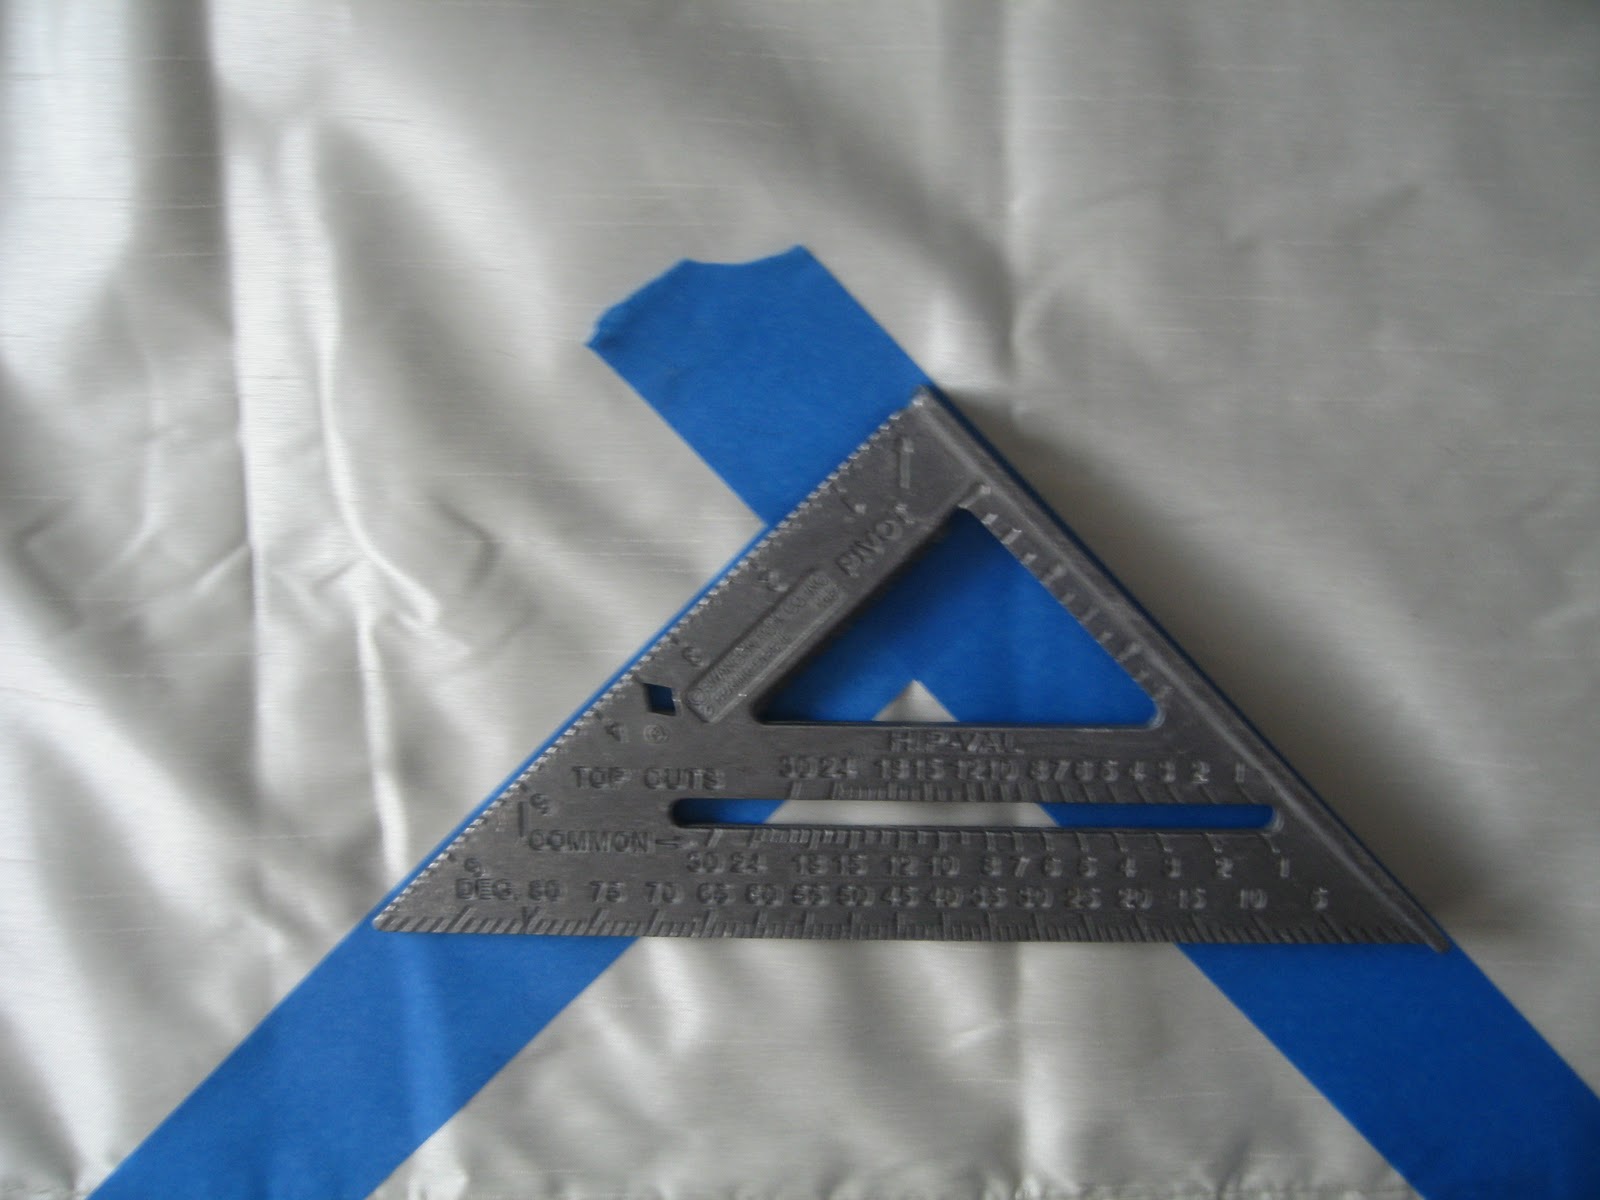
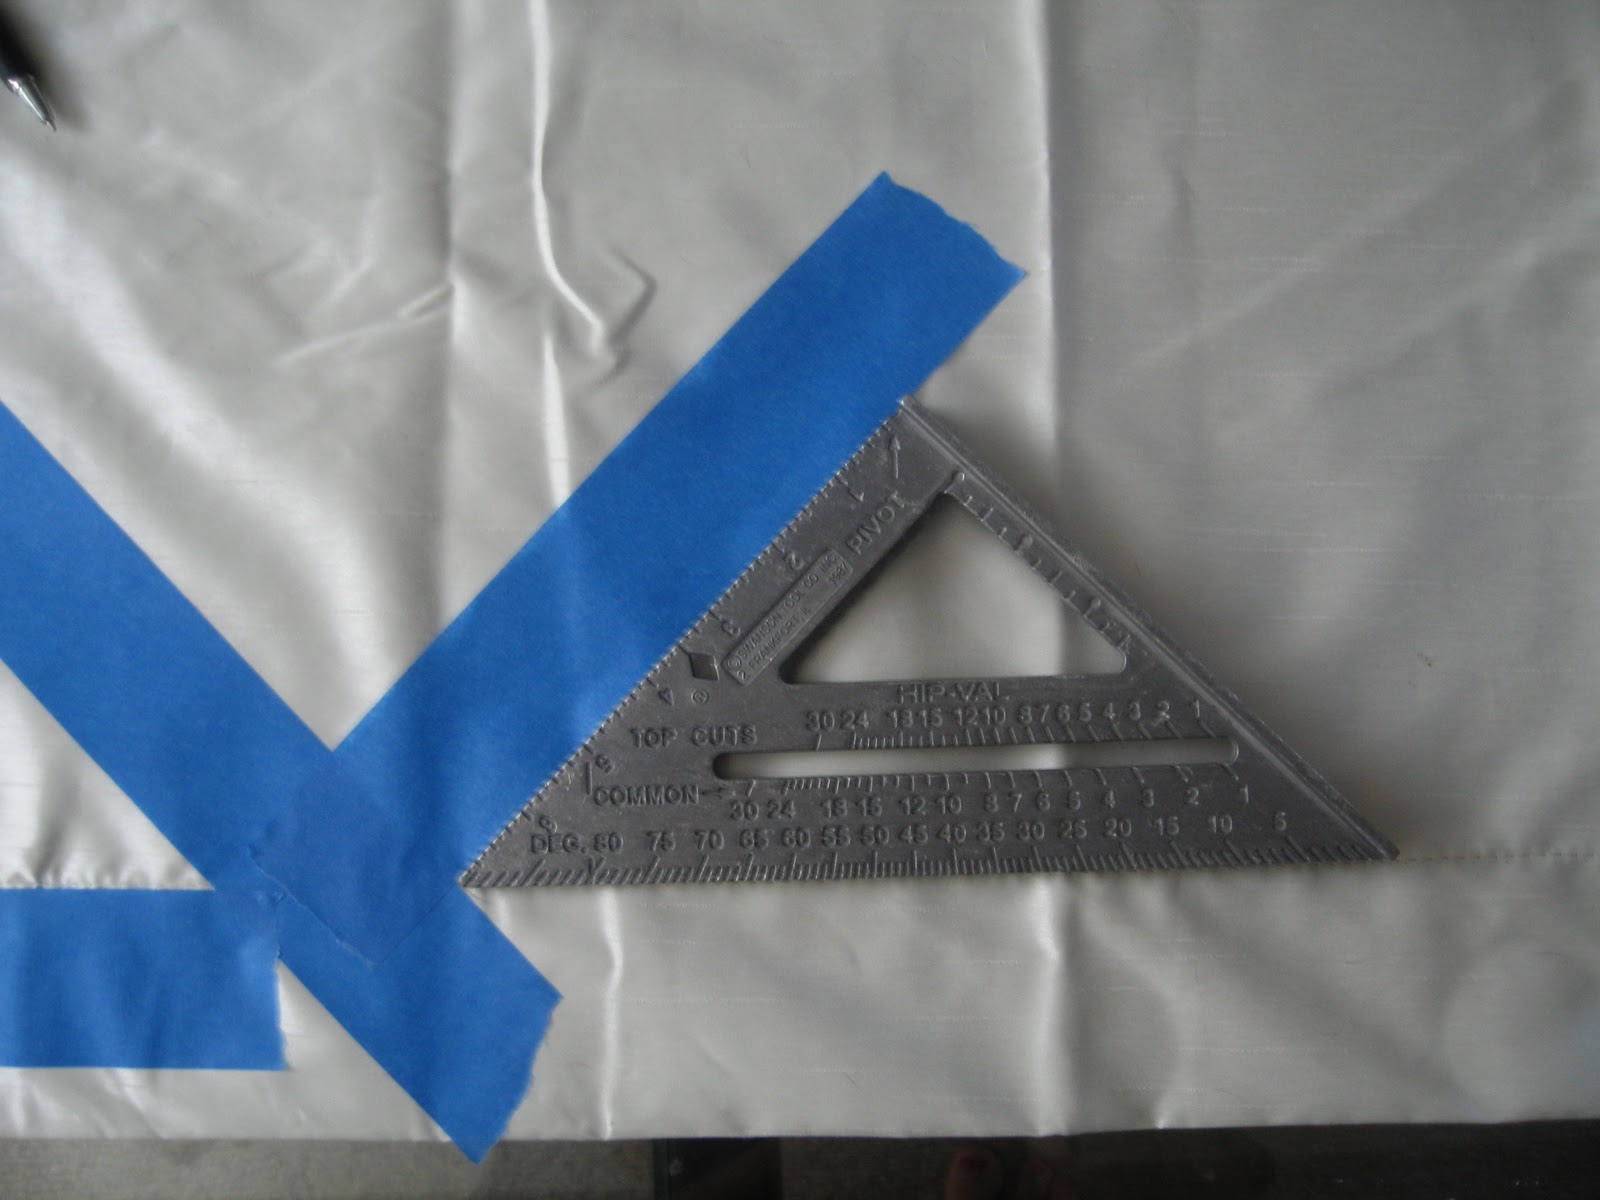
Step 1.  Place the speed square just above the curtain's hemline.  Tear off two pieces of tape, and place it along either side of the speed square. 
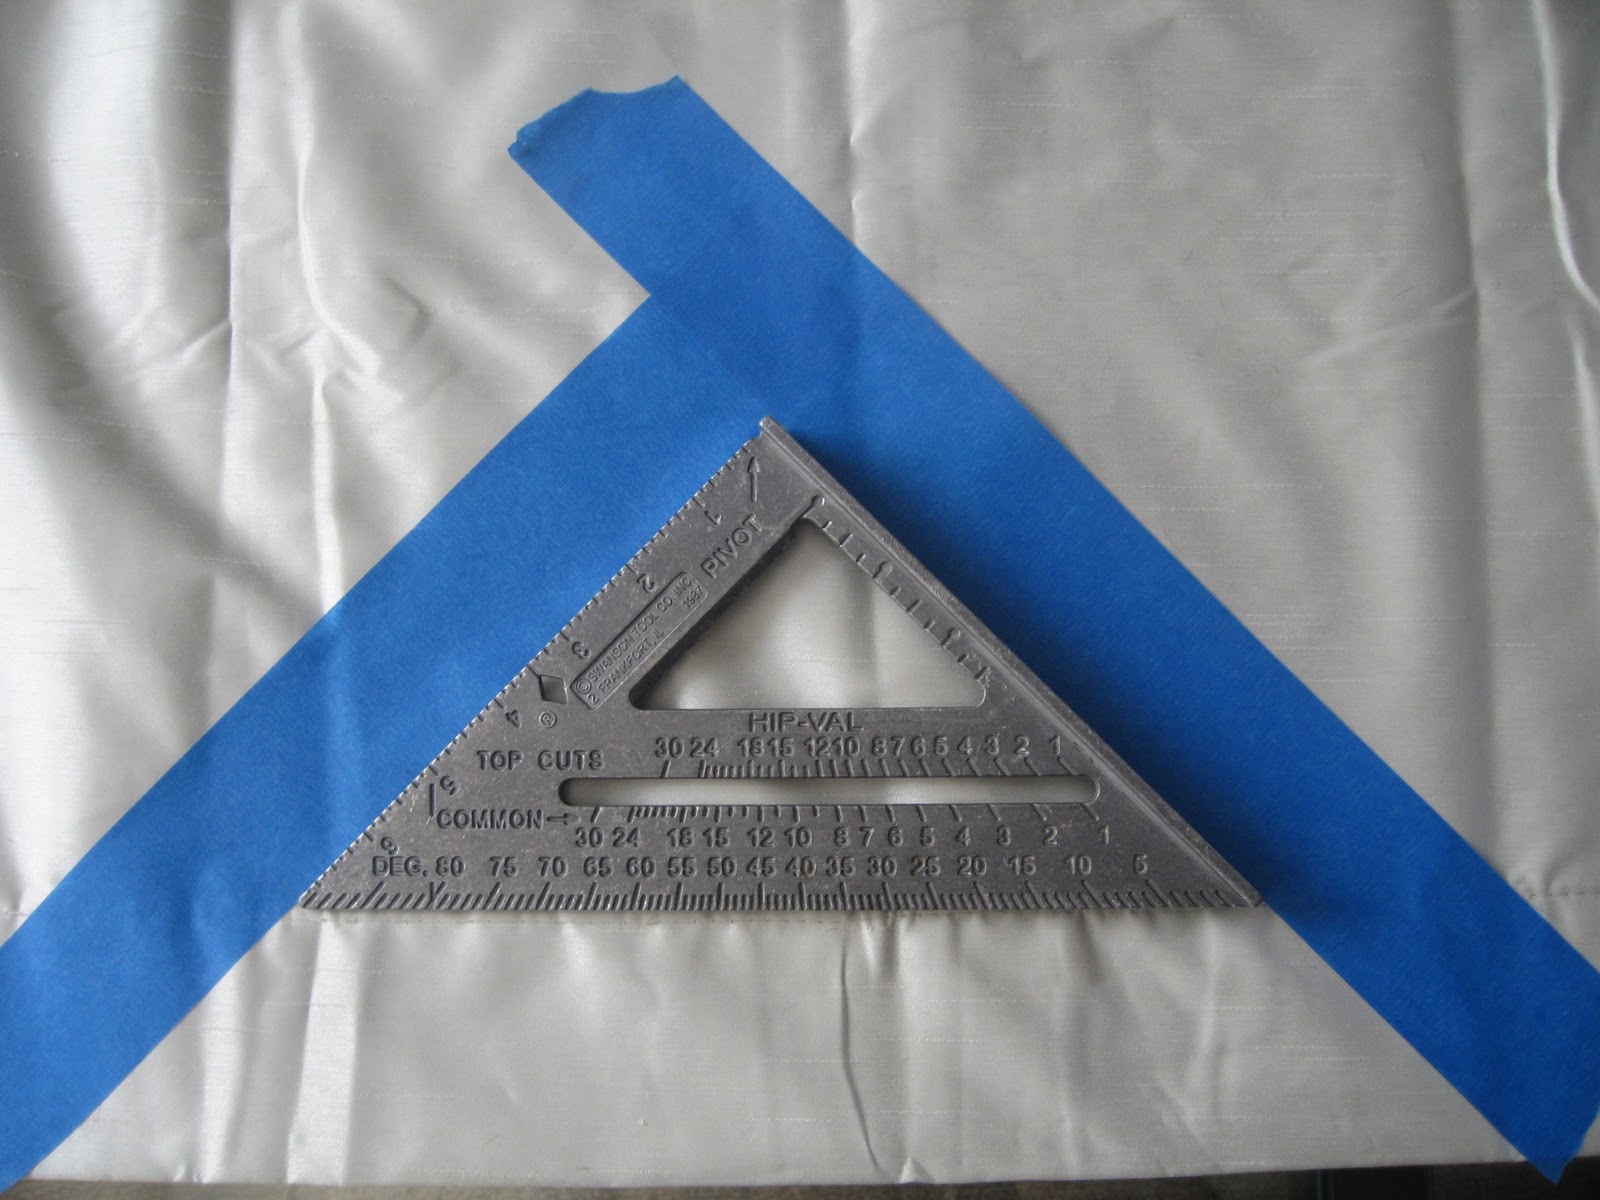

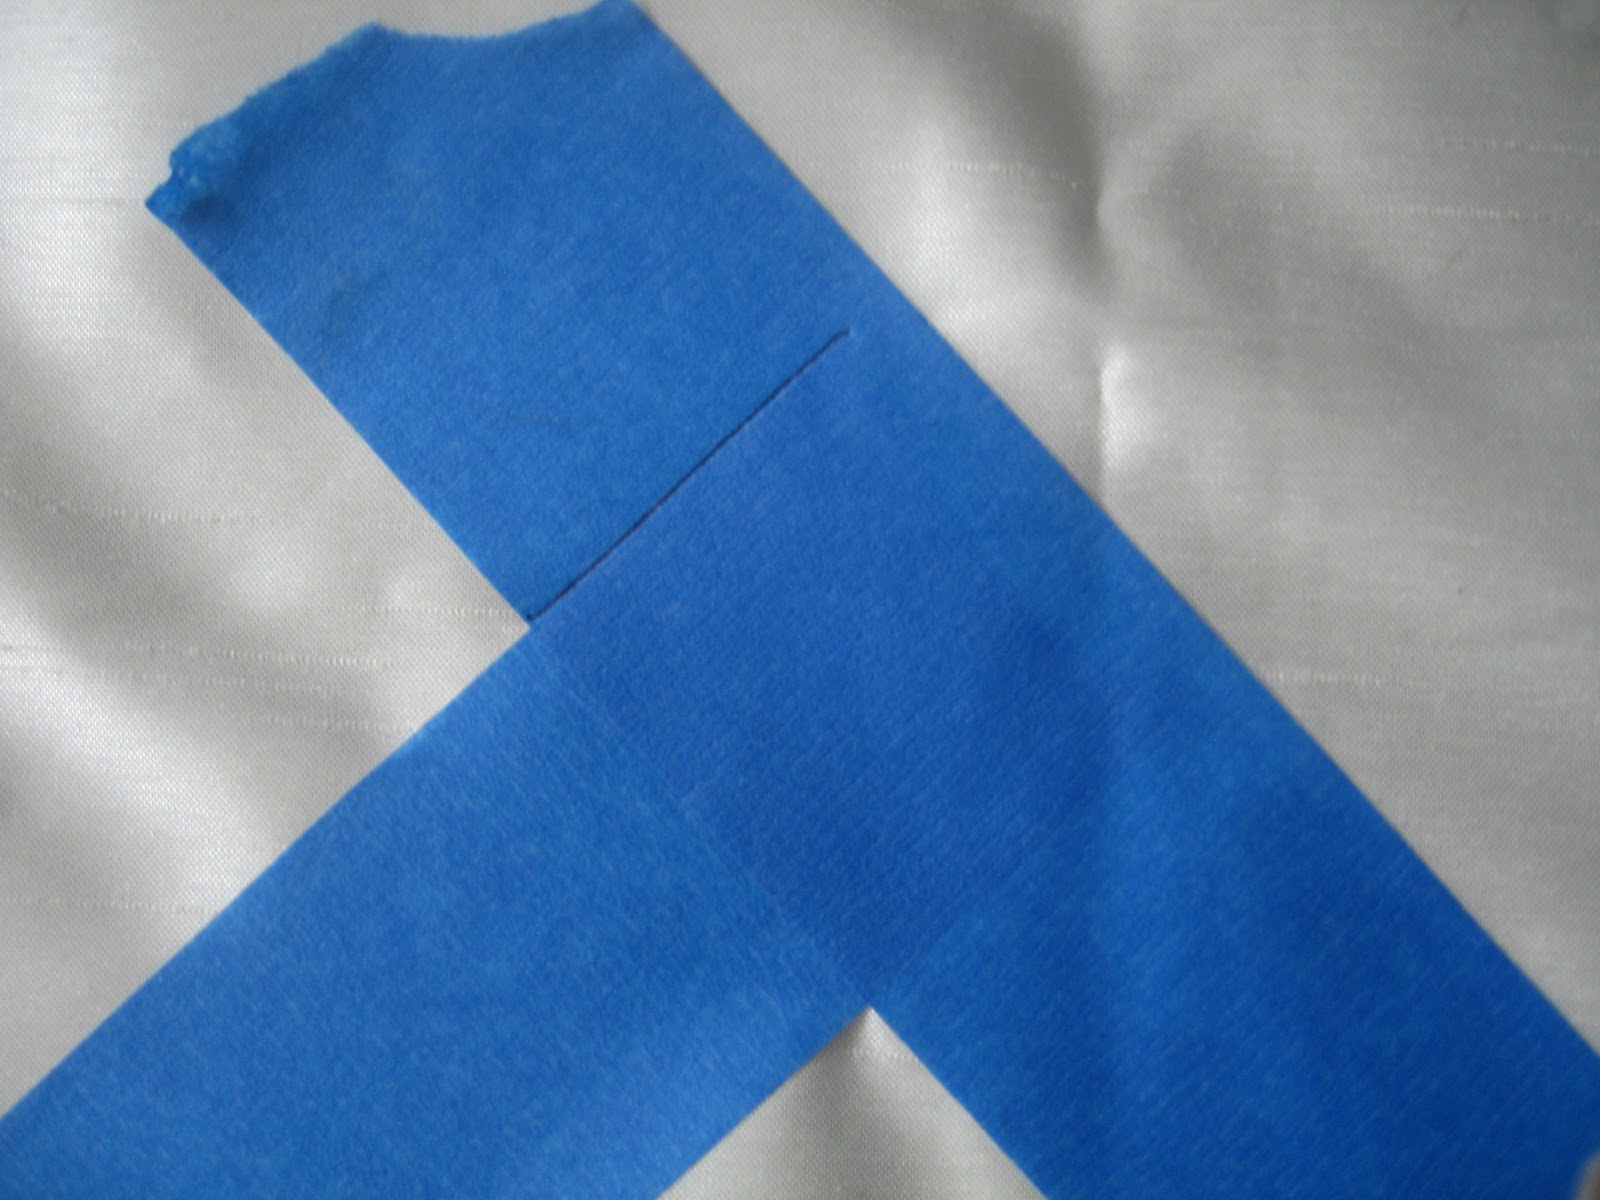
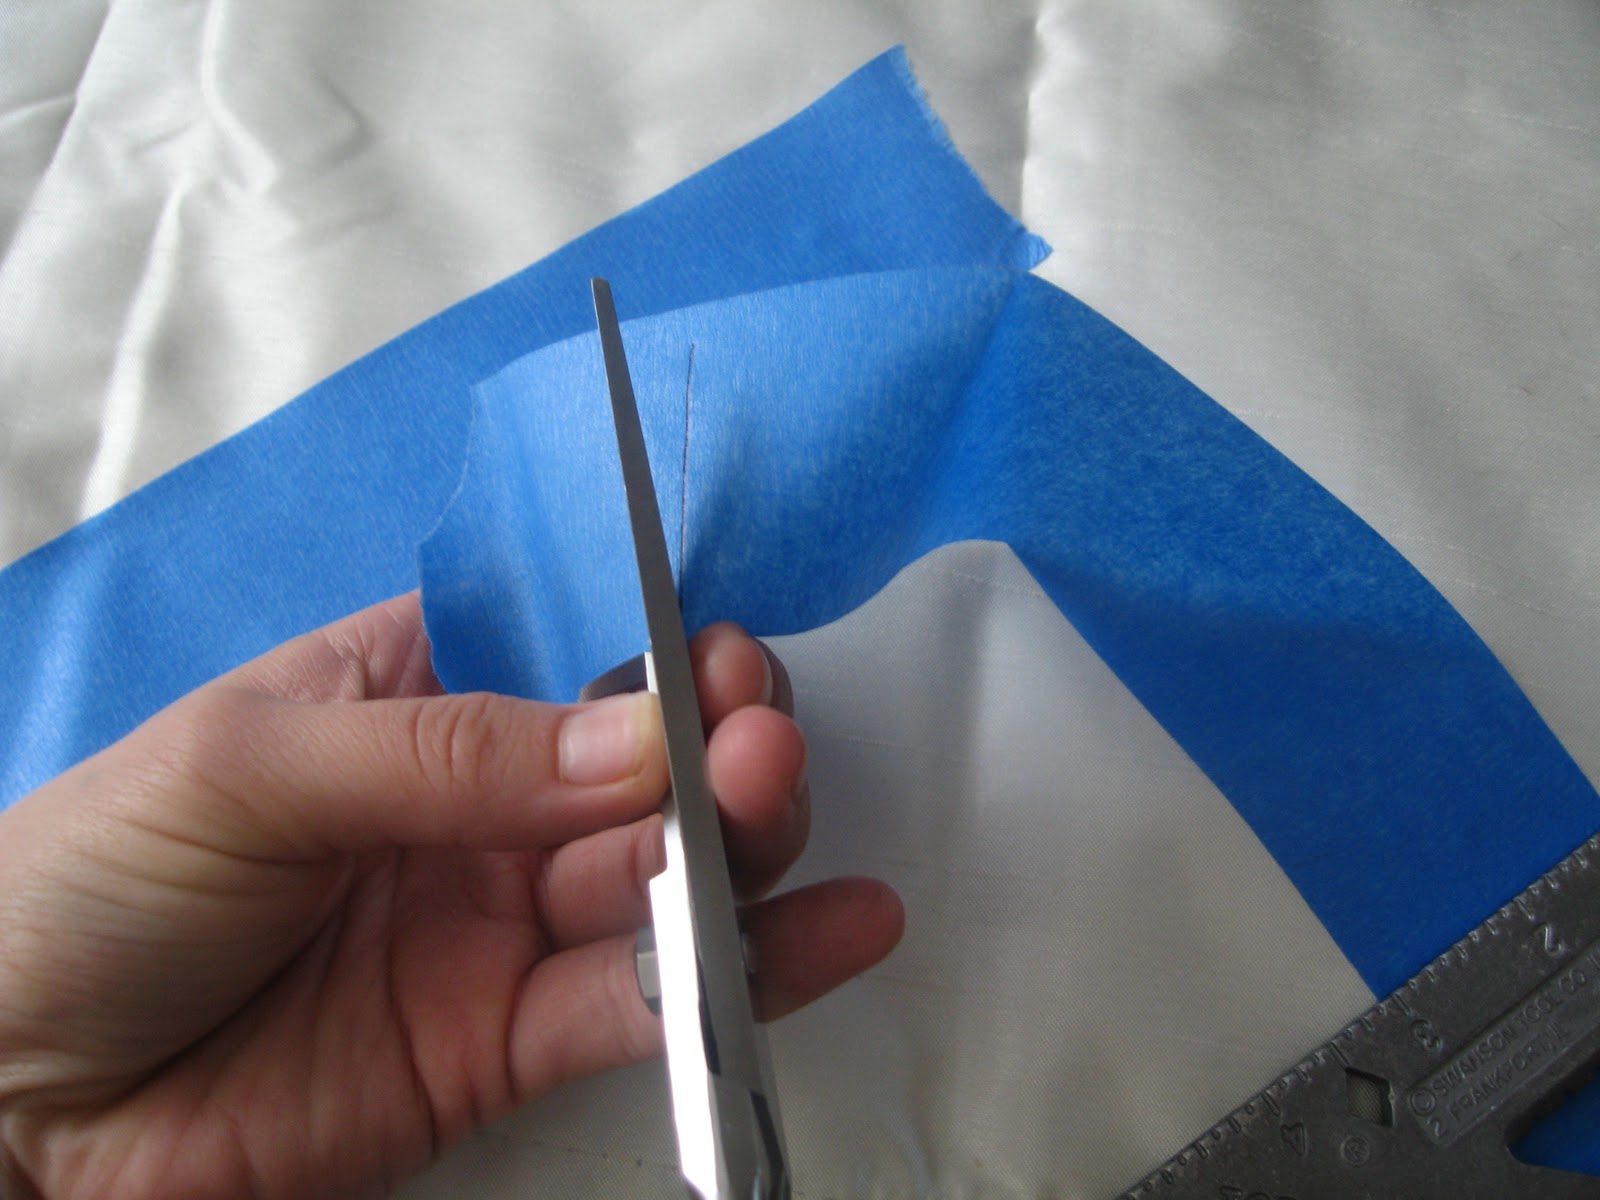
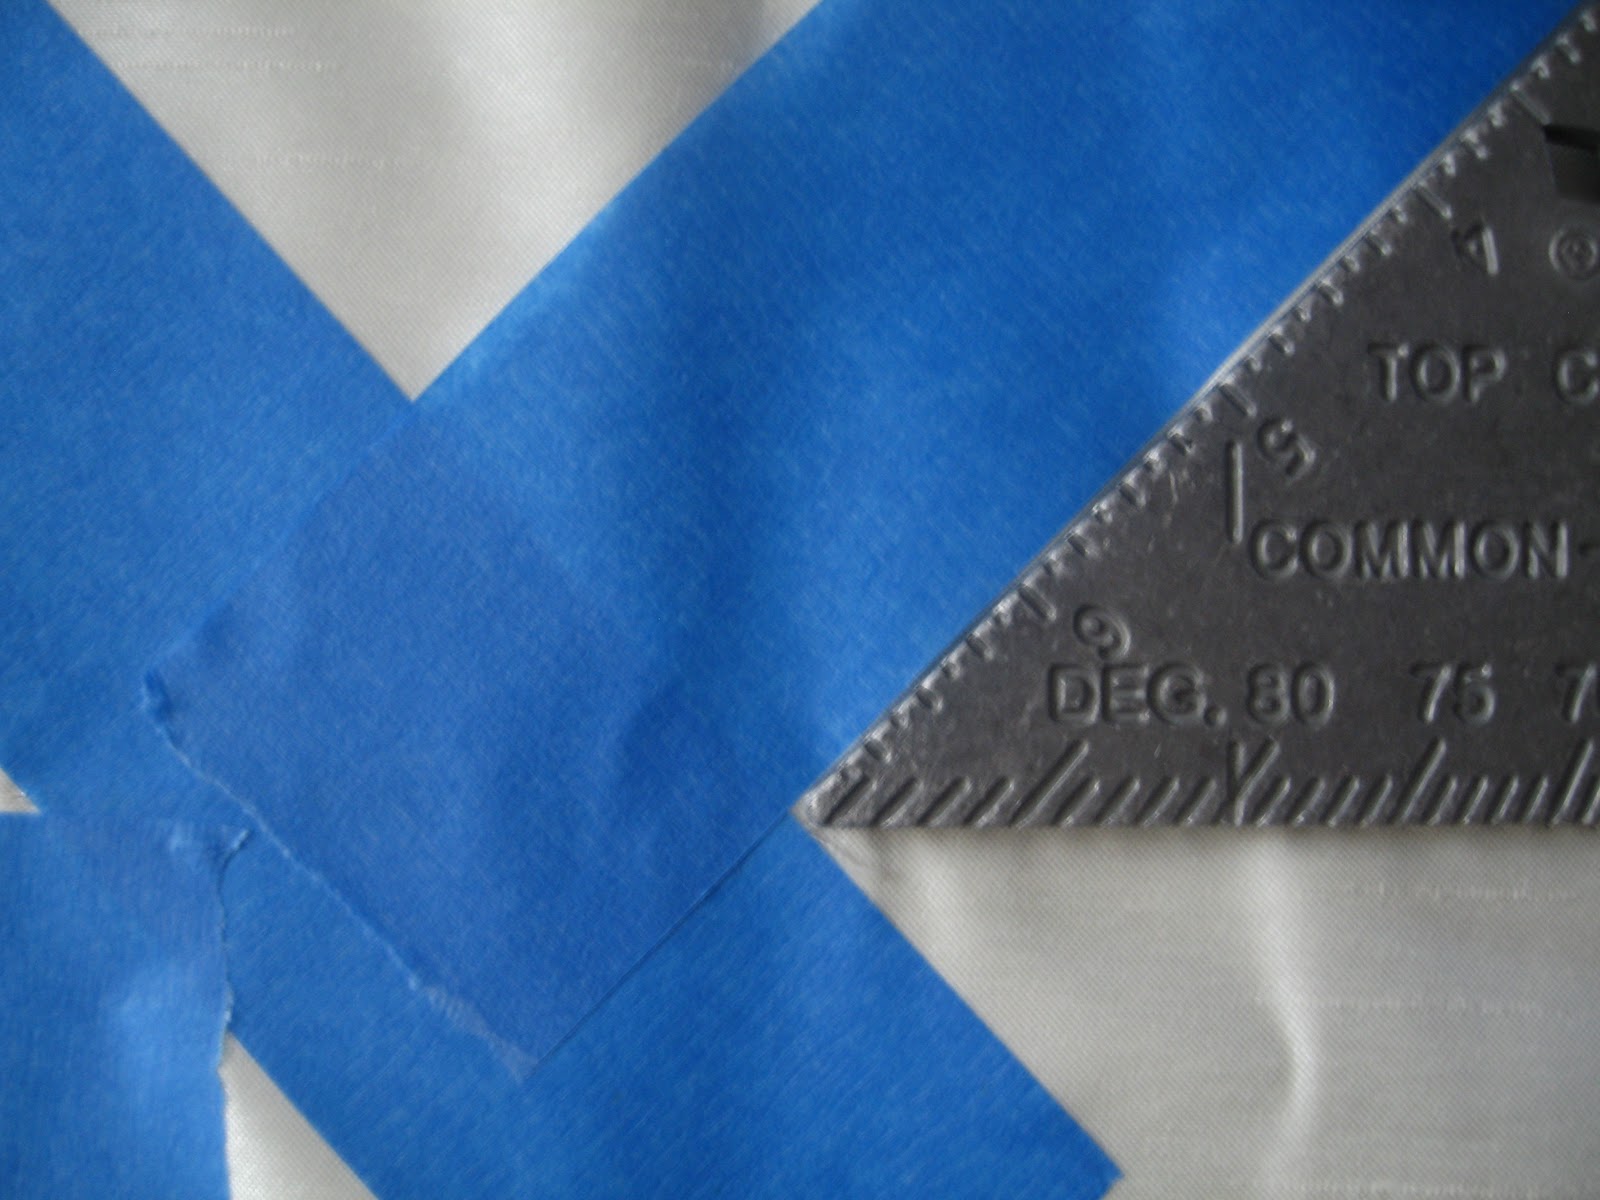
Step 2.  Place the speed square at the top of your chevron point.  Draw a line.  Cut the tape along that line, so you create a perfect tip for you chevron.


\


Step 3.  You will now use your tape as your template for length and width.  Because my tape is 2 inches wide, my chevrons will be 2 inches wide as well.  Place two pieces of tape next to the inside of your blue tape.
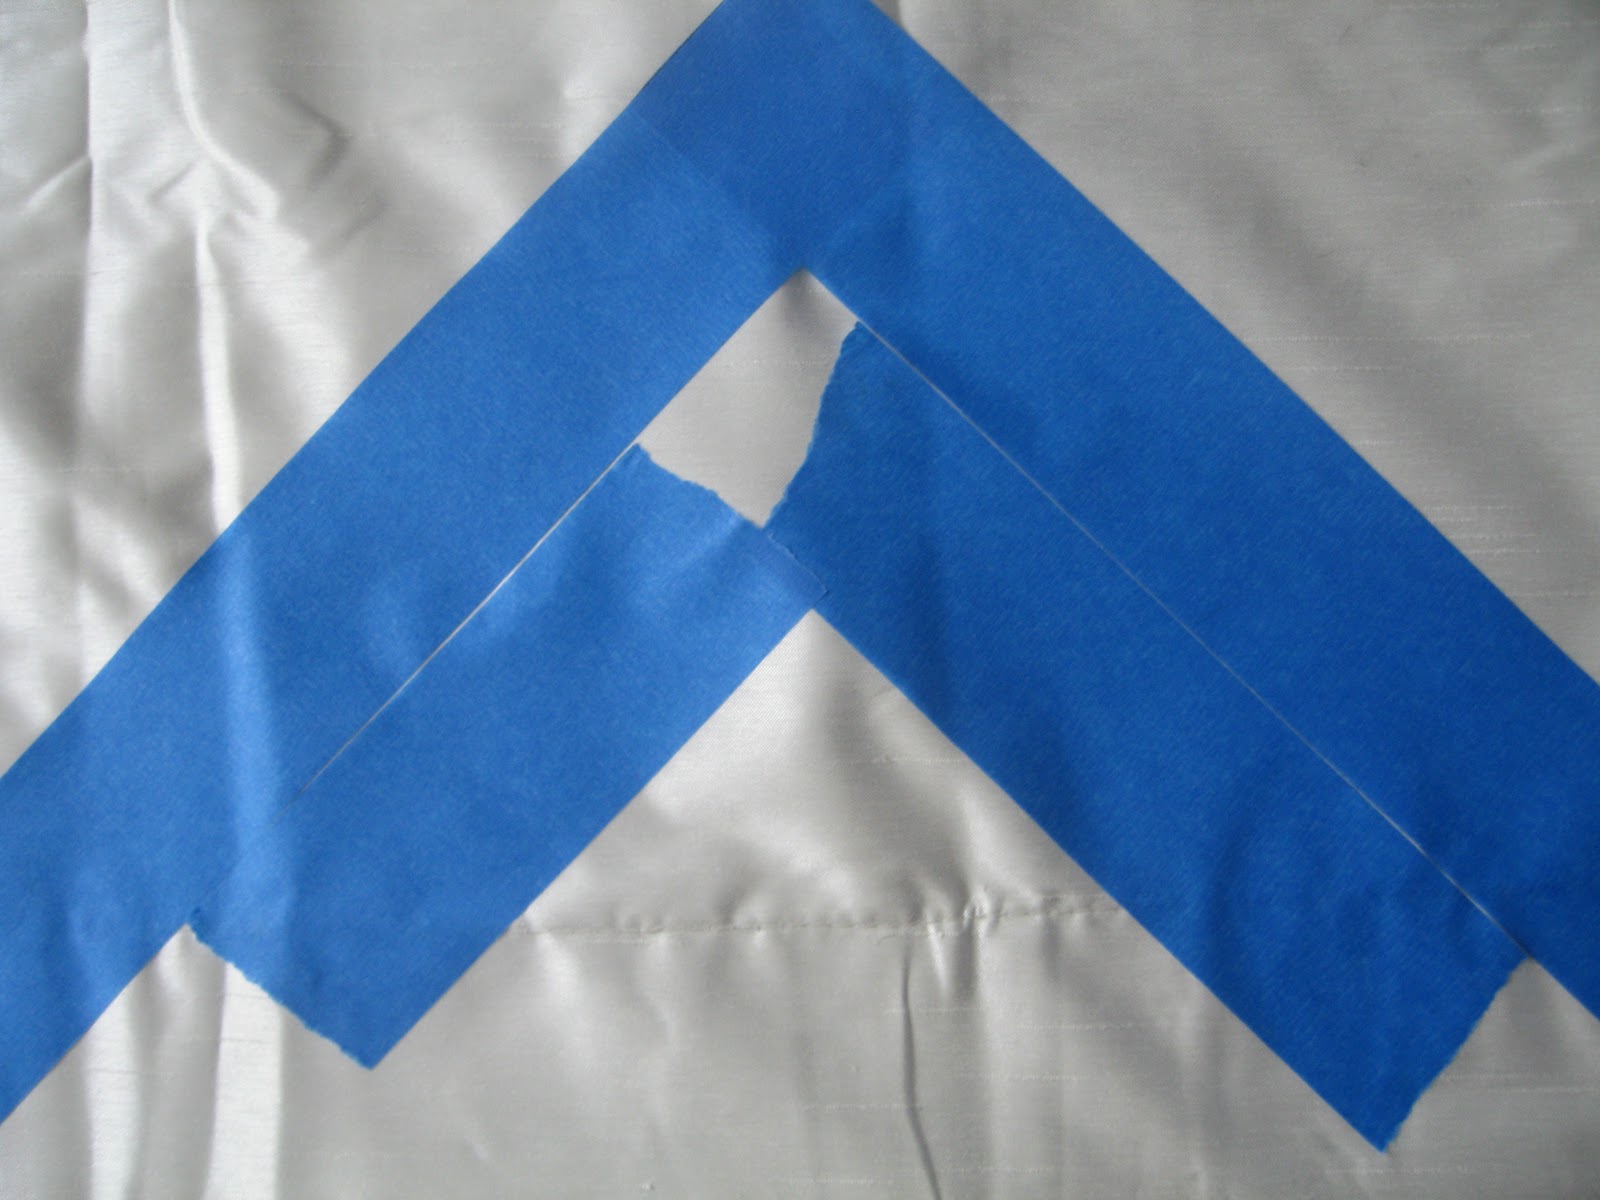

Okay, don't worry about that glob of curtain showing there in the corner.  Those two pieces of tape will be removed.  I just needed those in place to create a nice point and V.   Once those are taped down, repeat Step 3. 
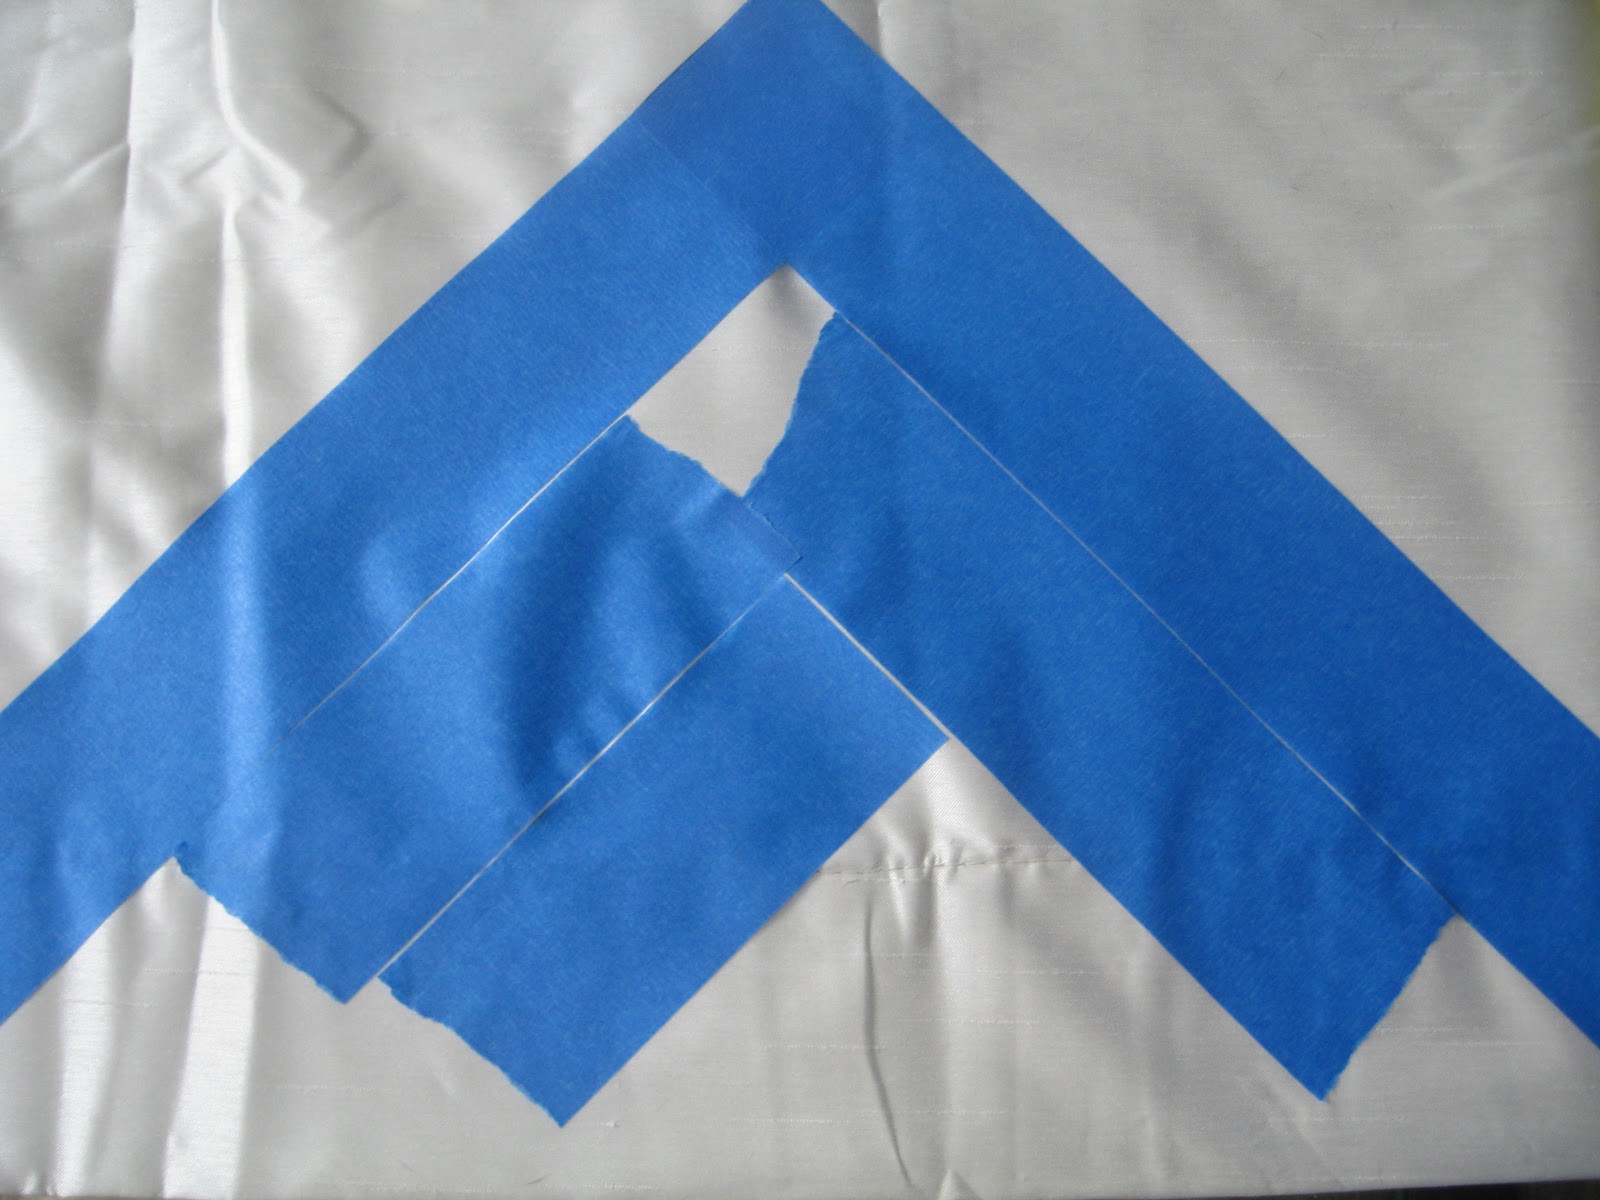


I taped off where I do not want paint, so I placed tape along my hemline.
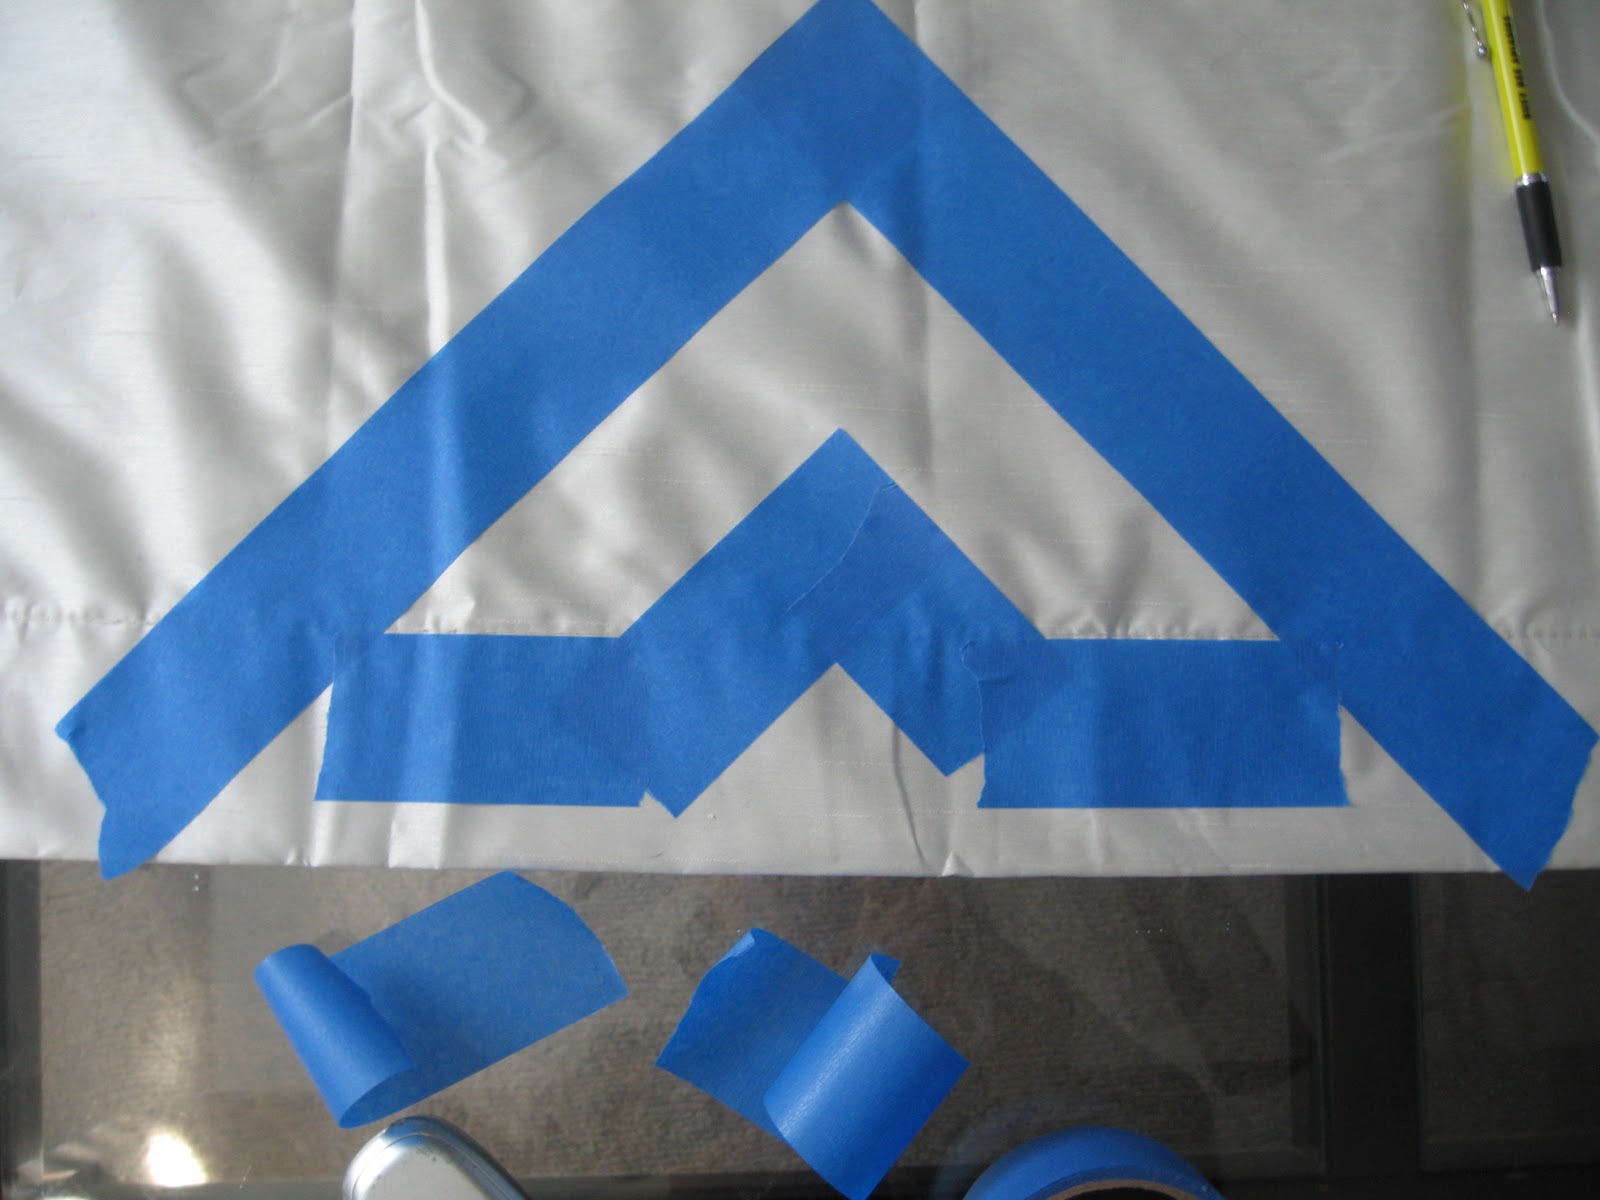
 

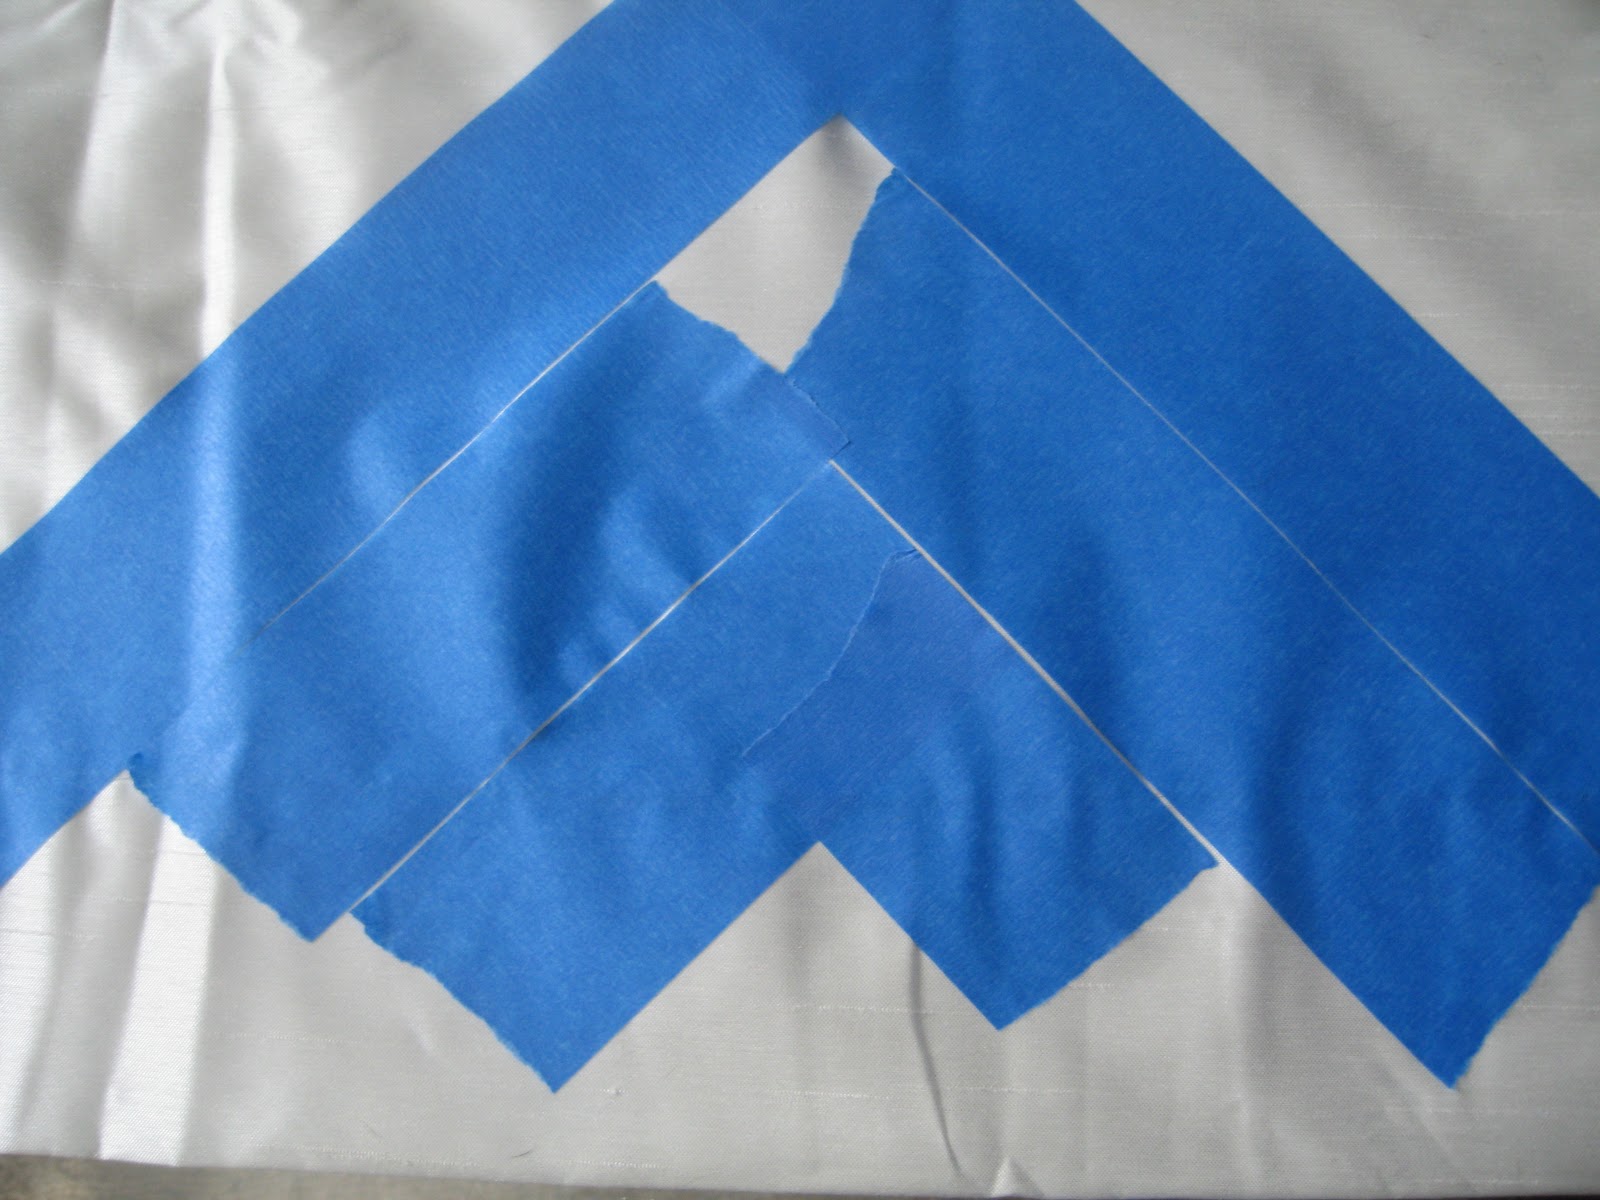
Step 4.  Move the speed square (or the template you made) over to create the next upside down V.  Make sure your tape will create a sharp point in the corners.  (Refer to photos below for better clarification.)


 You want your point to look like this!!!!

NOT THIS!!!!!



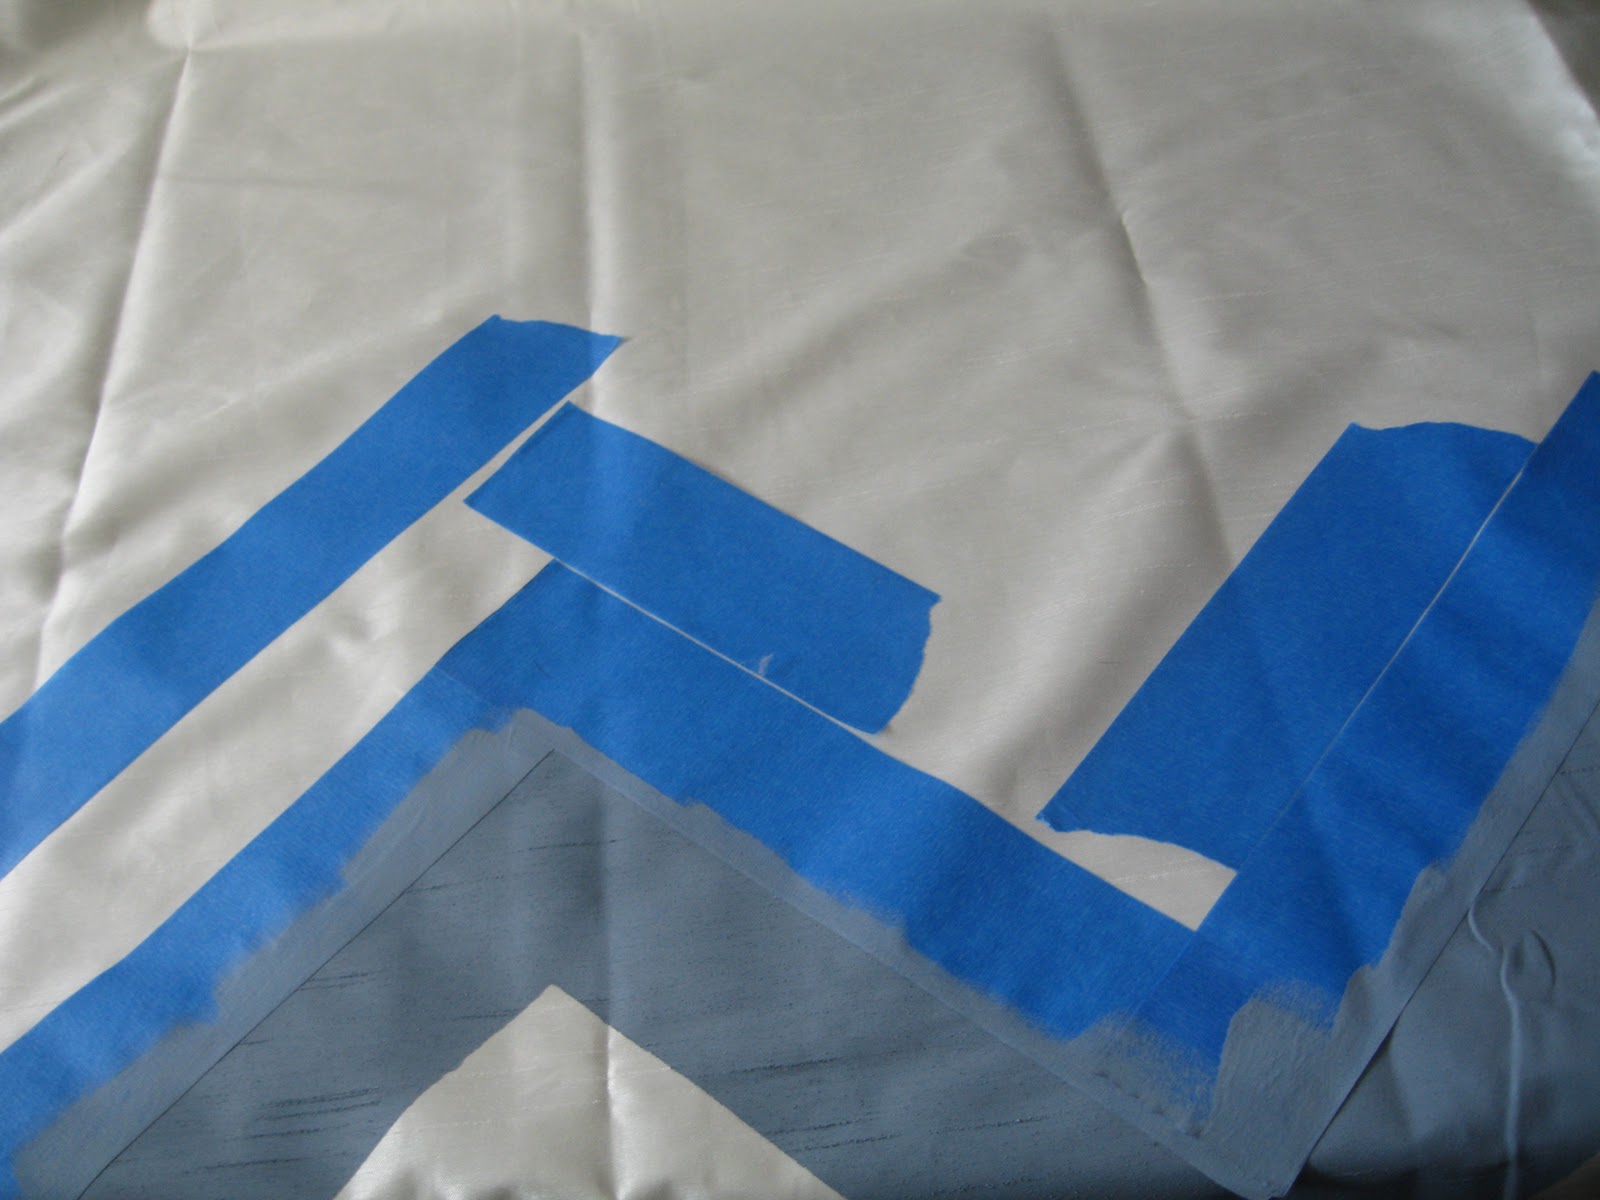
Step 5.  Repeat steps 2-4 until you have your first row of chevrons. For these next few photos ignore the paint that I already applied.  To make your next row of chevrons, you will not need your speed square except for marking straight lines.

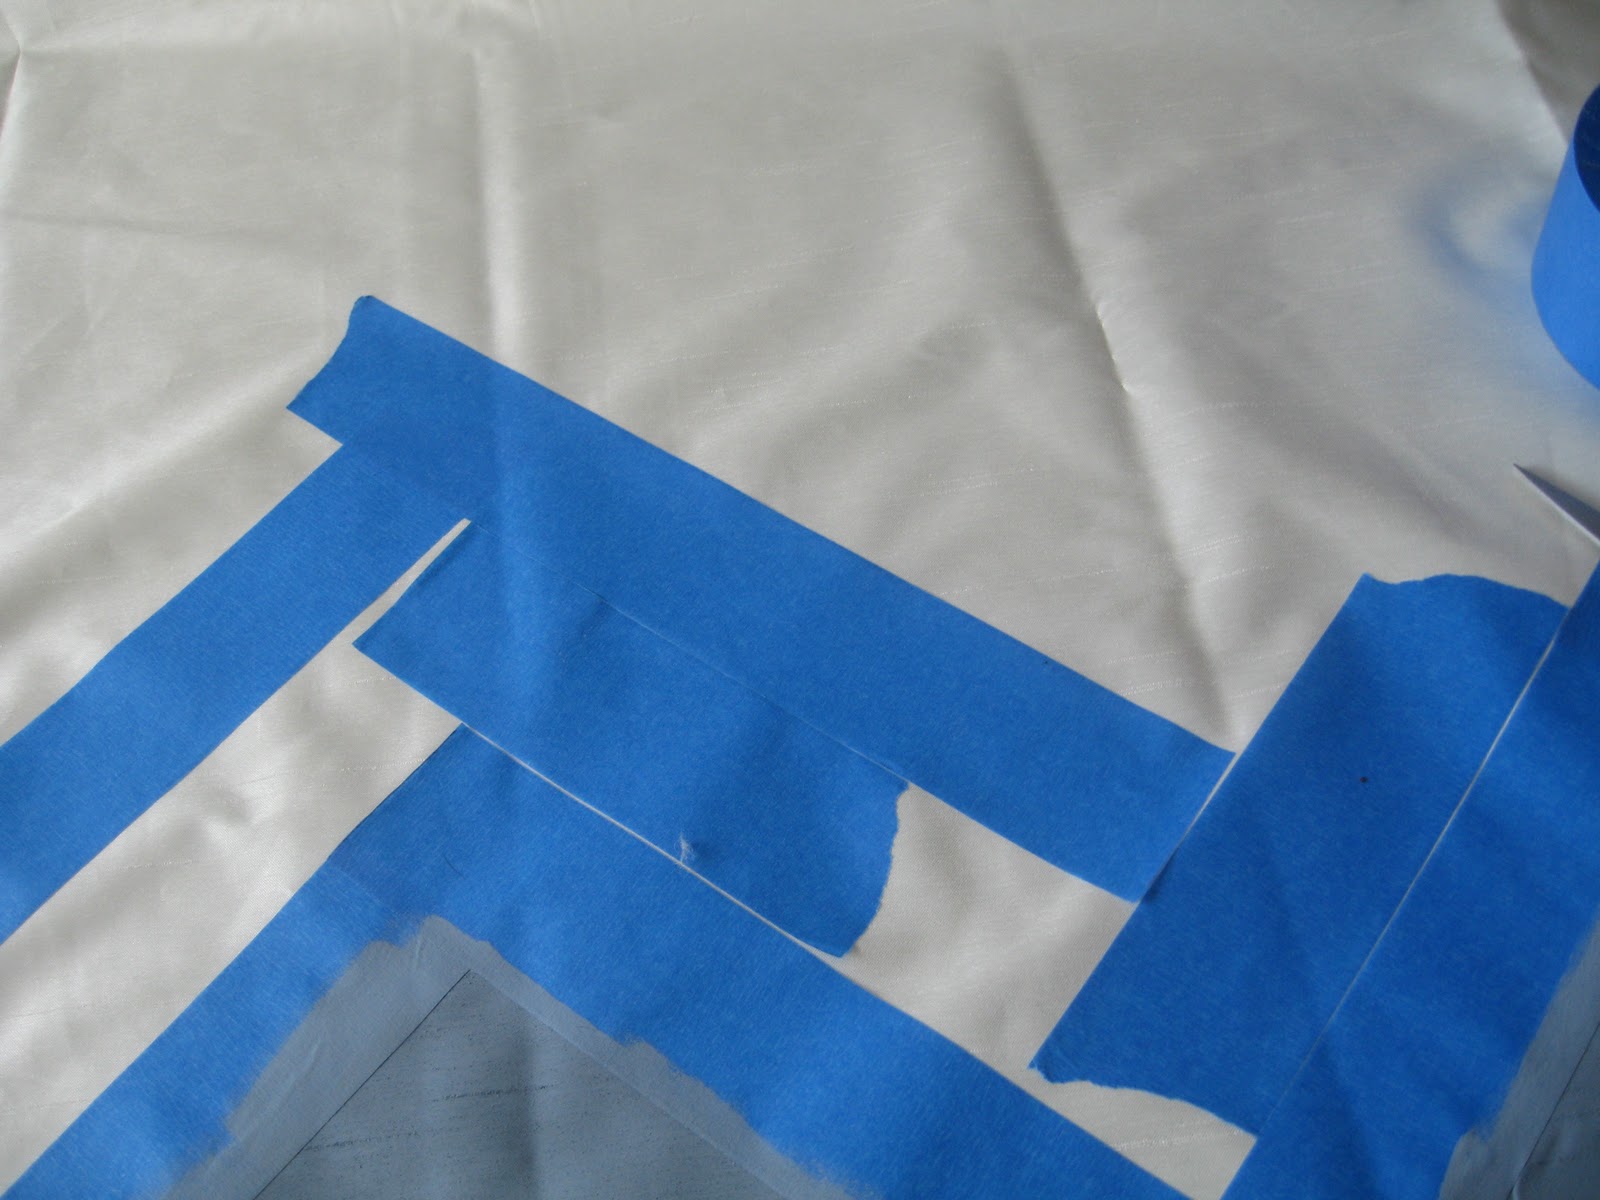
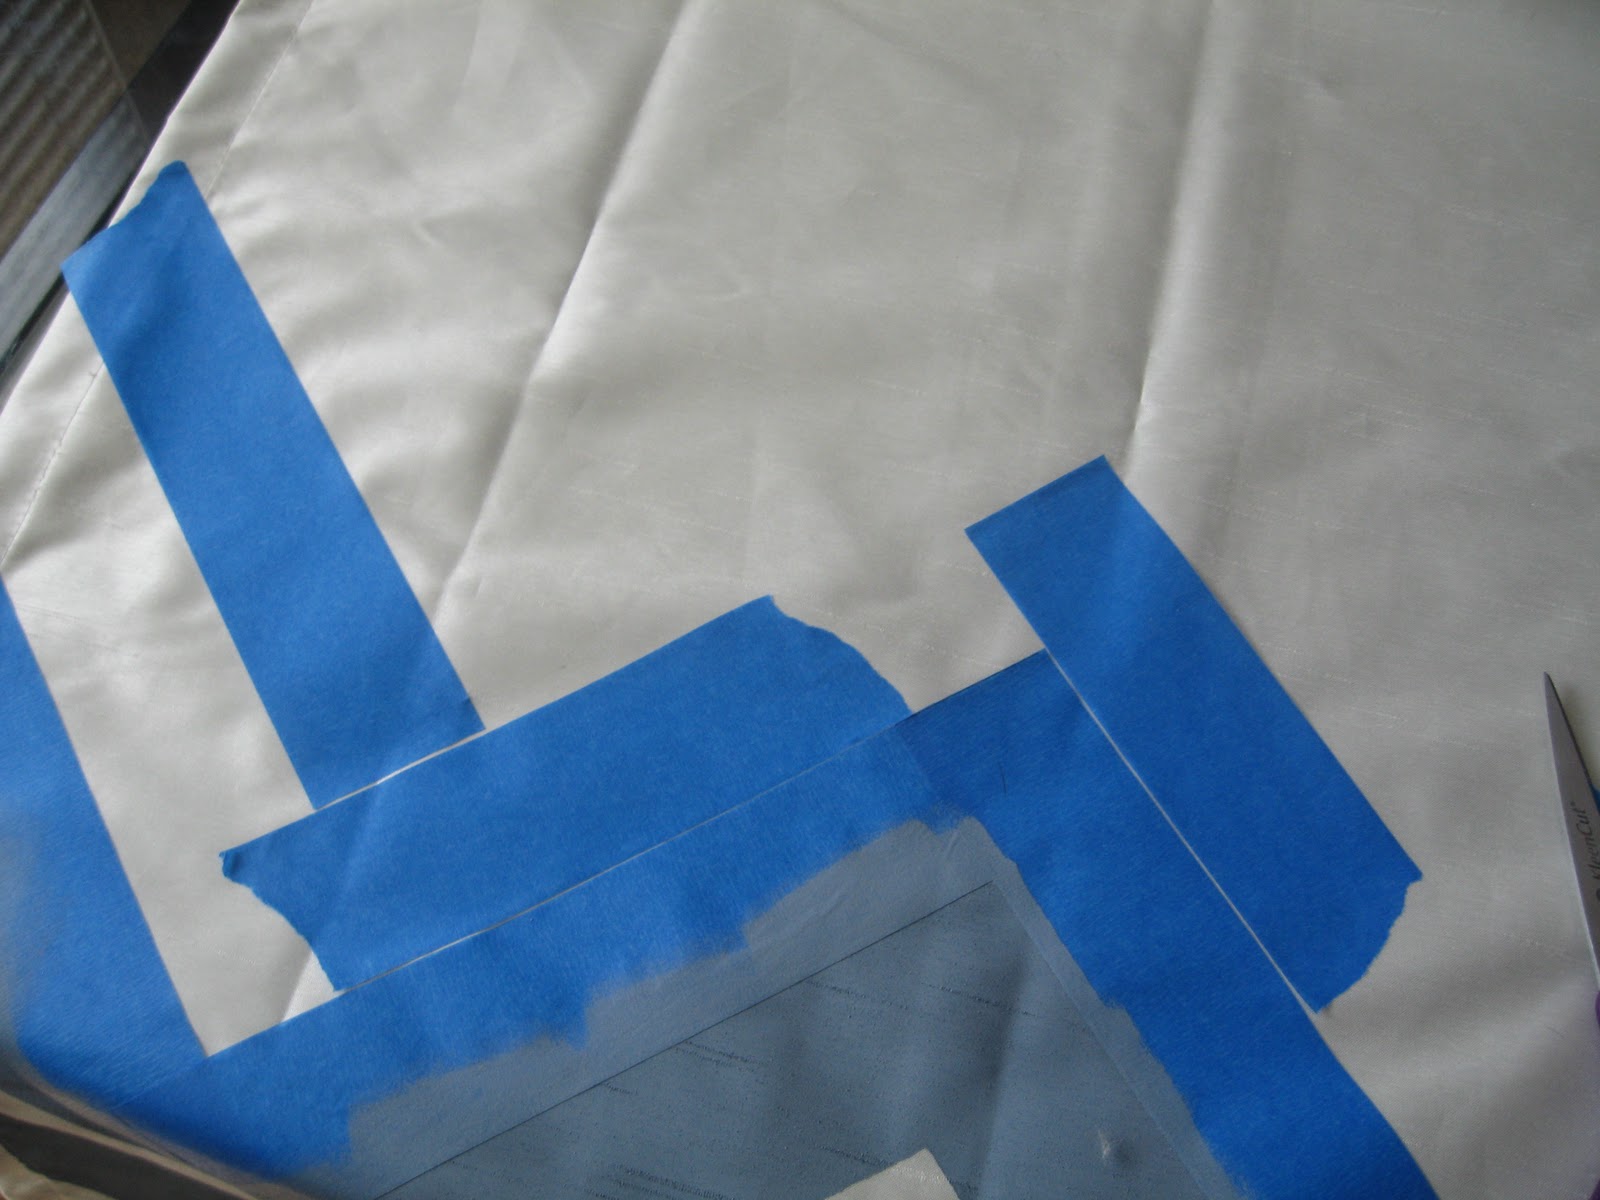
Step 6.  From here and on out, you are basically repeating steps 2 and 3.  Place two pieces of tape along the sides of your chevron.  Notice that glob of curtain again?? :)
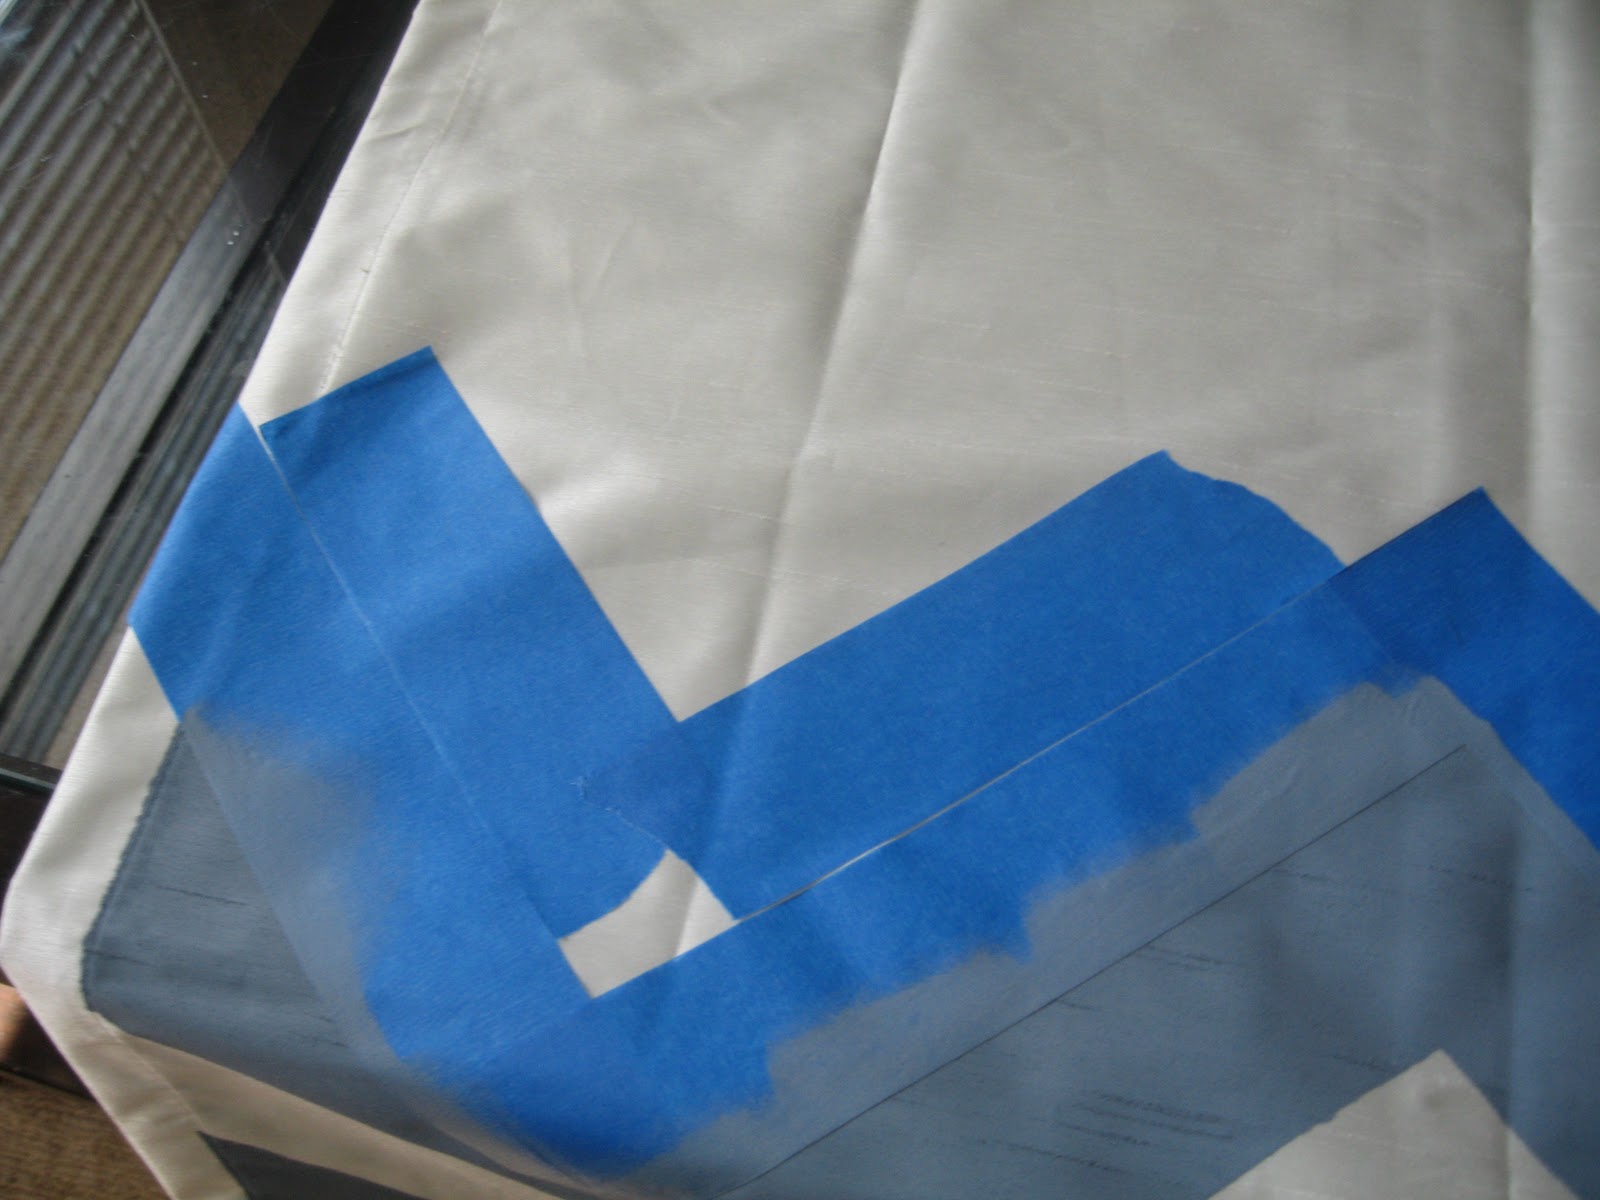

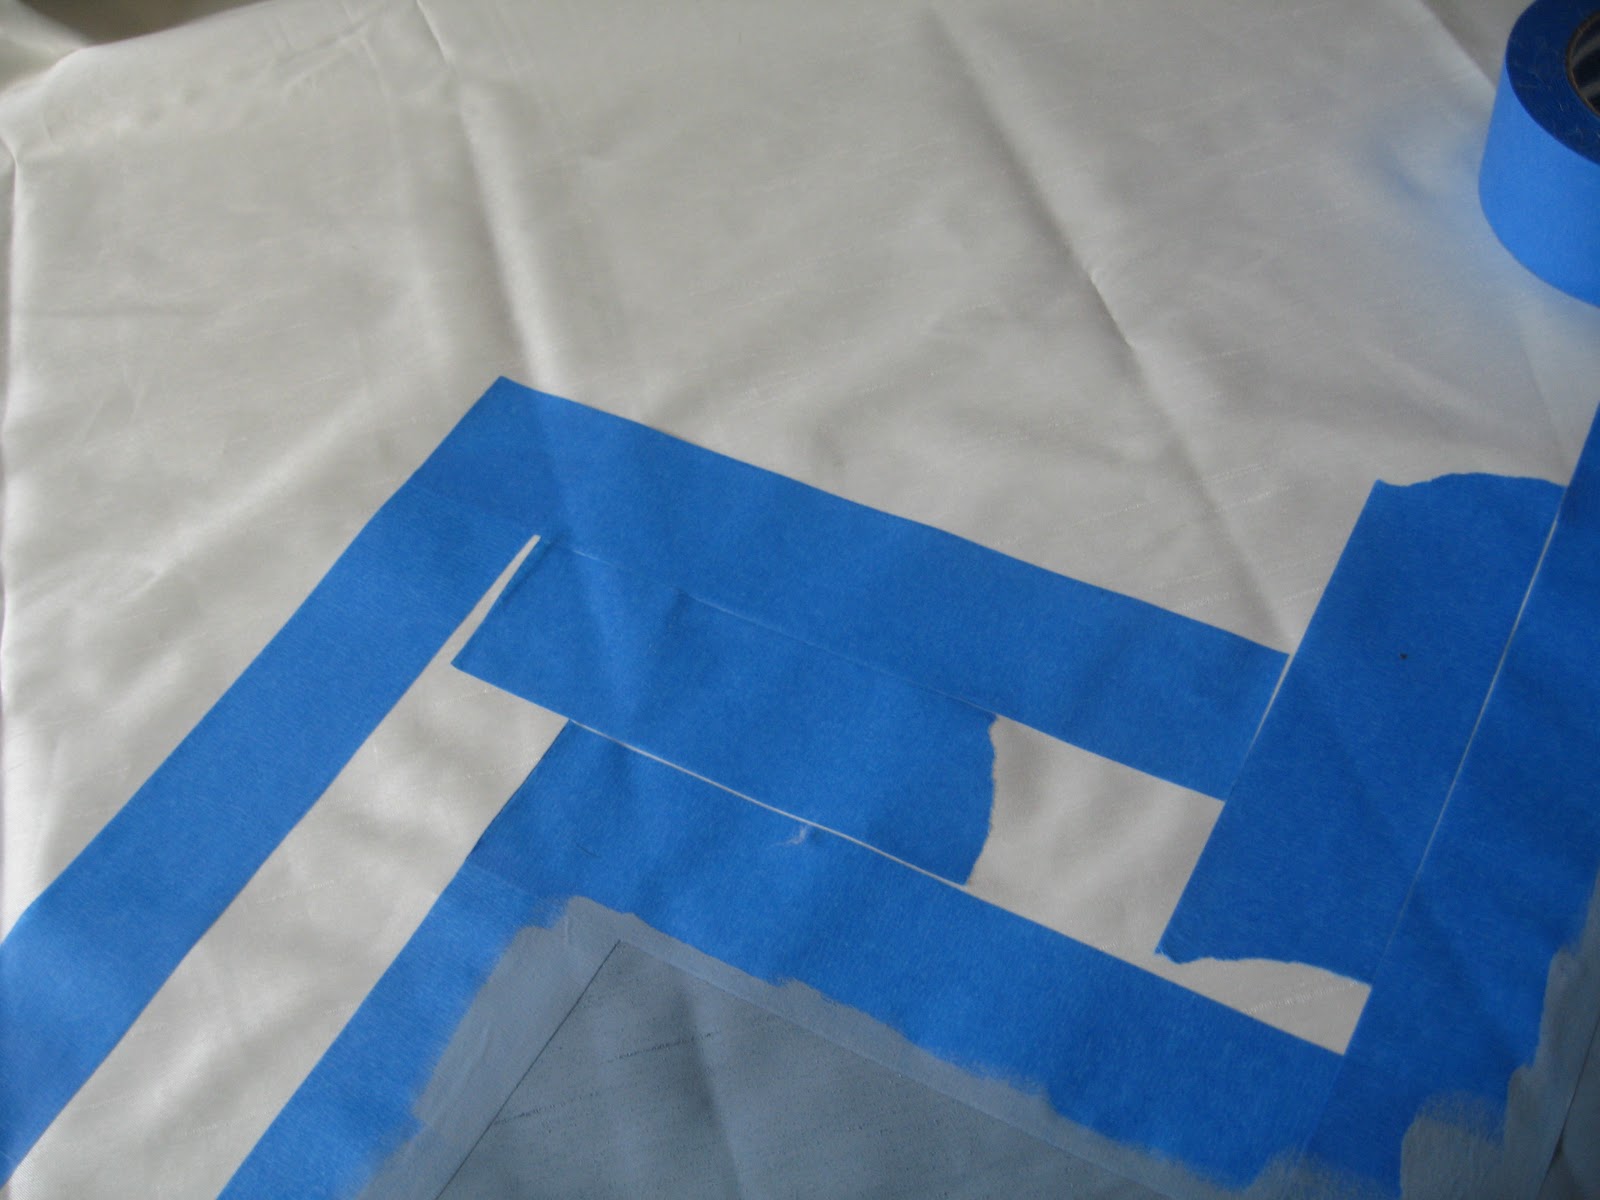
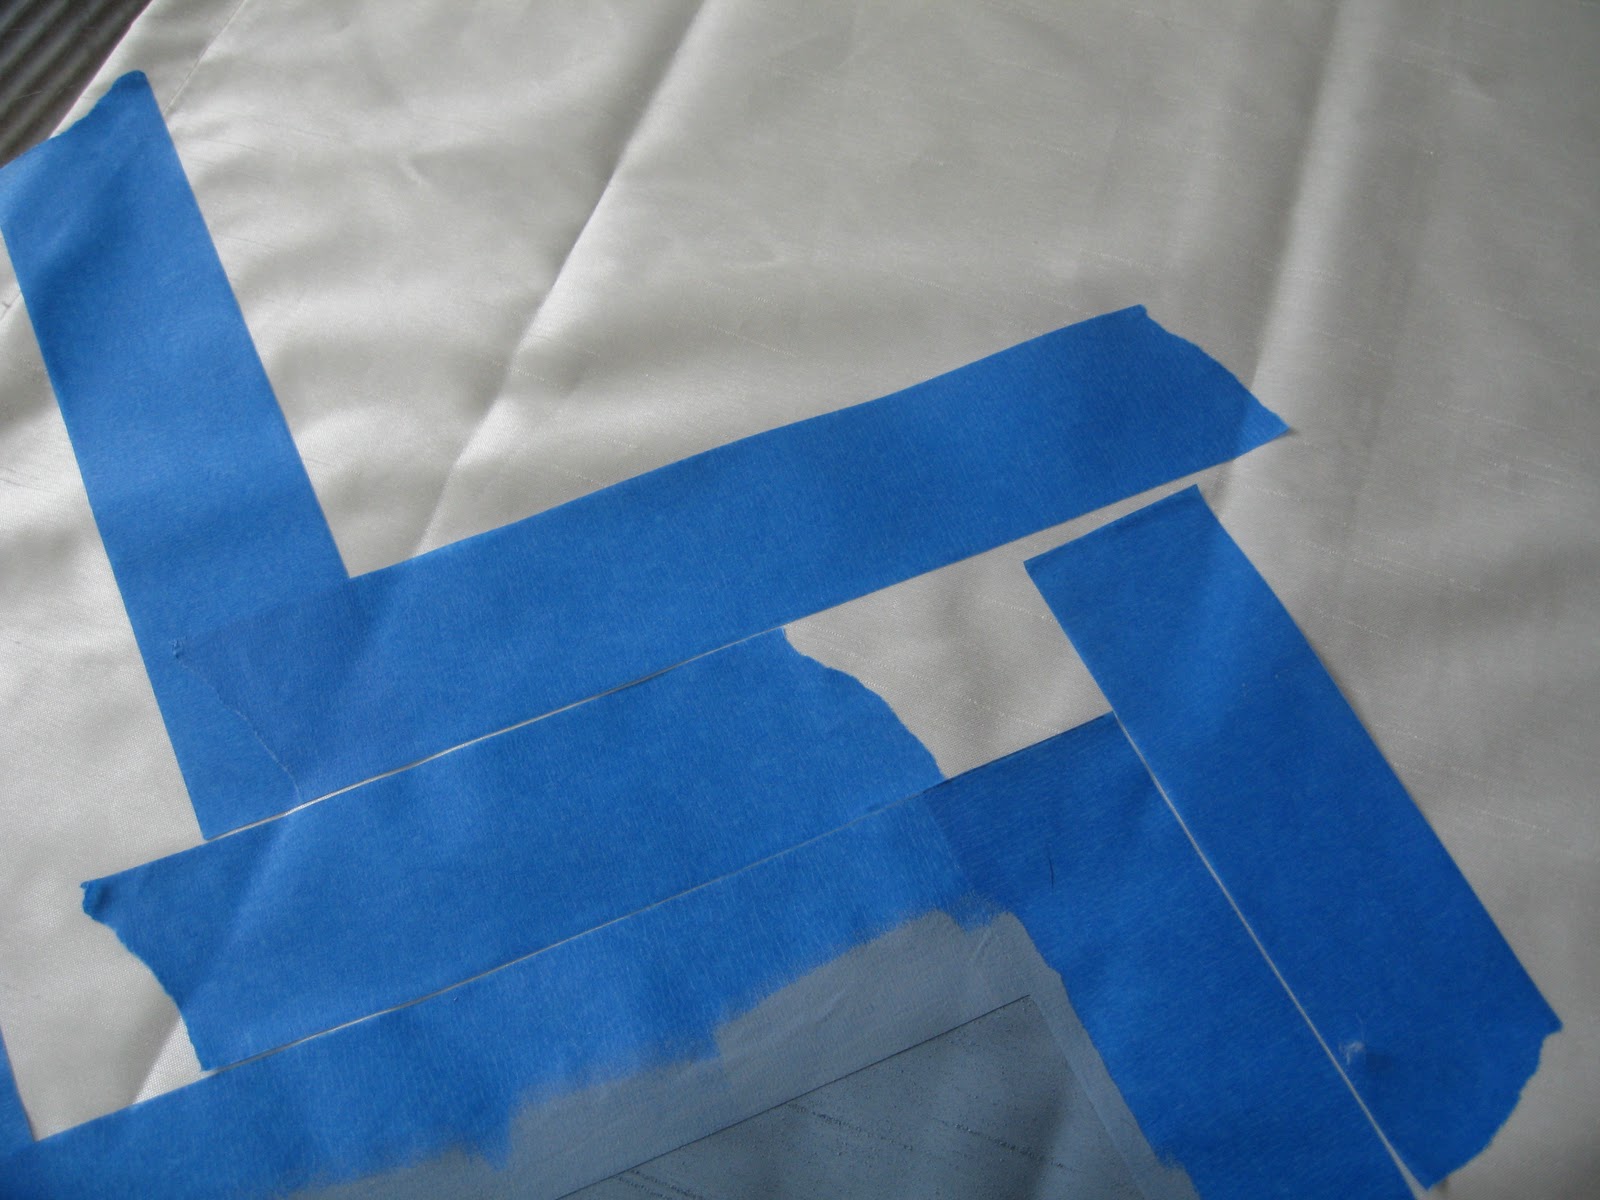
Step 7.   Place another piece of tape, and cut it so it is straight.
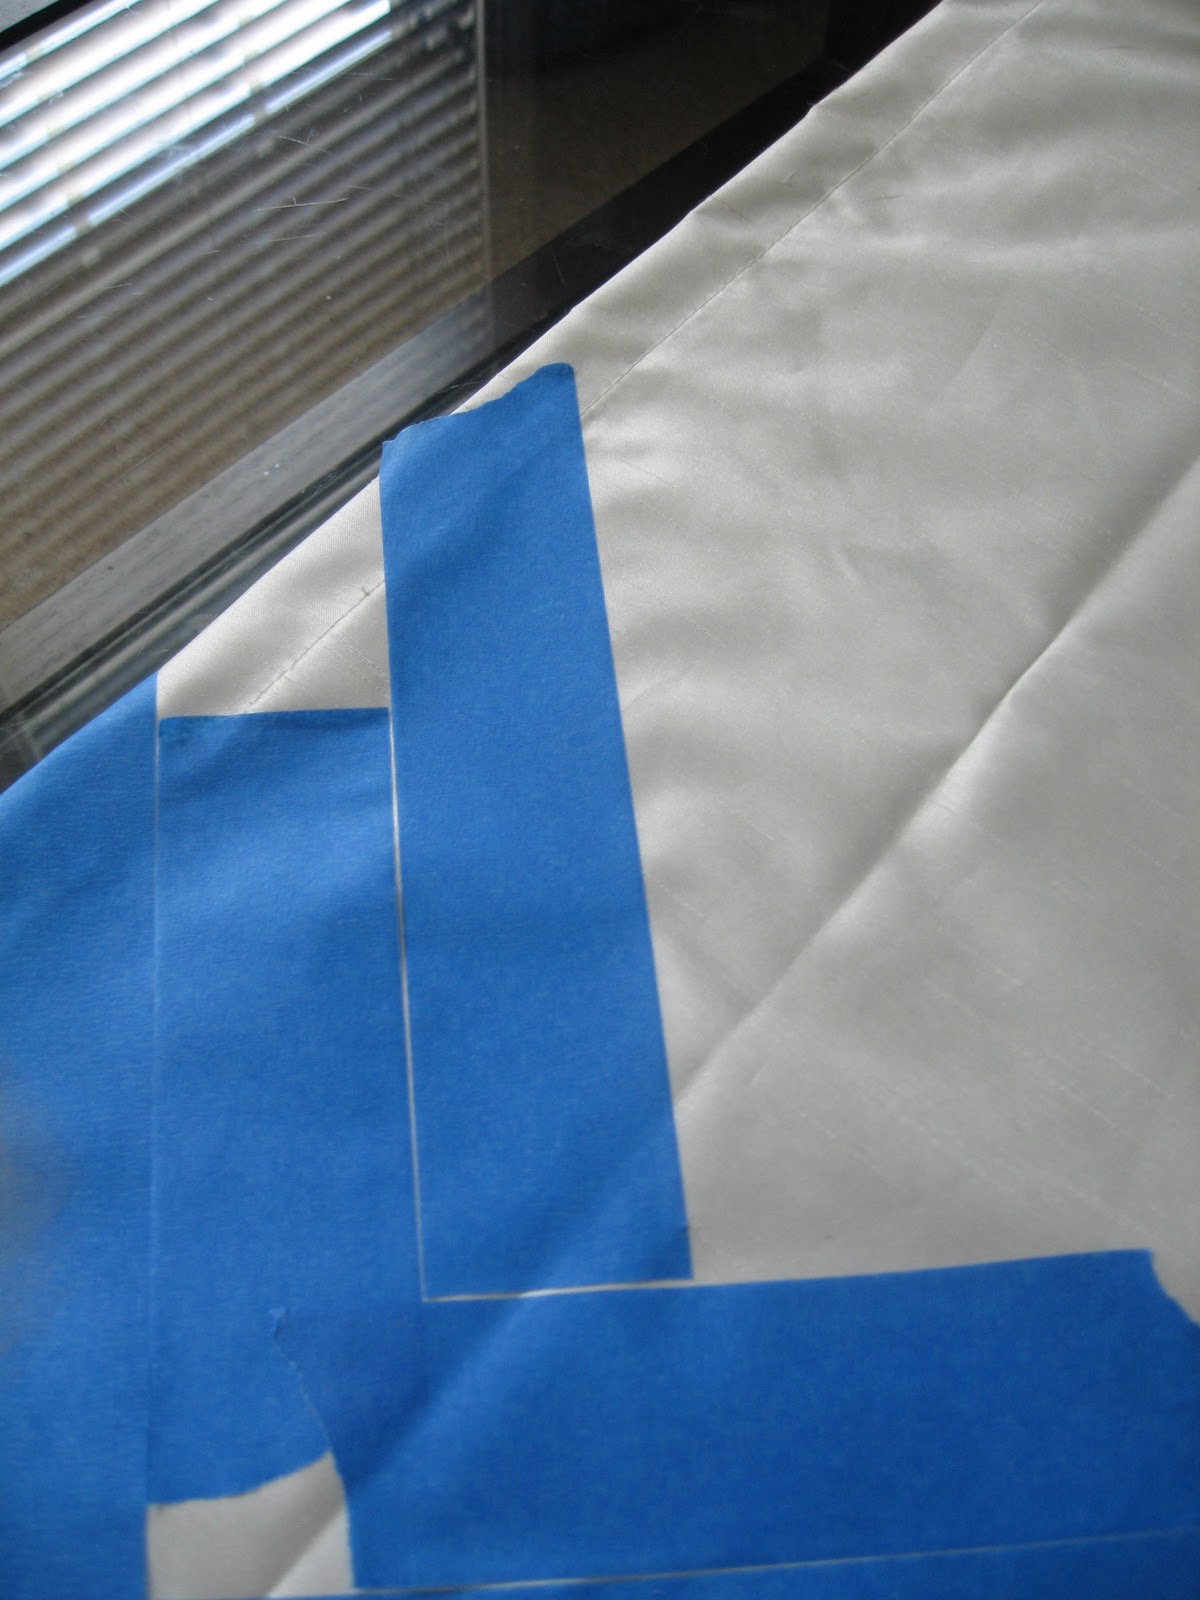

Notice below how the left piece of tape is gone?  I moved it over to the next chevron, so I knew how long of a piece I needed. Basically, I used the same two pieces of tape throughout the project as my "template."  Still confused?  Don't worry!  Hopefully, these pictures will help explain it better!
Here I am checking the length of tape, so I do not waste my expensive blue tape. :)
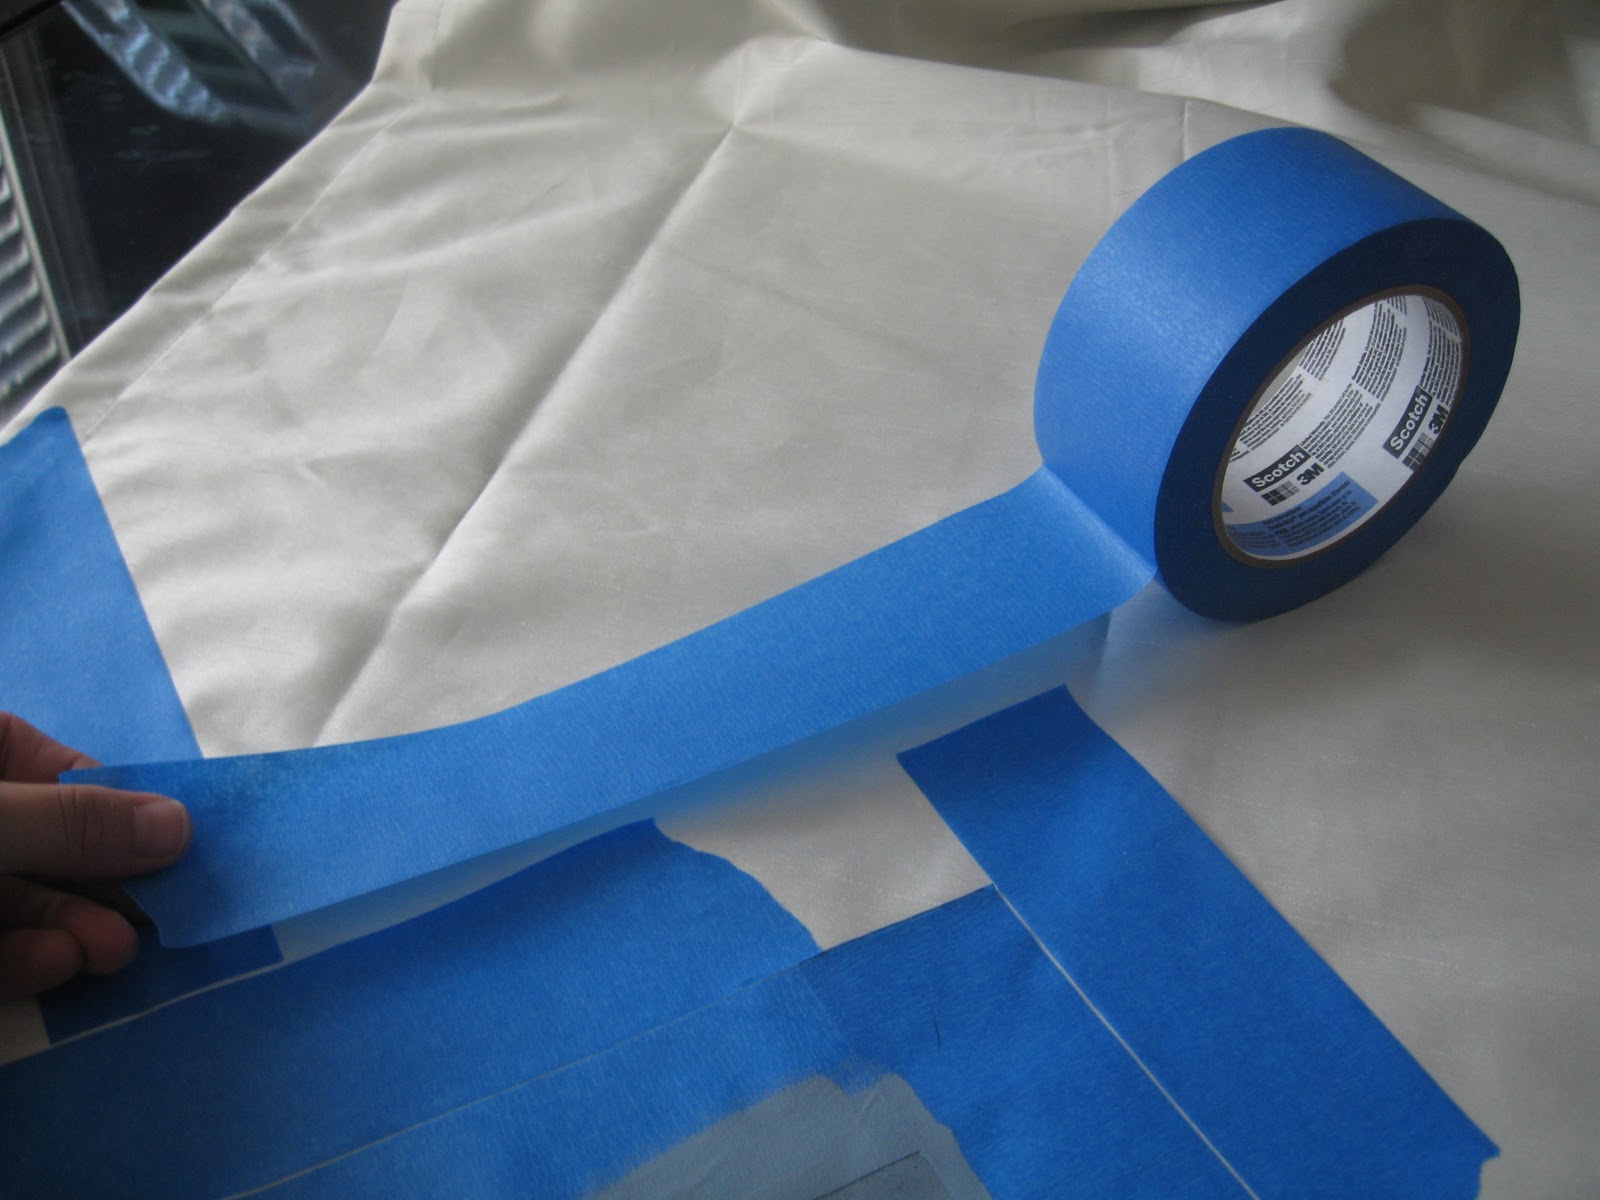

The torn piece of tape to the left is about to move over . . .

 to the far right.
  
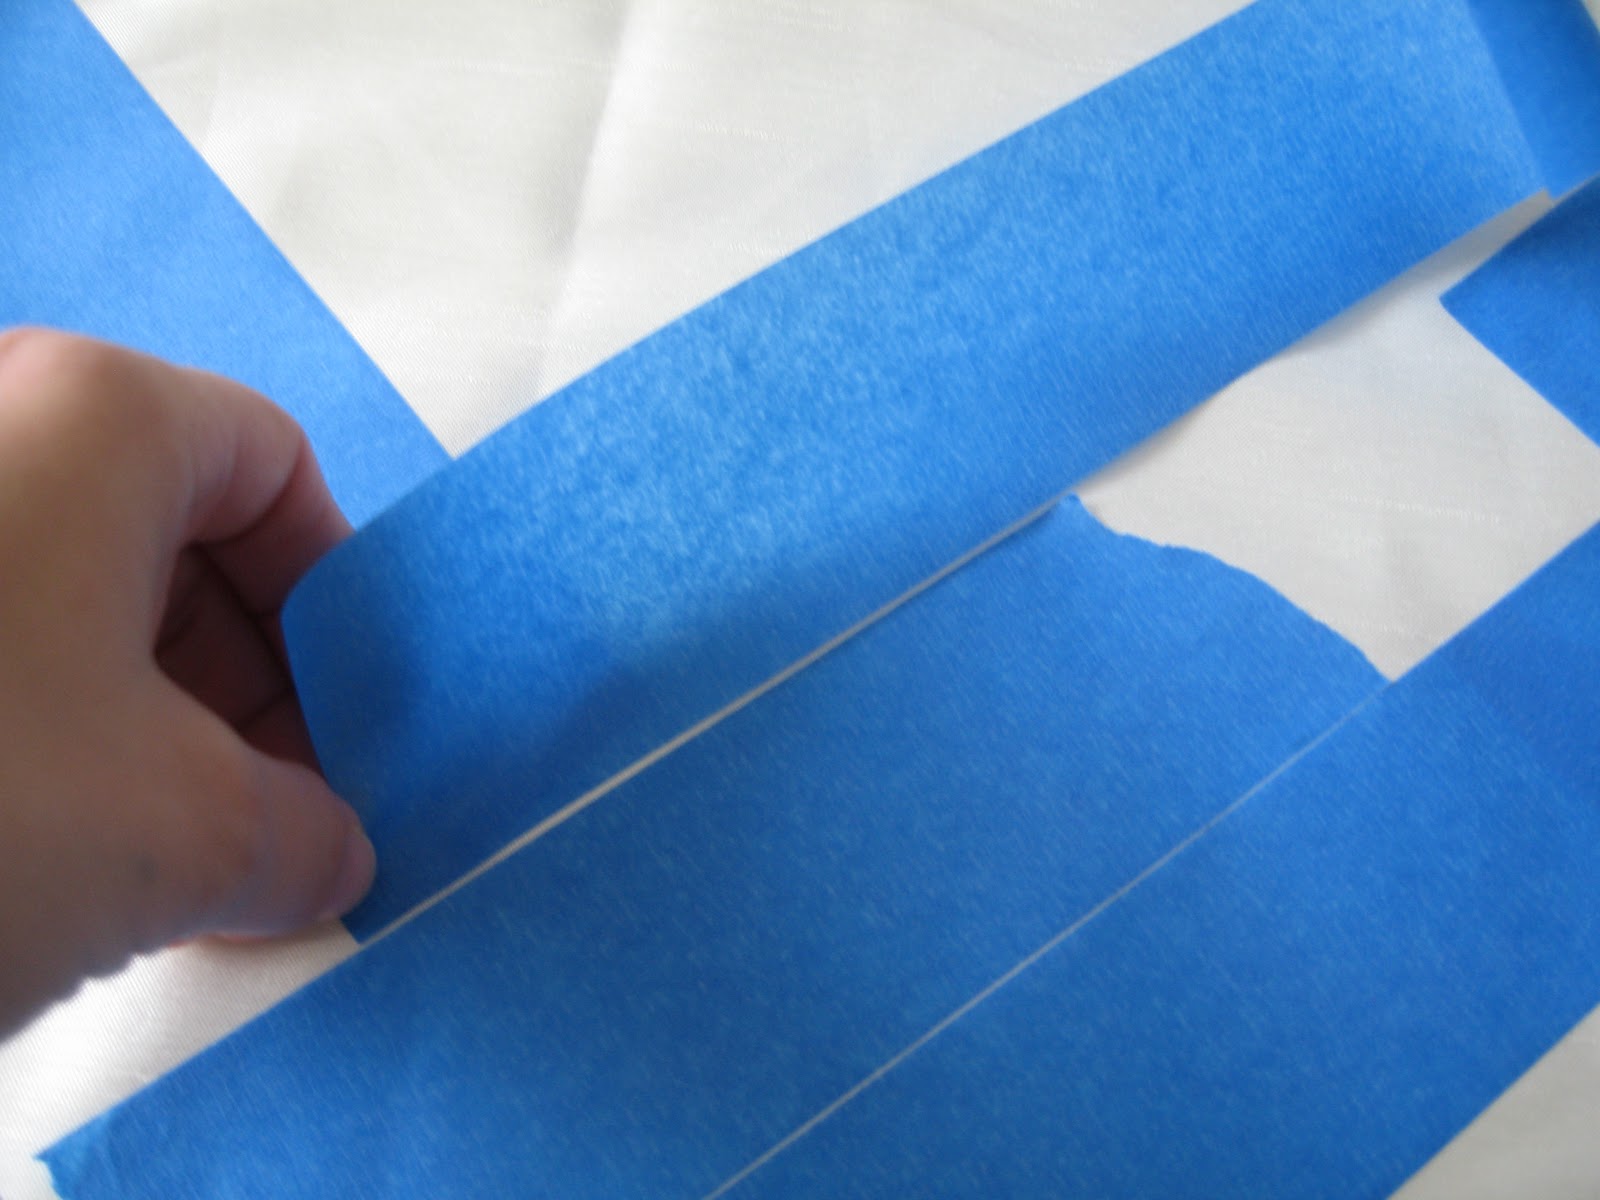
I cut a straight line with the next piece of tape, which will be my bottom point.  The top of the tape (where my fingers are touching), I just tore it off.  For that torn part, you are repeating step 2 by using your speed square to a mark a straight line for you to cut. 
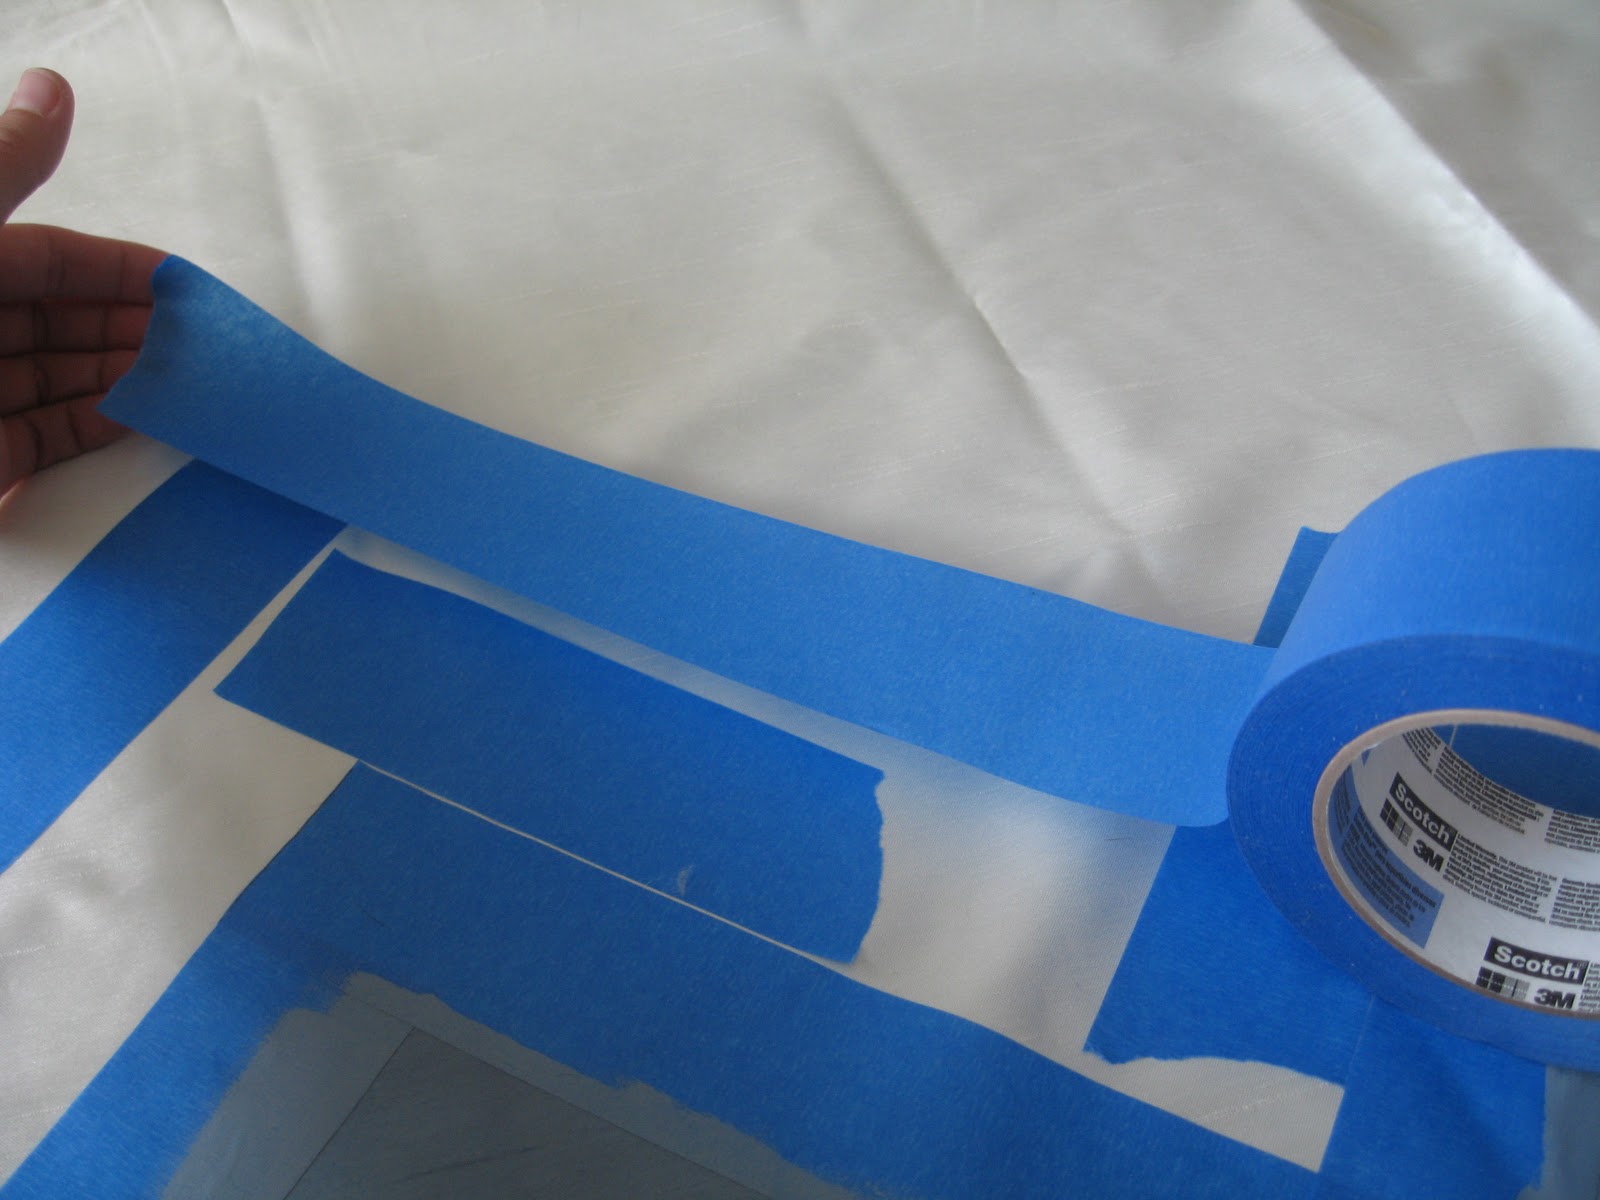


If you end up cutting your tape crooked throughout the project, do not worry about it!
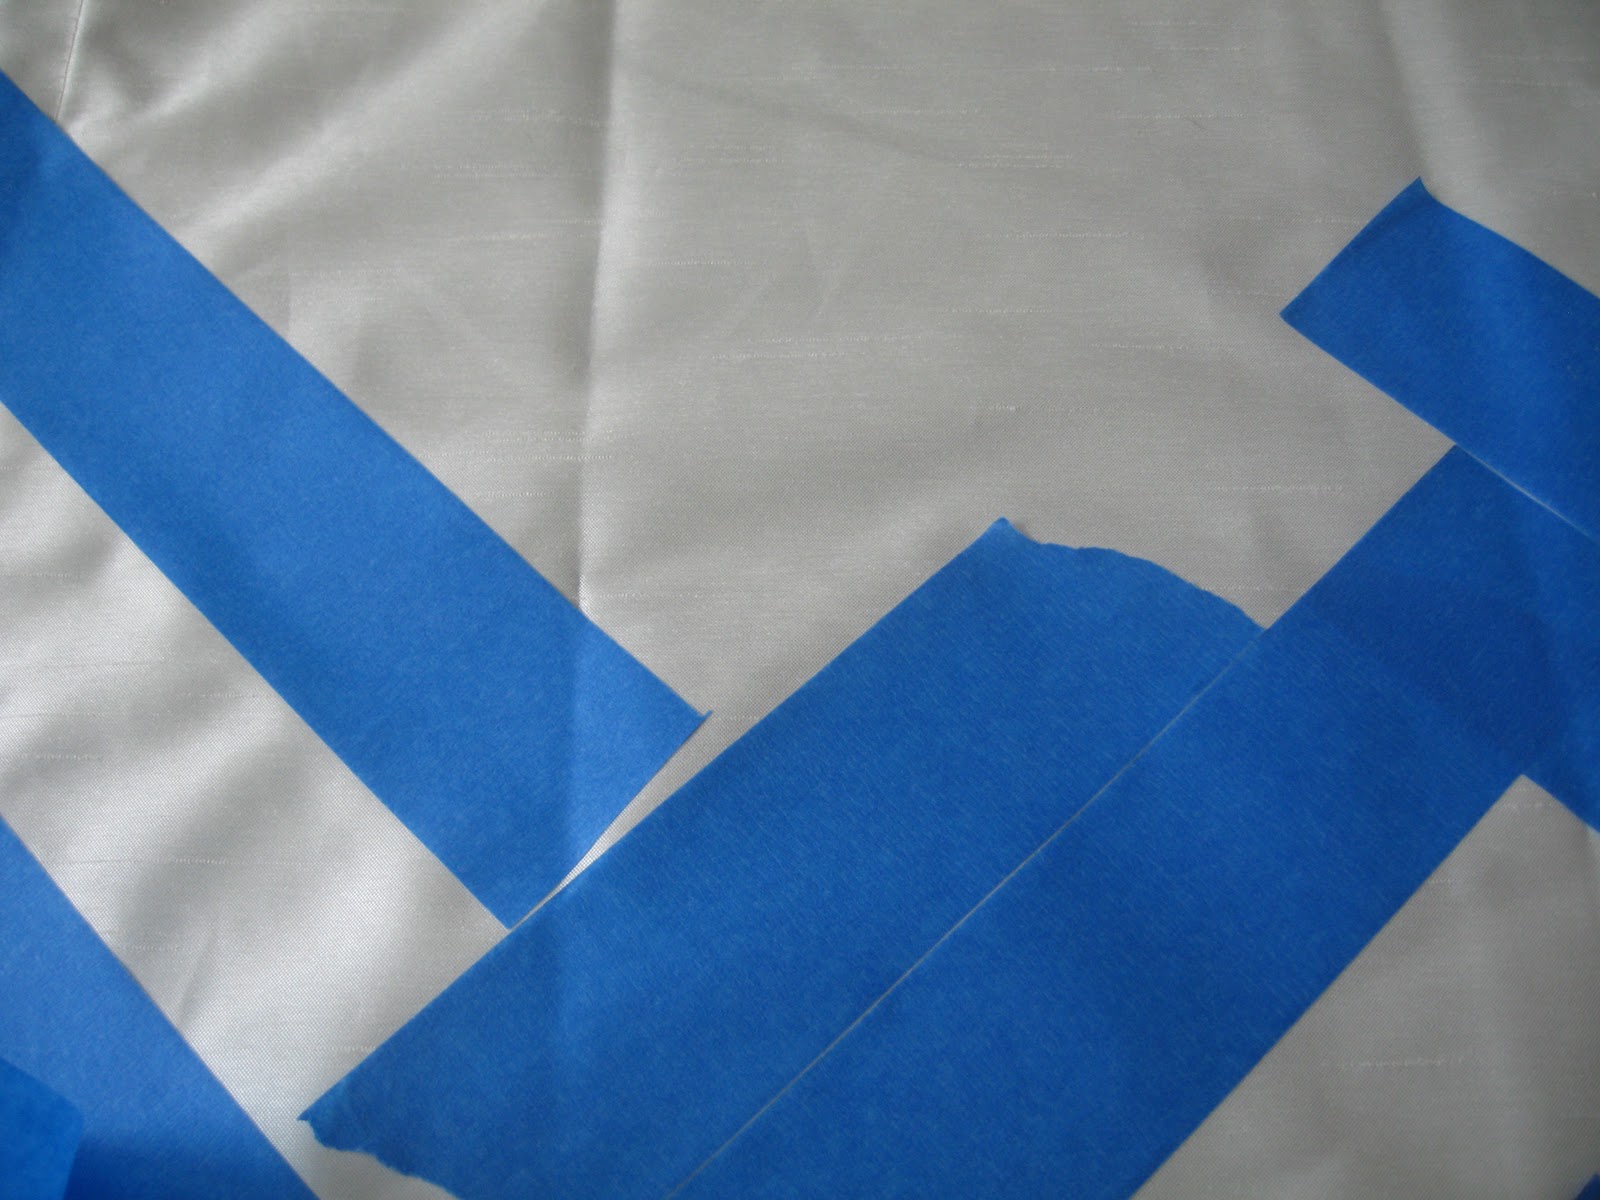
Use your second piece of tape to make it straight again.
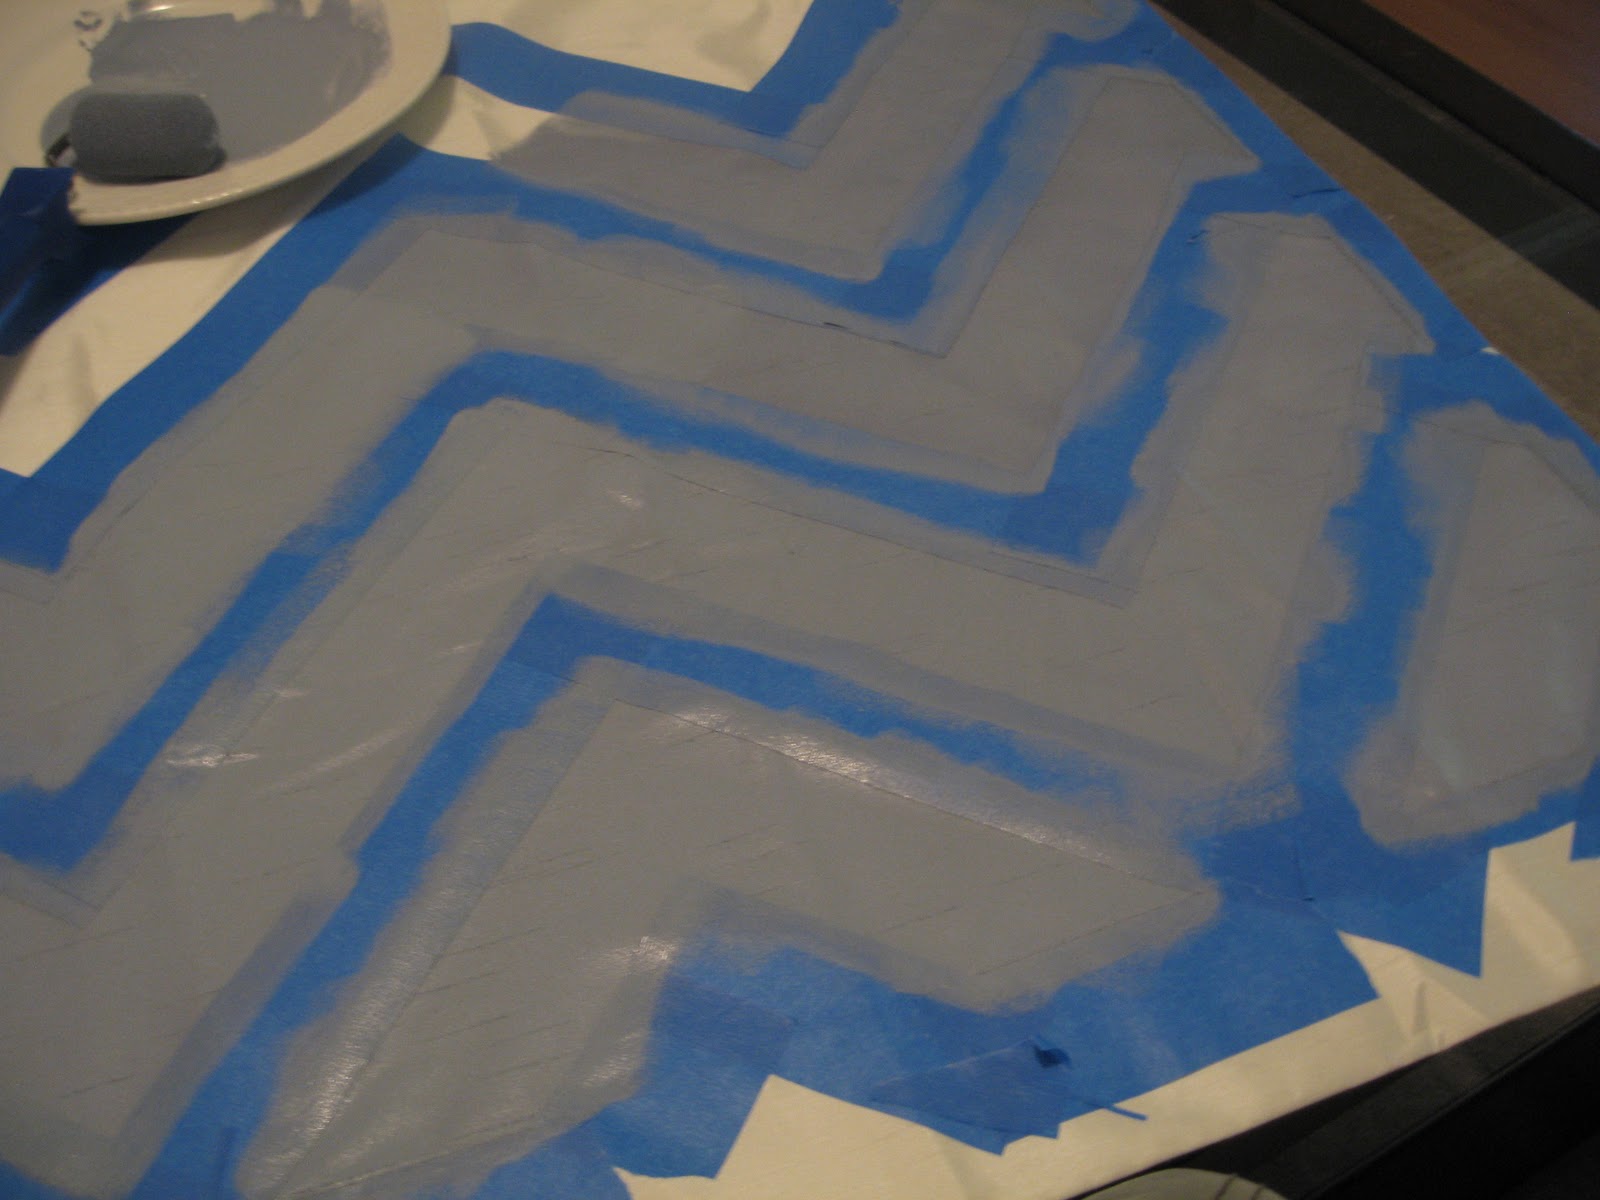
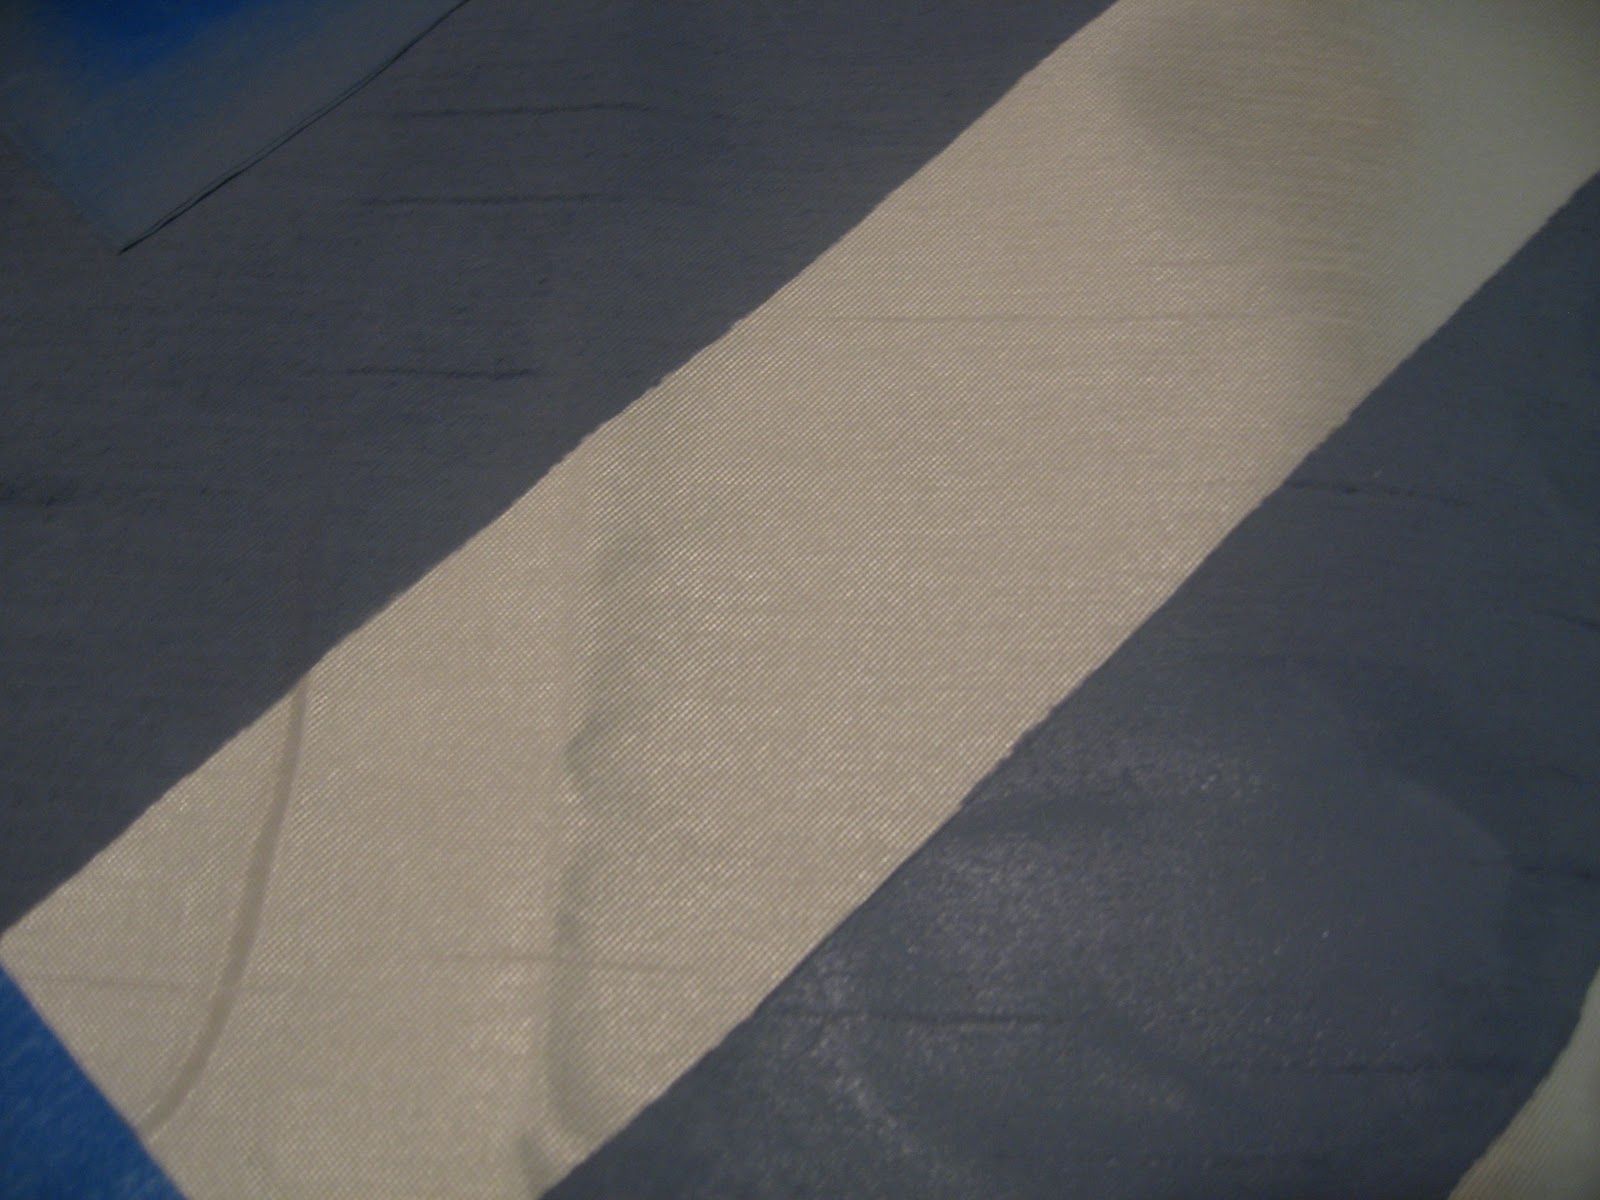
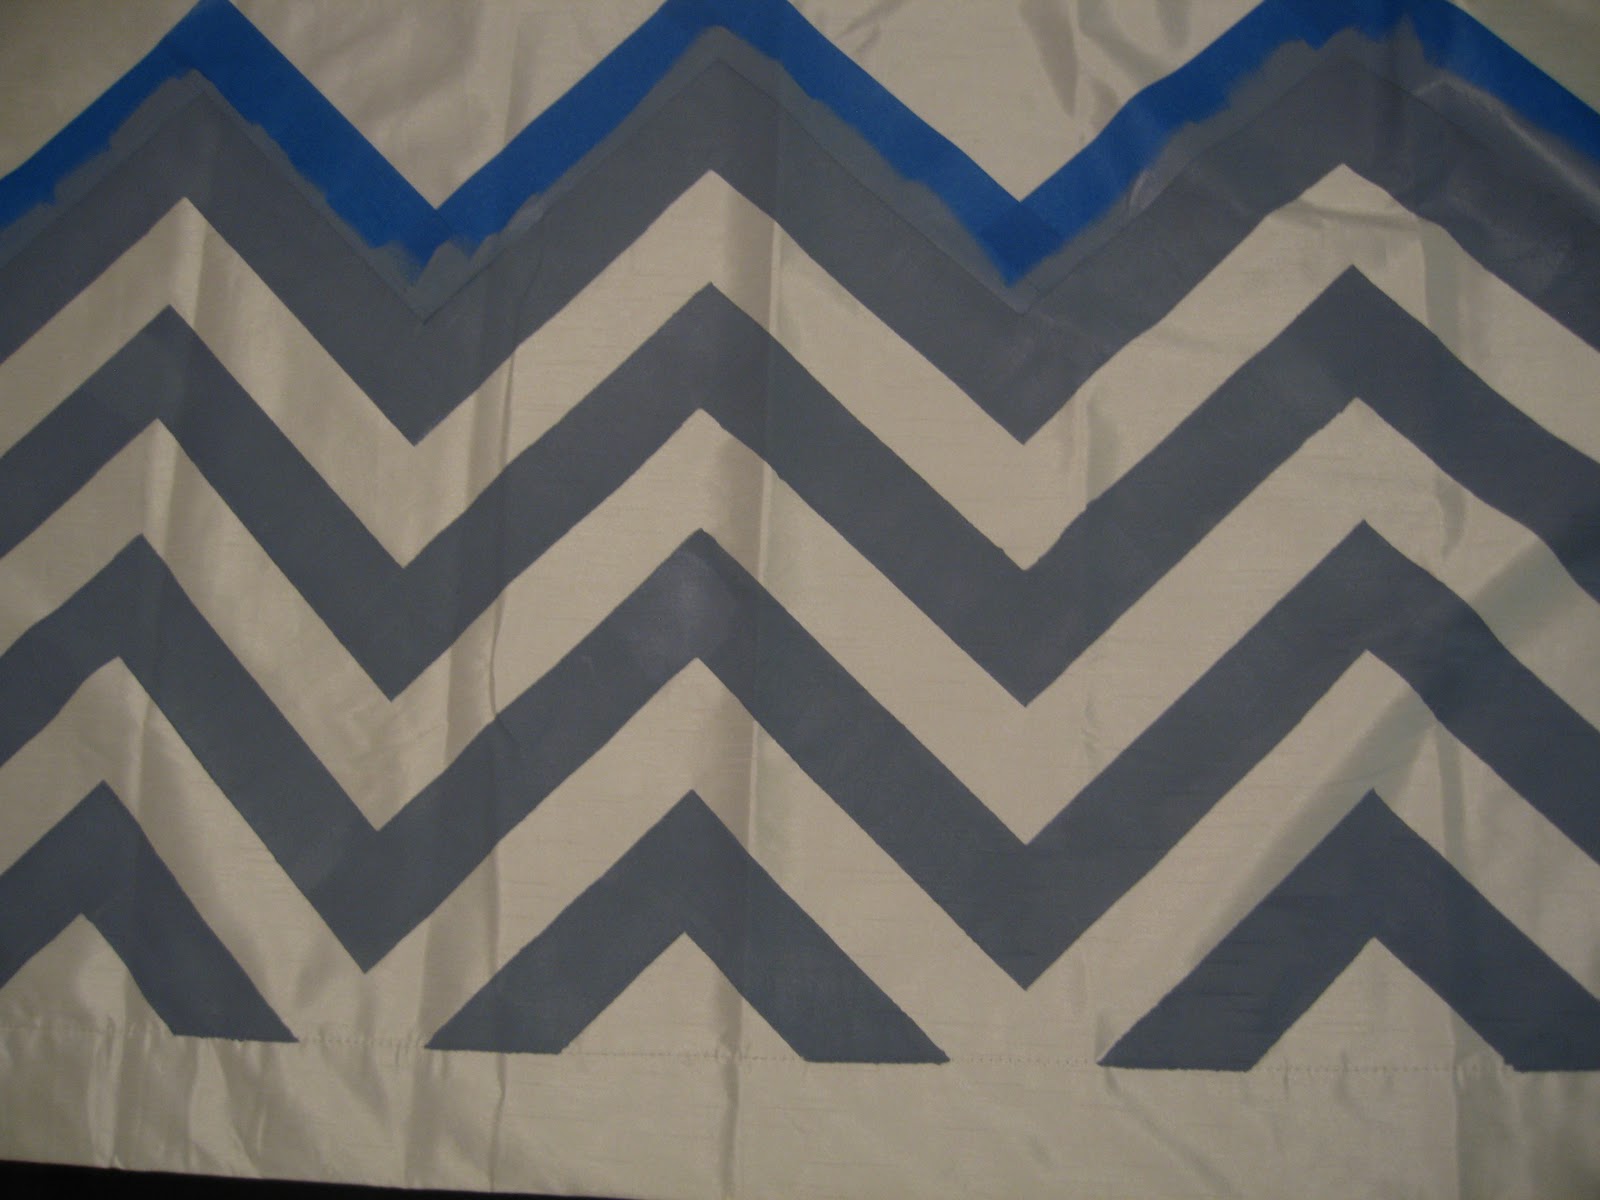
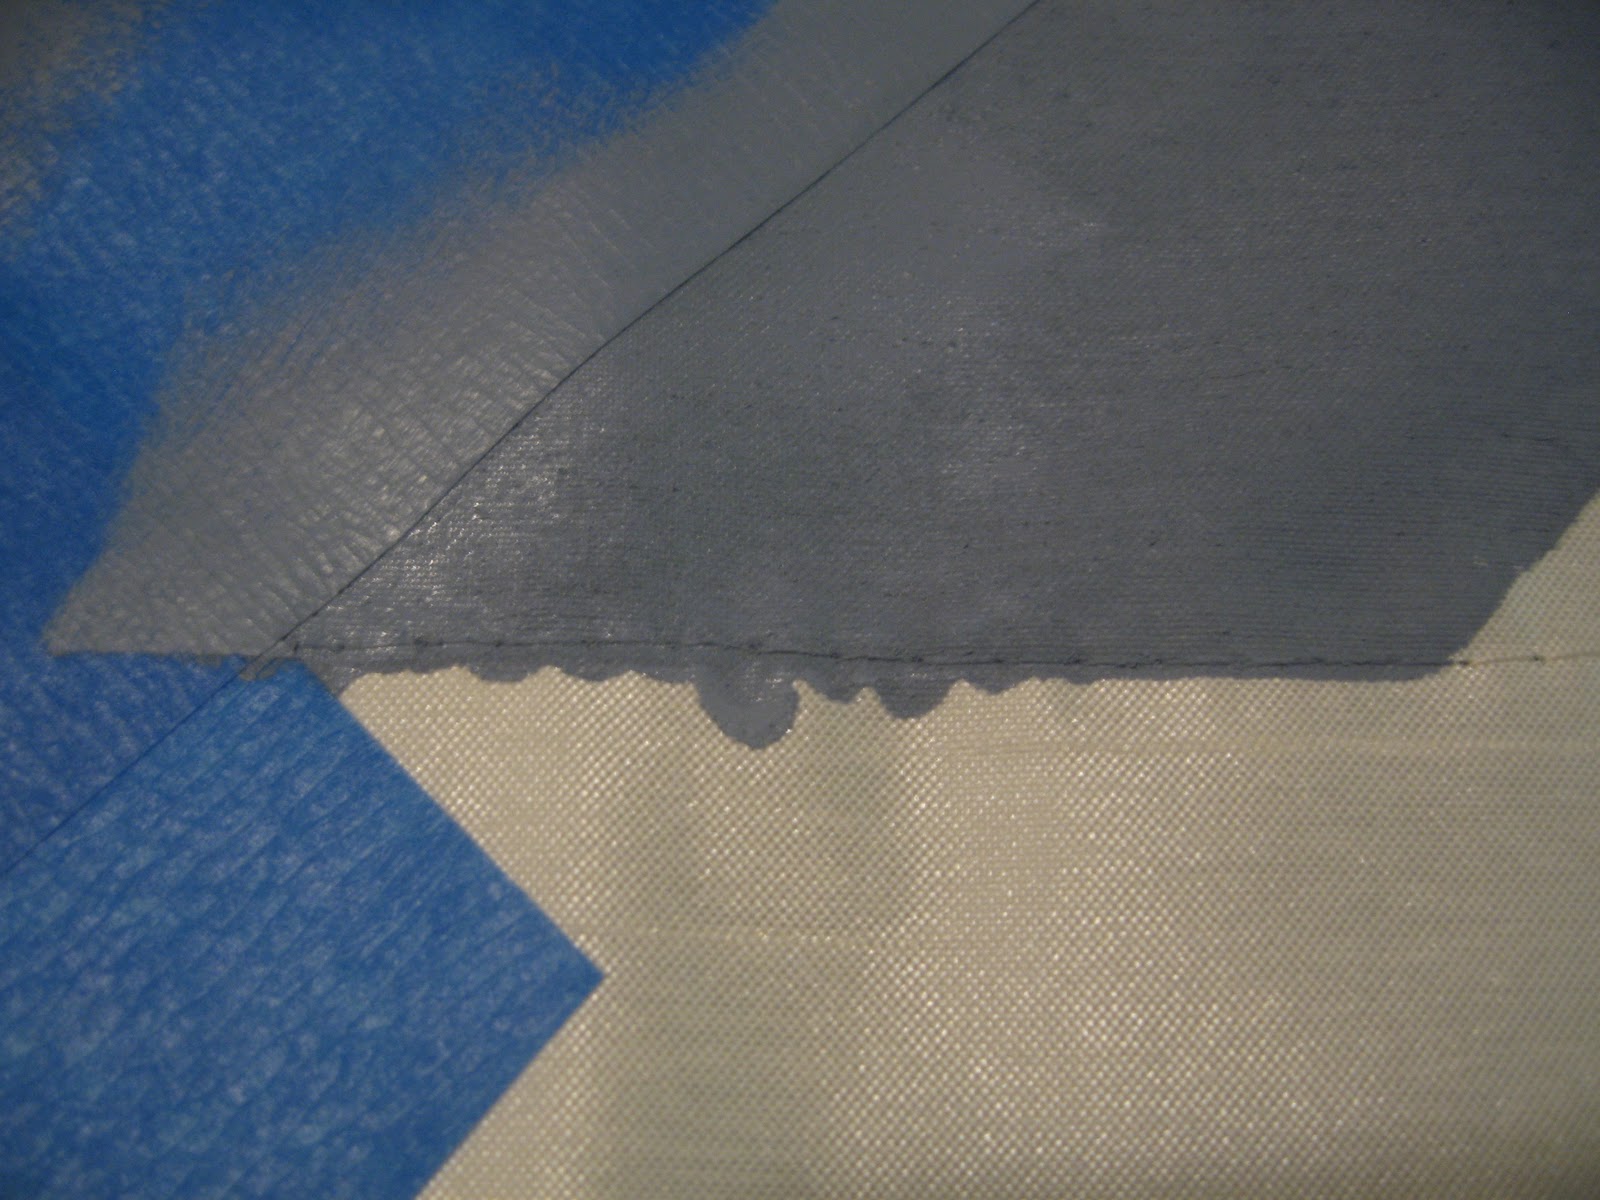
Step 8.  Paint!  I divided my curtain into four parts, so I would tape my first part and paint it before moving onto my second part.  Make sure you press along your tape really well in the area you are painting.  You want good adhesion so paint will not leak underneath.
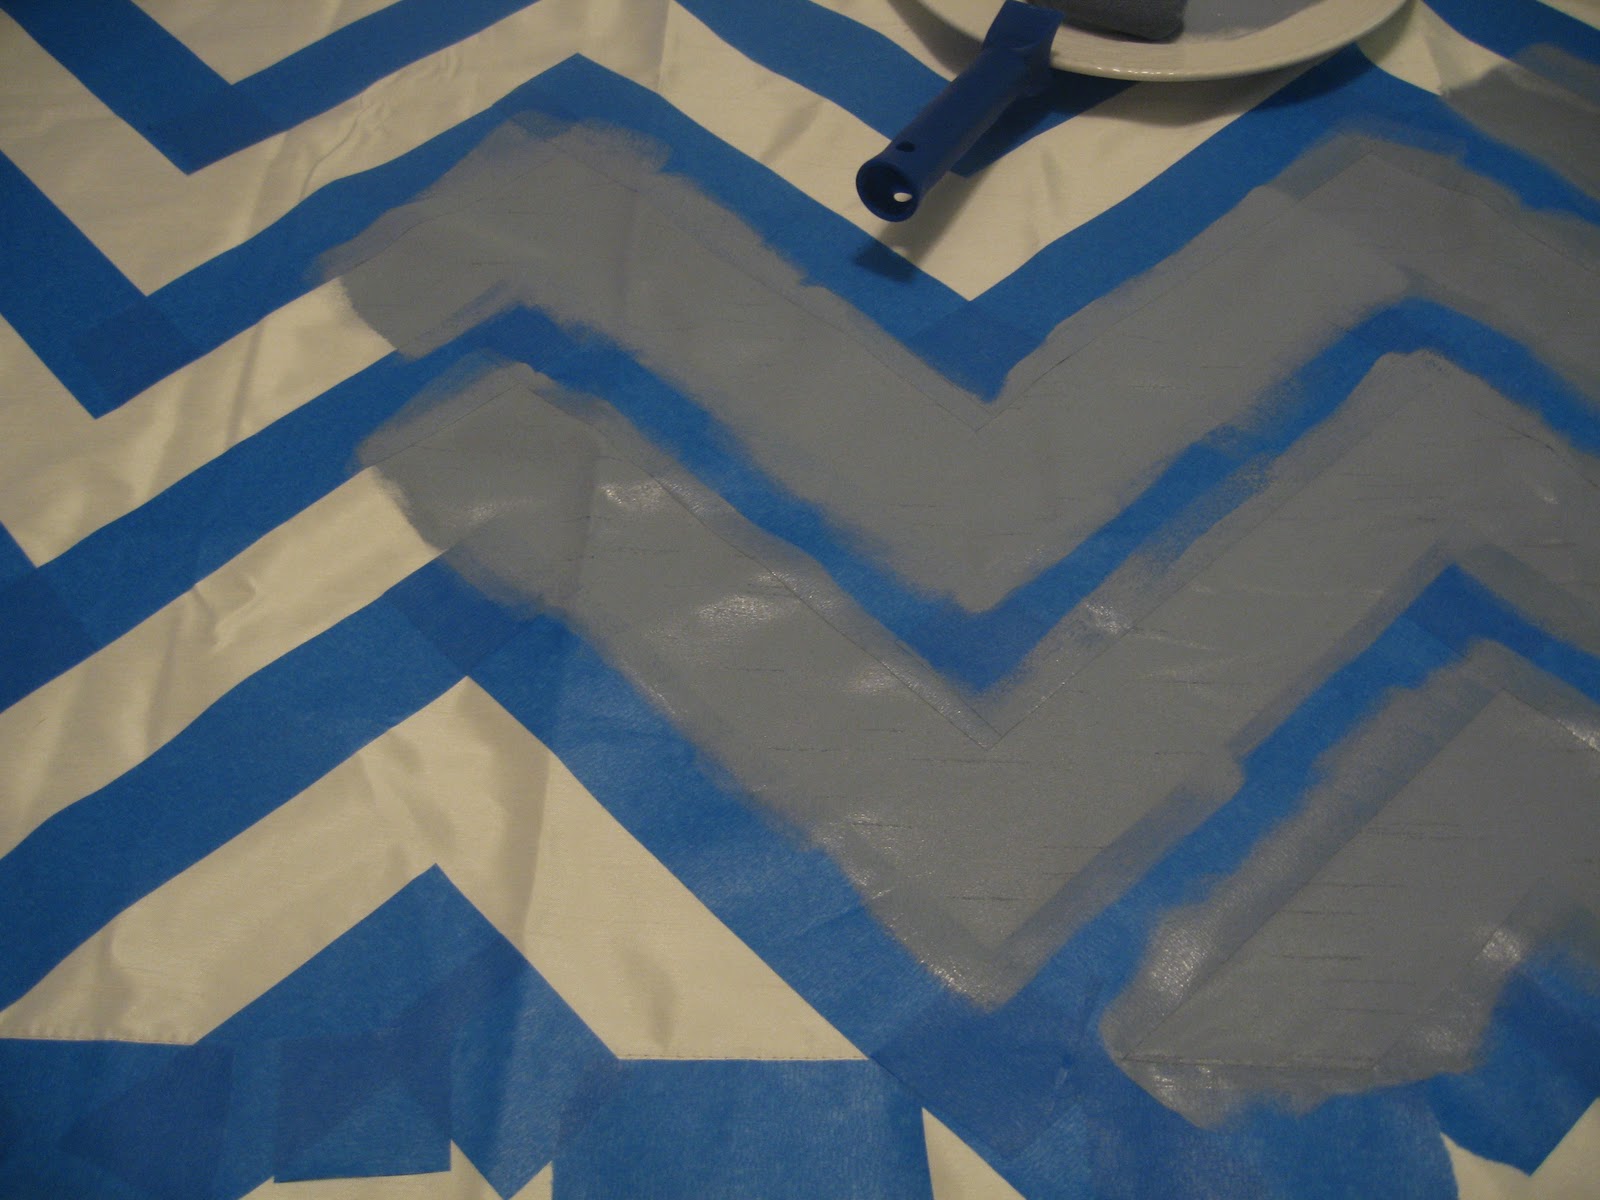


One thing I learned from this is to not include the stitching in the design.  I should have painted just above the hemline, but thank goodness this did not happen at everywhere on my curtains.  Overall, I am very pleased with the end result!


So let's take one last trip down memory lane . . .
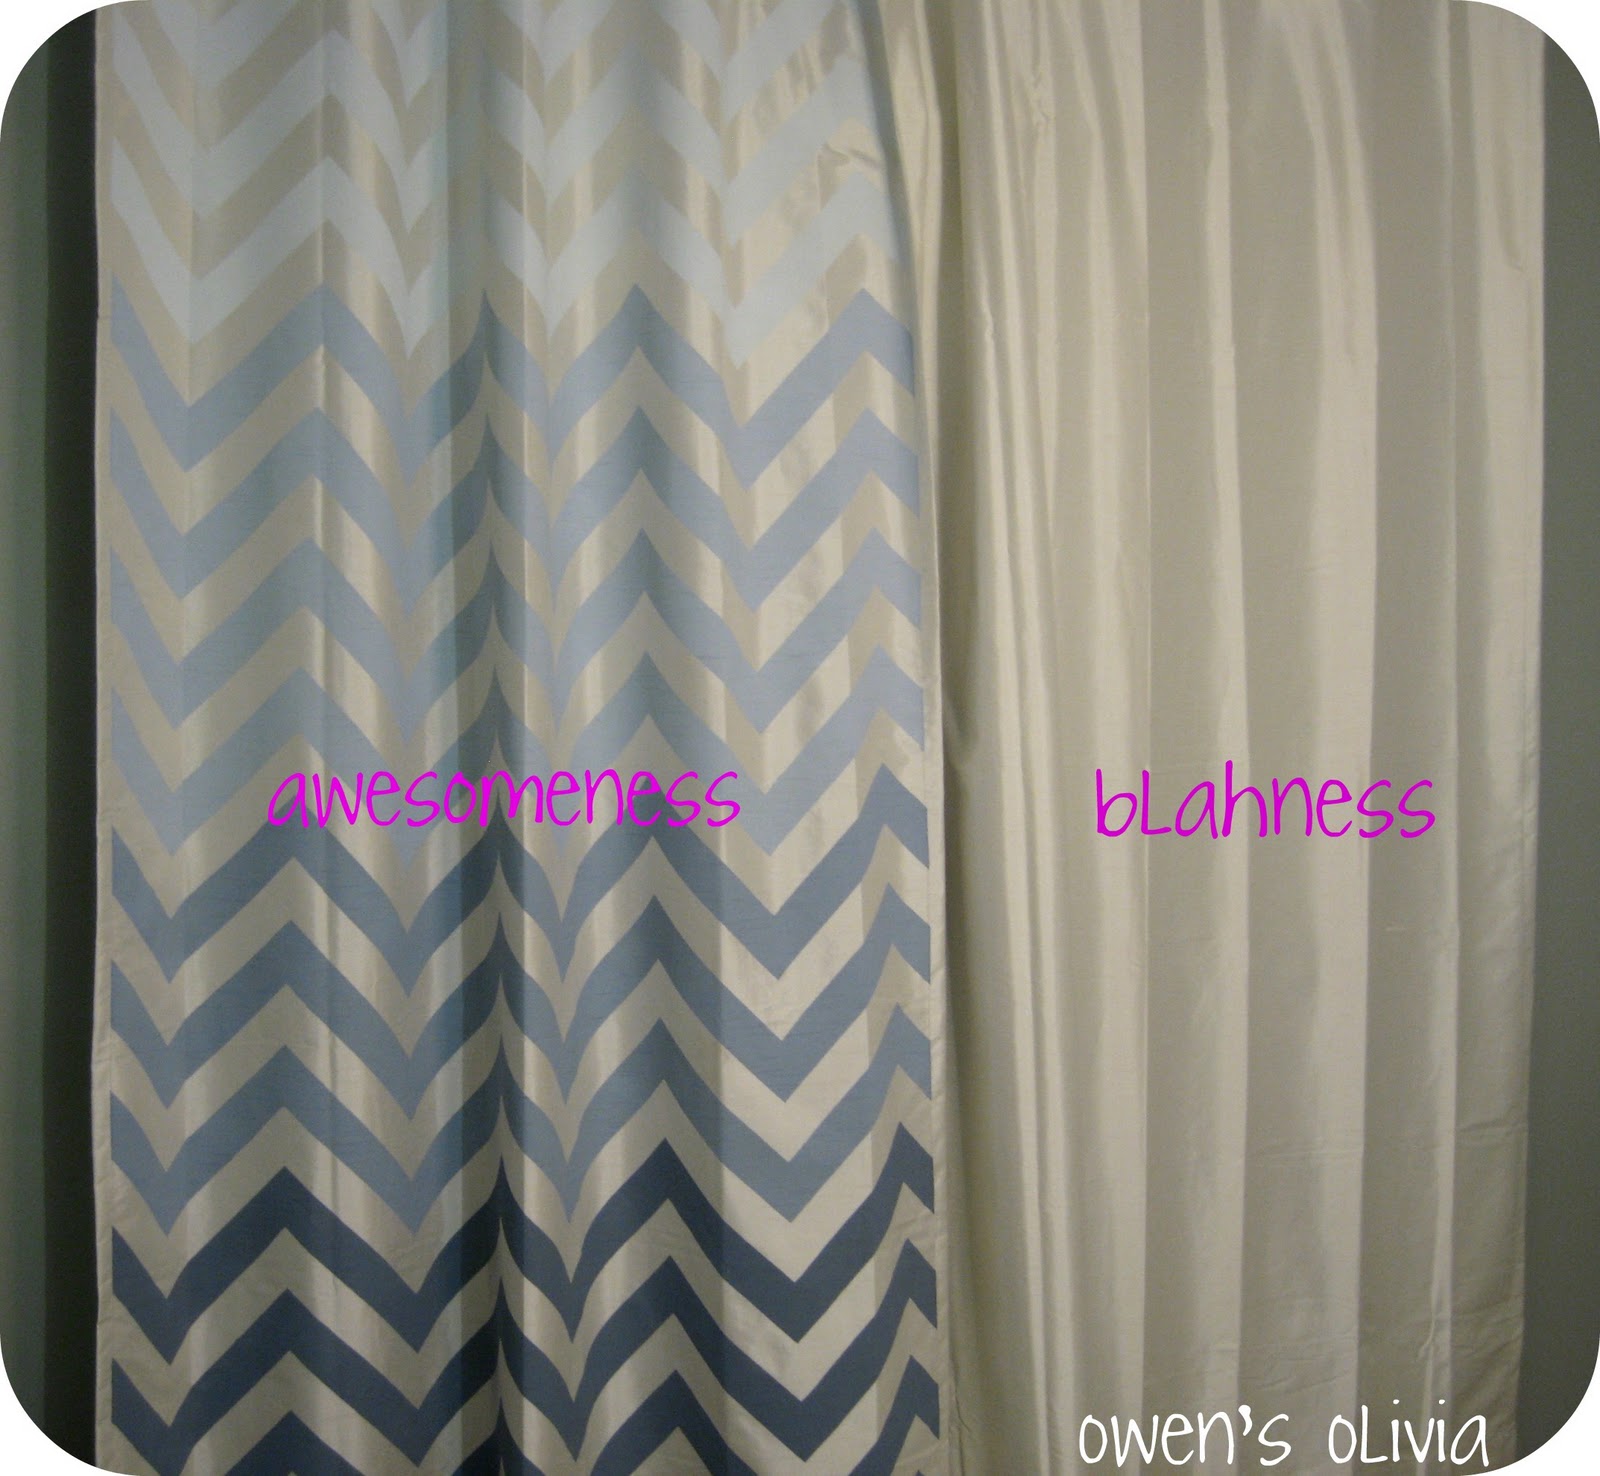

Now, just sit back and admire the new curtains!


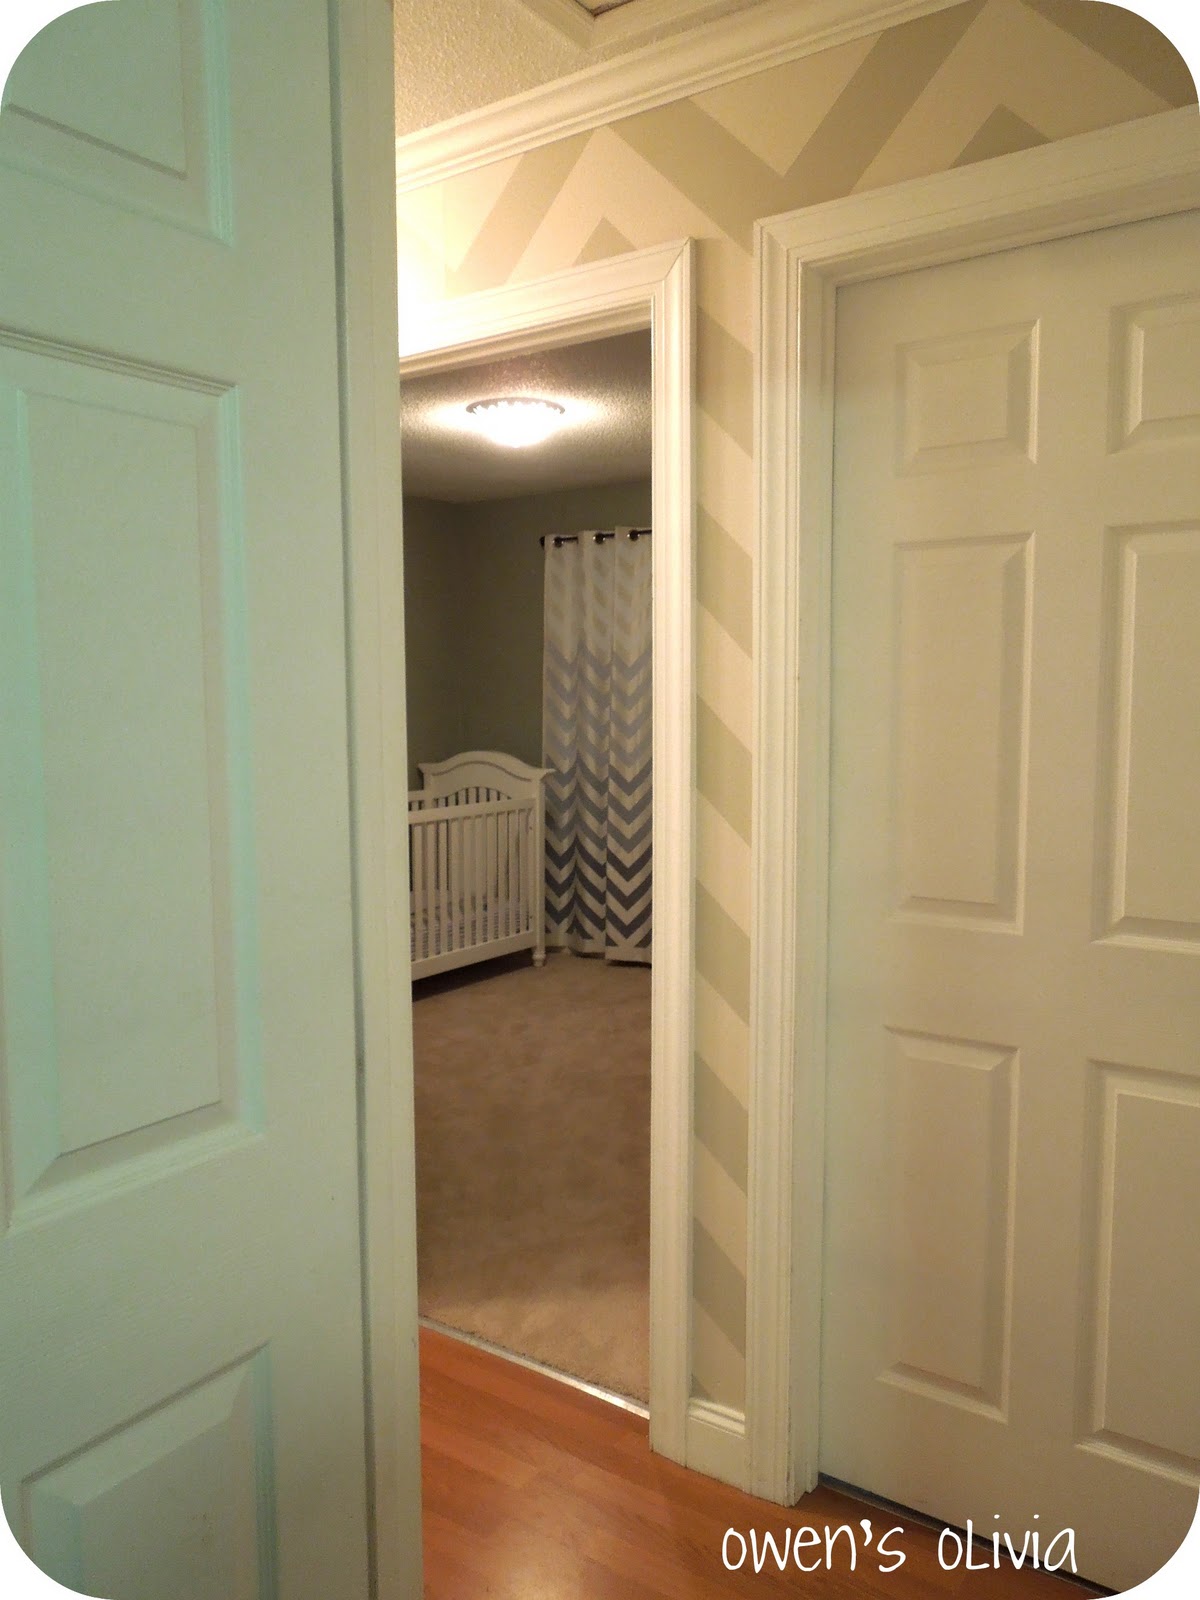
And this is what I get to see from my room.  (Yes, my hallway is chevron (painted by me 40 weeks pregnant), but I told myself no more chevron in my home.  Okay, maybe a little pillow or something down the road. :)


This project was contributed by one of our fabulous readers! We love to share your projects with this great blogging community. So, if you have projects from kitchen renovation ideas to small bathroom remodels, overhauled and repurposed furniture, spray paint updates you name it please send it in! Thanks for reading Remodelaholic!

Read more...

Classically Beautiful Galley Kitchen Before and After

03 September 2011

Classically Beautiful Galley Kitchen Before and After

OK...now this kitchen was seriously ugly when we first moved in, needless to say it was one of the first things I did...and in a hurry. Luckily I was fairly organised and the day we moved in I had the removalist in the morning and about 4 trades turn up in the afternoon to start quoting!!!

I was determined that I would plan this kitchen carefully, it is compact and important to get right. So although I was pushing to get my new kitchen installed quickly I took the time to make sure that the storage worked and the layout was as ergonomic as possible.

It needed to be fully custom built as I wanted to take advantage of all the available space. A more cost effective kitchen would have been to use standard size cabinets. Because I am tall I also wanted the bench height to be a little higher than normal (this is the opportunity to get what you want for once, when you are having a kitchen designed for especially for you).

The original kitchen was a galley kitchen with an opening each end. I decided to close off the far end (to create a space for the large freestanding stove) and enlarge the opening leading into the living room. The window in the kitchen was too high and impractical, so it was replaced with a larger window in keeping with the rest of the house.

Some things to consider when you are planning your new kitchen...

  • Make sure that you have a cupboard close to the dishwasher to unstack the dishes so you are not trekking across the kitchen.
  • Plenty of bench space can never be over-rated.
  • Consider how you and your family use your kitchen, you may want a bench for the kids to sit up at if room allows or you may chose to have an extra small sink for the prep area. Every family has their own way of operating.
  • A microwave should always be considered as a built in, we all have one so plan for it to be either built in like an oven or in a cupboard....never on a bench top.
  • Good lighting is important, especially in the prep area and stove area, make sure that it is considered at the planning stage.
  • Have an appliance cupboard (or 2), toasters, kettles etc are used regularly so have them in an easily accessible cupboard where they are plugged in always ready for use and not on show! I have two, one side has kettle and coffee maker with jars of teas, coffee and sugar on the shelf above and cups on the next shelf. The other cupboard has a toaster and blender with bread box above and then glasses above that.
  • A good exhaust fan over the stove is a must...make sure that you choose one that is not too noisy and if possible can be ducted outside.
  • Bench tops - mine is marble on one side and timber on the other, both fairly high maintenance, which I am prepared to do but you might prefer to use a quartz stone top (man made stone). The many different brands available now are all more or less the same but they are a great practical surface.
Well on with the photos...I hope there aren't too many!!!


YES...it had to go


Ahhh....that's better, the new enlarged doorway

Read more...

Stenciled Drapery Tutorial

26 May 2011

Stenciled Drapery Tutorial by Heather


Hi Remodelaholic readers!!!  I am so glad to be guest posting today, from one remodelaholic to another!!!  I blog over at {twenty}something where I write about turning a builder beige turn-key into a home through lots of DIY projects and lots of great Pottery Barn and West Elm knock-off tutorials...all done on a teacher's budget!
My husband Rusty and I are both teachers at the same school, so we budget out our weekends and summers to cram in as much home remodeling as possible.  Here are some of my favorite projects:
My White Mantelscape with shutters and a coffee filter wreath.
Pottery Barn Jewelry Holder Knock Off made form a thrift store frame and some jewelery wire.  Cost totaled under $3.00 for me!
Pottery Barn Hundi Lantern Knock Off made from a thrift store light fixture and a glass hurricane from Michael's.  Cost totaled under $30.00!
Oversized Pottery Barn Clock made from plywood and a homemade stencil.  Project cost under $10.00!


Here is the project I am sharing today.  I took my breakfast nook from this:
To this:
Since Christmas, we have been redoing our breakfast nook.  Since curtains are the next most dramatic thing you change in a room besides paint color, I set out to make some curtains inspired by this West Elm photo:
Supplies:
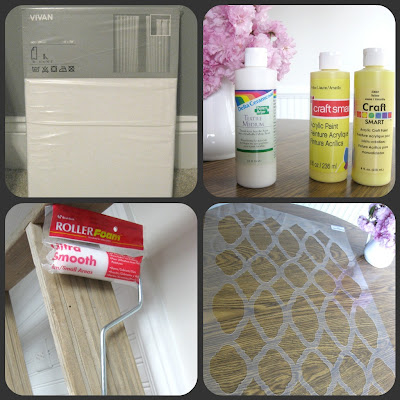
  • Curtain panels (Ikea Vivan in white)
  • Acrylic Paint (Craft Smart, Yellow)
  • Fabric Medium (Delta Ceramcoat)
  • Stencil (Zagora Allover Stencil from Cutting Edge Stencils)
  • Foam Roller
  • Brown Craft/Painter's Paper

Steps:
1.  Cover a large, flat working area with heavy paper to catch all paint that might bleed through.  I used my breakfast nook floor.
2.  Wash and dry curtains.  This will keep the curtains from drawing up later on when you go to wash them.


3.  The directions say to iron the curtains.  Mine were not wrinkled when they came out, so I just skipped this step and smoothed and tugged out the wrinkles.


4.  Mix your paint.  You can use fabric paint, but I found that it was too expensive.  I just bought acrylic paints and a product called Fabric Medium.  You just mix 2 parts paint to 1 part fabric medium, and you will have tons of fabric paint for next to nothing!  Play around with your shades by adding colors together until you get the color your want.  I took my yellow to a more muted yellow by adding some leftover wall paint from when I painted my kitchen.
5.  Place your stencil in the upper left hand corner (if you are right handed like me) and add a few pieces of blue painter's tape to hold it down.
6.  Prepare your brush by rolling into paint and removing excess on a dry paper towel.  You could also roll right on for a faster, thicker coverage.
7.  Stencil your first section. 

8.  Repeat last two steps until your are done!

Now, here are all of the little helpful tips I learned along the way that I hope can help you out:


It is very possible for the fabric to misbehave and ripple under the stencil or behave perfectly.  Both are fine because you can't tell when you are done!
When you are done stenciling a row, pull the whole curtain up and lay it back down to keep the paper from drying to the curtain.  I wouldn't pull your curtain down after each square because it actually helps keep your fabric tight and makes it easier to align.

When stenciling fabric (especially curtains), you will NOT get the stencil to line up perfectly because the fabric will pull all different ways and stretch.  Stop stressing about this since they will hang and flow anyway!  It's just like not shaving your legs in the winter...no one has to know!
Once you have lined it up as much as possible, carefully stencil the pattern beside it without going over the pattern in the overlapped areas.
In tight corners or edges, you can turn your foam roller sideways and use a tapping motion.  This works well in the parts of the stencil beside where you have lined up with the last area you stenciled and you don't want to roll over any parts that are not matched up.
And here they are in all of their glory!!


I really love how they turned out.  If this project really matches your style, come join me over at {twenty}something as I dive head first into my summer off with lots more cheap-o DYI projects and knock-offs!


Read more...
Related Posts with Thumbnails
Emealz - Easy Meals for Busy People!
Home & Garden Blogs Home & Garden Blogs - Blog Rankings

Blogging  tips, tutorials and SEO

From Here to Eternity

  © Blogger template On The Road by Ourblogtemplates.com 2009

Back to TOP