


Ombre Painted Chevron Curtains Tutorial
03 October 2011
Ombre Painted Chevron Curtains Tutorial
Thank you so much Cassity for having me! I am delighted to be here today. I blog over at Owen's Olivia, where I focus on design, fabric, DIY, and anything else that catches my eye. It has been a wonderful creative outlet for me, so it makes me happy that others are enjoying reading about my journey. I have only been blogging for three months now, so I am truly honored that Remodelholic has noticed my work!
My husband attends NCSU for electrical engineering (B-O-R-I-N-G :) while I stay at home with our son, Owen. I am very blessed to be able to dabble in my creative affairs and tend to Owen while my husband is off doing all the dirty work. He is awesome.
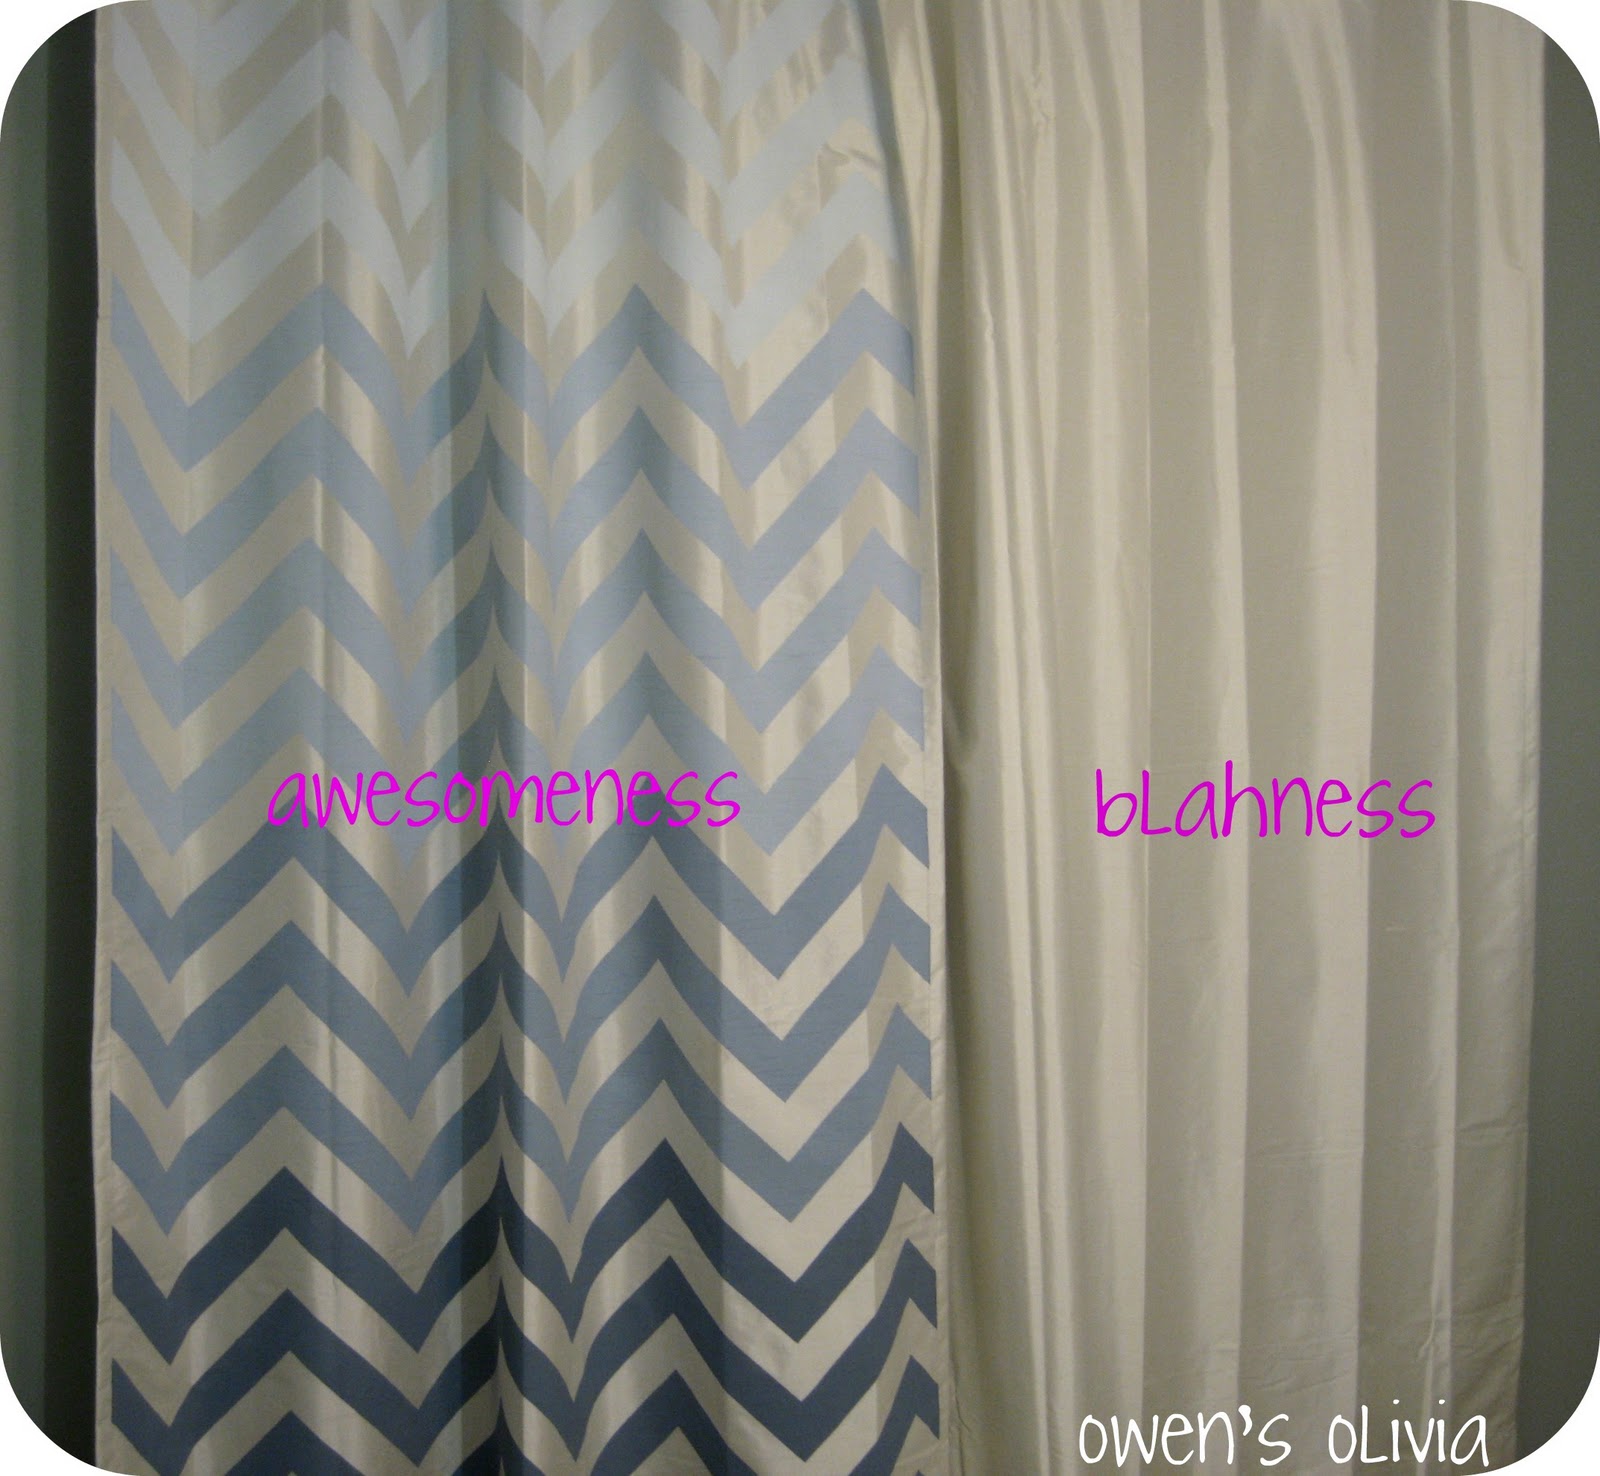
It has been a sloooow process converting our guest bedroom into a room for Owen. Seriously, he'll be 15 by the time I am done with it. Curtains were the first thing on my to-do list. I knew that I did not want to make curtains (though I do like to sew), and Ikea is not within driving distance. I needed something fun and playful (but not too baby like) that blocked out light.

Hard work aside, painting these curtains are incredibly easy to do!! ANYONE can paint these curtains and make them look custom. You can even take this process and do a completely different design. The sky is the limit. Do not let all my pictures and steps trick you into thinking there is much to do or painting curtains is cumbersome. I just take a lot of pictures, and I am literally walking you through every step! If you are visual person like me, you can probably get by just by looking at the pictures.
Items needed for chevron curtains:
Curtain panels
Painter's tape ~ 1, 2 or 3 inch wide (my chevrons are 2 inches wide)
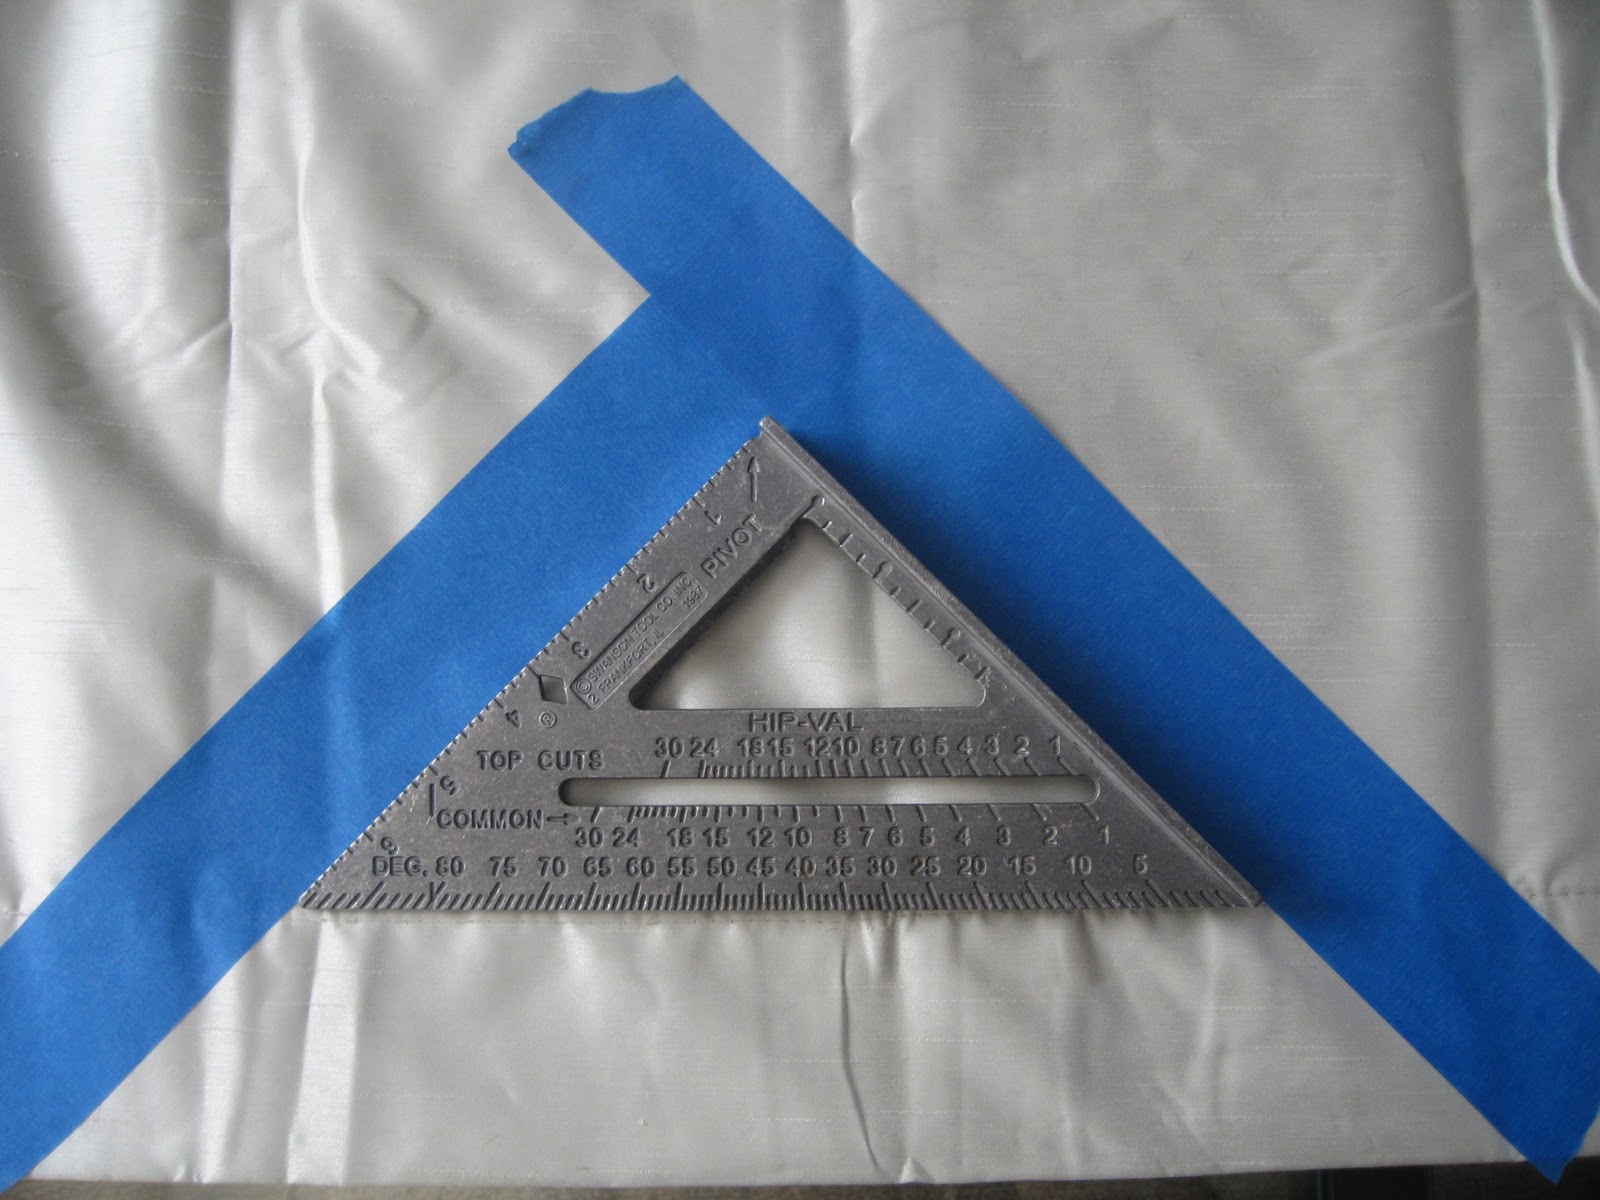
Speed square or some other form of a template (if making a template you will want your corner to be a perfect square or 90 degree angle)
Speed square or some other form of a template (if making a template you will want your corner to be a perfect square or 90 degree angle)
Paint (I bought 4 sample cans from Lowe's)
Please note that there are many different ways to apply a chevron design to fabric. This is a way that works best for me for this particular project. You may find a faster way to apply the design.
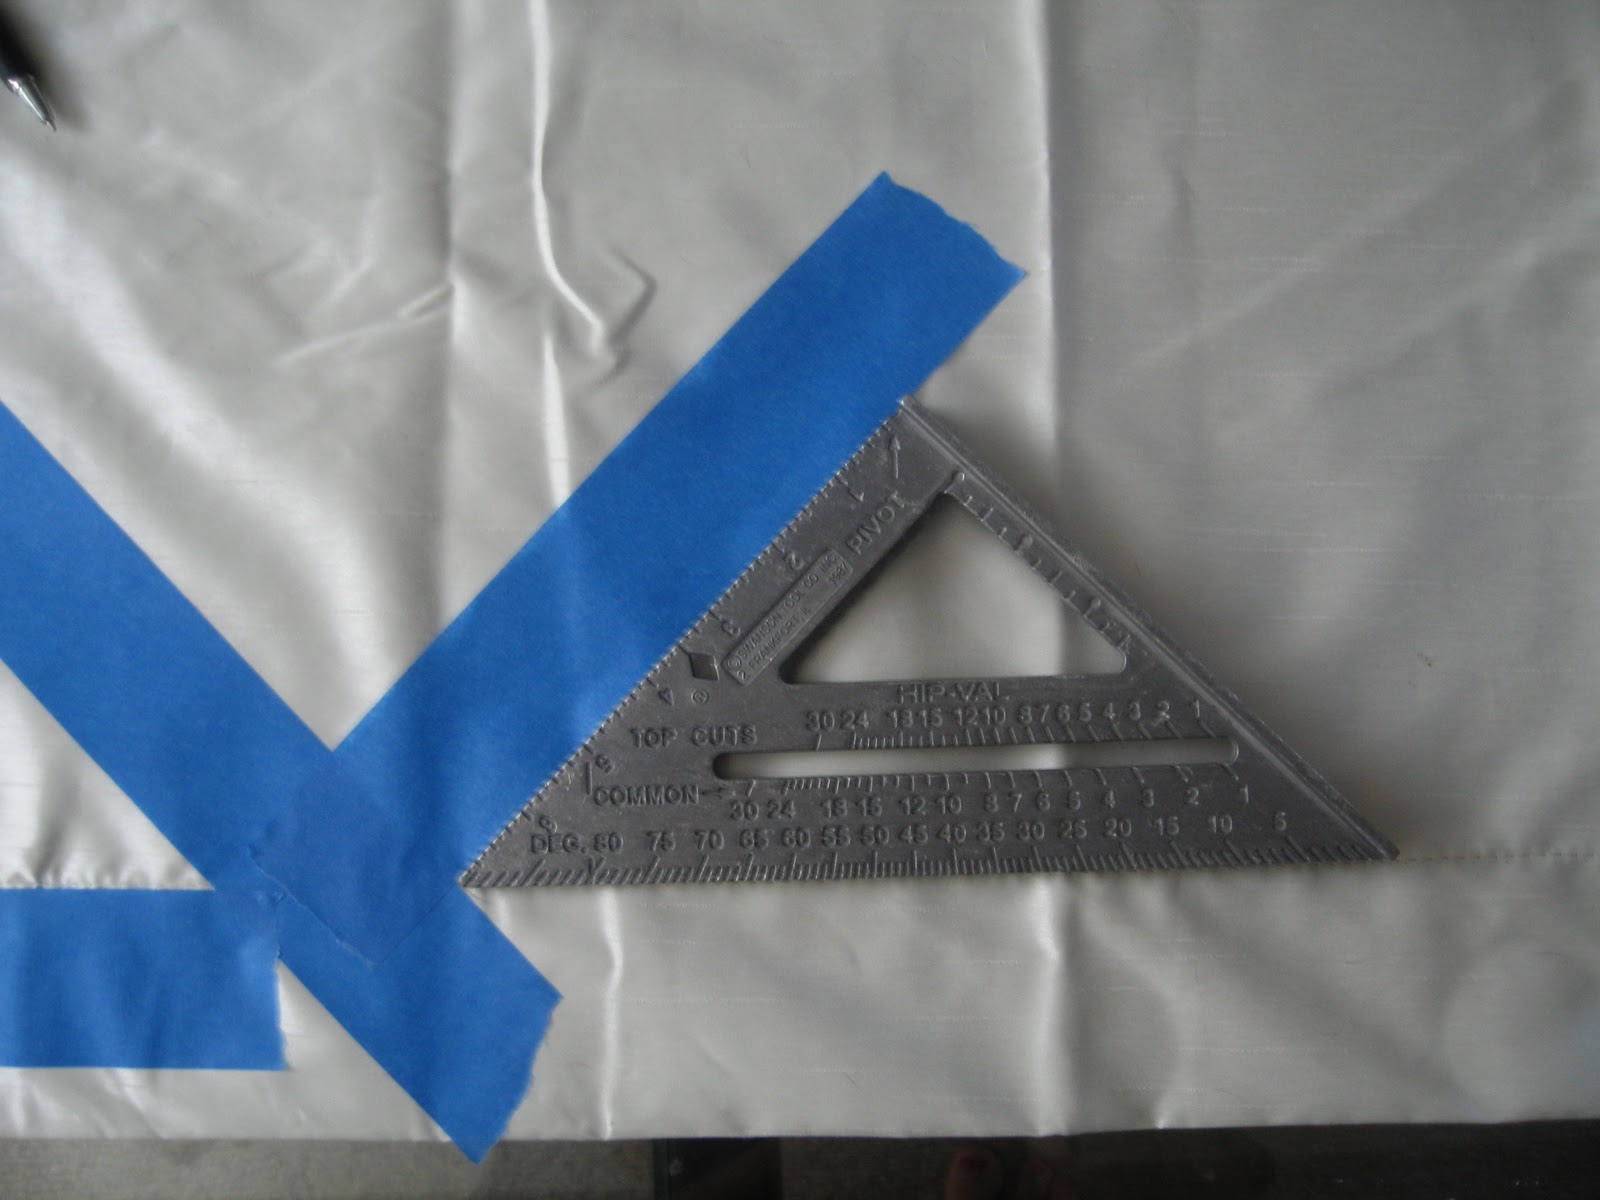
Step 1. Place the speed square just above the curtain's hemline. Tear off two pieces of tape, and place it along either side of the speed square.
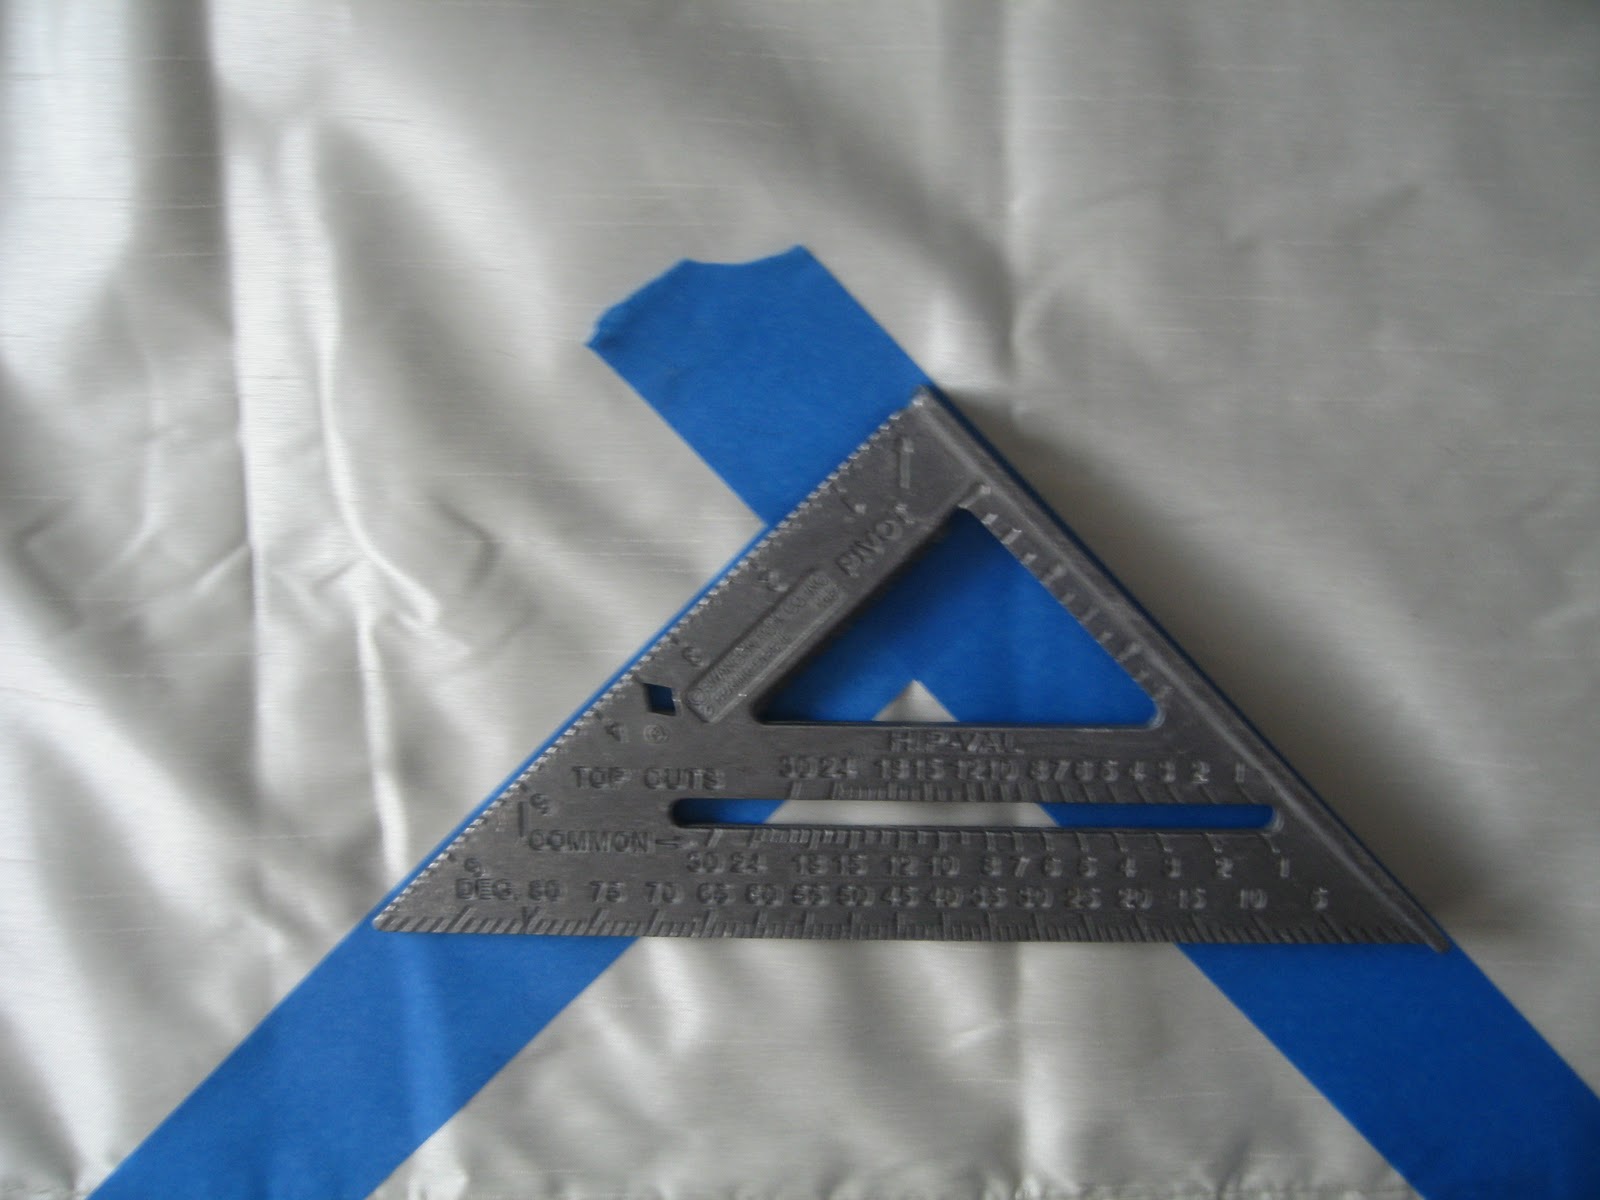
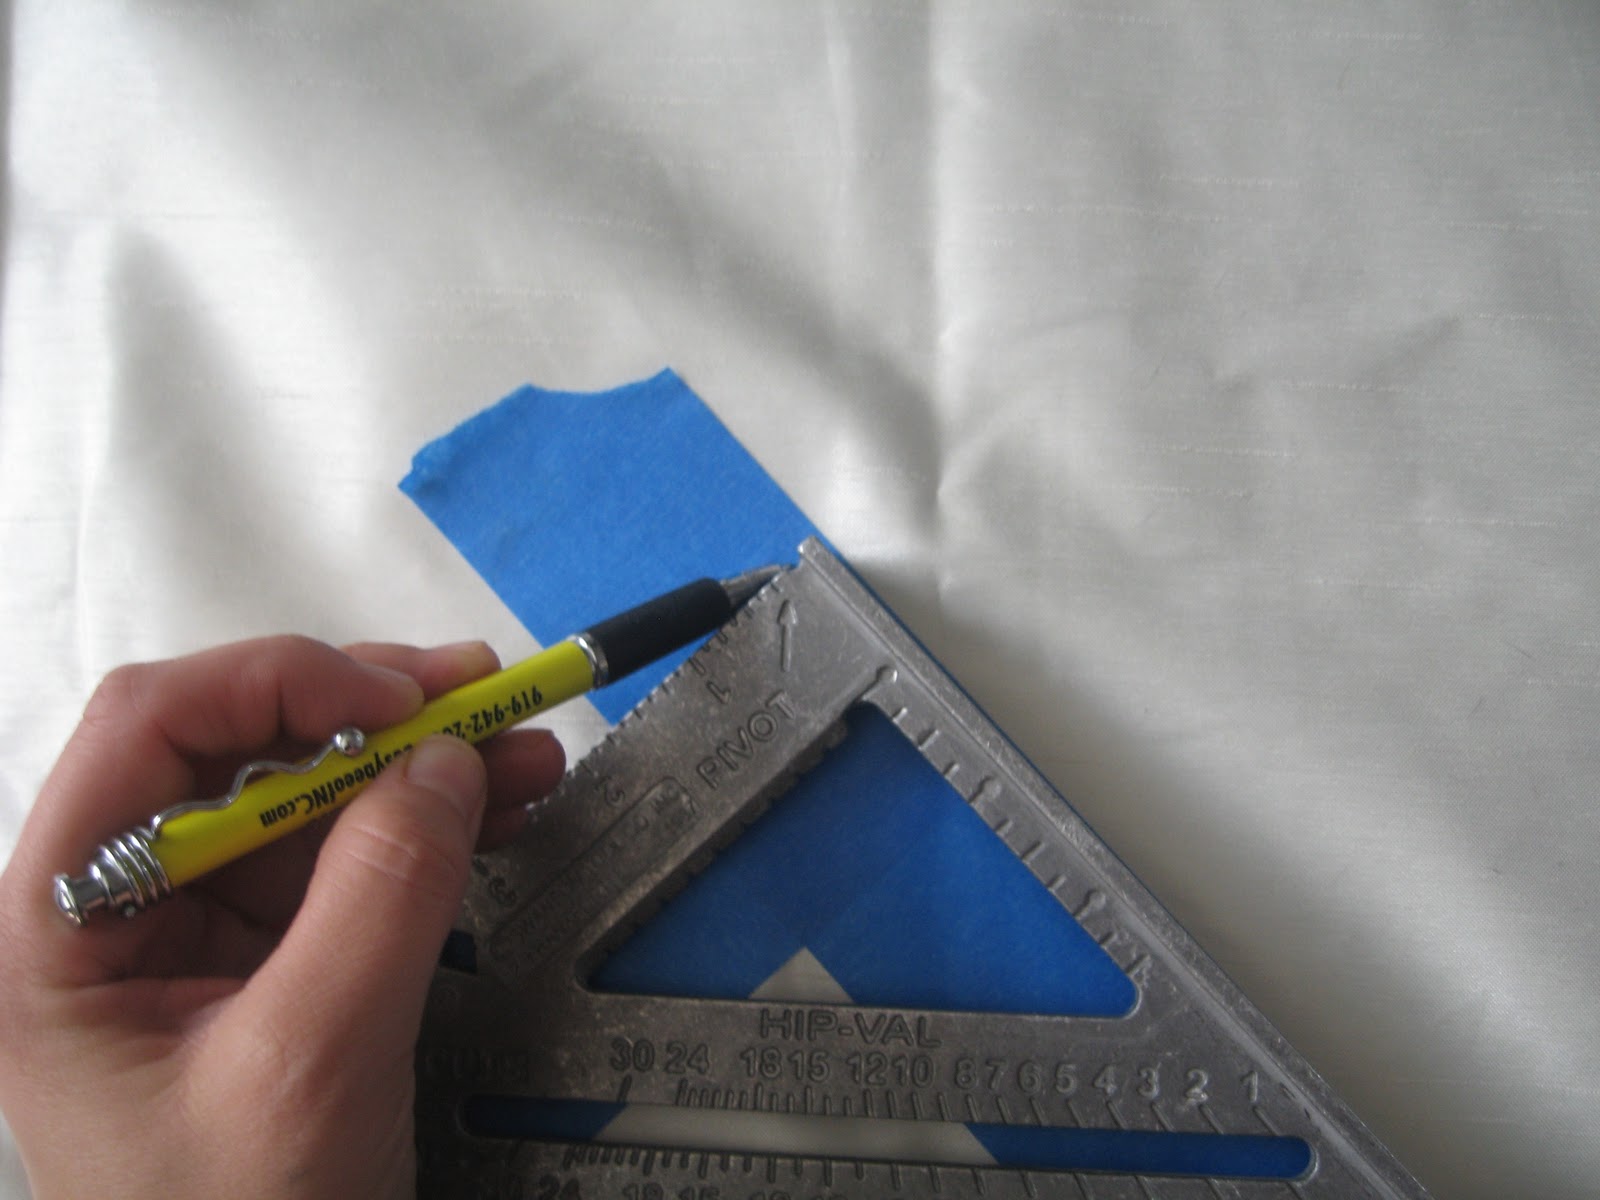
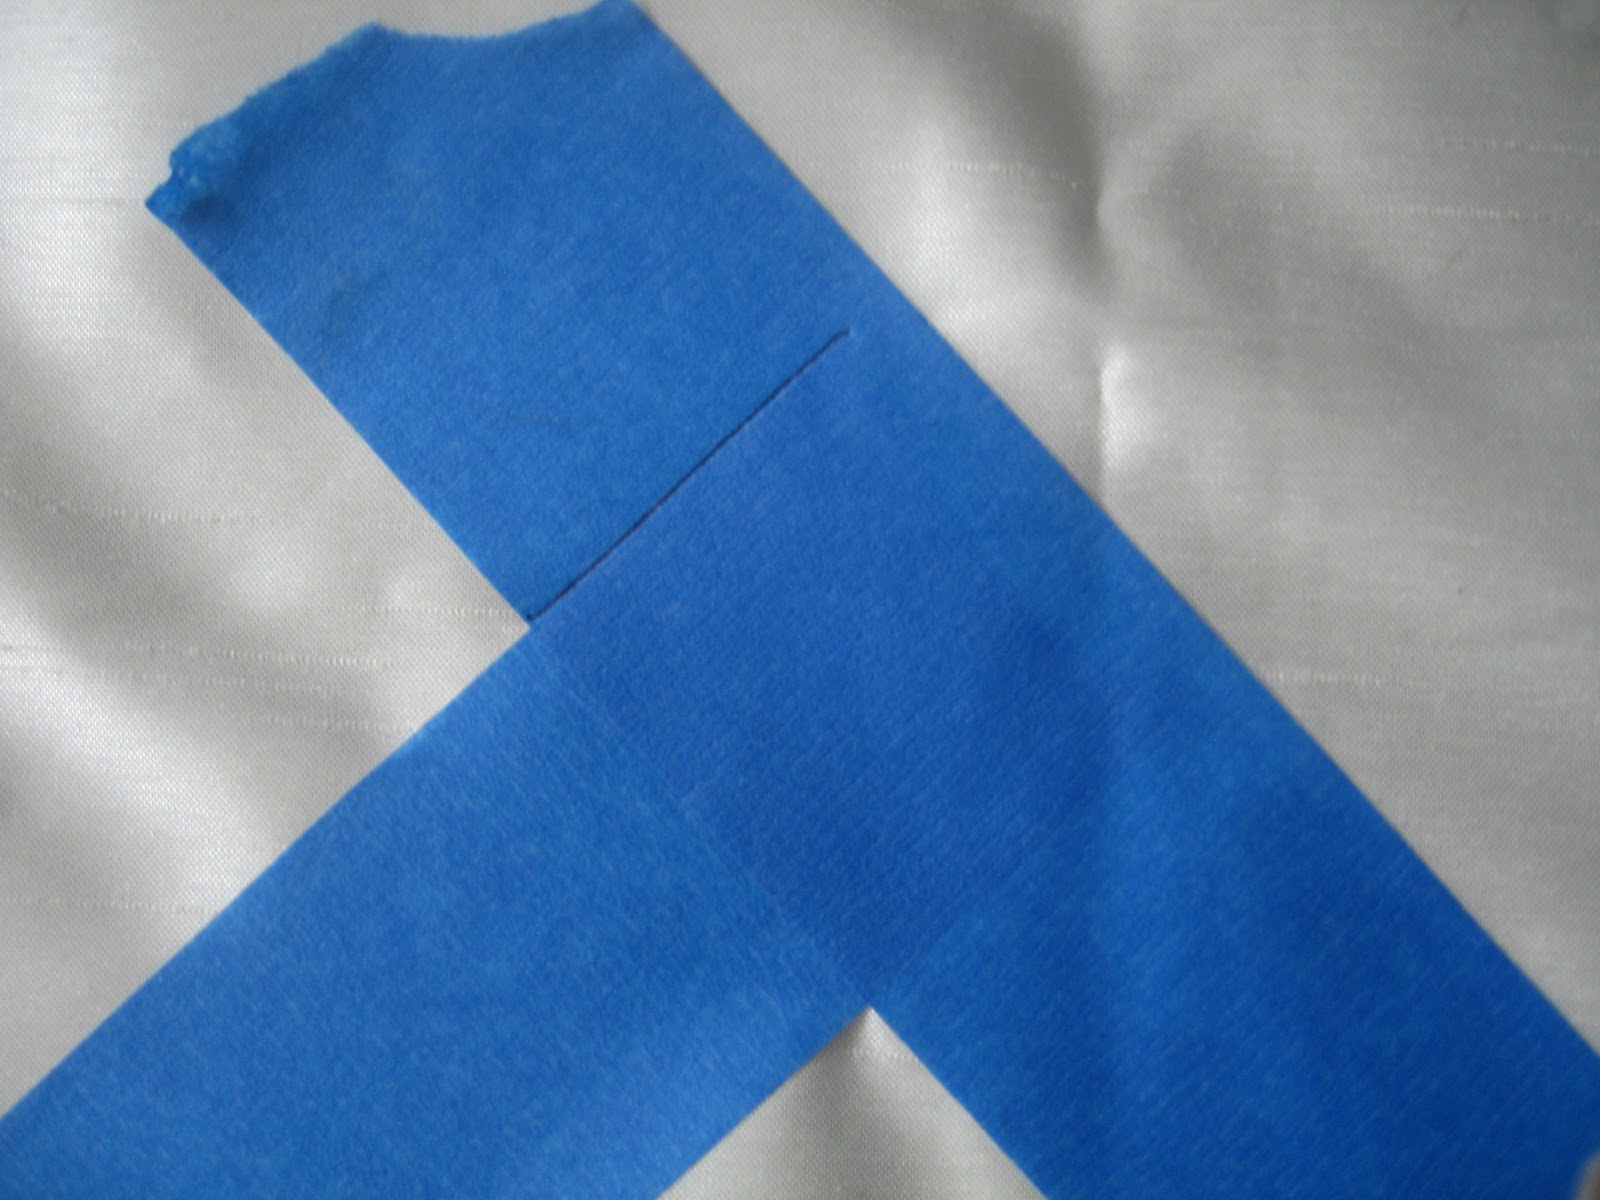
Step 2. Place the speed square at the top of your chevron point. Draw a line. Cut the tape along that line, so you create a perfect tip for you chevron.
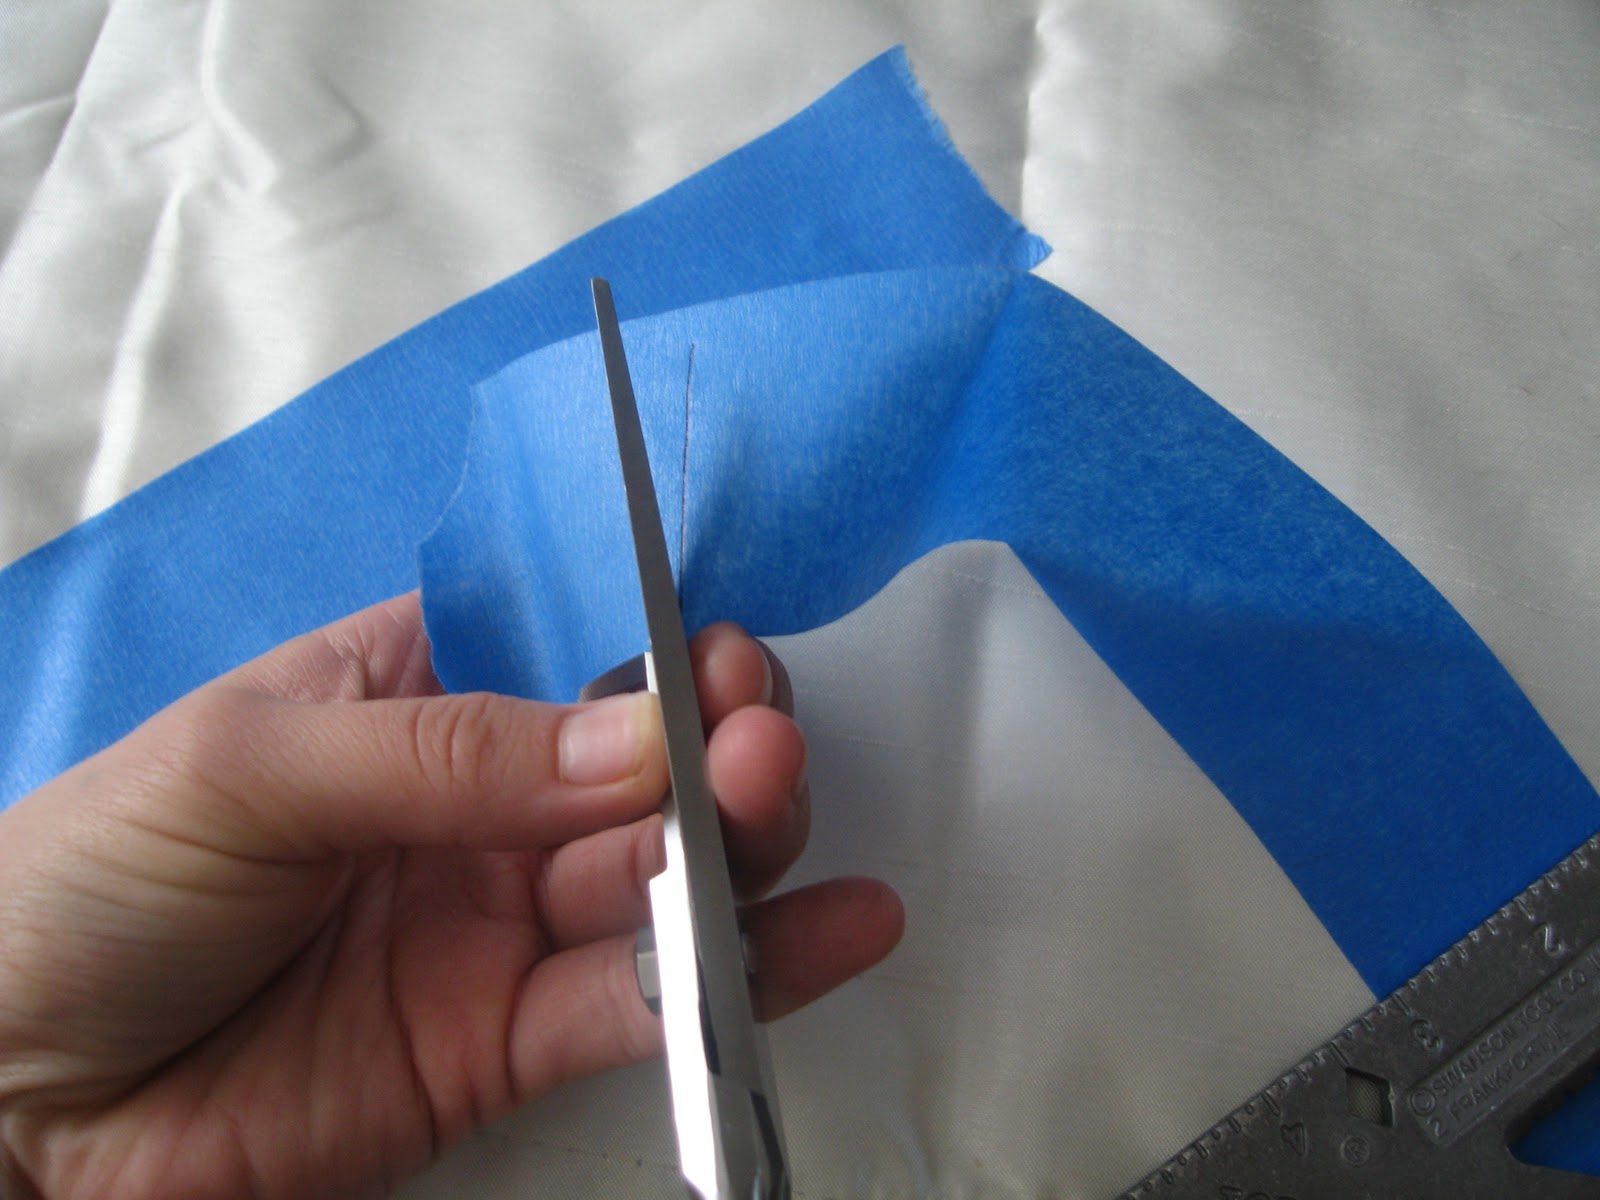
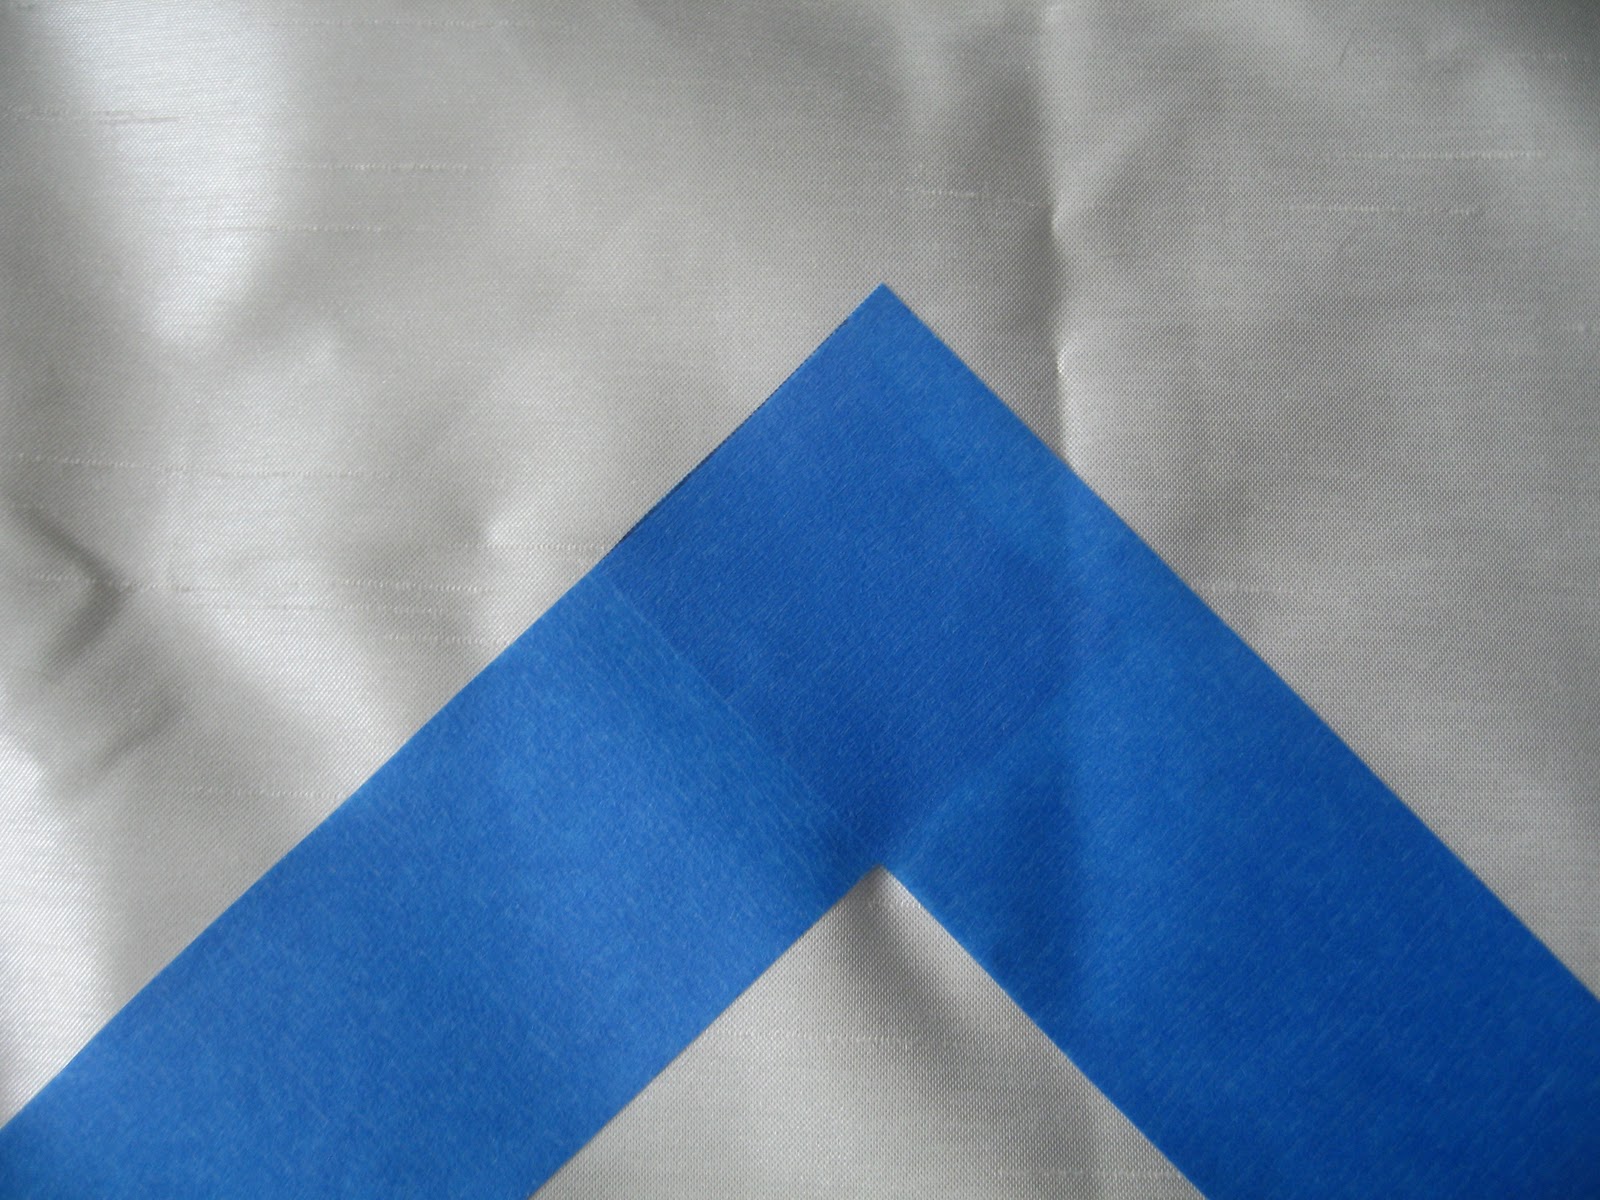
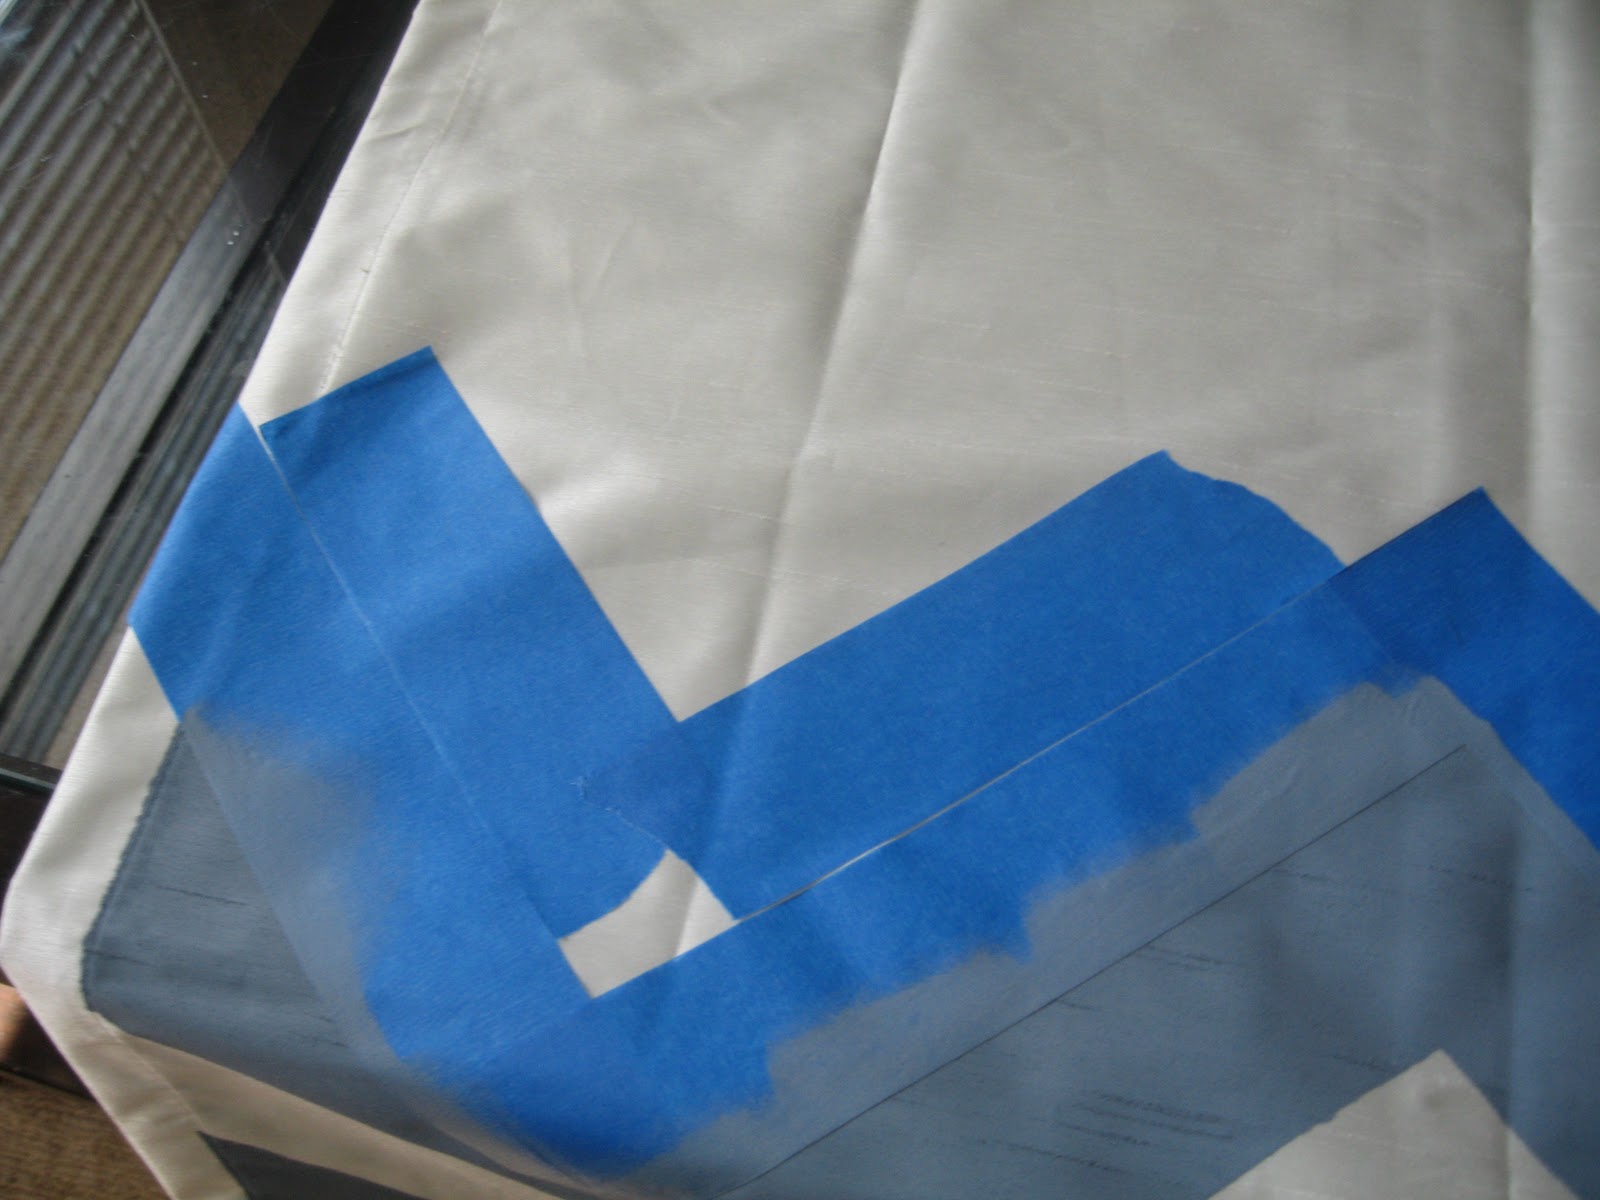
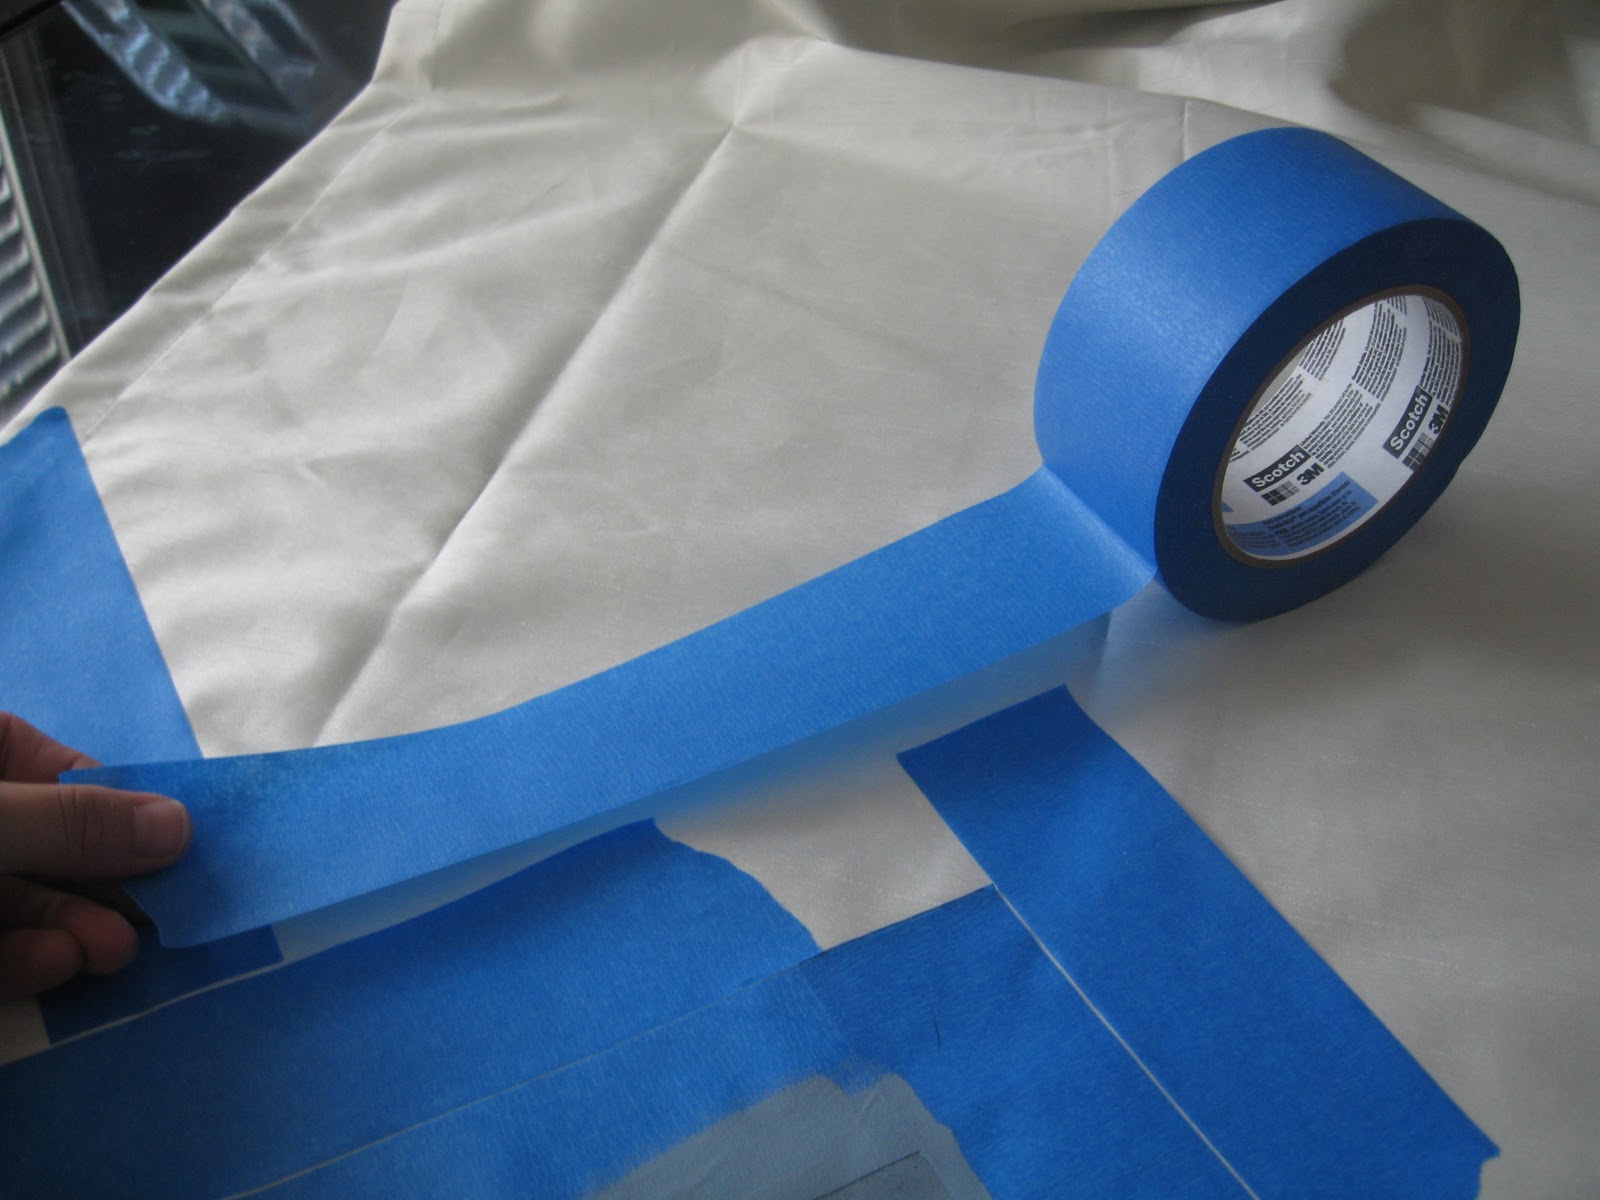
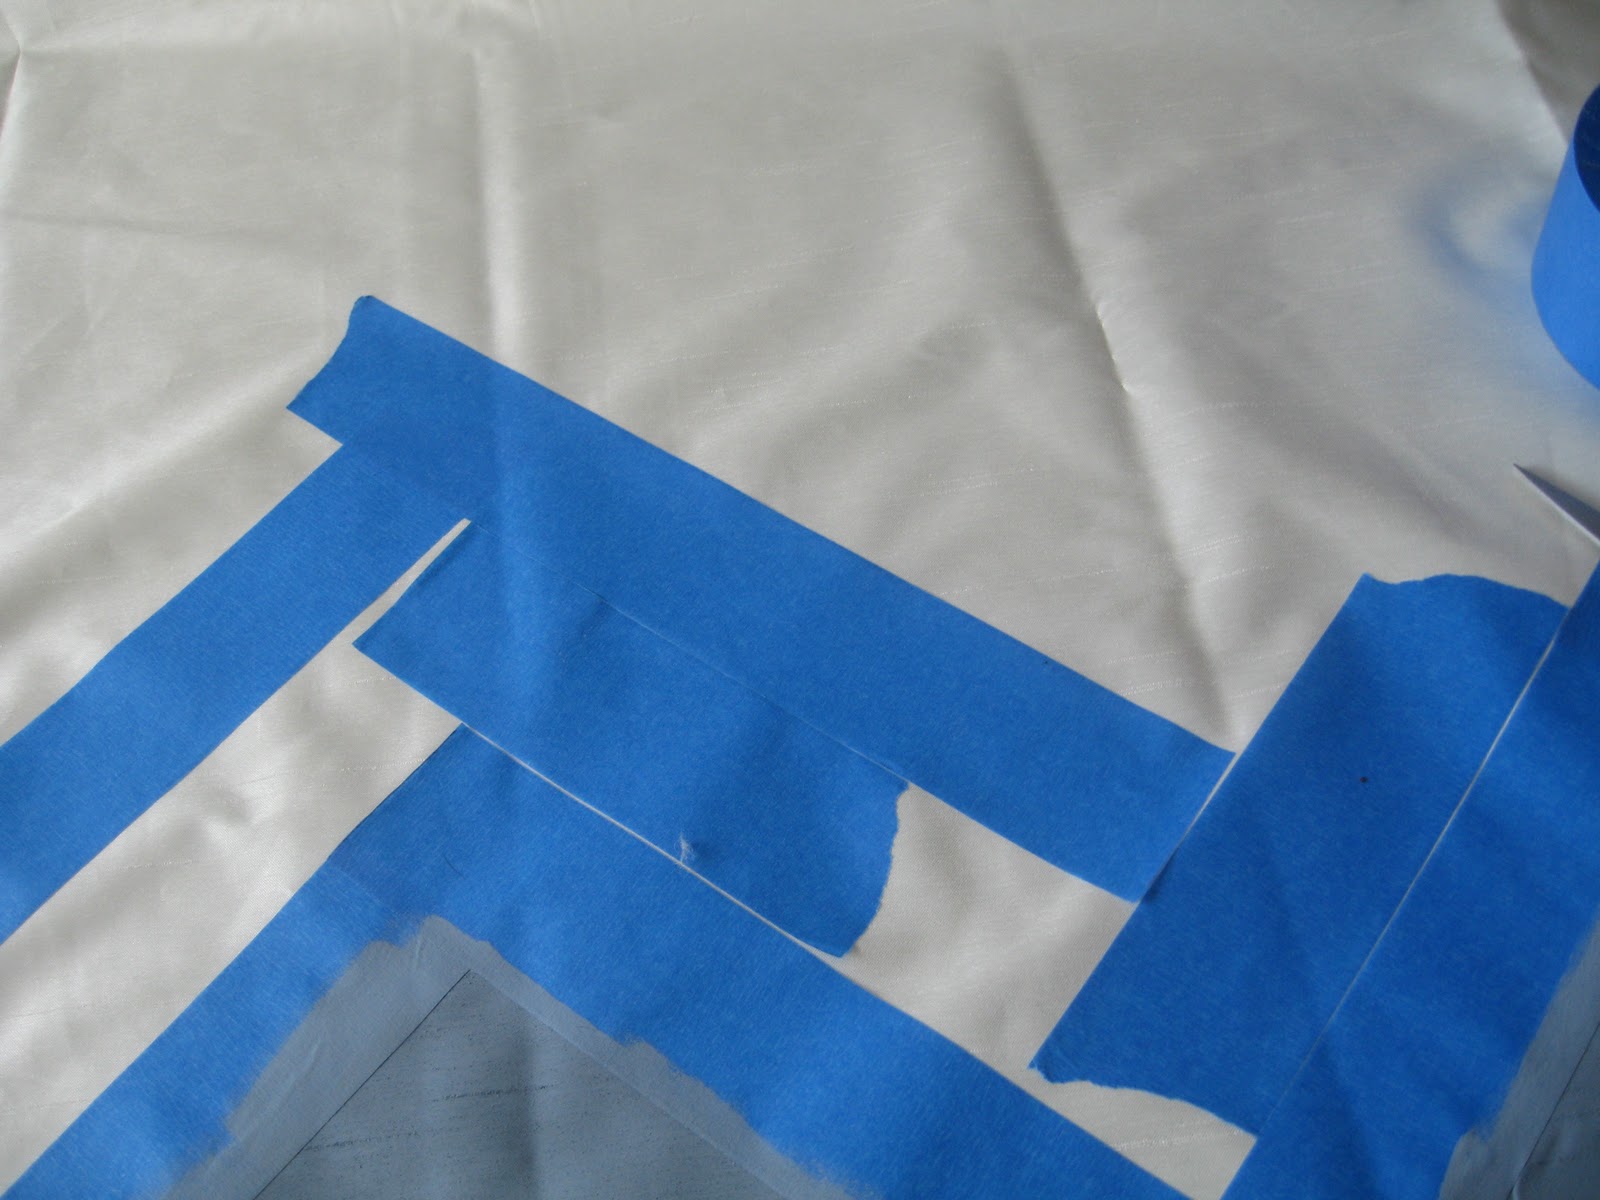
Step 3. You will now use your tape as your template for length and width. Because my tape is 2 inches wide, my chevrons will be 2 inches wide as well. Place two pieces of tape next to the inside of your blue tape.
Okay, don't worry about that glob of curtain showing there in the corner. Those two pieces of tape will be removed. I just needed those in place to create a nice point and V. Once those are taped down, repeat Step 3.
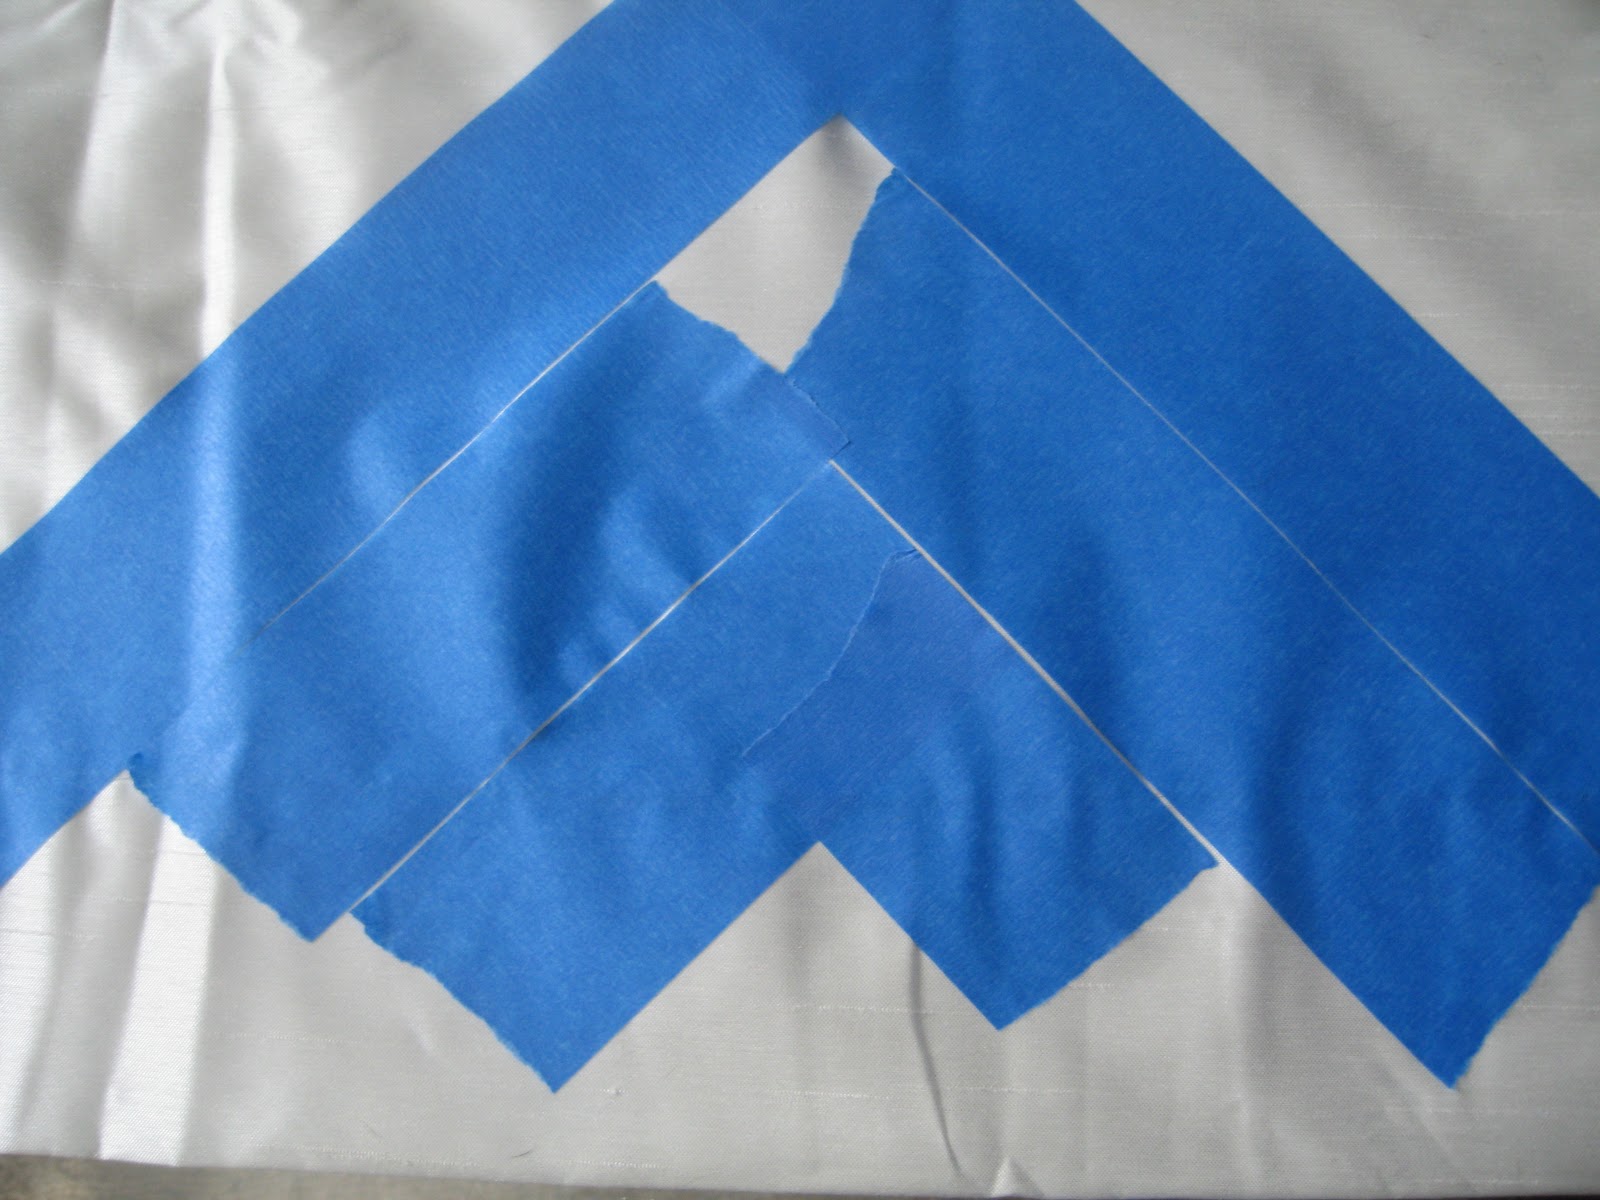

I taped off where I do not want paint, so I placed tape along my hemline.
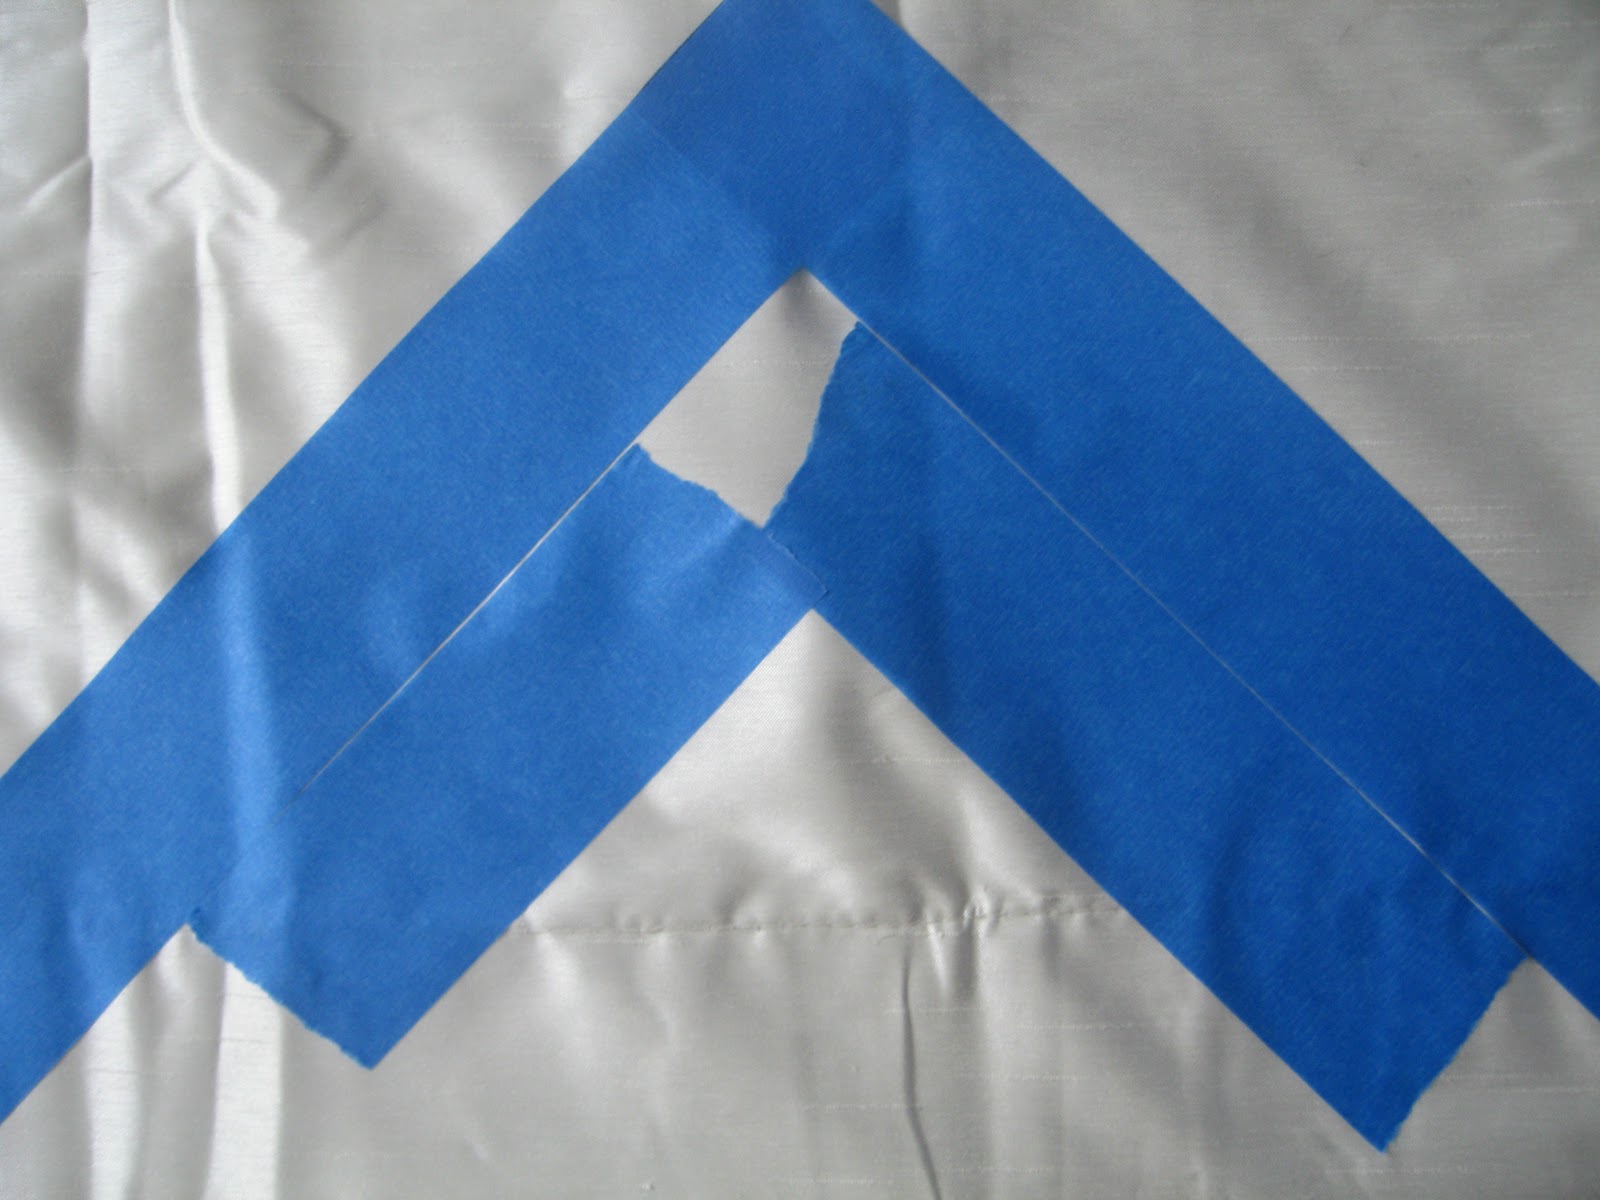
Step 4. Move the speed square (or the template you made) over to create the next upside down V. Make sure your tape will create a sharp point in the corners. (Refer to photos below for better clarification.)
You want your point to look like this!!!!
NOT THIS!!!!!
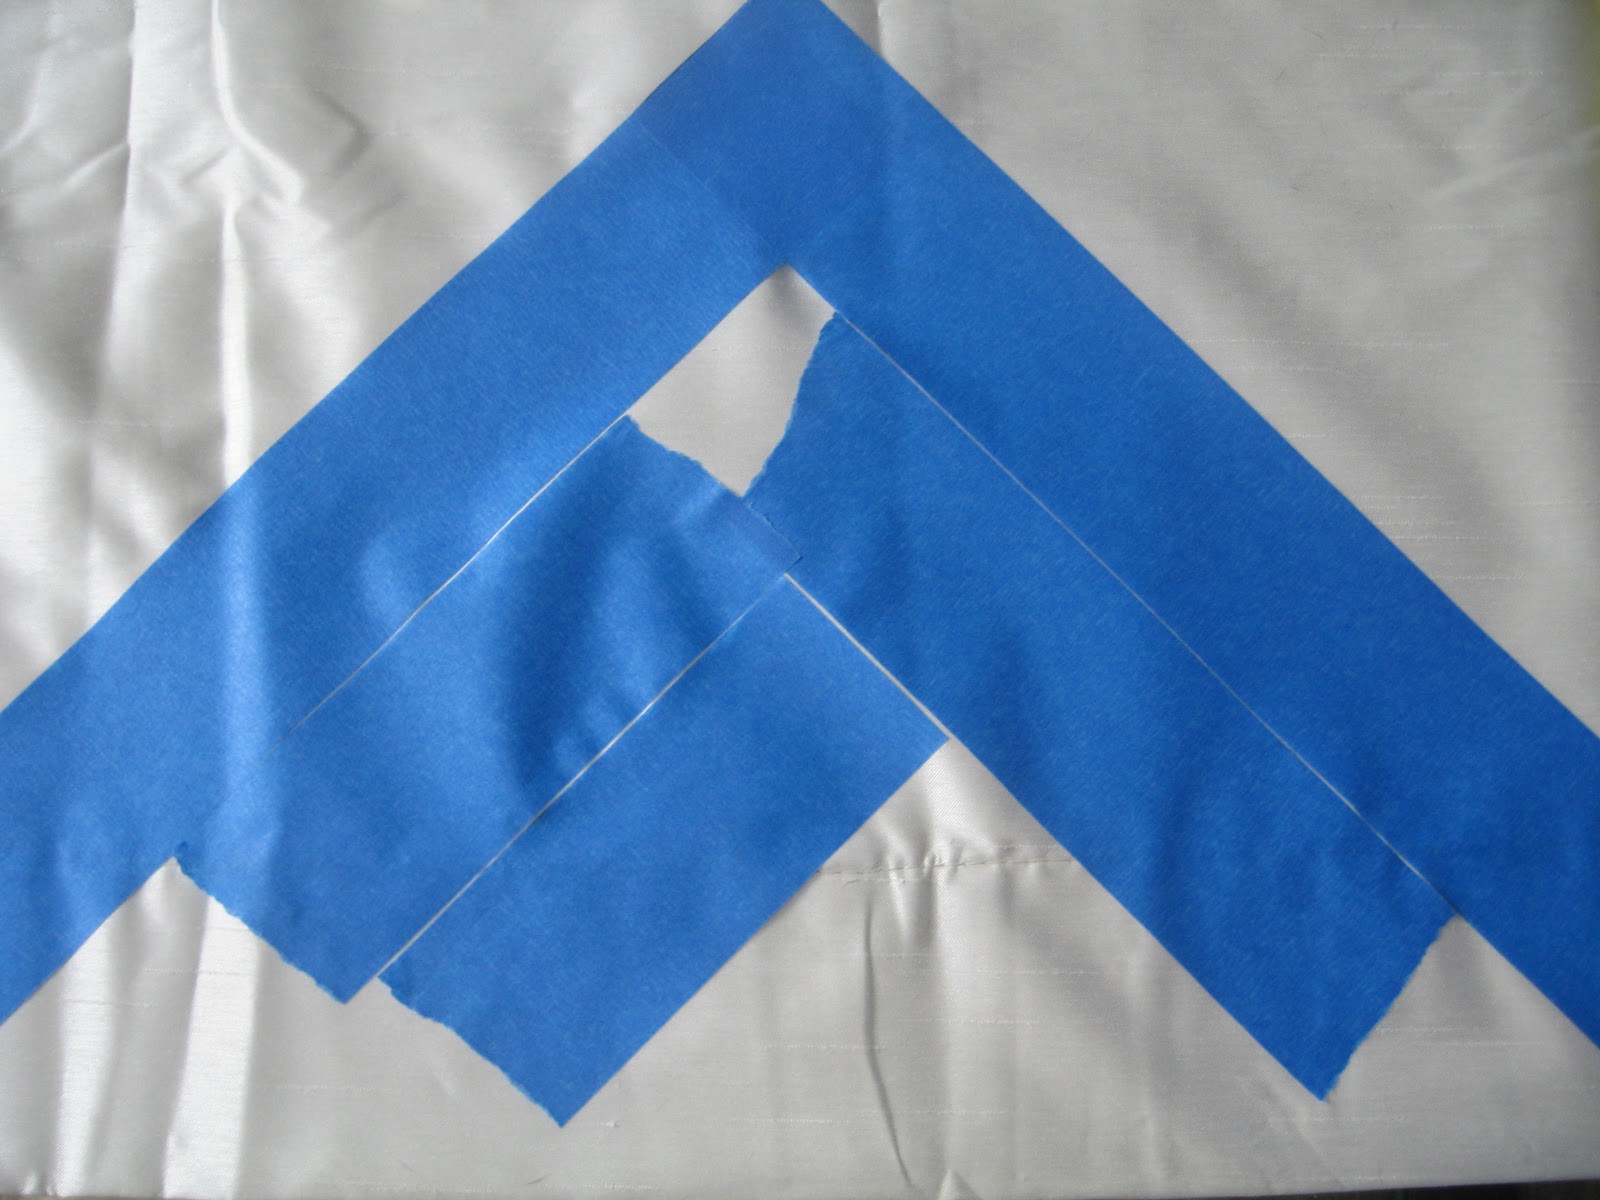
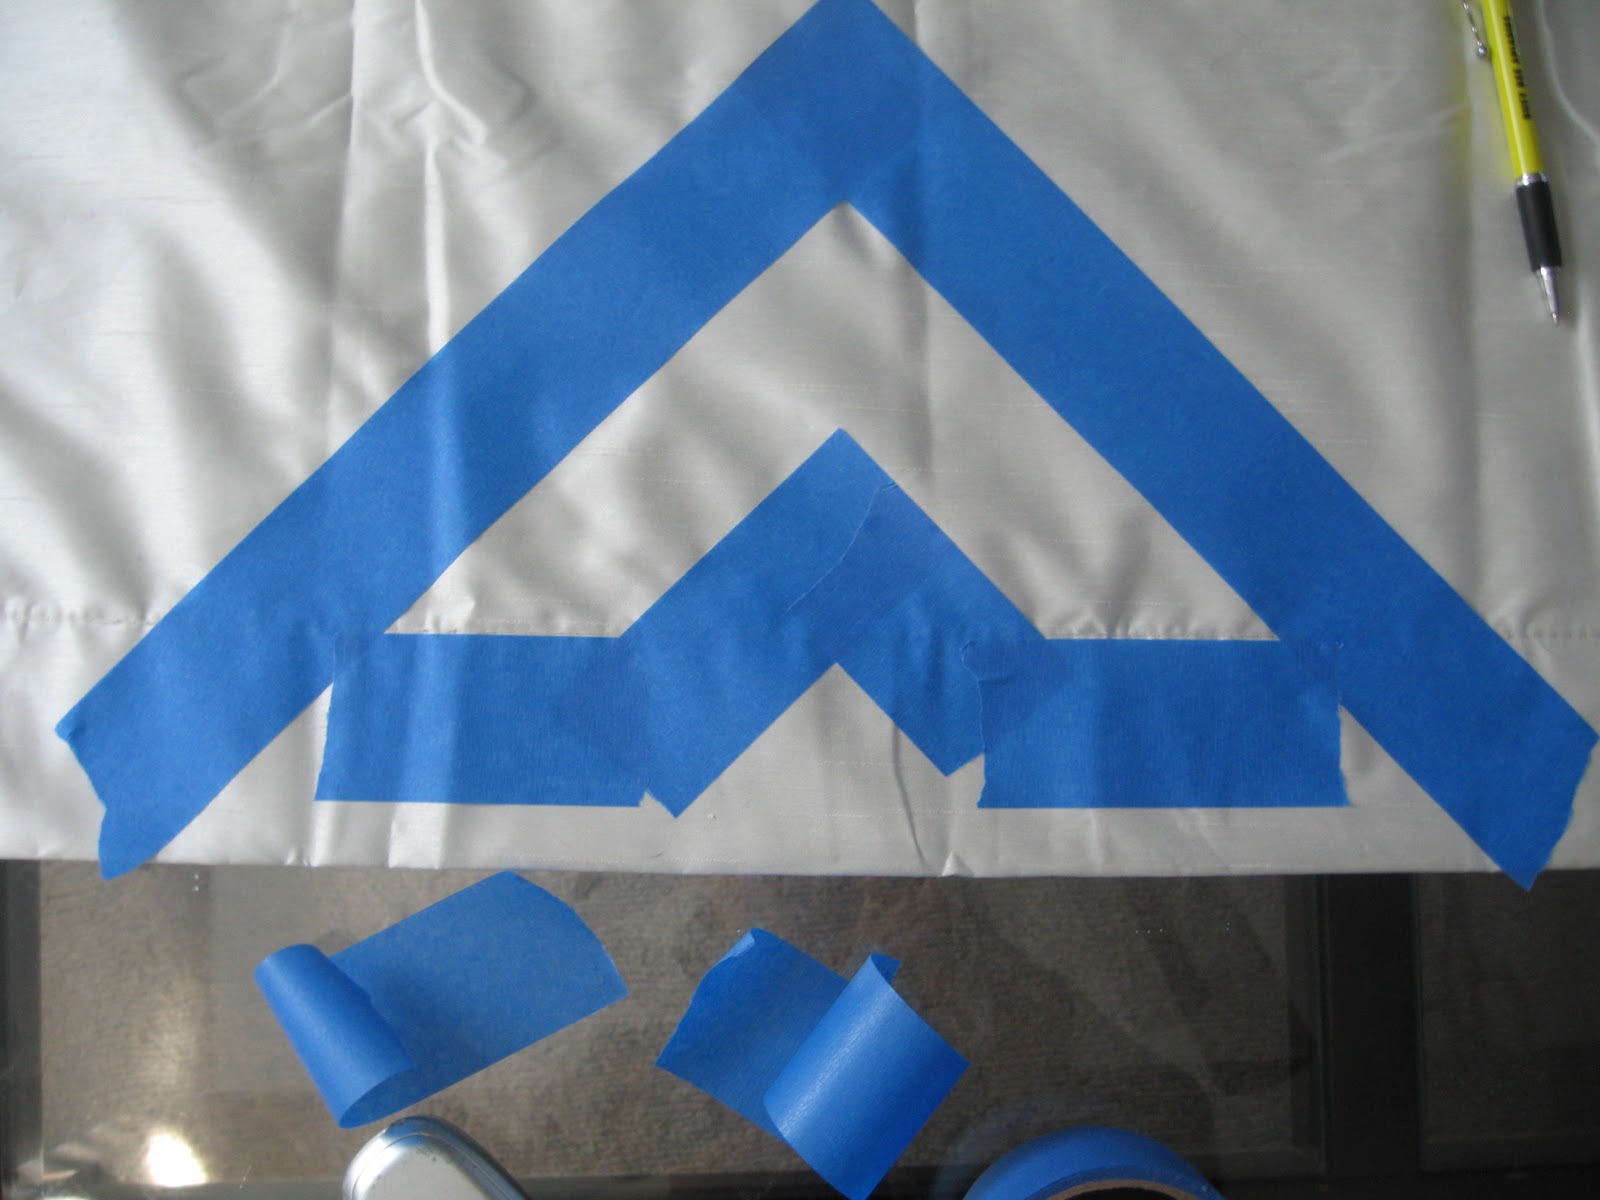
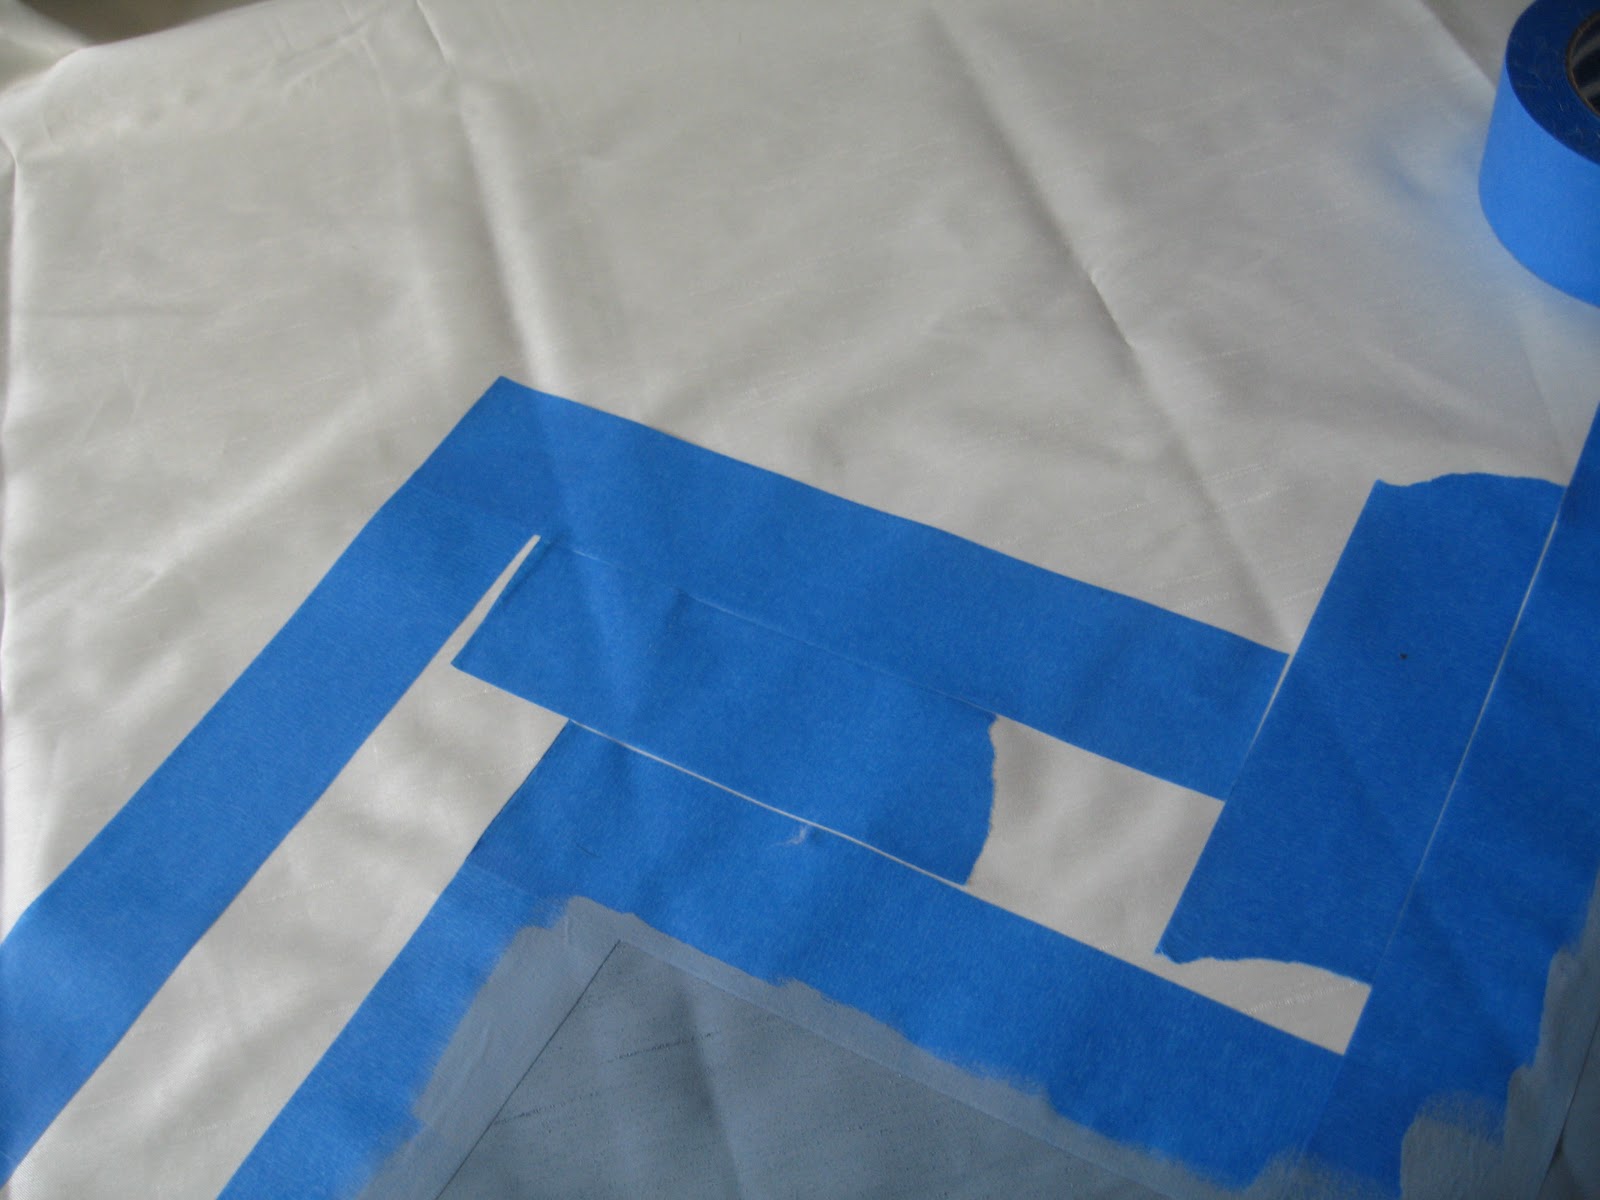
Step 5. Repeat steps 2-4 until you have your first row of chevrons. For these next few photos ignore the paint that I already applied. To make your next row of chevrons, you will not need your speed square except for marking straight lines.
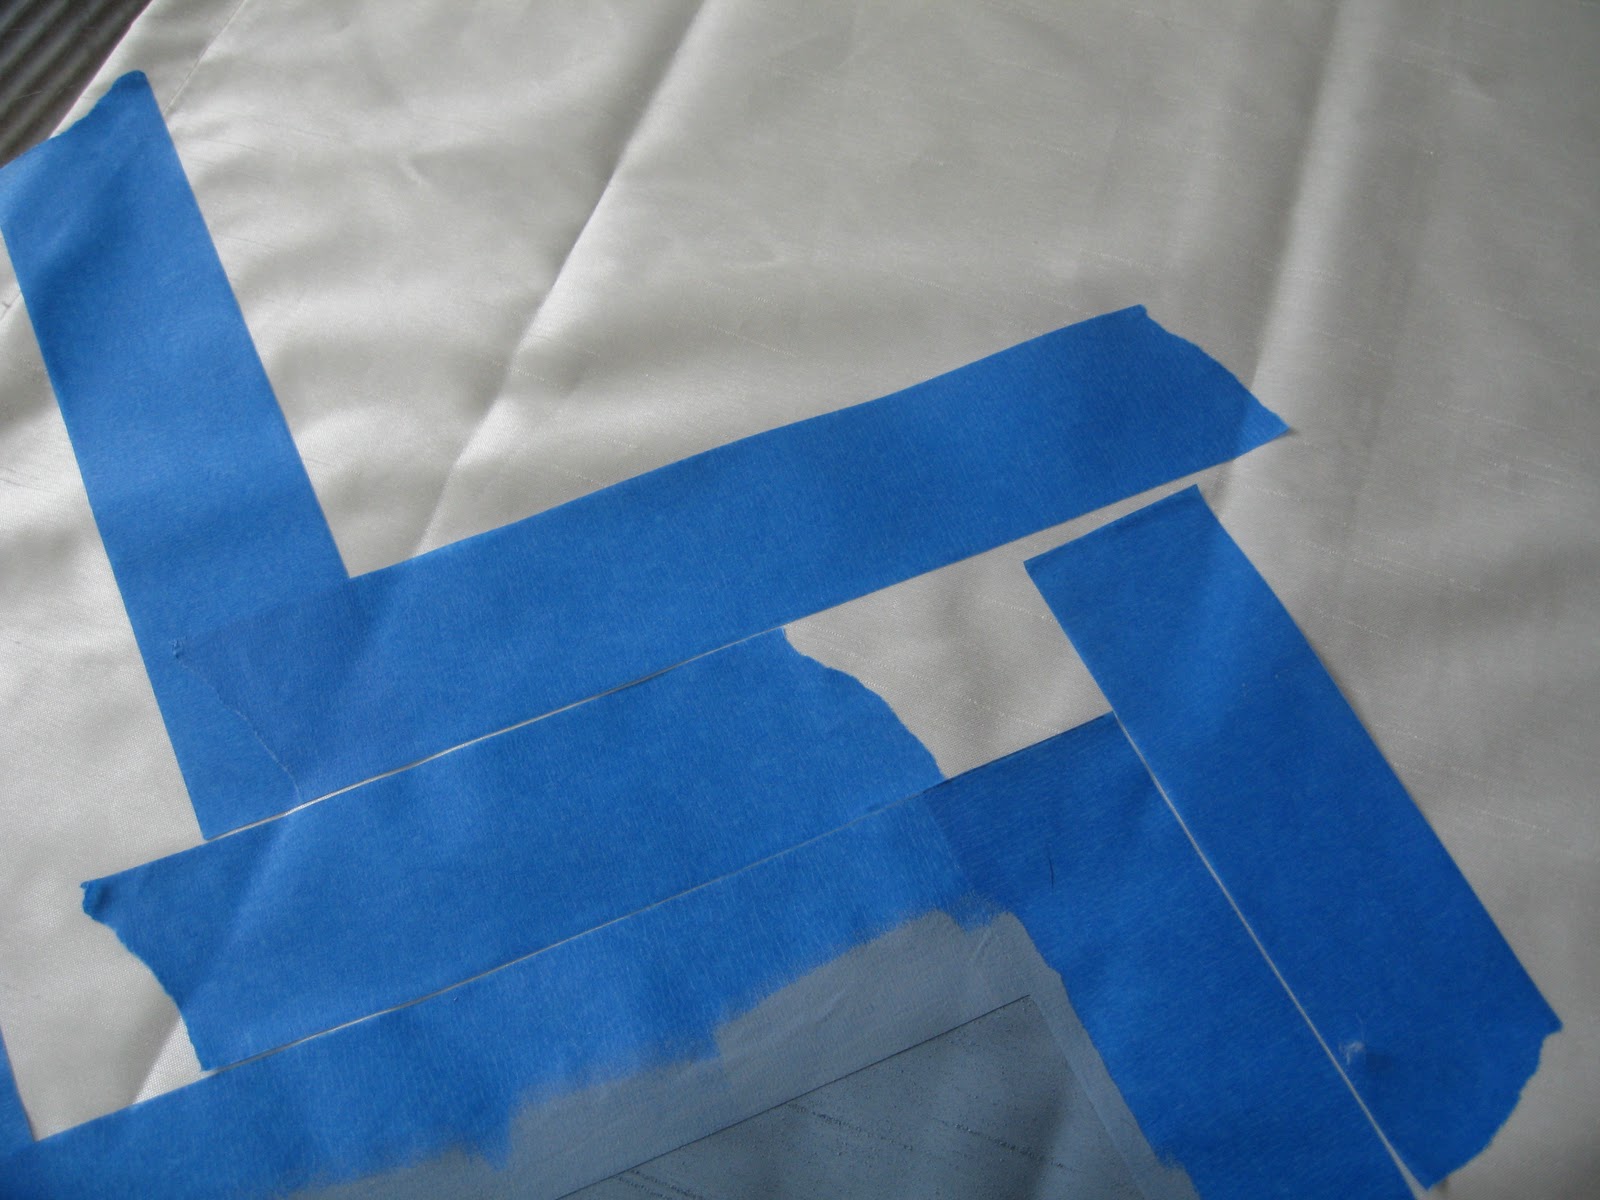
Step 6. From here and on out, you are basically repeating steps 2 and 3. Place two pieces of tape along the sides of your chevron. Notice that glob of curtain again?? :)
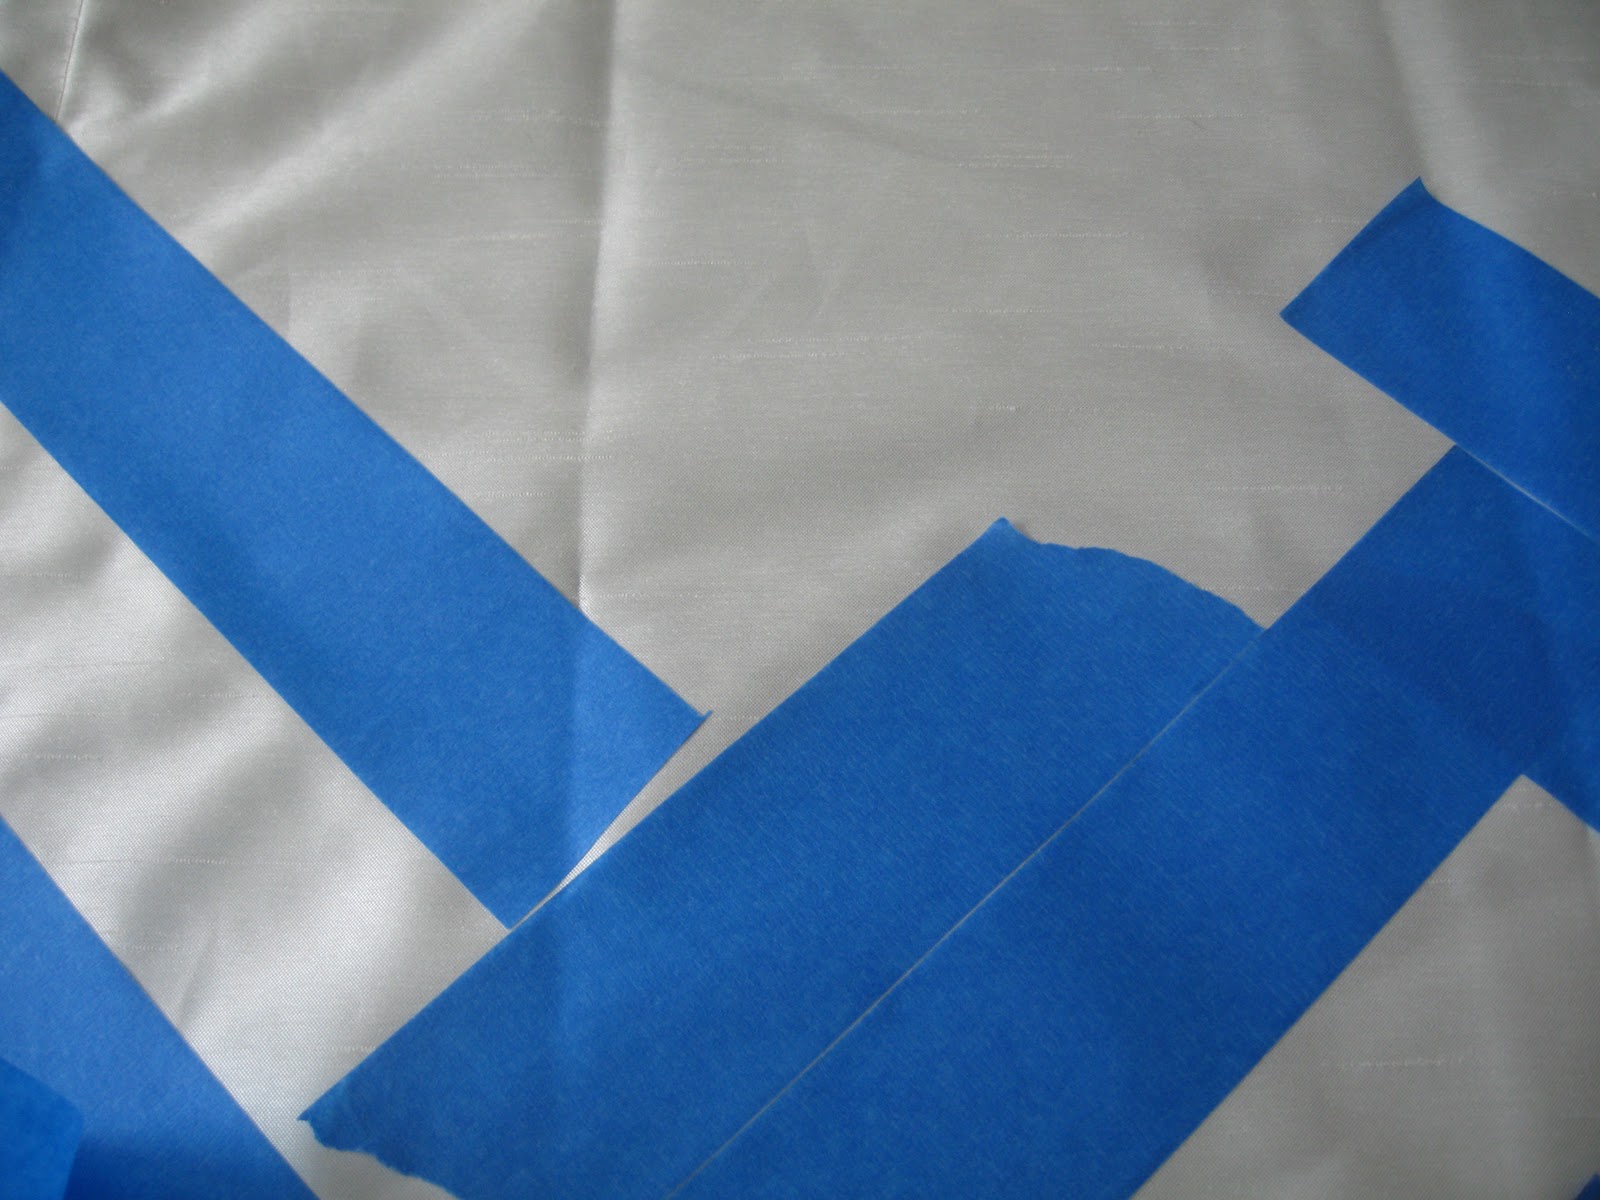
Step 7. Place another piece of tape, and cut it so it is straight.
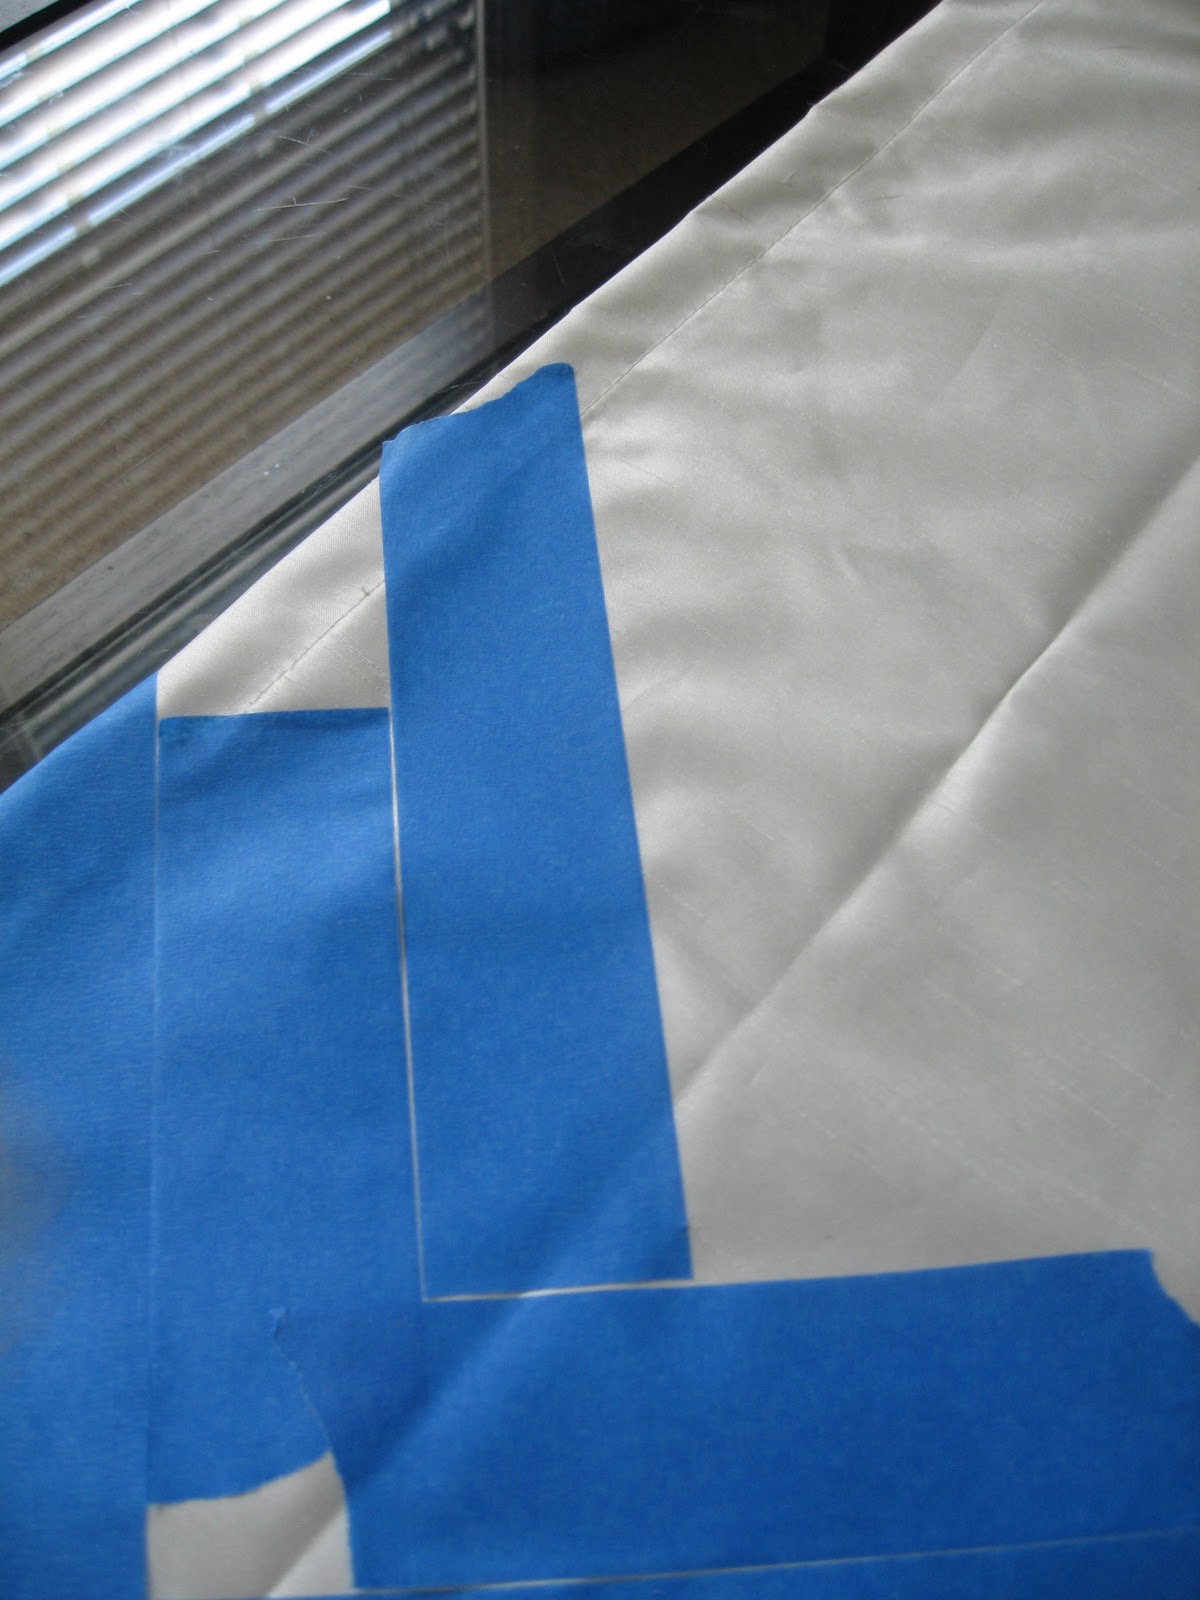
Notice below how the left piece of tape is gone? I moved it over to the next chevron, so I knew how long of a piece I needed. Basically, I used the same two pieces of tape throughout the project as my "template." Still confused? Don't worry! Hopefully, these pictures will help explain it better!
Here I am checking the length of tape, so I do not waste my expensive blue tape. :)
The torn piece of tape to the left is about to move over . . .
to the far right.

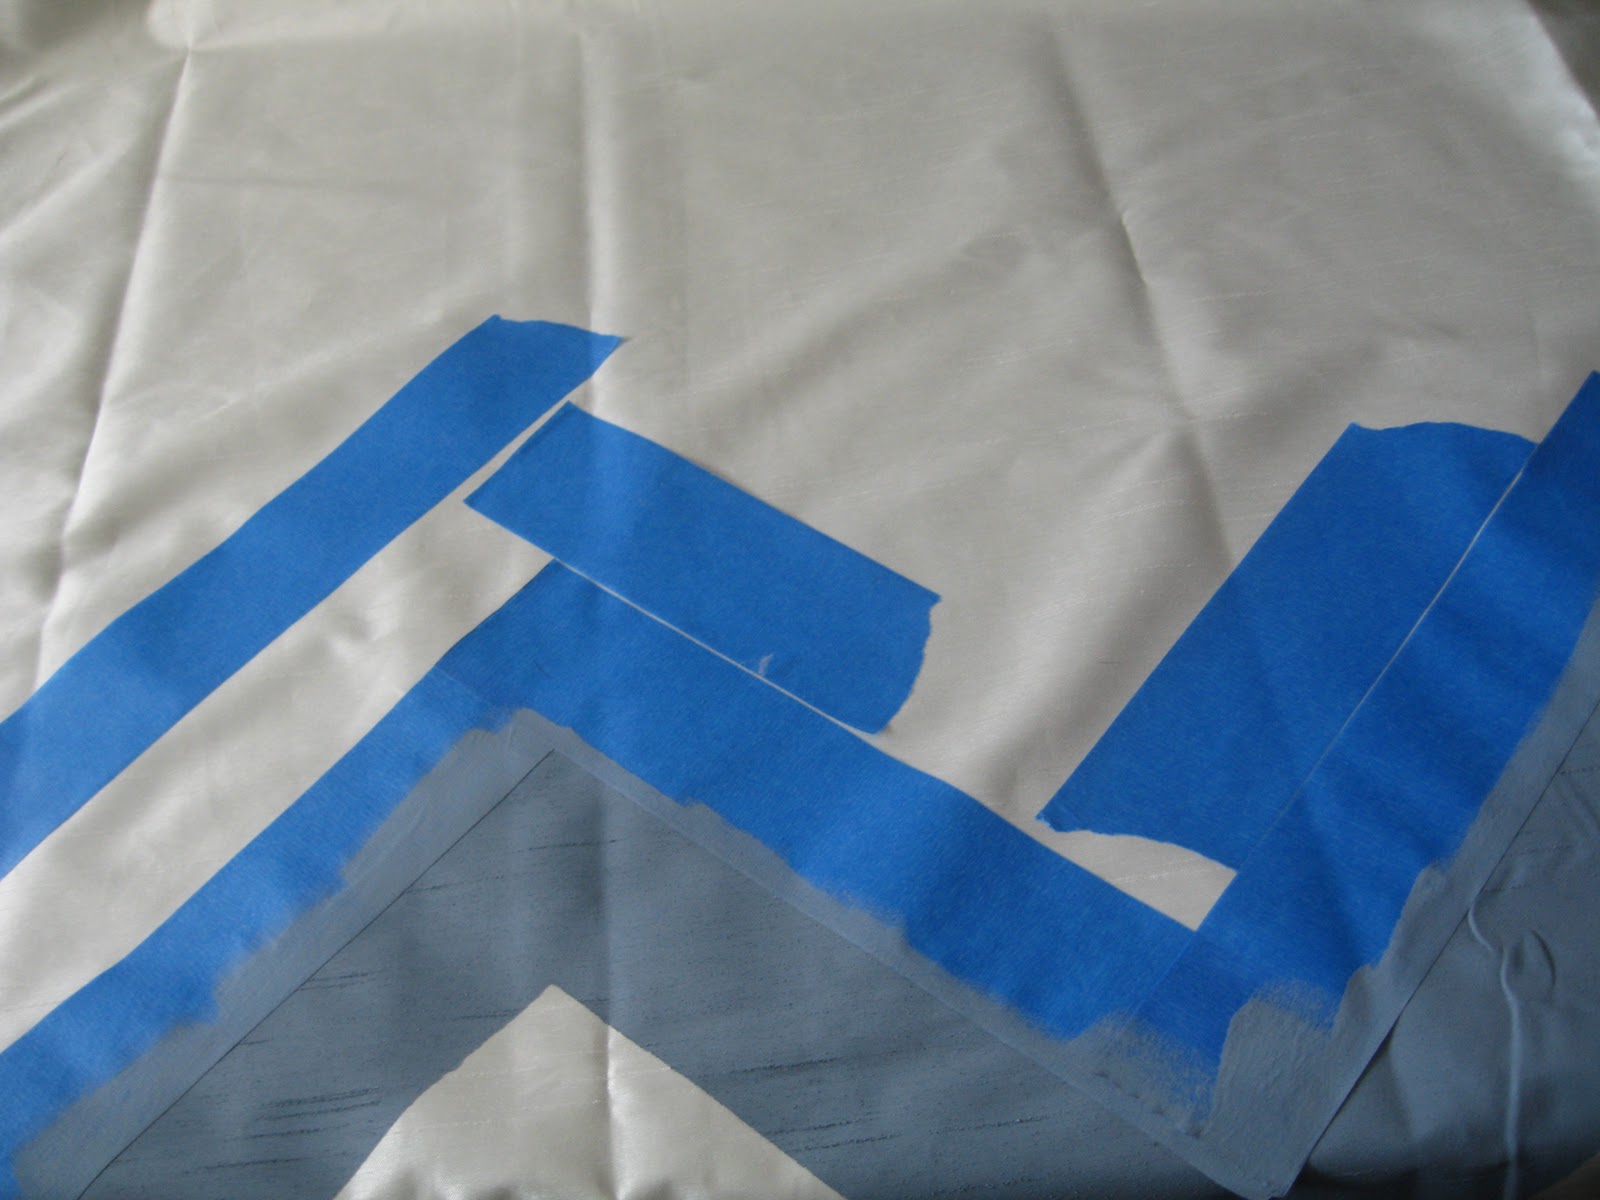
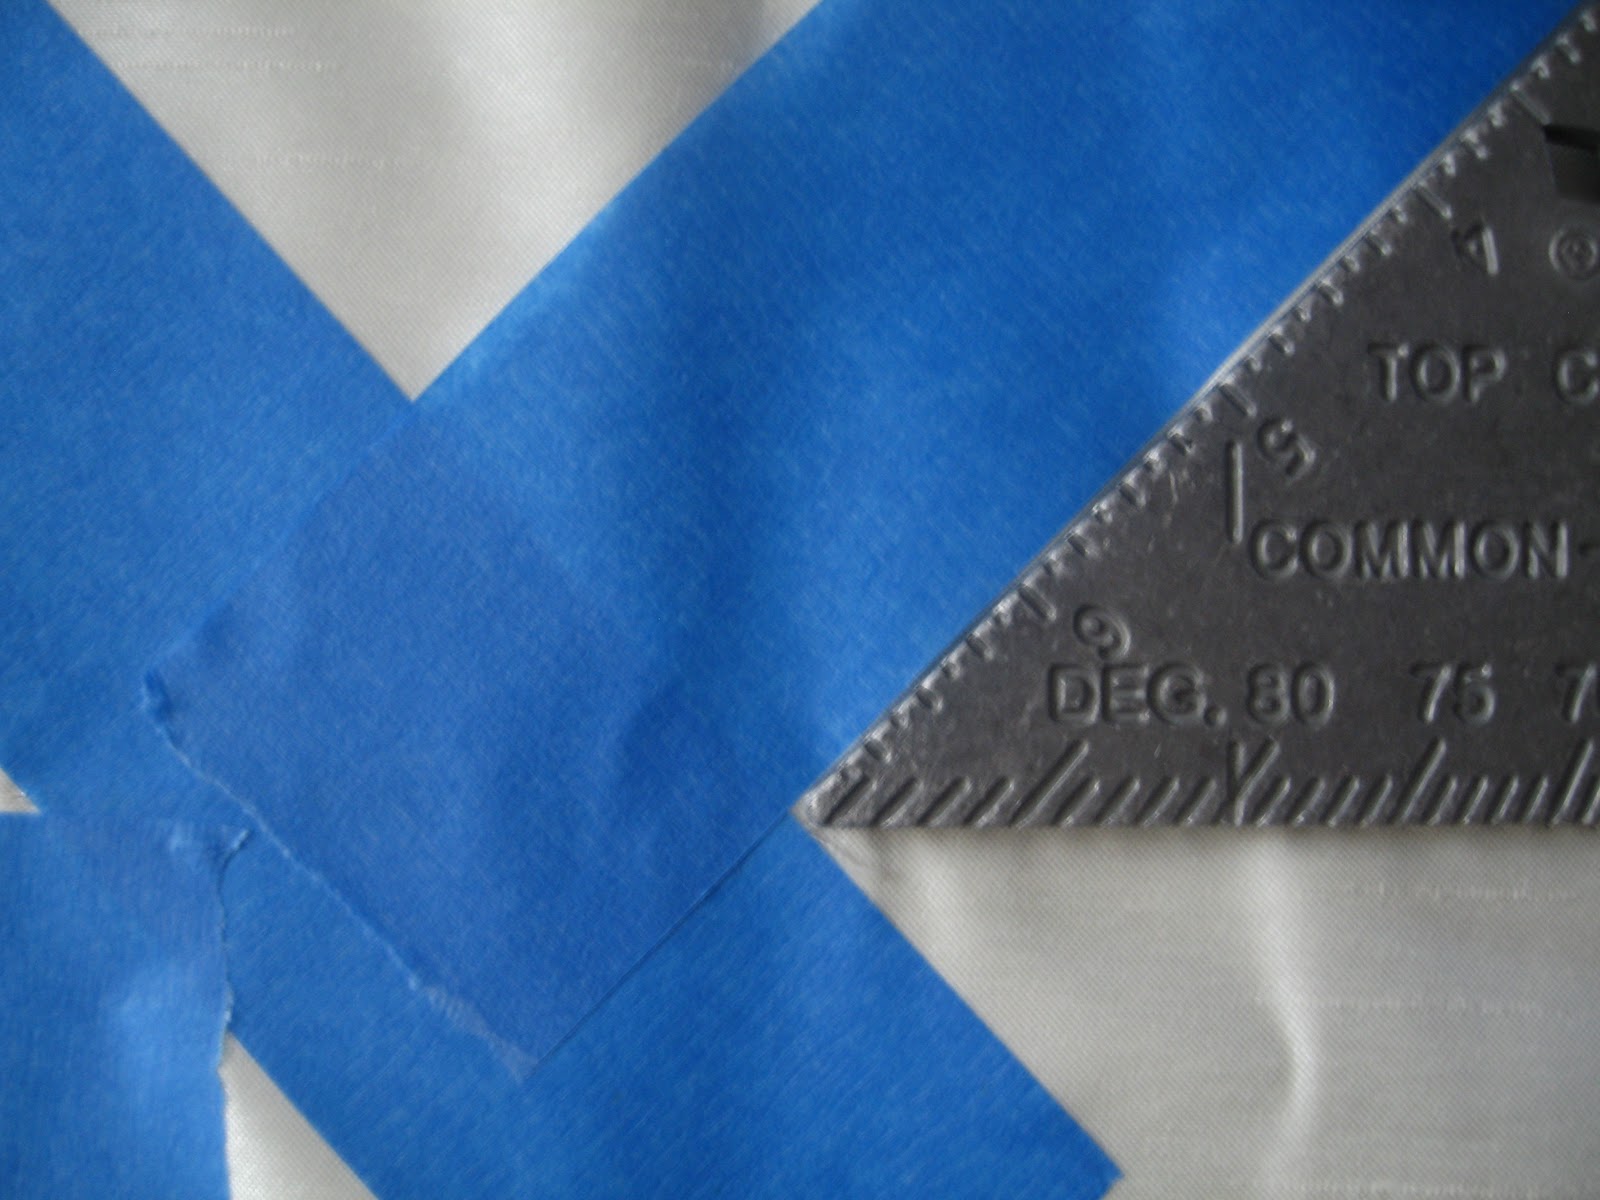
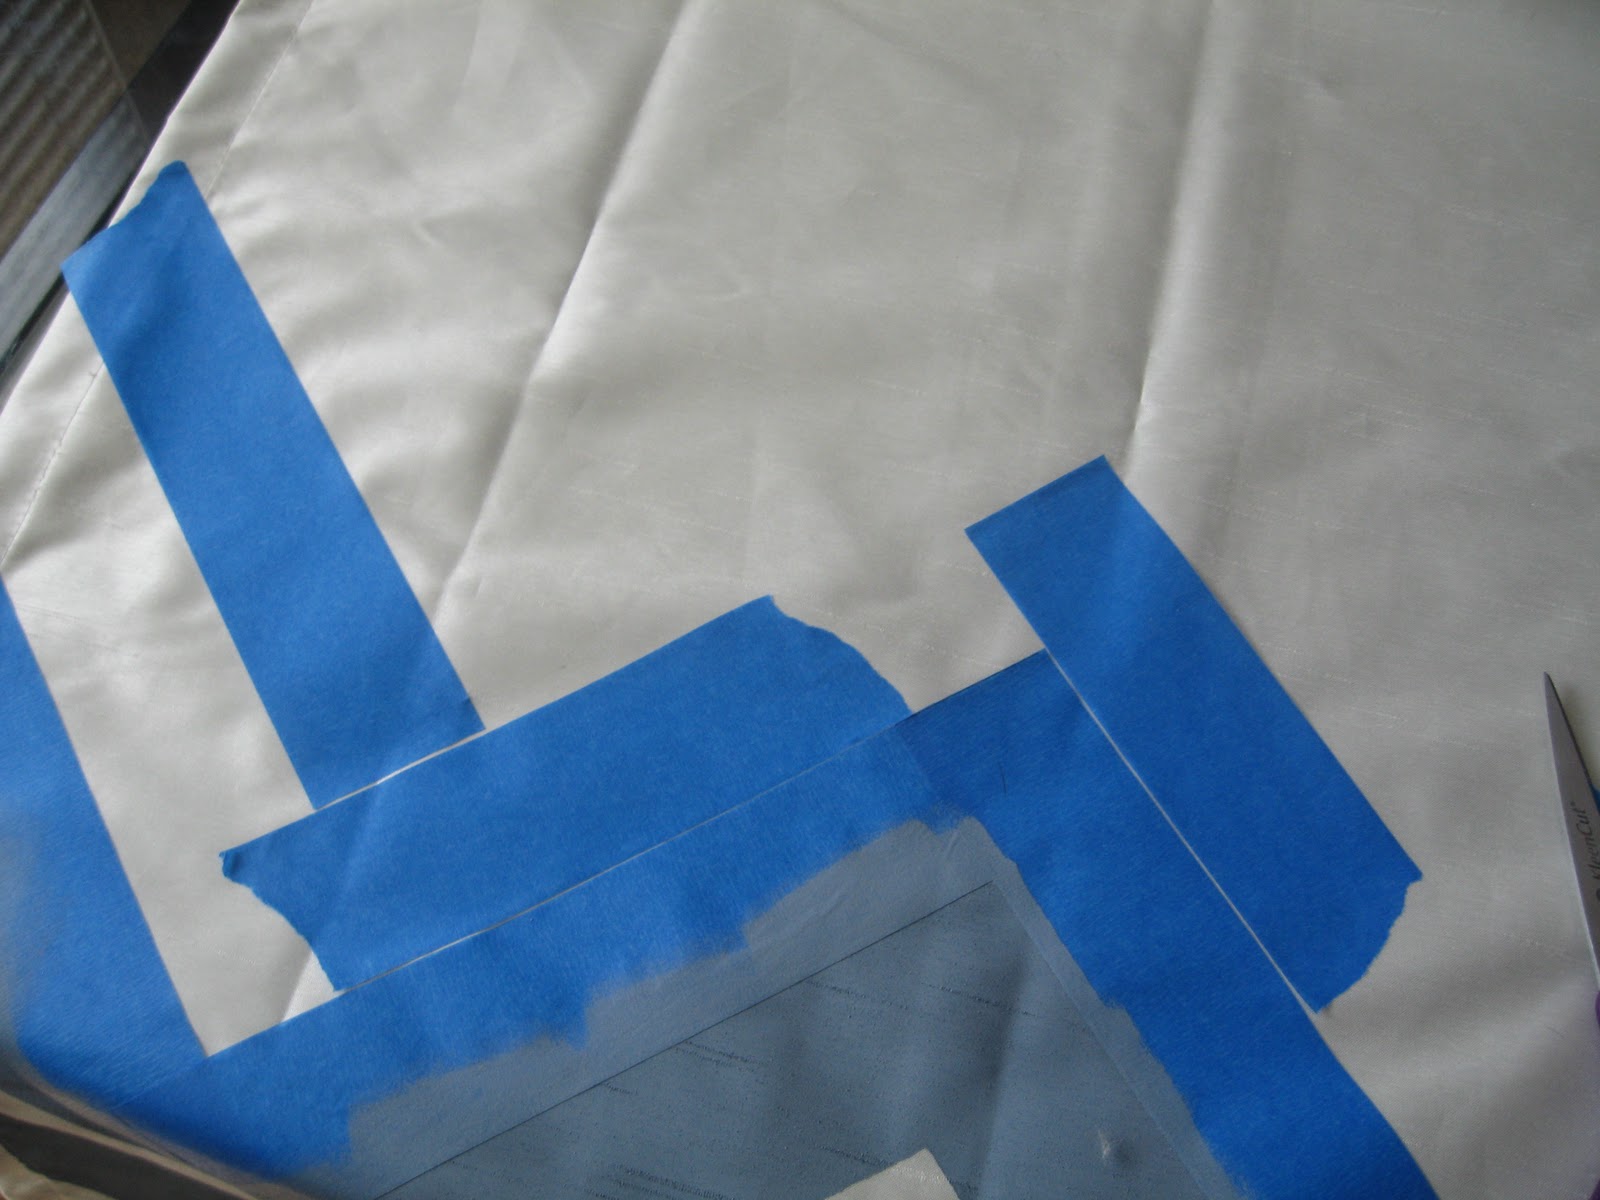
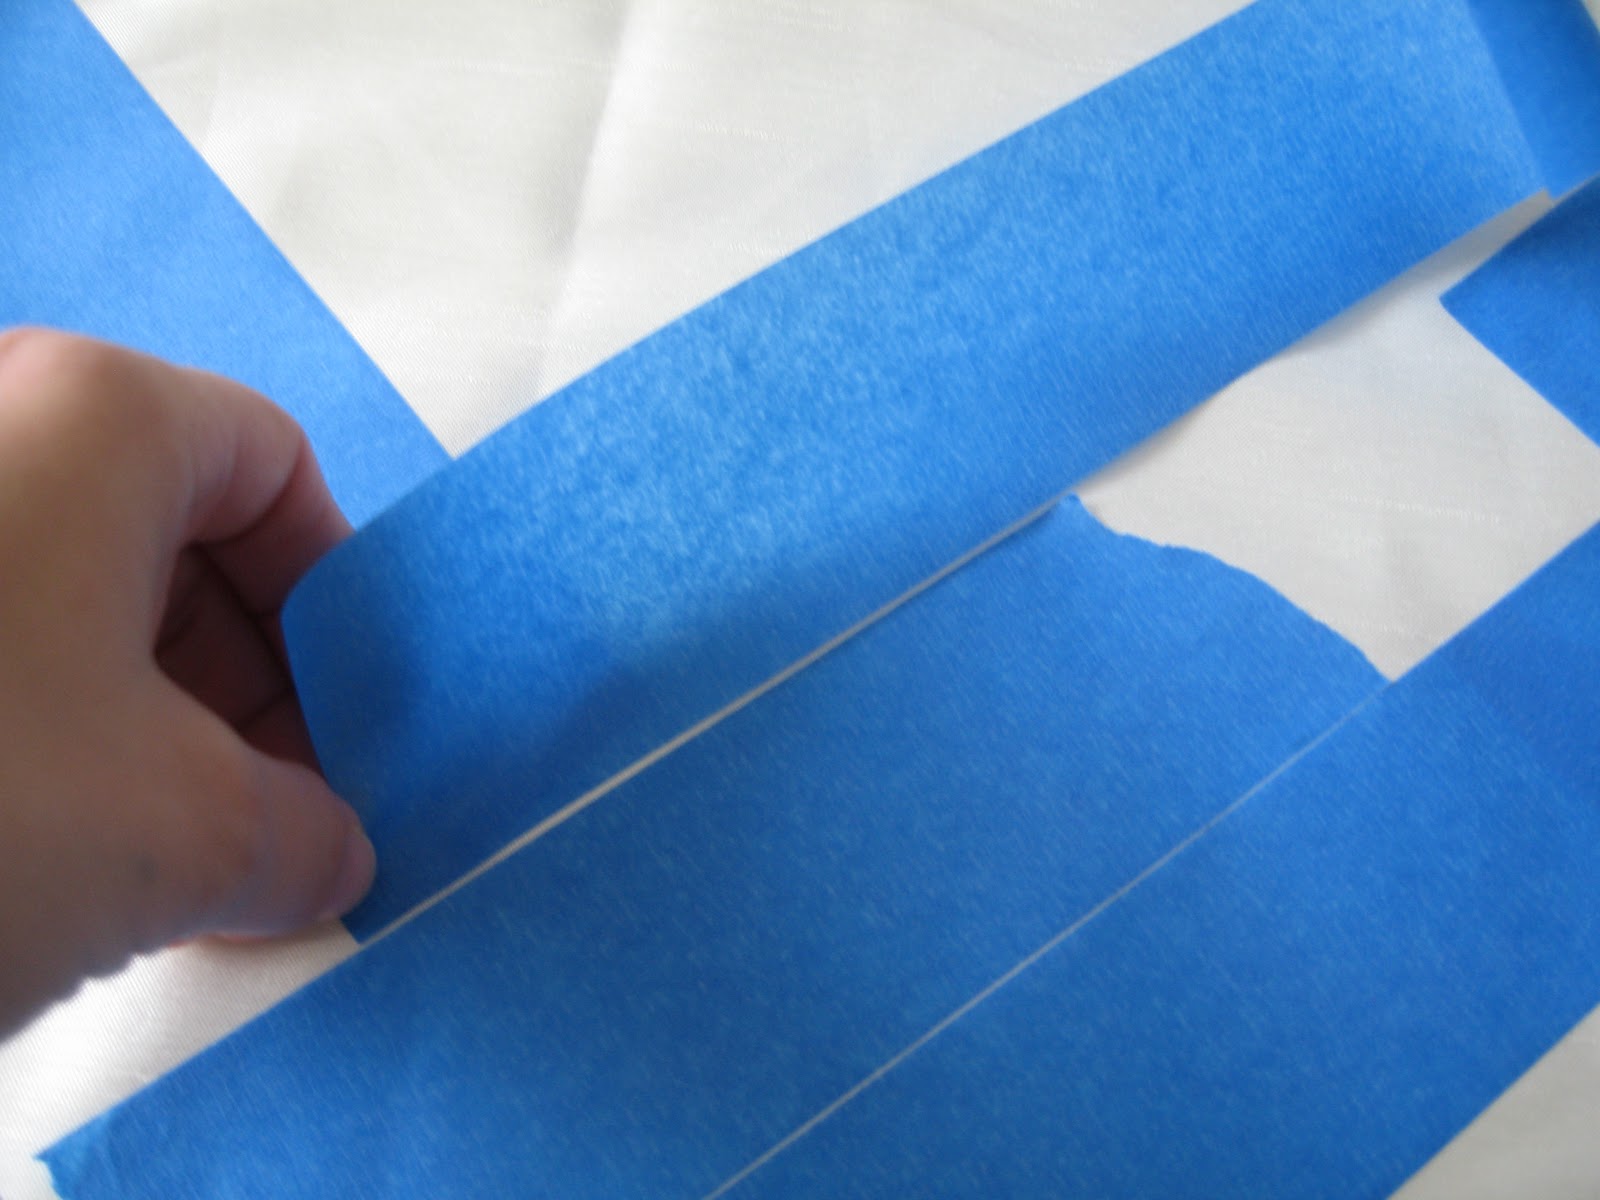
I cut a straight line with the next piece of tape, which will be my bottom point. The top of the tape (where my fingers are touching), I just tore it off. For that torn part, you are repeating step 2 by using your speed square to a mark a straight line for you to cut.
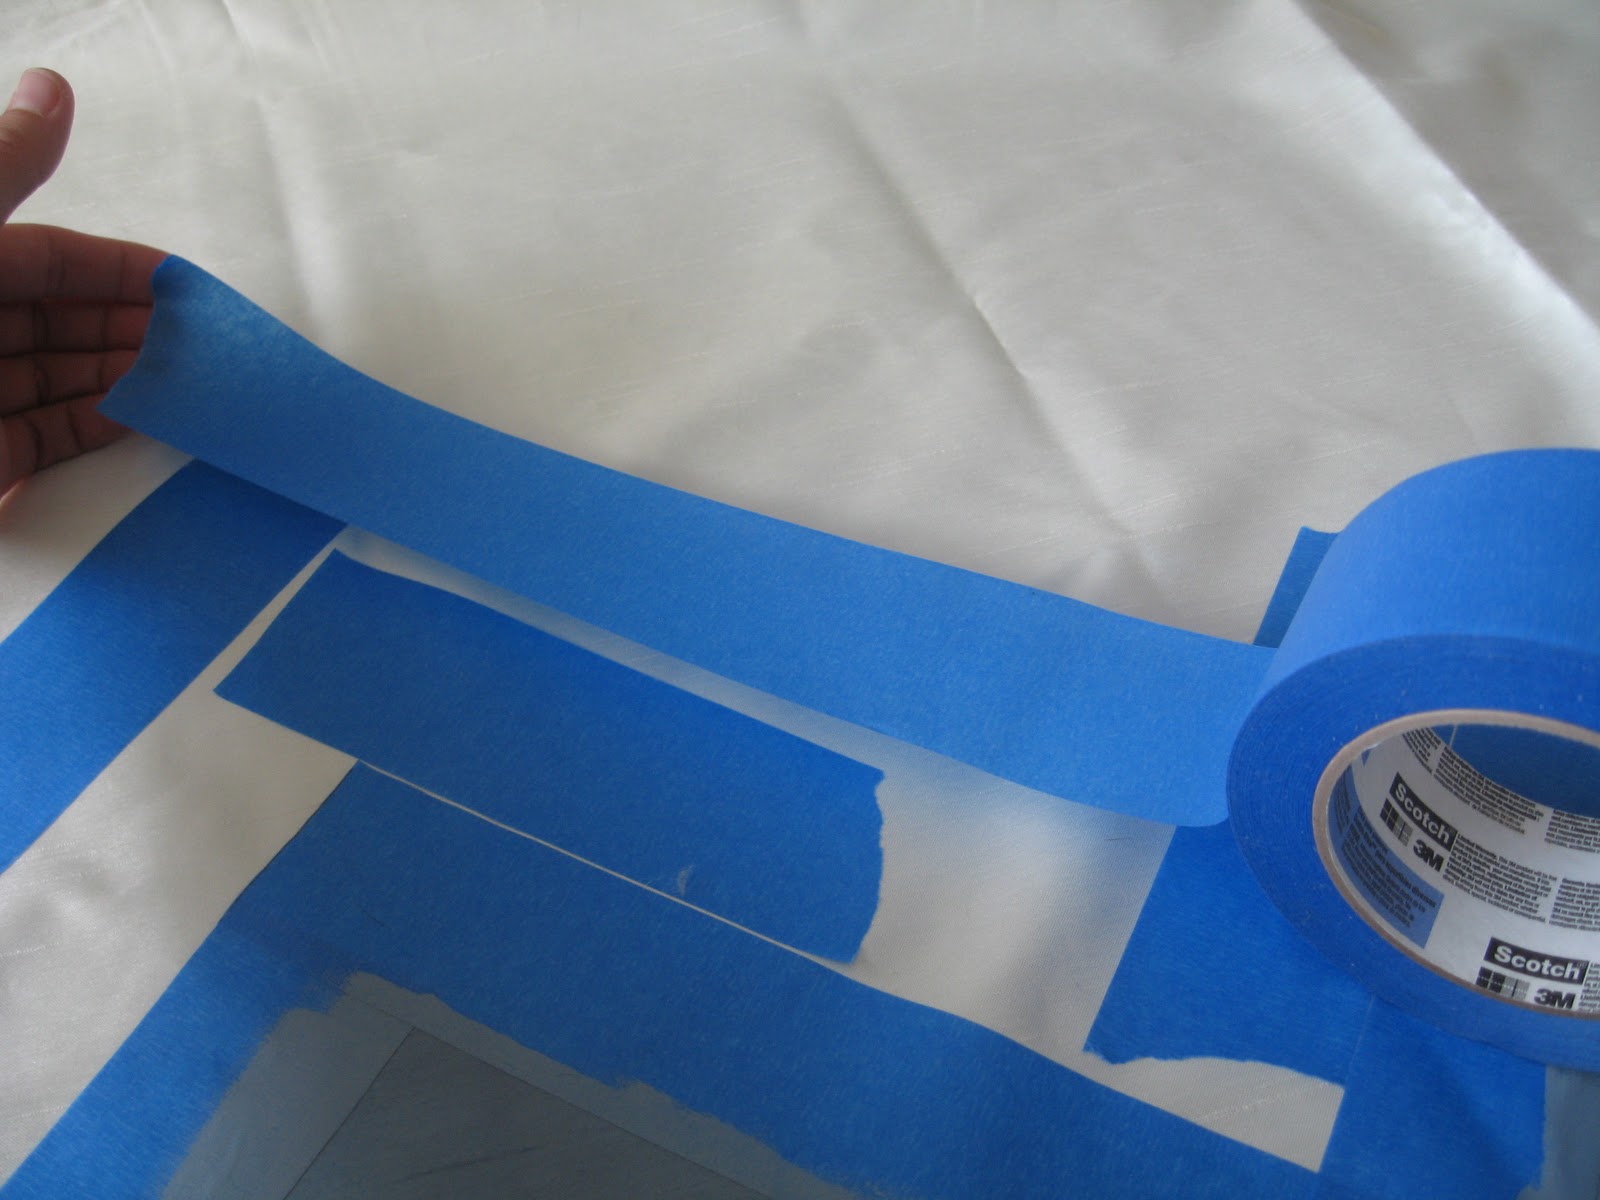
If you end up cutting your tape crooked throughout the project, do not worry about it!
Use your second piece of tape to make it straight again.
Step 8. Paint! I divided my curtain into four parts, so I would tape my first part and paint it before moving onto my second part. Make sure you press along your tape really well in the area you are painting. You want good adhesion so paint will not leak underneath.
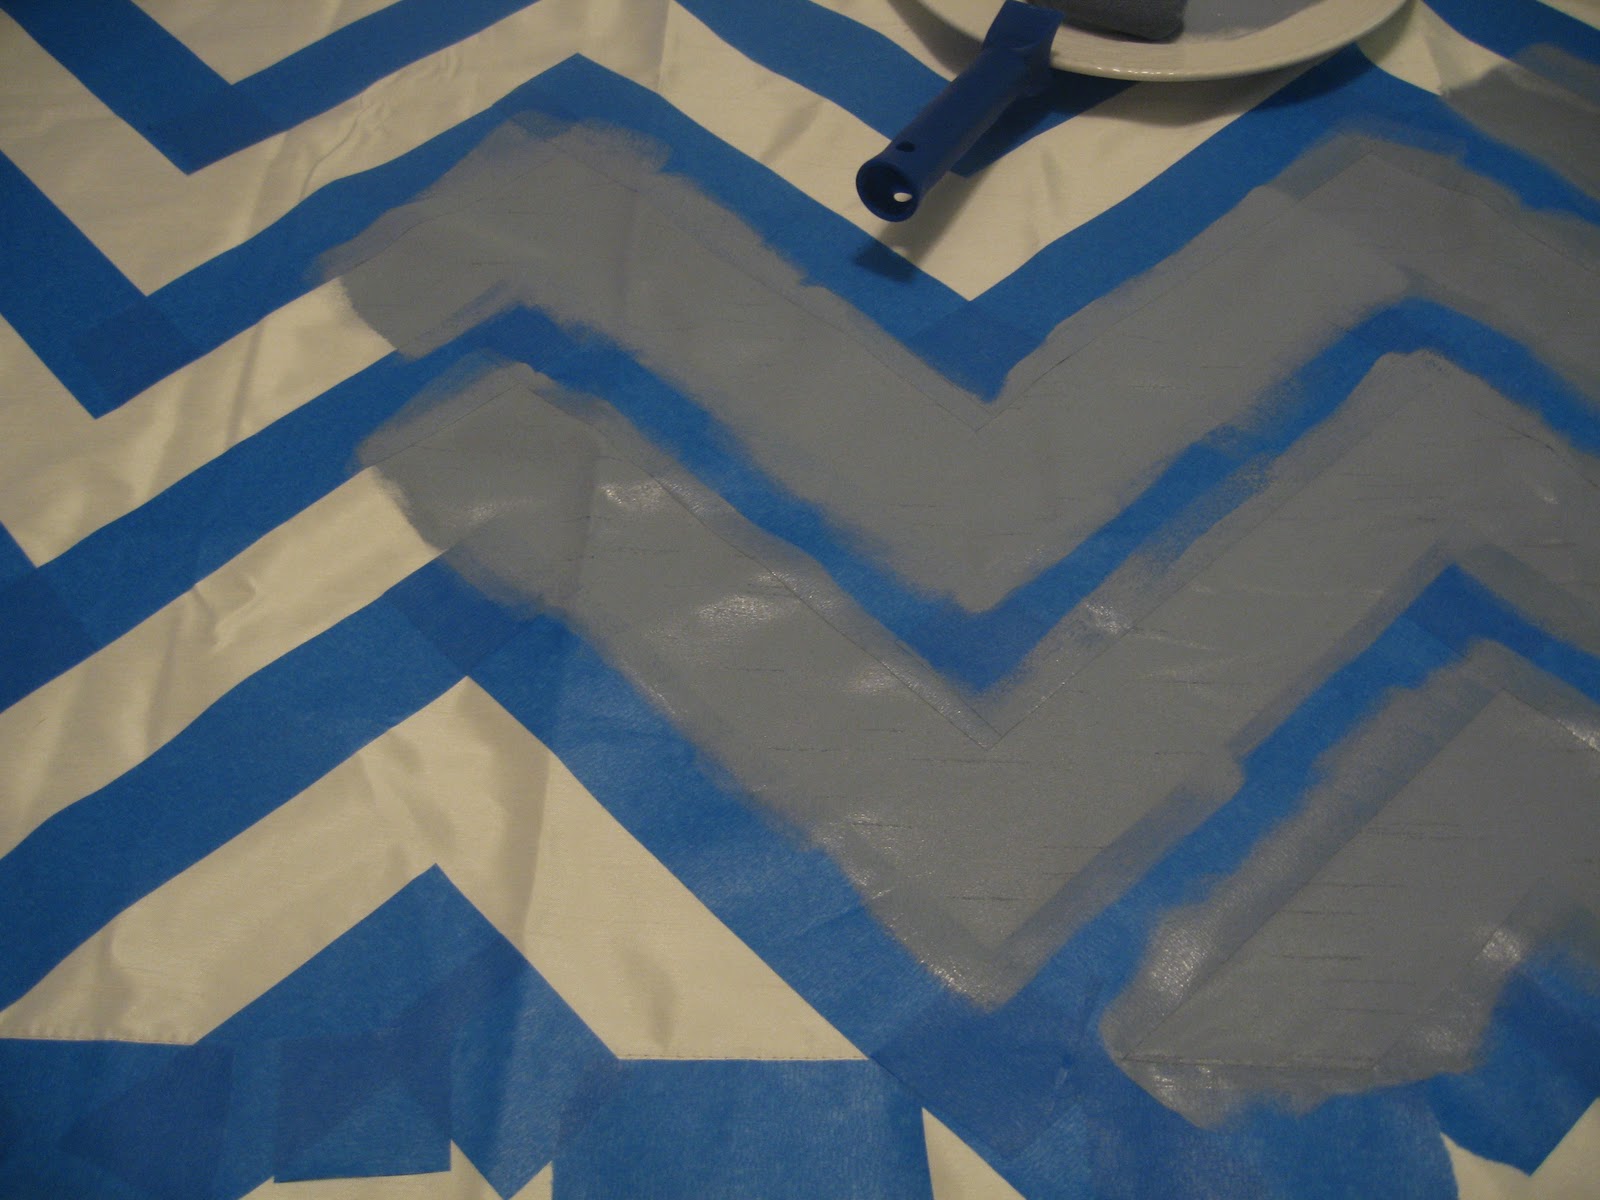
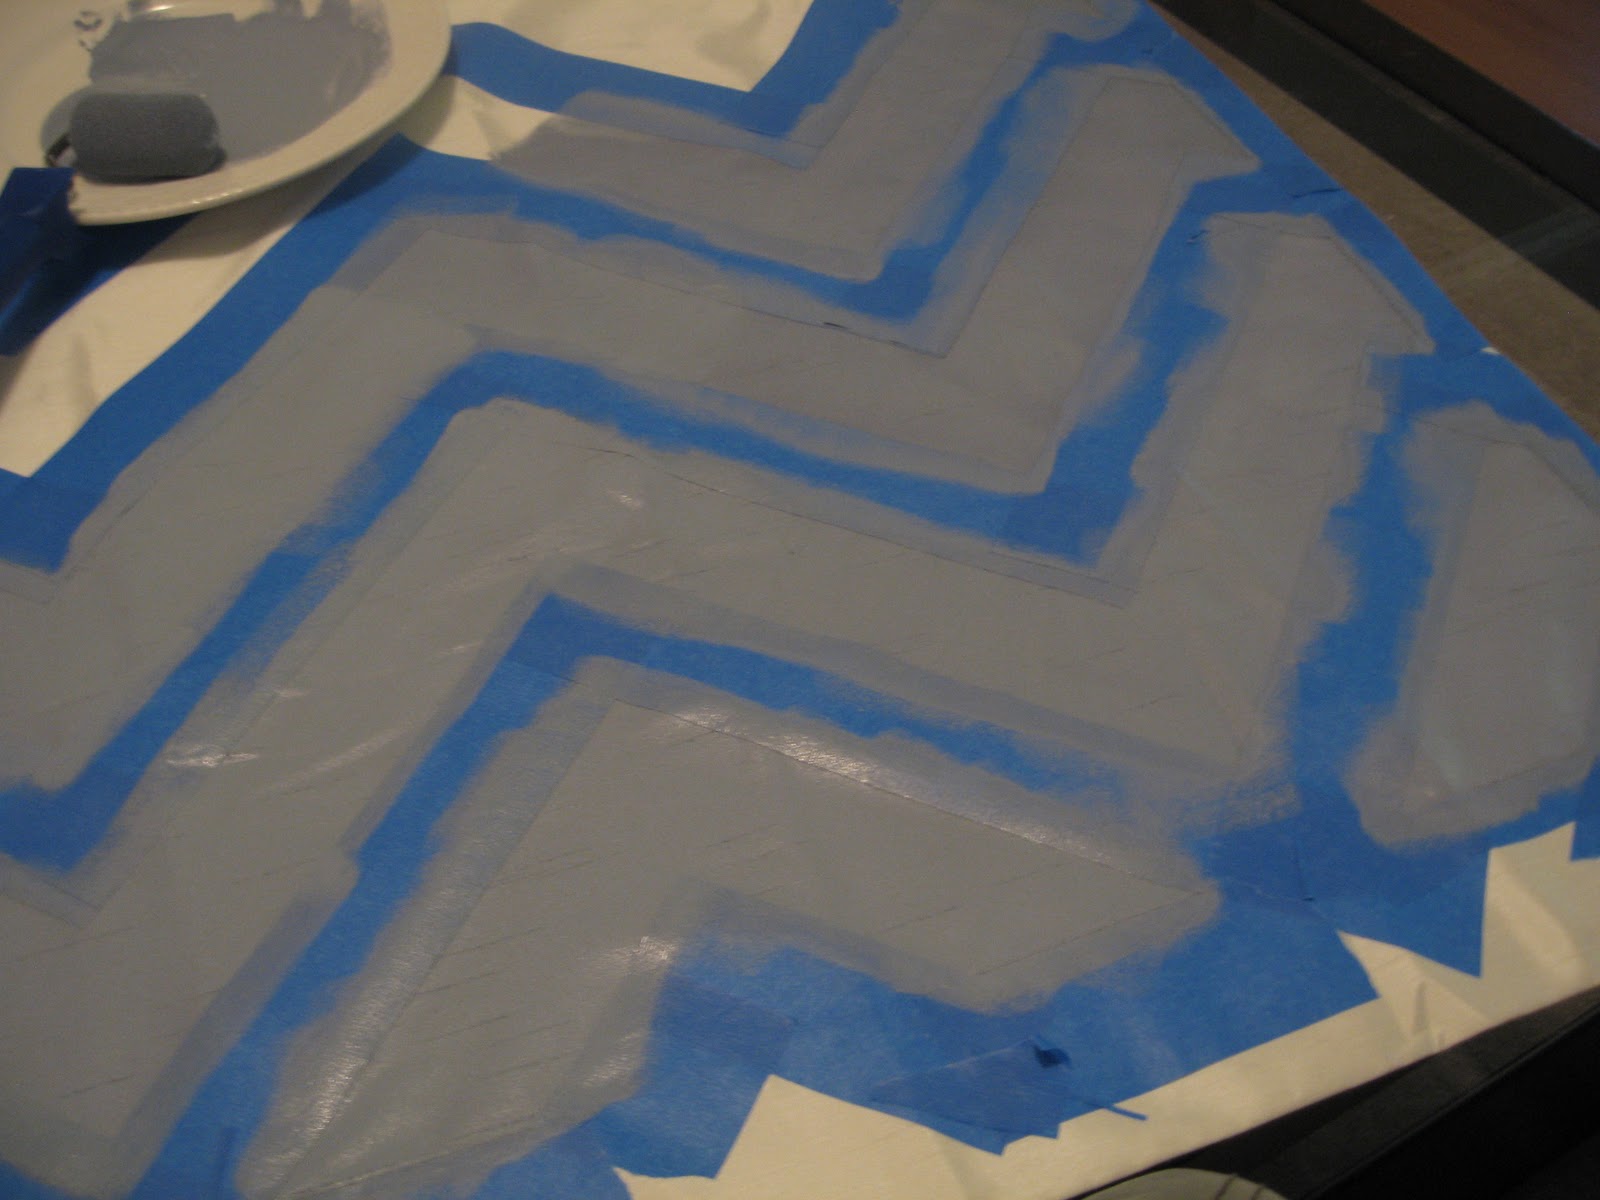
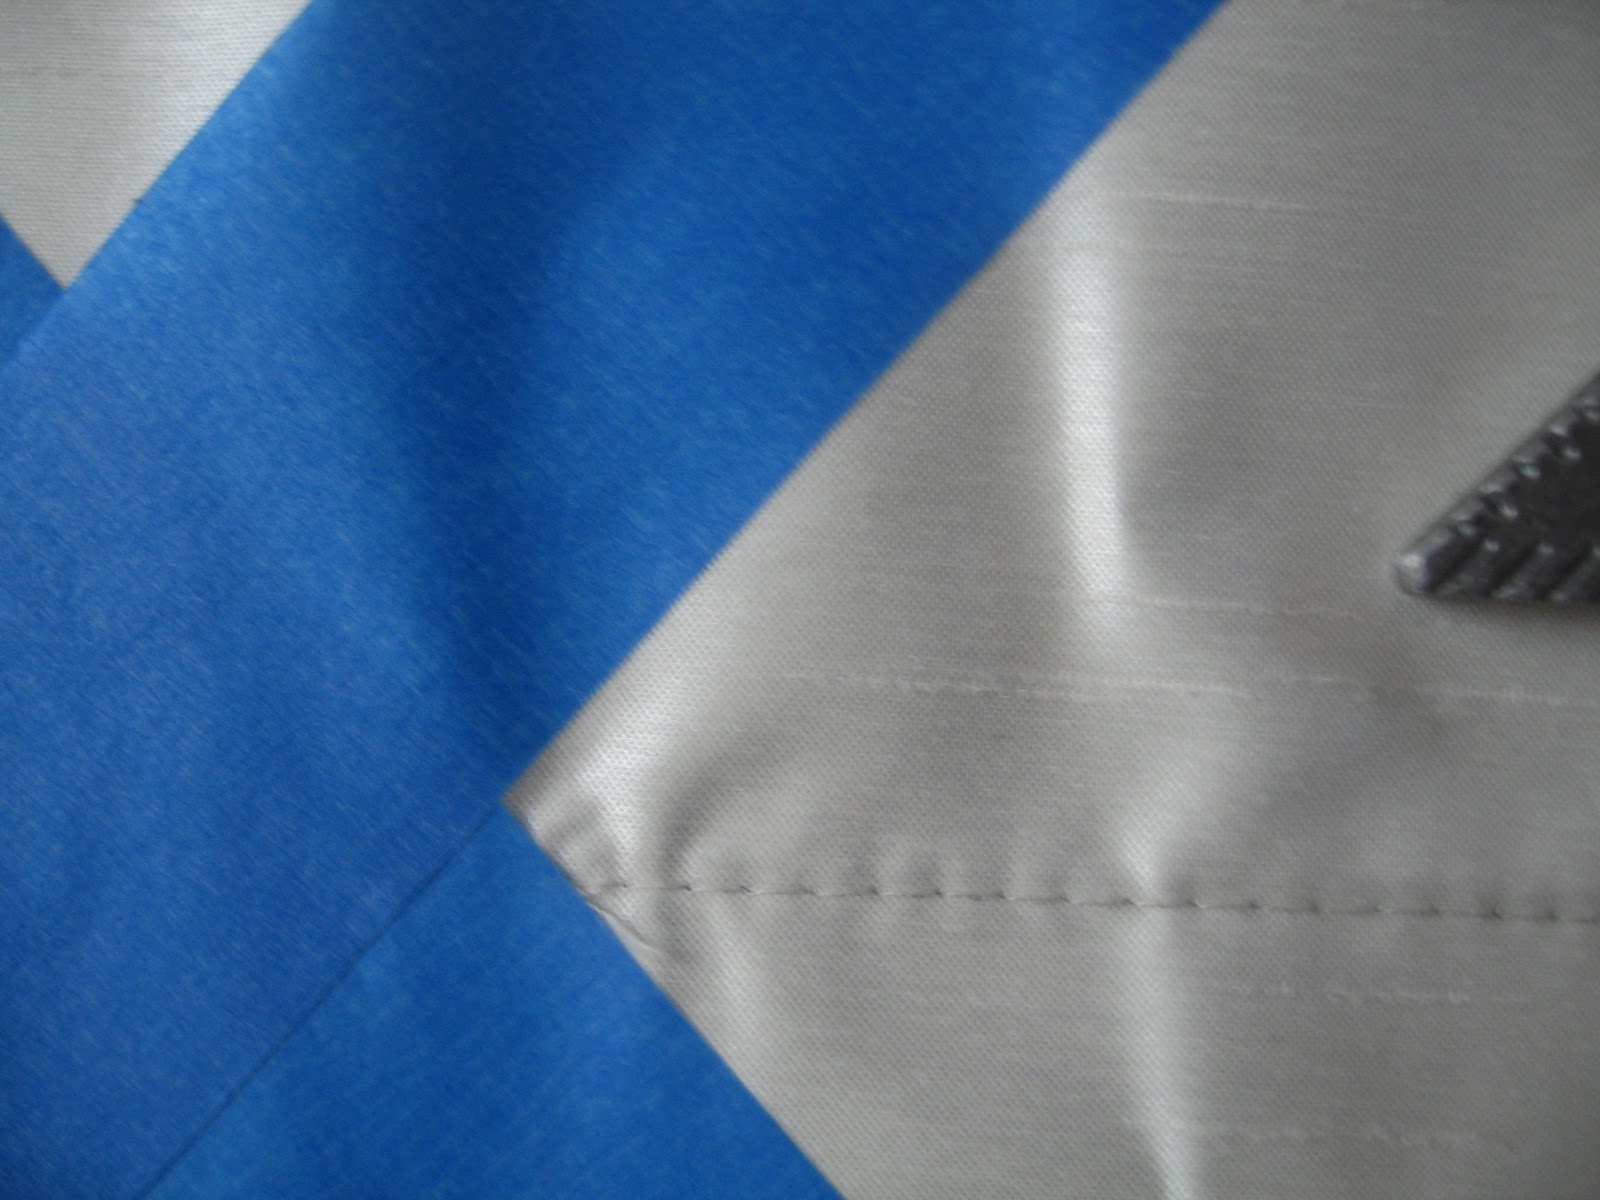
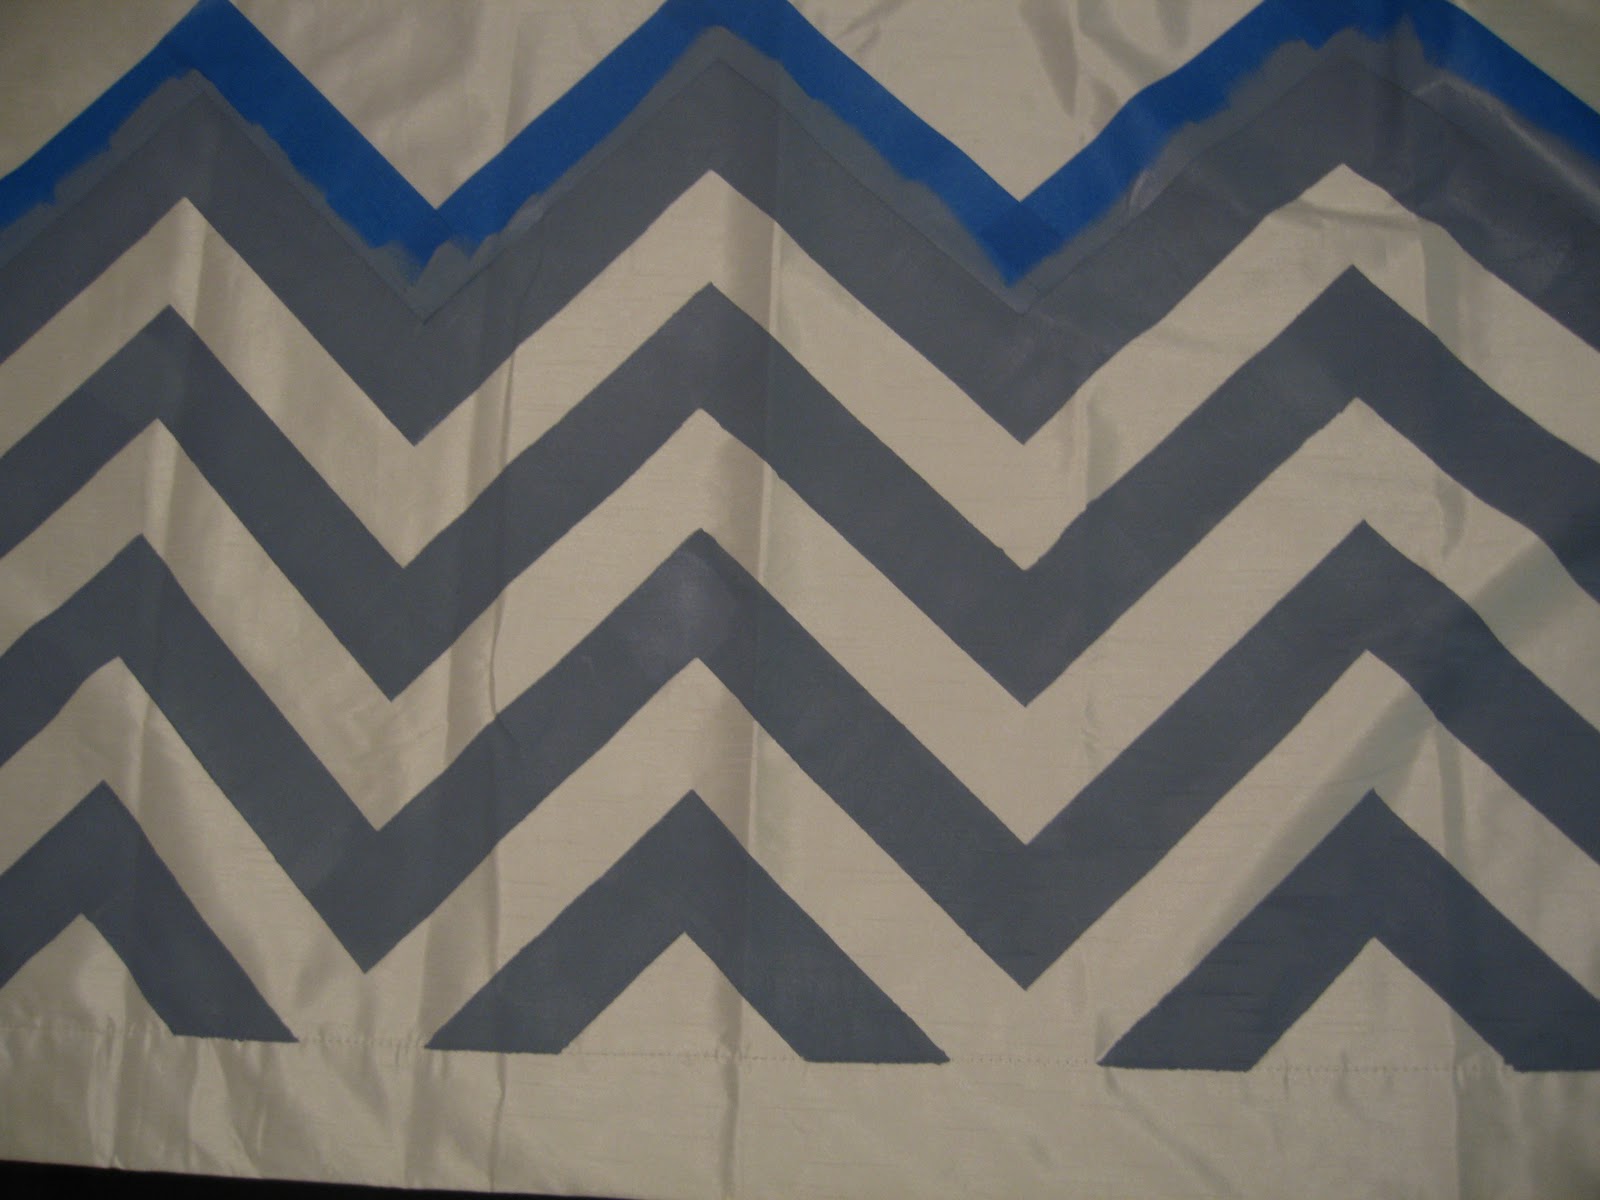
One thing I learned from this is to not include the stitching in the design. I should have painted just above the hemline, but thank goodness this did not happen at everywhere on my curtains. Overall, I am very pleased with the end result!

So let's take one last trip down memory lane . . .
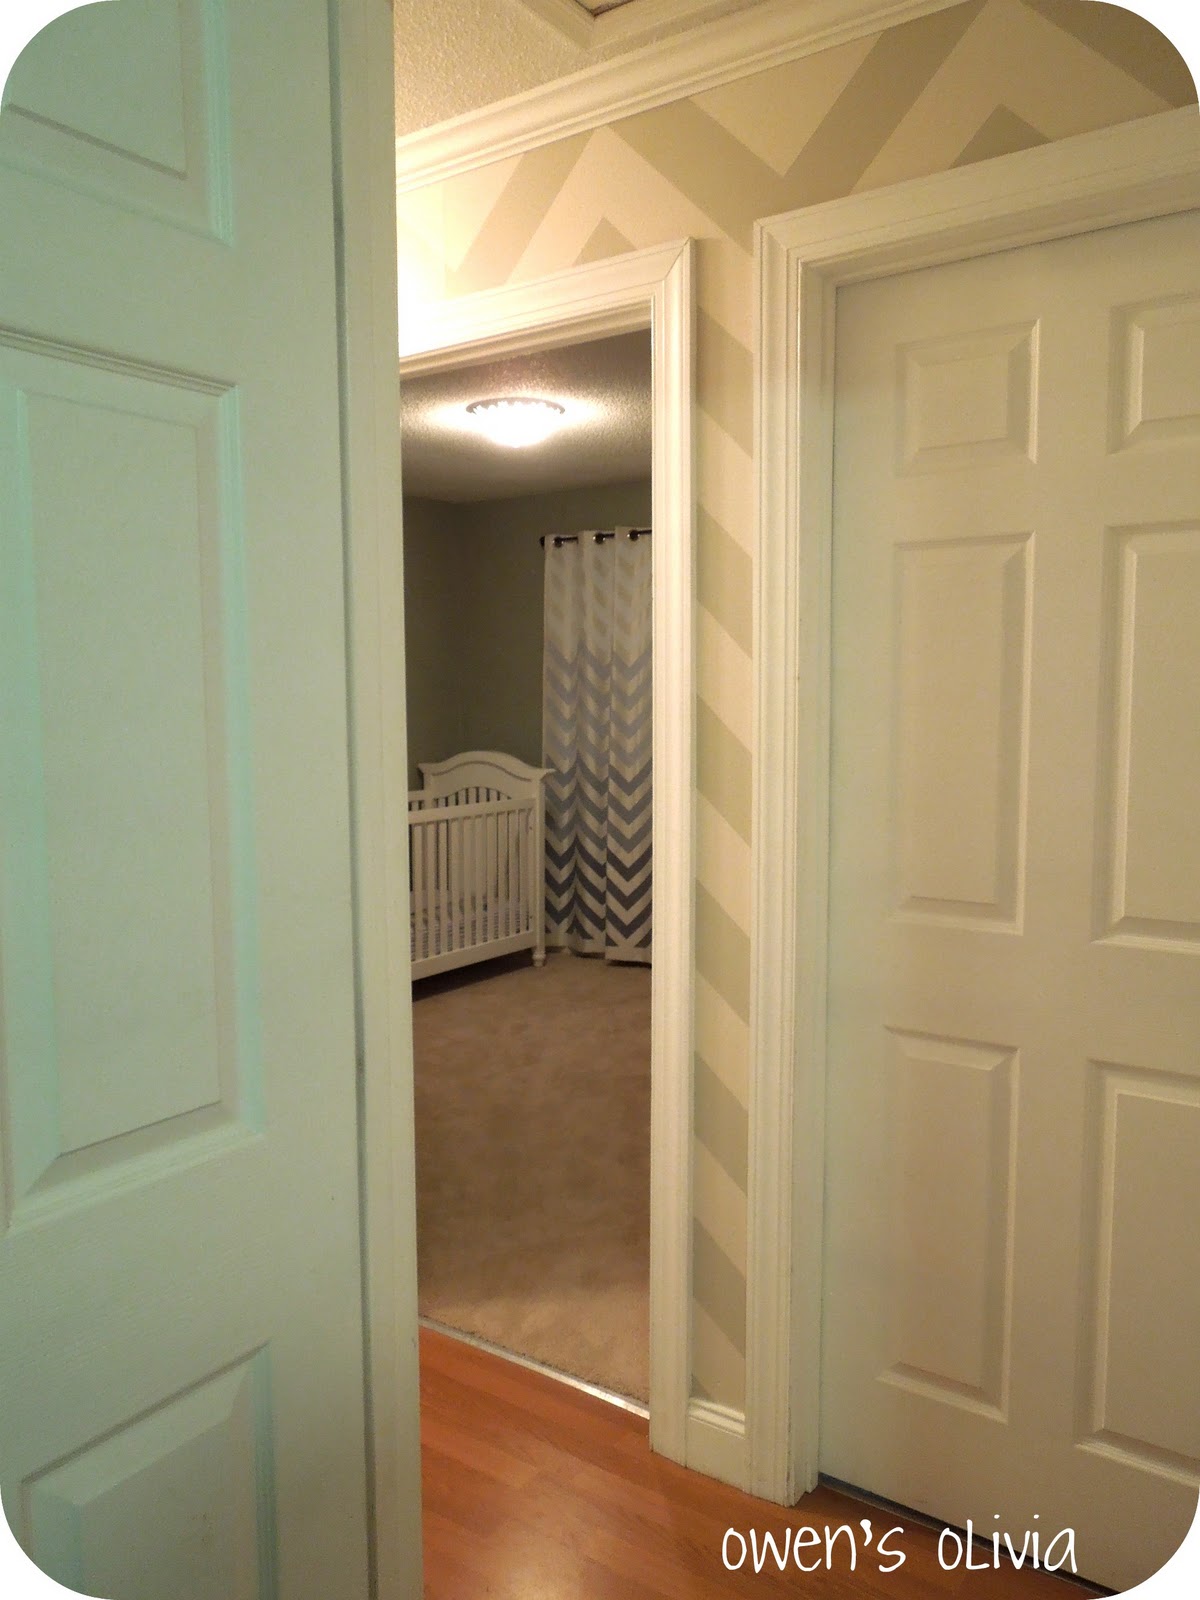
Now, just sit back and admire the new curtains!

And this is what I get to see from my room. (Yes, my hallway is chevron (painted by me 40 weeks pregnant), but I told myself no more chevron in my home. Okay, maybe a little pillow or something down the road. :)
 This project was contributed by one of our fabulous readers! We love to share your projects with this great blogging community. So, if you have projects from kitchen renovation ideas to small bathroom remodels, overhauled and repurposed furniture, spray paint updates you name it please send it in! Thanks for reading Remodelaholic!
 Labels:
Fabric,
Painting,
Tutorials,
Window coverings,
Windows
Labels:
Fabric,
Painting,
Tutorials,
Window coverings,
Windows


14 comments:
This looks great! How long did they take? That's a lot of taping!
I'm loving these curtains! Just thought I would let you know, I pinned them on Pinterest less than an hour ago and have already had them liked or re-pinned 40 times!!
@ Renewed Upon a Dream ~
I had to paint at night, so toddler wouldn't get into it! It took me several days. Taping is the longest part of the project but so worth it!
@ Sarah ~
awww, that is so sweet of ya to do that. Thanks! :)
You said that you bought the paint at Lowe's... but what type of paint?
You did a wonderful job on your curtains.
@ SmalltownOntario ~
Thank you! I purchased Lowe's Valspar paint in Satin.
Love how this turned out! Making me think about re-doing some old curtains! :)
Great job! Those lines are perfectly straight. Impressive.
That really is awesomeness! You did an amazing job.
--Jill
from Jill Made It
Does is matter what type of material you paint on? What kind of curtains did you use? I'm LOVING these!
I don't know how you find the patience to do this! It is amazing but I judt don't know that I could measure each angle the way you did. Turned out amazing though!
Simple fabulousness. I ♥ them.
Thank you everyone!
@ Svoboda ~
My curtains are polyester. I am sure cotton and linen will work just as well. I am not sure about silk, though I do think of silk screening, so that may be a possibility. My curtains came from Hancock Fabrics, and I used the Tiffany kind.
This is amaaaaaaaaaaaazing.
chevrons & ombre combined? pure genius!
definitely bookmarking this tute for later; thank you!
Post a Comment