We’ve Moved!


If you aren’t redirected here is the link:


Remodelaholic!


THANKS!

Showing posts with label Table. Show all posts

Pedestal Style Kitchen Table, Cut Up And Turned Into A Coffee Table.

11 April 2011

Pedestal Style Kitchen Table, Cut Up And Turned Into A Coffee Table.

I was too excited to wait until next week to share this little project I have been working on all weekend.

For a few years, I have been searching for a pedestal style kitchen table to cut up and turn into a round coffee table for my family room.

I have a lot of little kids, the idea of a coffee table with no sharp corners makes me happy.

It was going to be a tricky redo, because, as it turns out, people don't want to sell their nice wood tables for cheap. Even thrift stores would mark them much more than I ever wanted to spend on an item that I was ultimately going to cut up and paint. I just happened to be driving past a local thrift shop that sets of its goods out to suck you in, and there it was.

A pedestal table. I stopped on a whim, and checked the price. $75. I was hoping they would come down on the price, when the guy running it said that everything was 50% off that day. Sweet! With tax, it ended up being just under $40, which I was more than willing to pay.

Now, this puppy isn't solid wood. The pedestal is, as are the feet, but the tabletop is just veneer. Which, for me, is fine. This isn't an heirloom piece. The great thing about it being MDF on the inside is that it is a great deal thicker and sturdier than an all wood table, which means my kids can lean on it without fear of tipping.

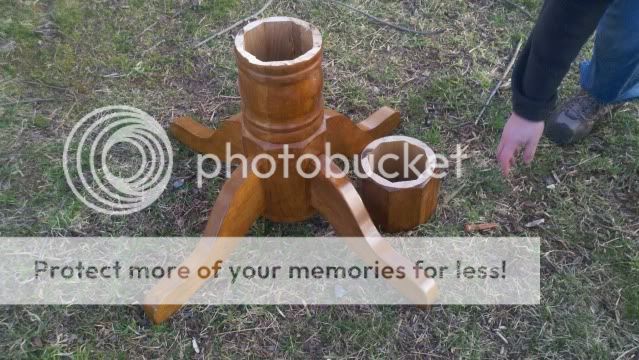
I didn't get a good "before" pic, because my hubby decided to just take the top right off of it almost as soon as I got it out of the car. So here is a before of the pedestal at least:

with some of the pedestal cut off. He got it all cut, the screws replaced, and then when we got it inside, we decided to cut it down a little bit more, so it isn't as tall as it is here:
Read more...

Re-stained and Painted White: Oak Pedestal Table And Chairs

24 February 2011

Re-stained and Painted White:
Oak Pedestal Table And Chairs
contributed by Red Hen Home


I am still on my quest to get enough of my garage cleared out for my husband to park in the garage before the frost hits! And I may just make it! :-) 

I finished one of my more ambitious projects to date. Although I have finished two tables (here and here), and even eight chairs for one of those tables (here and here), I didn't tackle them all at once. This time, however, I found a bargain I couldn't resist, in the shape of an oak pedestal table (with leaf!) and six pressed-back chairs. They've been sitting in my garage for about a month now. 


Read more...

Old Barn Door Recycled into Kitchen Table

11 January 2011

Old Barn Door Recycled into Kitchen Table
contributed by Mason Bay


Hinges, and latches adorn my kitchen table. An old barn door, attached to some legs, and perfection. 

The door became a beautiful kitchen table. 

The plain wood legs, and base needed something, so a white wash, and paint stained clothes was a must.


Read more...

Kitchen Table Refinished With Distressed Look

20 December 2010

Kitchen Table Refinished With Distressed Look
contributed by The Backyard Boutique

I have always loved my kitchen table. Lately, though, I felt like it needed a good facelift. Once again, I failed to take decent before pictures for this project. I scoured my iPhoto and here's the best I came up with. (Lucky for you; you get to see my cute Little Man!):


I decided to change the whole appearance of the table by painting the legs a lovely shade of Heirloom White from Home Depot (my favorite), staining the top a rich Jacobean by Miniwax (also found at Home Depot), distressing the whole thing, glazing it, and then polyurethaning the heck out of it (nine coats, to be exact). Five days and about 28 ant bites later (I worked on it outside, obviously), it's finished and I couldn't be more please with the results.


So, my friends, for the cost of twelve cans of spray paint (the high-end stuff, no less), a can of stain, a can of polyurethane, some sandpaper, and 5 days out of my life (I'm not kidding), I acquired (Or perhaps reacquired...?) myself a new kitchen table. And I wake up in the morning, look at it, and feel like a new person. What a steal!

Nothing like being 9 months pregnant and nesting to get my act in gear! And now on to the next project... Next up on the agenda? I'm just finished re-doing a vintage baby cradle. Come back again tomorrow and it will be posted, complete with (decent) before and after pictures. That is, unless I go into labor... Which, come to think of it, wouldn't be so such a bad idea at this point!

Read more...

Updated Pool Table Makeover

02 December 2010

Updated Pool Table Makeover
contributed by Fun With Nancy
Pool anyone?

I get a phone call one day and the hubby is all excited about a good deal on a really good pool table ($300.00) and it has real Italian slate too! To be honest all I heard was "blah blah blah" $300.00. What's a girl who has no cue (pun intended) about pool suppose to do? Great honey!!! Let's buy it!
Oh...Okay, I guess, but it's kinda of ugly honey. Oh, it's only temporary until we can afford a much nicer one (he said). Well then...Okay (I said)!
But honey, It's just so...UGLY!!! What? you want to know if I can jazz it up a little?
Well, Let's see...Yup, all I need are a few supplies, and one of these....My brother Sam and some power tools.
I started this little project with a trip to Lowe's & Home Depot. I bought 2 sizes of rope trim. The table already had trim work, but it was too boring. I put small rope trim between the old trim. Sam cut the 45 degree angles and we used a air compressor to nail it on.
The table will have lion heads and swags.
The end caps are just a little too short to fit 2 swags and the disk that will hold the lions head. So, we just cut off some of the flower on the end of the swag to make it fit. Notice the line across the table. That line indicates how far down the side rails will hang so I can properly center the swags.
The legs were just as ugly as the base so they got a larger rope trim and fun little swirly appliques on 3 sides. The forth side gets a wood disc for the lion head.
And there he is! Mr Lion head. I center him then trace around him.
Now it's time for my least favorite part. Sanding and filling in all the holes with wood filler, then repeat the sanding to get everything smooth.
No, I didn't screw up my pictures! This is how I'm going to get the lion heads onto the wooden discs. The manufacture said I could use wood glue or steam them on. I of course thought it would be fun to steam them on! I told you I was fun!!!
The manufacture stated that steaming them on was more secure than wood glue and I didn't want to take any chances since the lion heads cost $200.00.
OK, water is boiling and steaming thru the canvas. I got the canvas at Hobby Lobby in the art supply department (only cost about 3.00). The lion heads contain hide glue which gets soft when its heated.
Once the lion head is applied to freshly sanded raw wood, it bonds to the wood. So cool! I taped them just to make sure they dried in place. Working upside down is a fun all in it's own category.
One lion head on each leg, one on each end of the table, and two on each side. Ten lions total.
Swags on. Lion heads on.
Tape off. Lion heads bonded! Yeah.....
All done with the sawing, gluing, filling, measuring. This is what the table looked like before lion heads. Already a major improvement!
Just a reminder that you must mark off where the side rails go or else your appliques will not be centered when you turn over the table & put the side rails on (you wouldn't know this until the very end and that would be horrible)
Here is a view of the leg with all the appliques, rope trim, lion head, and wood filler.
Next step is primer. It never looks good, but it is a must. Especially since the table was covered with a wood laminate. Notice the spoiled chihuahua on her princess pillow.
Everything gets primed.
primered legs. I love this step because it all starts looking like a whole design instead of "parts".
Two coats of paint in your desired color. This is Sherwin Williams 6107 Nomadic Desert. I used it because it was left over from painting some of the interior walls.
Table gets two coats too.
The next steps are really fun. I love the results! All you do is mix 1/2 stain plus 1/2 Faux Glaze.
I mixed 1/4 cup glaze + 1/4 cup Black Walnut water based stain on a foam plate and painted it on. Then I got a plastic grocery store bag, waded it up and just started jabbing it until I found a pattern I liked. Do this on a trial area first. I always use scrap wood and play with finishes. If you really want to see a video of this technique go to you tube and search faux painting.
When it dries, apply one coat of polyacrylic spray (I use minwax). When that dries we can add the hang up and shading. Where almost done!
Once the glaze/stain dries and you have applied one coat of polyacrylic you can now add hang-up and some shading for depth.
use undiluted stain, in this case the Black Walnut water based stain. Apply it on the rope trim, wipe off. Then paint a thin layer around the appliques and using a cheep dry paint brush, start jabbing the stain to "smear it" or soften the look.
All highlighted and smudged up. If you try to do this without the one coat of polyacrylic between the glaze/stain step I assure you, you will regret it! Major mistake!!!! You will remove the previous step and end up with a mess! But look at it from the point of view that you get to start over and learn! :(. Do yourself a big favor! Don't skip that step :)
See how much depth you get. I also wipe some of the stain over the applique to give it hang-up. Notice how this brings out all of the detailed work on the appliques.
The lion head and swags just pop with detail once the hang-up is applied. Simply spray the last 2 coats of polyacrylic to give it a long lasting finish. I used Minwax clear gloss polyacrylic spray.
This was actually the hardest step of all. Each side rail has 3 rail sights (used by the pool player to line up his/her shot) and I had to cover them with tape. Once they are painted the only way to get the tape off is to cut it out. OMG! this sucked!!!! But once I got them all off it was easy again. All I had to do when I applied the glaze/stain was to wipe the sights clean with a damp paper towel (while the glaze was wet, so you still have to be very careful).
side rails with sights all cut out
Once the side rails, ball pockets, and felt are added the table is done!
Not too bad for an amateur! I think the table looks amazing and now we don't have to use it as a temporary table. Total cost $1000.00! (300 for the table, 200 for lion heads, 100 for swags & rope trim, 400 to have it put together, re-felted, and leveled).
Honey, I hope you like your new pool table with that Italian slate you were so glad to get! I know I love it! Who called it ugly??

Read more...

Twin End Tables Painted Green

01 December 2010

Twin End Tables Painted Green
party hightlight by Crissie's Collections

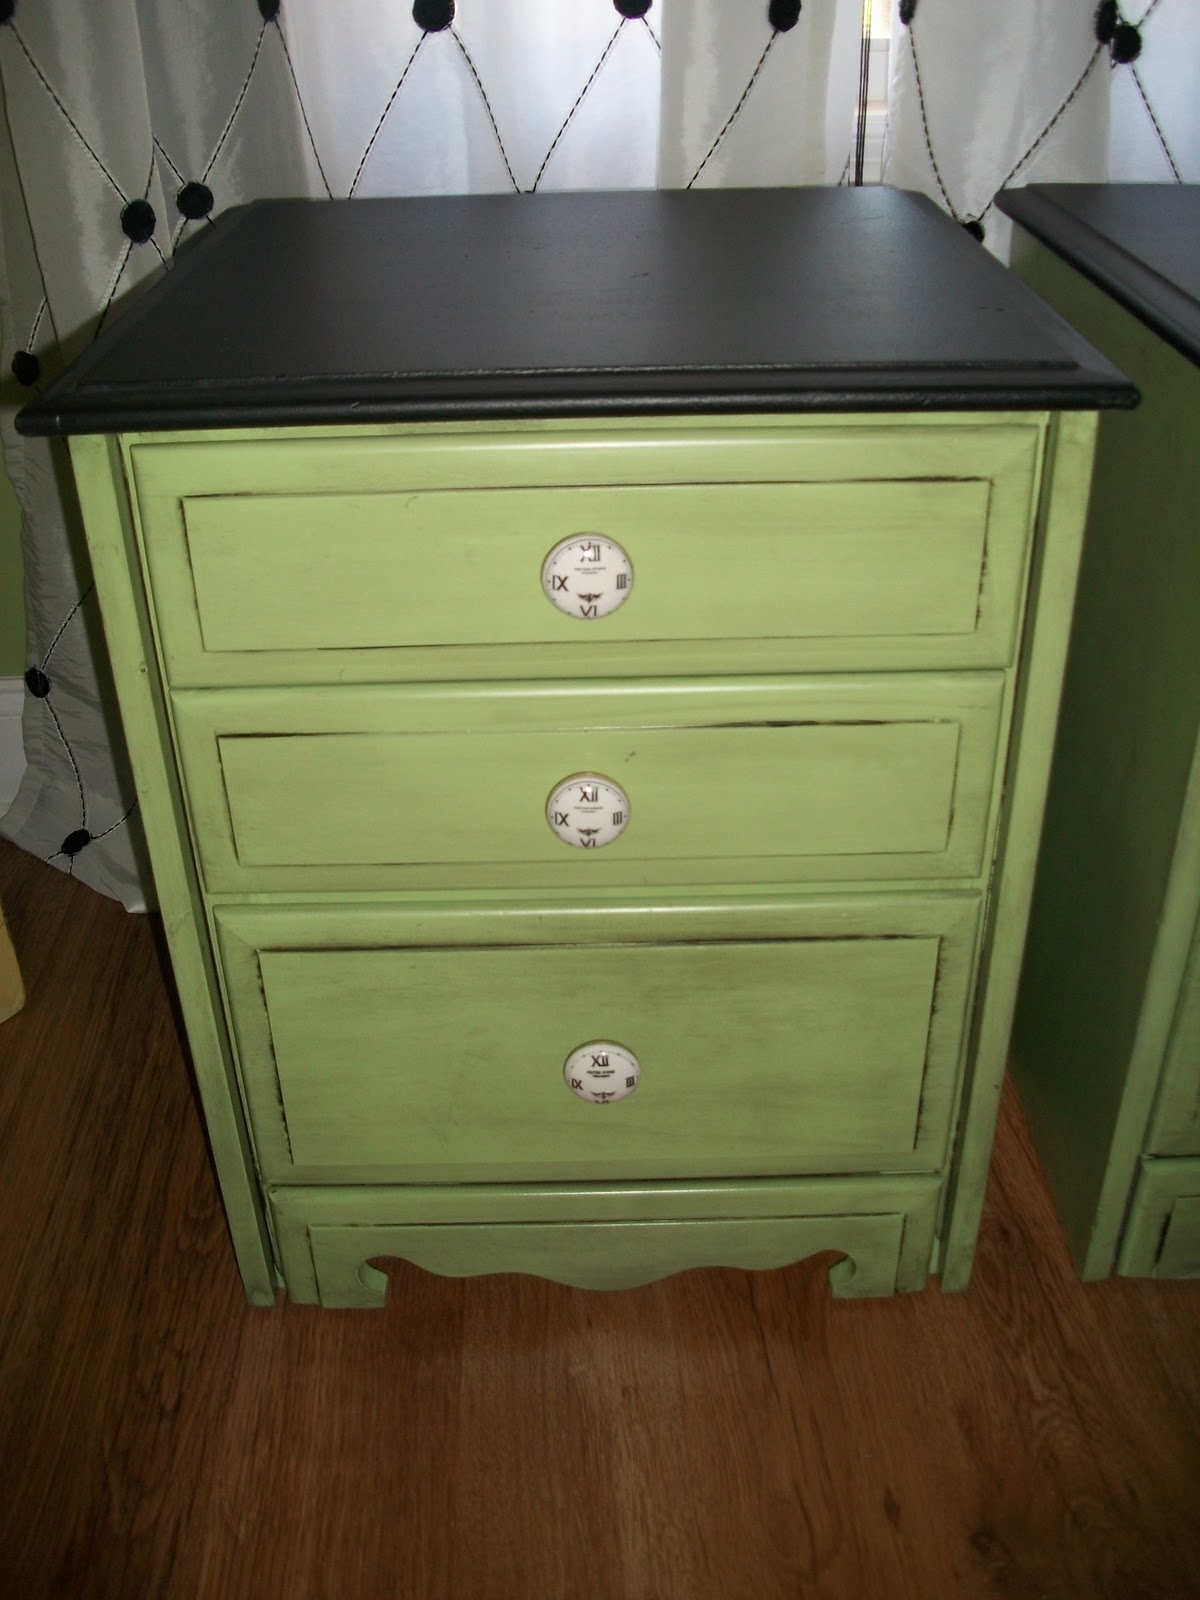
I picked up this very homely pair of three drawer end tables off of Craigslist some time ago. They were solid wood and the perfect sized  tables for each side of my sofa. Today they finally received their long awaited makeover. I used Valspar Pistachio and followed with a light glaze, the tops were painted with chalkboard paint. The clock face knobs I purchased at Hobby Lobby shortly after buying the tables. 


Read more...
Related Posts with Thumbnails
Emealz - Easy Meals for Busy People!
Home & Garden Blogs Home & Garden Blogs - Blog Rankings

Blogging  tips, tutorials and SEO

From Here to Eternity

  © Blogger template On The Road by Ourblogtemplates.com 2009

Back to TOP