Gorgeous Big Girl's Bedroom and How She Did It ALL!
I can't believe I'm finally showing you this room! Those of you who stuck with me through all 39 posts regarding Babygirl's Room deserve a drink medal. And despite taking sooooo long to complete, I love absolutely everything about this room! You've waited long enough, let's get to it!
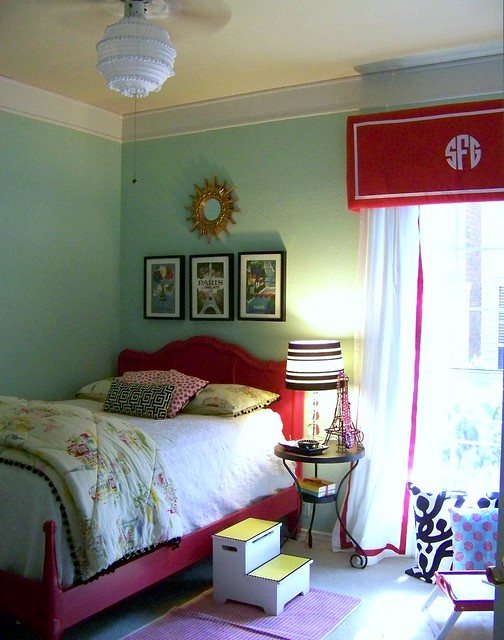
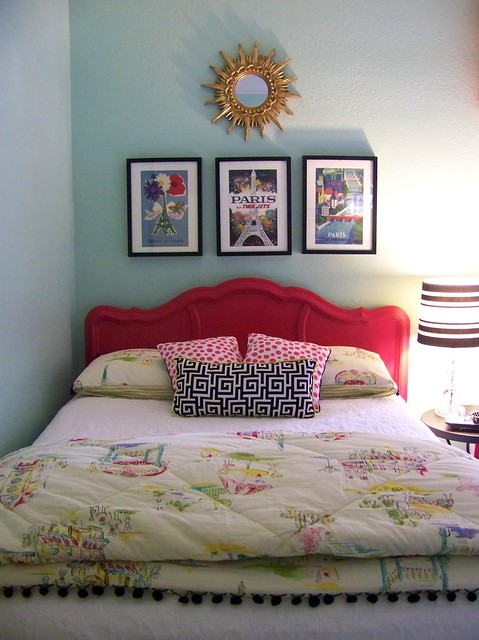
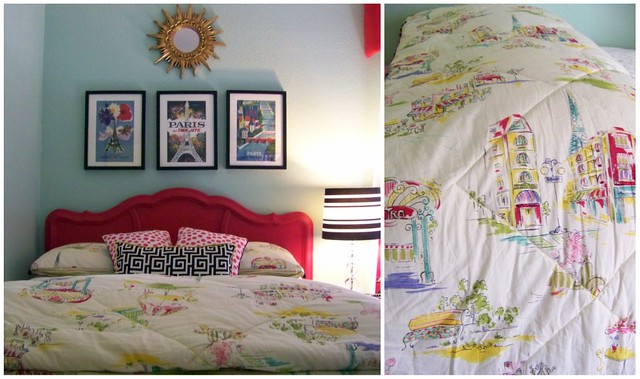
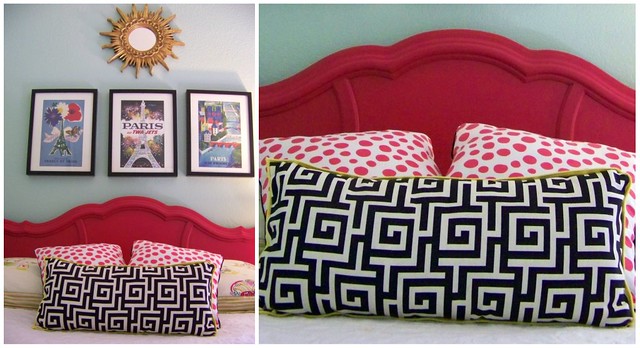
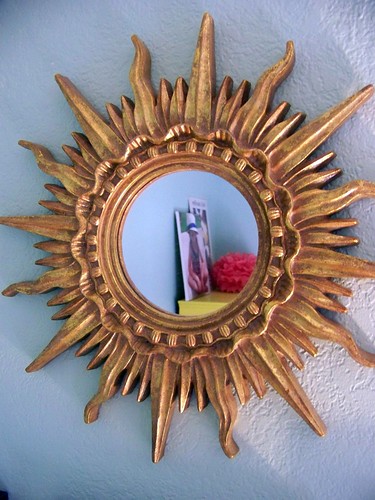
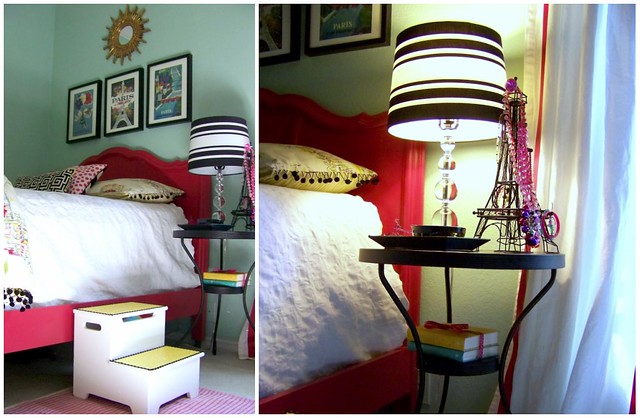
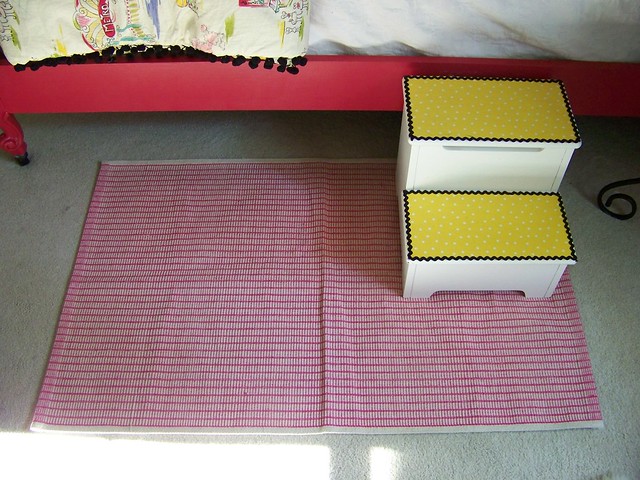
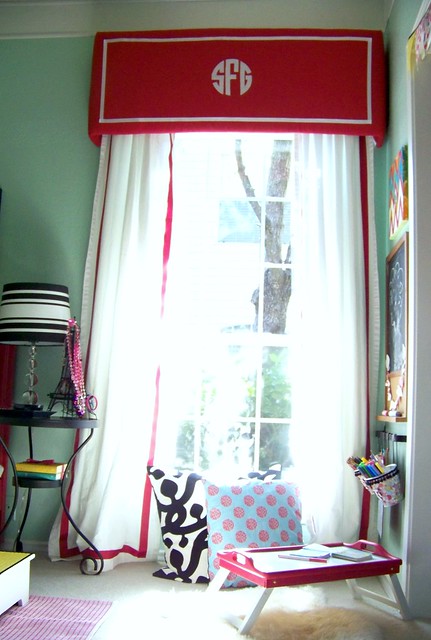
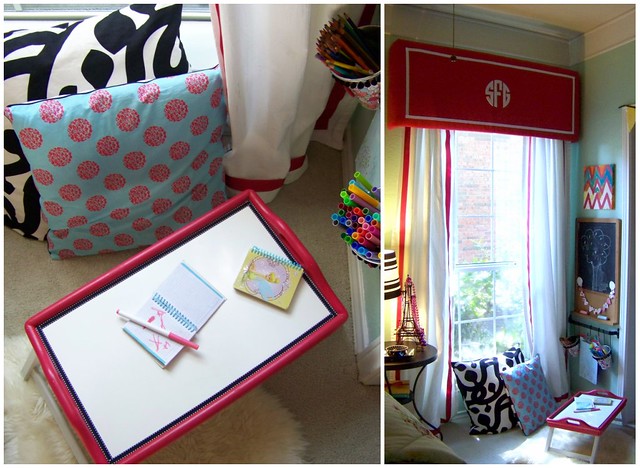
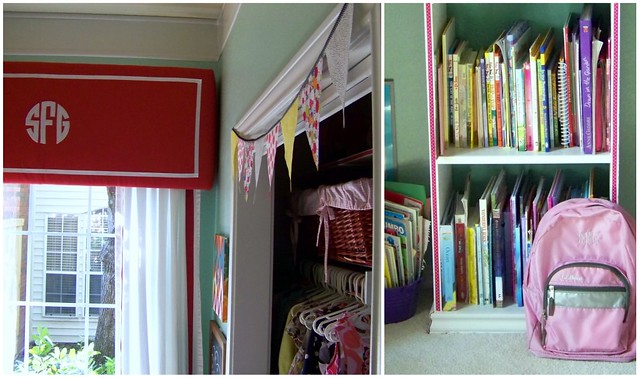
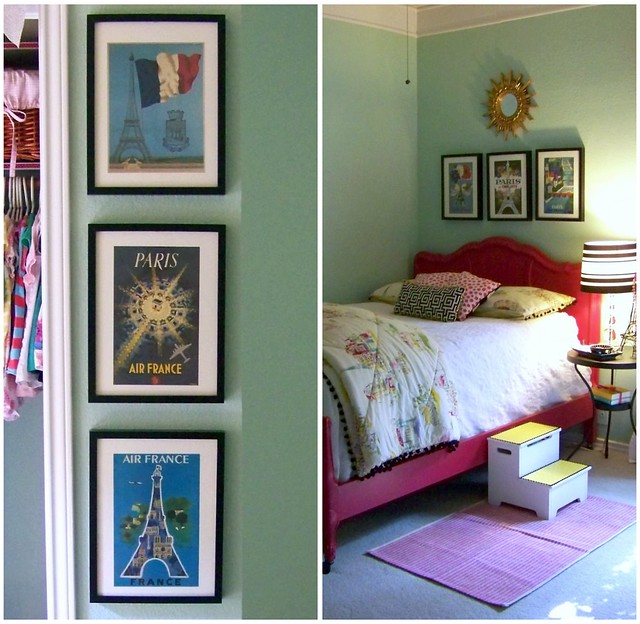
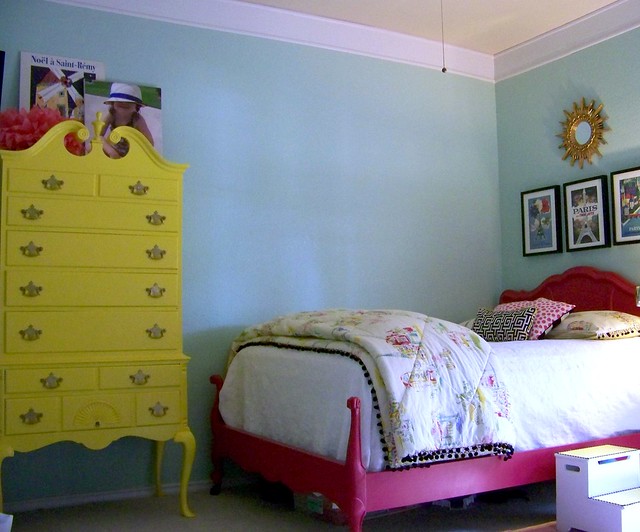
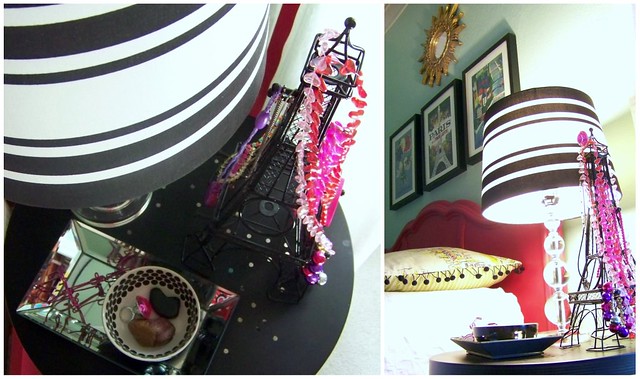
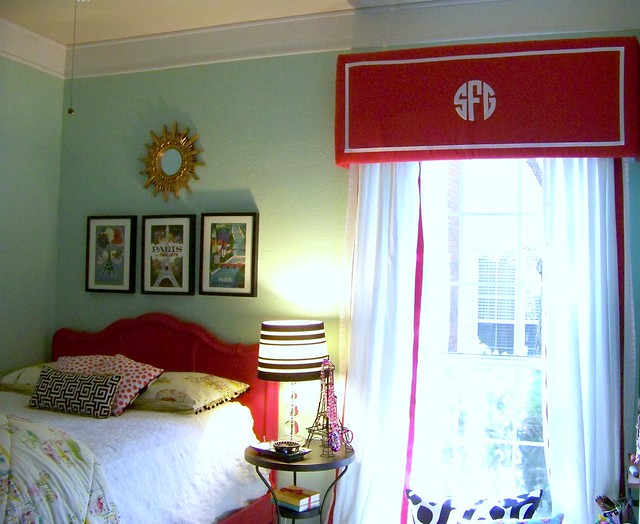
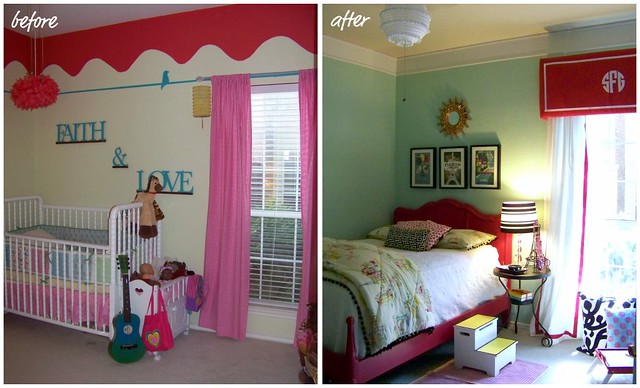
After choosing the color scheme, I found this adorable bedding with Parisian flair...so that became the underlying theme of the room. And painting the bed a fun radish color helps it pop off the wall for more weight and impact.There were so many fun colors to pull from, and the No-Sew Pillows were a great opportunity to add more prints as well.I scored this mirror ages ago and it's been waiting for the perfect spot. Proof that you don't need to shop kid's stores for children's rooms. They are little people, but can still appreciate big design.I originally wanted the bed on a different wall, flanked by side tables. But the dimensions of the furniture and room didn't allow for that floorplan, so it sits snugly in the corner. The main pieces are quite substantial, so I love the juxtaposition of the leggy side table (borrowed from another room, along with a lamp that lost it's home after Lamp-A-Palooza). It's the perfect spot for her Eiffel Tower Jewelry stand.I love to layer rugs over carpet for more color and texture. And the stepstool proved necessary due to the unexpected height of the bed!The window is the biggest transformation in the room. By raising the curtains and adding the Monogrammed Pelmet, it demands presence...as opposed to its former tiny, forgotten window status.I was surprised how great the monogram turned out...and it's held up fabulously!
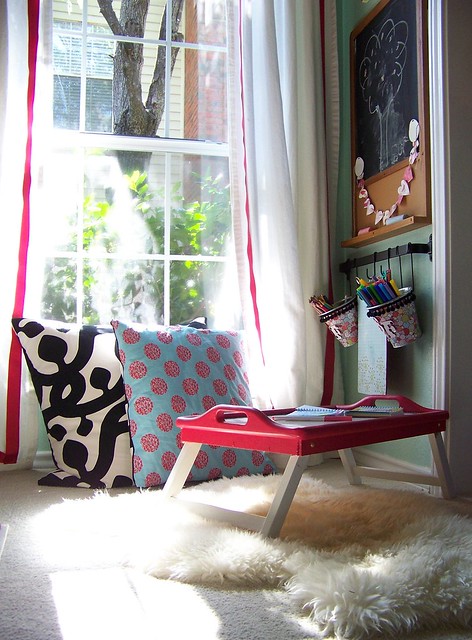
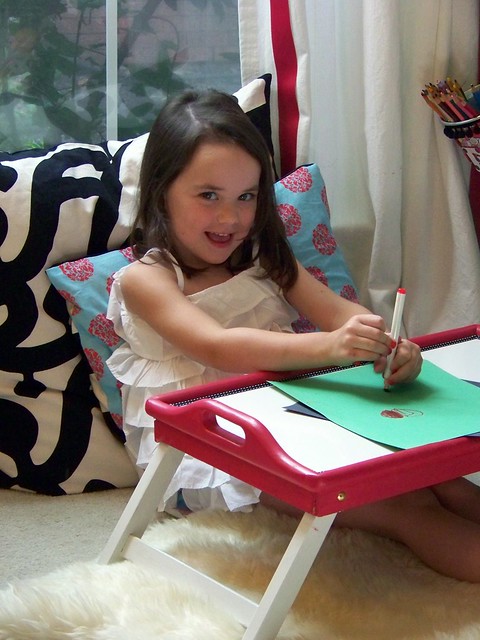
Since Babygirl is only 5, a full study desk isn't necessary yet. But I designed her an Art Center so she'd have an area to create and lounge.
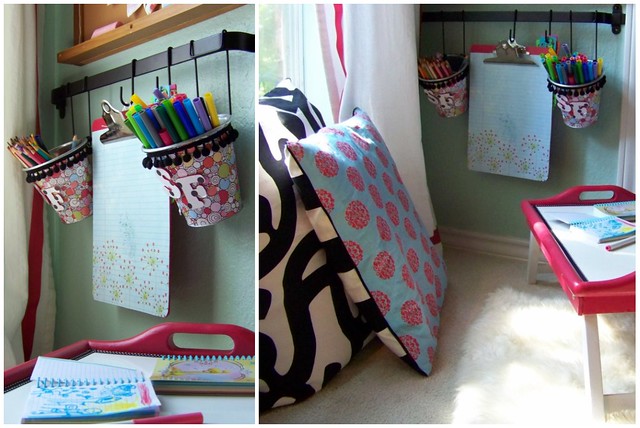
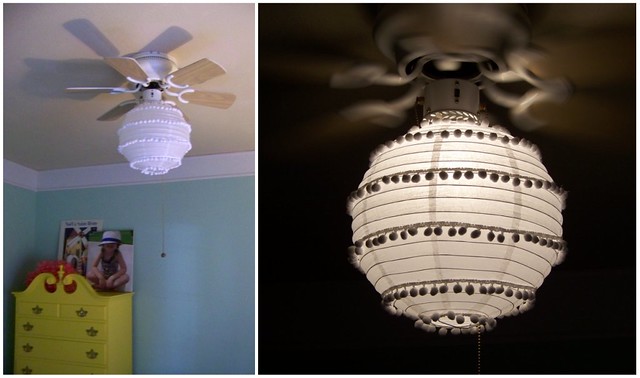
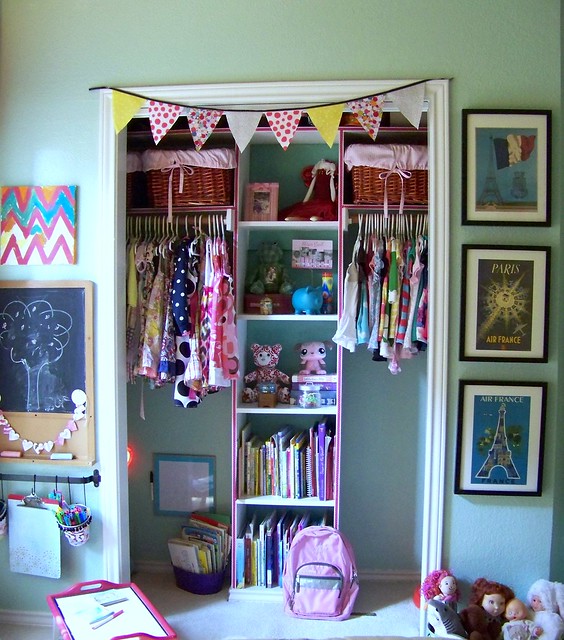
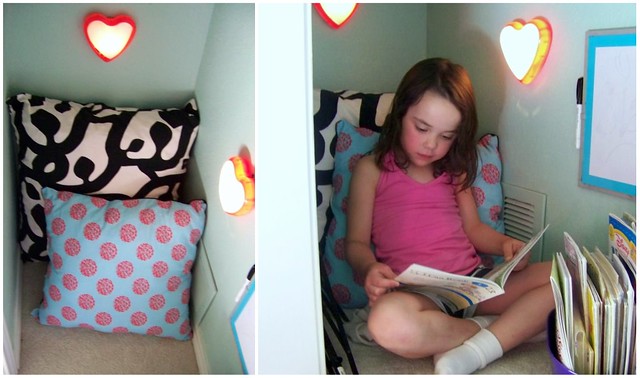
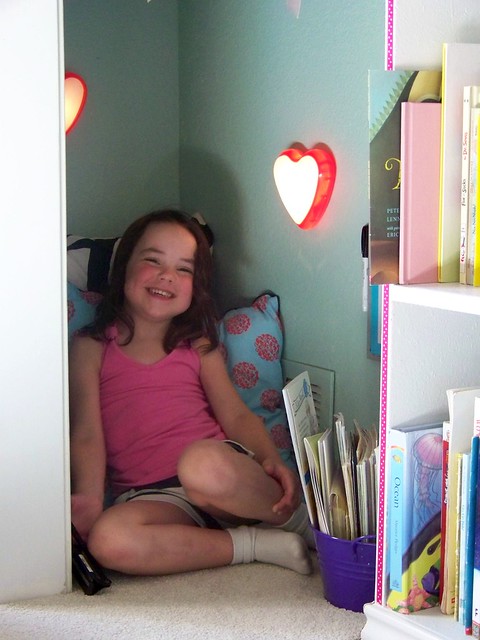
A madeover breakfast tray became the perfect lap desk, and monogrammed tins hold all the supplies she needs to create artful masterpieces.The light fixture proved to be challenging, but after a failed project, I love the simple pom-pom lantern we ended up with.The sliding doors made it difficult to utilize the closet, so I just took them out. By painting the inside and adding ribbon trim to the shelves, it becomes part of the whole room design.I made the fabric banner to bring more pattern and youthful energy to the room. Babygirl loves having all her books within easy reach too, so the bottom shelves are dedicated to them.All kids love hidden nooks, so the unused corner of the closet became her own special reading spot!
Pillows make it comfy and battery operated lights brighten the dark space. She's got her books within reach, and a dry erase board nearby for special notes. Perfect little spot for a special little girl!
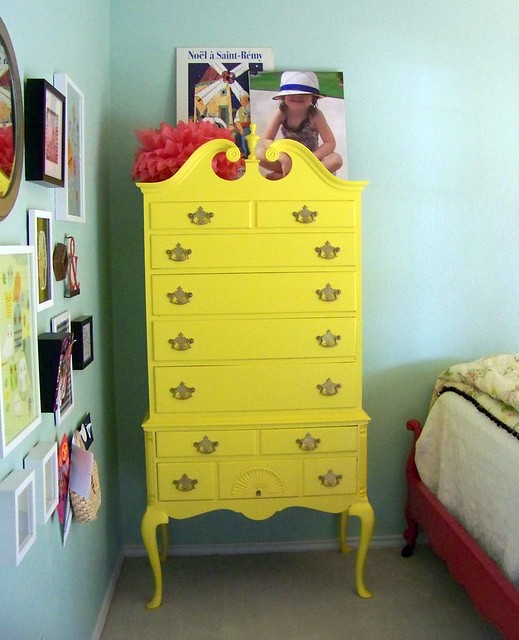
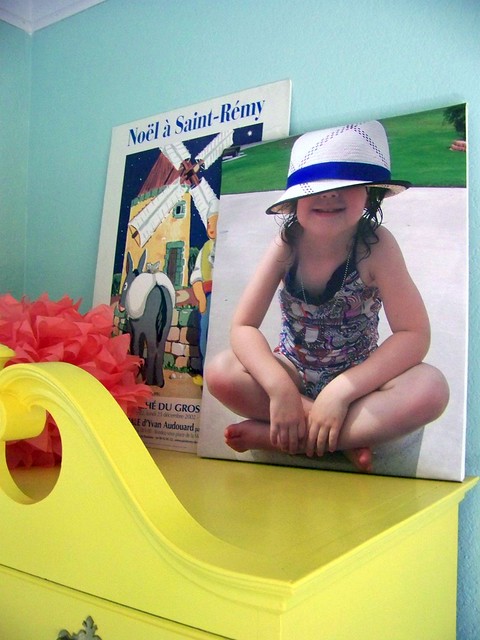
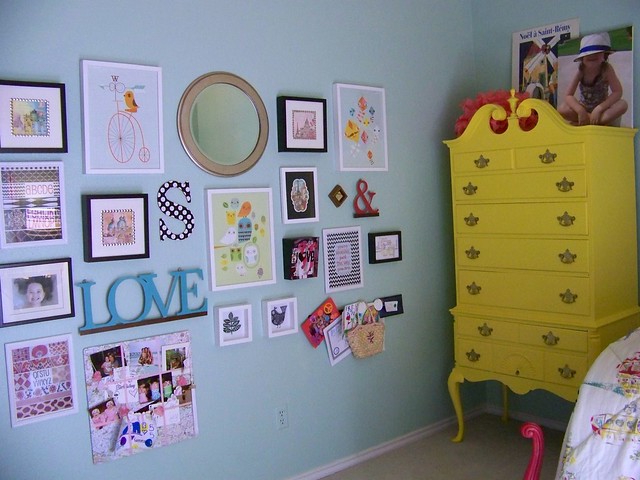
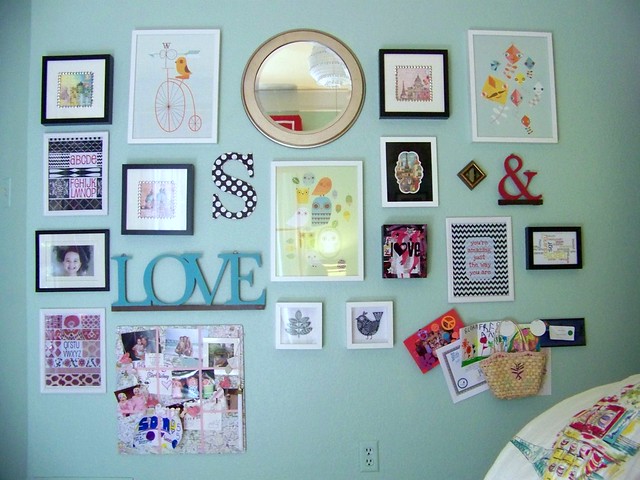
The Paris prints are a nice vintage touch in the room.Painting the highboy a glossy yellow was the best decision I made in the room. It is definitely my favorite piece. I know my grandparents would love that their dresser found its way to her room, and with such a fun impact.The DIY Canvas Art is a fun way to customize the room, and show off her personality.I thought of leaving the side wall bare, but couldn't resist the opportunity to create a fun Gallery Wall.The collection on the memo board and magnetic strip is constantly changing, and she loves having control over what she displays. I foresee changing out the magazine art quotes as she grows, and the Suzy Ultman prints can easily be swapped as her taste changes as well. I'll gladly move the DIY nailhead trim art to another part of the house if she tires of it!My
oops moment when painting the walls turned out to be a fabulous mistake since it resulted in a fun
painted ceiling. And the
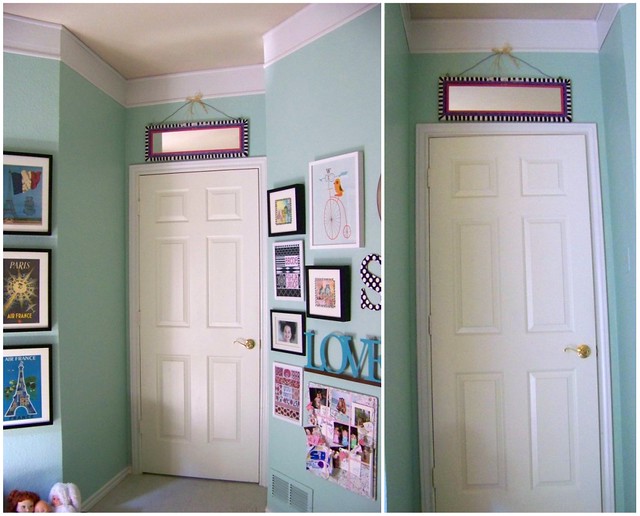
Faux Crown Molding adds architectural interest. I love the mirror hanging over the door, it reminds me of the transom windows we had in our
Paris hotel.
 There is definitely a lot of strong colors in this room, but perfect for a fun-loving little girl. I also mixed several different patterns, but kept them all in the main palette of aqua, radish and yellow for cohesiveness. The black accents ground the room and lend some sophistication.She may be young, but she can still appreciate special touches like a sheepskin throw rug.And fancy accessories like mirrored trays to hold small treasures.
I think her room is the perfect mix of youth and sophistication. Most nights you'll find all four of us snuggled up in her bed. I could lay there with her for hours, just looking around and listening to her stories.
And since we live for Before & Afters, here's a peek at where the room started as a
nursery.
And how does my client feel about the room? J'Adore!
I had so much fun creating this special room for my sweet girl, and I hope she feels treasured in it. I tried to design it with her personality and style in mind. After all, her room deserves as much time and attention as the rest of the house.
The majority of this room was DIY projects, just click each link to read more about them. I can put together a source list if you all are interested...just let me know, and add any additional questions you may have in the comments. Thank you so much for your honest and invaluable opinions along the way, and continued encouragement and support! *Group hug* We did it!!
Read more...

 Labels:
Fabric,
Girls Rooms,
Kids,
Painting,
stripes
Labels:
Fabric,
Girls Rooms,
Kids,
Painting,
stripes


 This project was contributed by one of our fabulous readers! We love to share your projects with this great blogging community. So, if you have projects from kitchen renovation ideas to small bathroom remodels, overhauled and repurposed furniture, spray paint updates you name it please send it in! Thanks for reading Remodelaholic!