We’ve Moved!


If you aren’t redirected here is the link:


Remodelaholic!


THANKS!

Showing posts with label Wall Finishes. Show all posts

Brightening Up the Dining Room

03 October 2011


Brightening Up The Dining Room

I had to clean my house yesterday for company so I thought it would be a great time to take some photos of what work we've done in some more of our downstairs rooms.

Here's the before picture with navy walls and dated wallpaper. The chandelier that we got on Ebay is already installed (after 4 or 5 attempts).


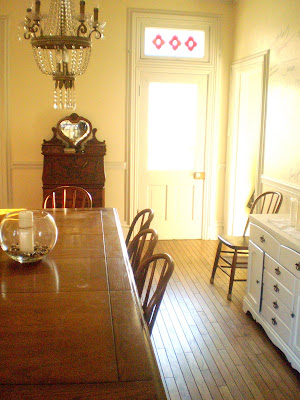
Here is what is looks like now with the icky wallpaper gone and the dark walls and trim brightened up with light paint.


The table was a local Ebay purchase and the chairs came from the church where my dad and grandfather were pastors and where my parents were married.

The china cupboard was from the Pennysaver years ago and the curtains are from a junk shop in New Brighton called Capo's. It's the kind of shop that is cram-jammed with stuff and the guys who work there know exactly where everything is. Love it.


The opposite side of the room. The desk was my husband's grandma's.

This is one of my favorite things in the whole house. We call it our autograph wall and I got the idea from a wedding I attended last summer where they had everyone sign a picture of the new couple. I'd been raking my mind for wall art ideas and when this one came to me. I love the graphic quality of it as well as the happy feeling I get when I see the signatures of those we love. Makes a great conversation piece too.

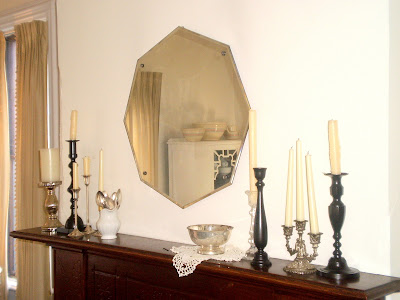
This is the mantle...which changes frequently, of course.


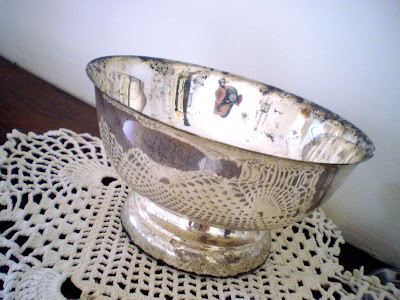
The following are all pieces bought at junk shops for a few dollars each.


It's not finished yet. But then, no room in my home ever seems 'finished.'

Half the fun of a house is changing it!                          

                                                 
This project was contributed by one of our fabulous readers! We love to share your projects with this great blogging community. So, if you have projects from kitchen renovation ideas to small bathroom remodels, overhauled and repurposed furniture, spray paint updates you name it please send it in! Thanks for reading Remodelaholic!


Other beautiful dining rooms:

Read more...

Stenciled Wall Master Bedroom

04 September 2011

***The Pinhead Project Link up will be Tuesday!  
Sorry I am not done writing my post!  
Can't wait to see you all tomorrow and your Pinterest Projects!


Stenciled Wall Master Bedroom 


I sprung this project on my husband about a week in advance of getting started.  This nearly caused a divorce because I told him that we could handle it without him and he wouldn’t have to do any of the work.  Well needless to say we did end up needing his help, he was not a happy camper but in the end he absolutely loves our new beautiful bedroom.


As you can see the walls were a dull beige color and everything was dark from the furniture, curtains and bedding.  The winter scene outside the windows certainly didn’t help!  Because the house is so old there was a lot of patching to do on the walls and since the walls are made of plaster, I recommend using Behr’s Ultra Primer and Paint in One.  It worked great for coverage and imperfections on the walls.

Read more...

Vintage Inspired Book Page Bedroom Makeover

30 August 2011

Vintage Inspired Book Page Bedroom Makeover

Design collaboration by

Read more...

Powder Room Transformation!

09 June 2011

Powder Room Transformation! by Carrie

Hello fellow Remodelaholics!
This is Carrie from Hazardous Design. Don't let the name of my blog scare you! The house my husband and I moved into about nine months ago is located on Hazard Ave. It was built in the late 1800's and needed a bit of TLC. Hazardous Design is a documentation of our renovation.

I was very excited when Cassity invited me to share the highlights of our recent powder room remodel and how it went from looking like this:

to this!
It is a bit of an improvement, no?

It all started back in December when my husband, Chris, began tearing apart the old bathroom,
and framed up a new wall to hide the plumbing stack in the corner.
Since we were going through all this trouble, we decided to reorient the bathroom sink and move it against the new wall instead of where it had been under the window. This meant we could have a bigger sink and wire for sconces. So next, we called in our electrician to do the rough wiring.
And then the plumber to install the pipes for the new sink location.
With that done, we could finally hang the wallboard.
Finally we got to the exciting stage of the project (at least for me!), where all of the decorative elements started to come together. We opted for wide plank vinyl beadboard hung 4ft high,
and to use several different sizes of white carrera marble tile.  Chris laid them in a mosaic pattern.
After painting the ceiling blue to match the wallpaper, he installed crown molding. It makes the tiny room look so elegant!
We called plumber back to install the toilet, sink, and radiator, and then asked the wallpaper hanger to come and work his magic.
You can imagine how excited we were at this point. The only thing left to do was install the sconces and overhead lighting!
So finally, after about six months of living with construction debris, dust, materials and tools in my kitchen, we have a completed powder room that looks like this:
 The mirror was an antique mall find. It was originally gold, so I spray painted it black.


If you are curious about what else we might be working on on Hazard Ave, please stop by and visit us at Hazardous Design!


Read more...

Creating a Calming And Serene Master Bedroom

24 May 2011

Creating a Calming And Serene Master Bedroom by MJ

Hello fellow Remodelaholics! I'm so thrilled to be able to share my latest remodel with all you wonderful fans! My name is MJ and I blog over at One Nutty Girl. When I started One Nutty Girl a few years ago I never imagined I could accomplish such a project like this. But, thanks to BlogLand, and all its wonderful inspiration, I have evolved into One Nutty Girl who can accomplish things she never thought possible! I'm obsessed with painting. I paint anything and everything I can get my hands on! It is cheap therapy and the best way to transform anything!

The Before and The AfterThe Before and The After

Read more...

Girl's Dream Room and Re-purposed Bed to Desk

05 April 2011

The Yellow Cape Cod shows off her Daughter's New Room!

I am so excited to be here at Remodelaholic.  Thank you so much, Cassity, for asking me to be a guest today. 

A little about me.... I am a Banker with 10 years of Real Estate Investment experience.  I also happen to be the Biggest Home Design Enthusiast ever.  The Yellow Cape Cod, my blog, is where I share projects from my home as well as inspiration from others that share my passion for design.  The Yellow Cape Cod provides online design consultations to help others create a home that they love, on any budget.

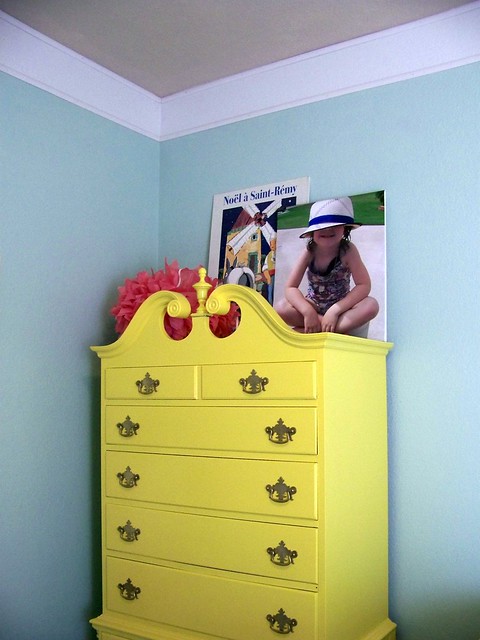
My daughter went on a surprise trip to Greenwich, Ct. and New York City with her Grannie. While she was gone... I took the opportunity to clean out her room and spruce it up a bit.


Read more...

Completely Updated Foyer! DIY

29 March 2011


Hello! My name is Tracie and I am author of cleverlyinspired! So happy to be visiting here at Remodelaholic today! I specialize in DIY projects along with crafts, recipes, trash to treasure, sewing...you name it! I love to share with my readers what I learn along the way. My background is in Photography and Communications---so writing and sharing on my blog have become like second nature to me. Please stop by and take a look at some past projects!

Here is a project we recently finished in our home. Our foyer was a bit dated and needed a breathe of fresh air...so here is the before...


And now....LOVE ;)
Here is how we went about changing things....

Read more...

DIY Paneled Wall Tutorial

17 March 2011

DIY Paneled Wall Tutorial
contributed by Decor Chick
Thanks for all of the love on my stepson’s new paneled wall!  We just love it, and so does he!
Ok, now on to the tutorial.  I have to give a special thanks to Rambling Renovatorsfirst and foremost for the inspiration behind this project.  If you haven’t checked out their paneled wall yet, you must do that.  They even went the extra step and added some pretty trim to each of the boards.  I LOVE the look.  We didn’t add any trim to our version so it’s a little more modern for the boy’s room, but both styles look great!
THE STEPS:
1st: Since there is no need to change what’s already a good thing, I used RR’s measurements for the boards and had them cut the same width.  I bought 2, 4×8 sheets of MDF a 1/2 inch thick at Home Depot for $20 each, and had them cut the sheets into 4 inch wide, 8ft long strips for me.
NOTE: If I were to do this again, I would splurge and buy primed MDF to cut back the painting time a little.  I’m not sure if the primed MDF is sold in big sheets like this, but I would think so?
2nd: Paint your wall white, or whatever color you will be doing this BEFORE you add the boards. Trust me. :)  You should also lightly sand the boards so they are very smooth and clean up any rough edges. And if you want to be super efficient, you could paint your boards before you nail them up too.  I didn’t do that of course. :)
3rd: I made a frame around the wall with the boards first, and just nailed them up with the nail gun.

Read more...

Best, Most Complete Wainscoting Tutorial Ever!!

14 March 2011

Best, Most Complete Wainscoting Tutorial Ever!!

Read more...

Faux Board And Batten For $50

10 March 2011

Faux Board And Batten For $50
contributed by Little Blue Chairs


I am calling this collateral damage.


After spending weeks working on the storage space across from the bathroom I got it in my head that our bathroom was all wrong and needed a bright, clean new look.  So I decided to say Bye-Bye to my little birdies and their trees.


 Now, Don't get me wrong.  I loved my little trees, especially since they were a labor of love (check out Making Mistakes Work).  But, we have been living with them for almost 2 years, and I just felt the bathroom was just screaming out -white, I want to be white. 

I have been having this back and forth struggle with trying to go very pale or adding color to my space.  Latley, I am being seduced more by the very pale look of the Scandinavian country styles that I so love.  So it was an easy choice when it came to changing our bathroom.

Since it is such a small space I felt I could try it out.


I also, wanted to try my had at the faux board and batten.


I think I love it!.

It took me a weeks worth of time to do the work, and around $50 in materials.


I pretty much stripped it down and let the natural elements do their jobs.  The shelf I ended up using was re-purposed from the basement.  I still have 3 of them down there. I love the way it looks so much that the remaining shelves may show up in other places.


And the best response I got was from my daughter who told me it was so beautiful, it brought tears to her eyes. 


Read more...

Faux Crown Molding

08 March 2011

Faux Crown Molding
contributed by Hi Sugarplum!


Are you ready to be mildly wildly impressed?!? Are you like me and easily wooed by an easy and inexpensive DIY project? Then today's mega-post is for you!

A major component in Babygirl's Room is complete....the Faux Crown Molding!!

100_2929

Love it? What if I told you the total cost was $30?!? Now you're impressed! Here's the 'How-To.'

I'll save you oodles of time wandering the aisles of Home Depot, while on the phone describing every possible option to your aunt, and just tell you what to get! 

Read more...

DIY Stenciled Faux Wallpaper

23 February 2011

DIY Stenciled Faux Wallpaper 

I love the look of wallpaper - but it can be sooo expensive!  When J and I bought our condo {almost exactly 3 years ago}, the first thing we did was wallpaper my office and our master bedroom.  I LOVE how it turned out and certainly don't regret it.  But since then, I have come across some GREAT alternatives!

{I apologize for all the crummy iPhone pics!}


Anyway - here is my DIY painted wallpaper that I did in my entryway:

Read more...

Beautifying the Master Bedroom

21 February 2011

Special Guest Post:  Beautifying the Master Bedroom 
**If you get the chance, please help her out by voting for her in the Ivory Homes Interior Design contest if you can!   All you have to do is go to Ivory Homes Facebook page, "like" them, and then "like" my submission.  Last day to vote is today!

I am thrilled to do a guest post here today.  I feel honored to be amongst the pages of such talented bloggers and DIY-ers!

My very humble and oh-so-small blog, Little Miss Penny Wenny began late last year in attempt to share the joy with others in some of my favorite domestic and creative hobbies- furniture revival and reupholstery, cooking, sewing, decorating, and thrifting.  The transition for me from a fast paced professional career to a stay at home mom was a difficult one to say the least.  Finding the joy in this chapter of my life has truly changed my perspective.  I feel so blessed and happy to be where I am!  My goal is to help others find that joy as well.

My hubbs and I recently tackled a huge project in remodeling our Master Bedroom.  This space hadn't really been decorated at all since we built the house last year.  I had slowly been collecting pieces that I wanted to refinish or decorate with for the space, when my friend informed me about an interior design contest that he suggested I enter into.  Me?  Interior Design???  HA!  Having had no professional experience or training in my life on the subject I thought it was a laughing matter.  However, I do love a challenge.  So within about a week (and absolutely no sleep) our bedroom went from this:


to this:


Read more...
Related Posts with Thumbnails
Emealz - Easy Meals for Busy People!
Home & Garden Blogs Home & Garden Blogs - Blog Rankings

Blogging  tips, tutorials and SEO

From Here to Eternity

  © Blogger template On The Road by Ourblogtemplates.com 2009

Back to TOP