We’ve Moved!


If you aren’t redirected here is the link:


Remodelaholic!


THANKS!

Showing posts with label Nurseries. Show all posts

Beautiful Green, Navy And White Nursery

17 May 2011

Beautiful Green, Navy And White Nursery  by Shelli

Hi ya'll!  My name is Shelli and I am so happy to be visiting Remodelaholic today!  When Cassity asked me to share my baby girl's nursery with you I was super excited, what an honor!  I am a new blogger of 3 months, and am enjoying learning more and more as I delve into blogland.  Wow!  Who knew?  I am a former corporate junkie in the world of medical device sales, turned stay at home mommy to the cutest 15 month old hot mess, baby K.  I blog about all things stylish with an emphasis on interior design with a budget in mind- a' la mode

Cassity asked me to share a few details on baby K's nursery and I am honored to do so!  My life changed in February 2010, as my little girl entered the world.  Her nursery is one of my FAV rooms in our home.  It is bright and cheery and makes me happy- I can only hope it does the same for her (fingers crossed).


I started with the basics.  I knew I wanted an iron crib for an old school feel.  I also knew that I wanted to go with white furniture basics for a fresh crisp feel to the space.  The glider is great for late night rocks with baby, but has a club chair feel.  No need for an ottoman, just use a stool!  Mine came from a garage sale over 15 years ago, and has been upholstered in every fabric on the planet.  Well, not really, but you get the idea!  I repurposed a slipper chair from a guest room for extra seating and bought a changing table on clearance knowing that it will not stay in her room forever (thank goodness diaper changing doesn't last forever!).


The color palette of this nursery came from this $29.99 lamp from Tuesday Morning.  I love the bright fun green (very unisex) and the straw shade that gives some texture.


I am a big believer in creating a warm and fresh space for baby with pops of color for visual stimulation without being too literal.  In fact, the pillow on her glider was found in the clearance section of HomeGoods.  You certainly don't need to find your nursery decor in a baby boutique.


Never underestimate the power of etsy!  The possibilities are endless.....  I found these very 'non baby' fabrics (Modern Meadow), found a shop specializing in crib decor, and presto!


Storage is important in EVERY room, right?  The basic bookshelf tower came from ikea, but the mix of baskets and buckets were all from TJMaxx, HomeGoods, and from various rooms in the house.  No need to waste money on specific containers sold at places like Potterybarn Kids (though some are super cute!), it makes it more interesting when the containers aren't as expected.  Oh, and a little ribbon never hurt either!


My favorite new item in the room is this fun take on an animal skin rug.  Gotta love a splash of whimsy! Afterall, it IS a room for little people, right?  Some fun is always good!


I love adding a dash of history in a room to ground the decor.  We all like to reminisce and love it when a piece has a story to tell.  In my baby's room, it is right inside of the shadow boxes.  These sweet little outfits were my husband's baby clothes.  How was he ever that small?  I can't wait to share them with our little girl one day when she is old enough to understand...and kudo's to my mother in law, for keeping his baby clothing in PRISTINE condition (no pressure! lol)

A BIG thank you to Remodelaholic for having me today!
For all sources, head over to my nursery home tour!
www.alamodemaven.com

Read more...

Adorable Boys Nursery with Painted Wall Mural

09 March 2011

 And I am so excited to be here on Remodelaholic!!

I guess I've always been a crafter, but I haven't always been a blogger. I started The Willow Bee in January of this year as a place to keep up with ideas, find inspiration, and share with others. It's my happy place!

The project I'm sharing with you today was one I completed before I had a blog, and the very first project completed in our new home...


Read more...

Striped Nursery Wall

13 December 2010

Striped Nursery Wall
contributed by This and That Creative

We just moved into a new rental house about
three months ago. This is the FIFTH place
we have lived in our four years of marriage!!
I was tired of spending money on each rental
to make it feel like home, so this time around
I was looking for an inexpensive way to turn
a bland bedroom into a sweet nursery.

Here is what the bland bedroom looked
like on move-in day.

And here is some inspiration I found:


And here is the finished nursery.


I painted the stripes on just one wall so it
will be easy to paint over when we move.
The total cost: TWELVE dollars.
I got a gallon of white paint on sale for $5
and a roll of painters tape for $7
It was inexpensive, easy, and perfect for my little one!

Read more...

Baby Boy Nursery With Wall Stirpes

07 October 2010

I just wanted to show off this sweet little baby boy nursery.  It is a party link from House of Ficek.  I think they did a great job, check it out!


Okay, so I already have my baby toddler.  Gulp, BIG gulp and a little tear.  I just had to post his room because it is the only room in the house that is absolutely, completely, without a doubt done!  (I lie, I really should have added drapes).  When we moved in there were really old shutters mounted outside the frame and closet doors that wouldn't stay up.  Embarrassingly enough the room was in this state until we found out we were expecting and had to get our butts in gear.


Here are the new blinds that I got at Home Depot and cut down to size.


I wanted a nice upholstered glider, but I was 8 months pregnant 
and my husband won the battle after about 3 hours of debating in the store.

 We opted for these floating shelves from Ikea instead of your standard bookcase.


This is the picture in the white frame on the shelf.  I think it is my favorite picture, I adore my boys!


I didn't want anything too pastel and babyish so we went with a vintage baseball theme (I usually hate themes, but this is toned down).  I love the way it turned out, even over one year later.


I love the stripes and the shelves!
Also, if you notice in the first picture there is a 0 and a 9 framed separately for his birth year, and I love that idea!
What do you think?

Read more...

Great Inexpensive Art from a Book DIY Project

04 October 2010

When I saw this great home decor idea, I had ask if I could share it with you.  It is not necessarily a new idea, but it is such a perfect way to tie art together.  And if you can get a great deal on a special book that is even better!    This idea is from Megan and Honey We're Home:

The wall above James’ crib looked pretty barren without anything on it.  It’s a large wall and the first thing you see as you enter the room, so it needed some visual interest. 
Nursery 012
I debated putting letters spelling his name in the space, then changed my mind and decided to make my own framed art using an illustrated book.  (I did buy the letters to spell James, but think I’ll use them in his bathroom instead.)  I had 2 frames already that I could reuse and just bought two more, figuring 4 would fit the wall nicely.  The frames are from Target and a little pricey at $17.00 each (11x14 inch frames and 8x10 mat). 
Nursery 005
I went to the bookstore not knowing what book would have the images I wanted.  I just went to the large picture books and started browsing when I came across the most adorable book ever!  It’s called “I Love You More” by Laura Duksta. 
Nursery 001
You may have already heard of it -apparently it’s a NY Times bestseller- but it was new to me.   The premise of the book is that a boy asks his mom how much she loves him, and she proceeds to tell him how she loves him more than everything. 
 Nursery 002Nursery 003Nursery 004 
Then, the boys says, “I love you more.”  The book continues (you turn the book around) with the mom asking the boy how much he loves her, and the story repeats from his point of view.  Then mom says, “I love you more.”  The sentiment is so right on and the illustrations are beautiful- perfect for James’ nursery.  I was just giddy that I found this:)  I bought one copy, but since I cut the pictures out, I’m going to have to get another one so I can read it to James.  Perhaps Amazon will have it cheaper.
It was difficult to chose just 4 pictures, but I went with some of the ones with animals since James has a bit of a jungle nursery.  I used a blade to cut the pictures.
 Nursery 006 Nursery 007
Then I centered the picture into the frame and secured it with a small piece of tape. 
Nursery 008  Nursery 023
So easy and the results are fantastic.
Nursery 021
Before
Nursery 012  
After
Nursery 016
Click here to see the nursery in its entirety.
Have you done this in your home?  I think calendars would have good, large images to use as art.

Isn't that just adorable?
The art is bright and matches perfectly!

Read more...

Big Girl Room Design

26 August 2010

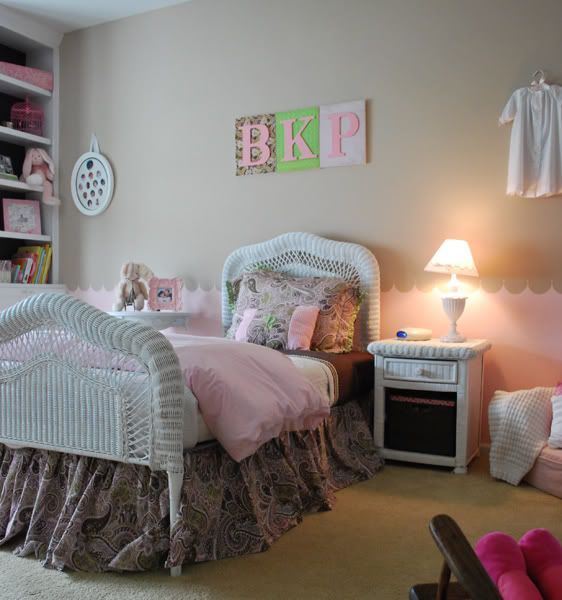
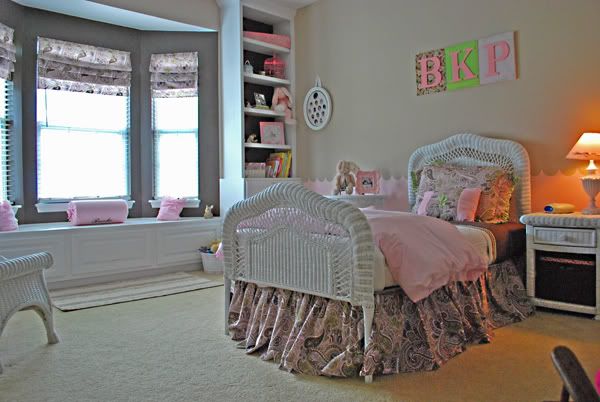
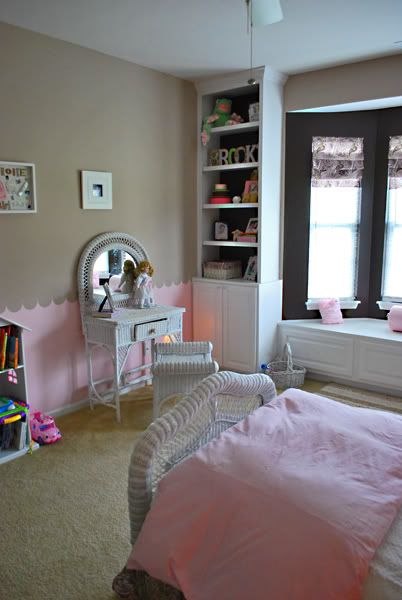
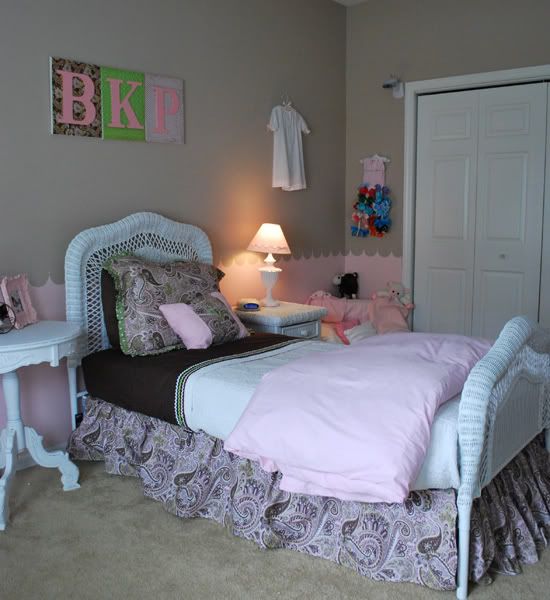
This is another project I asked to feature a while ago, such is blog life...  I love the way the big girl room looks! This is from the Price family blog check it out:


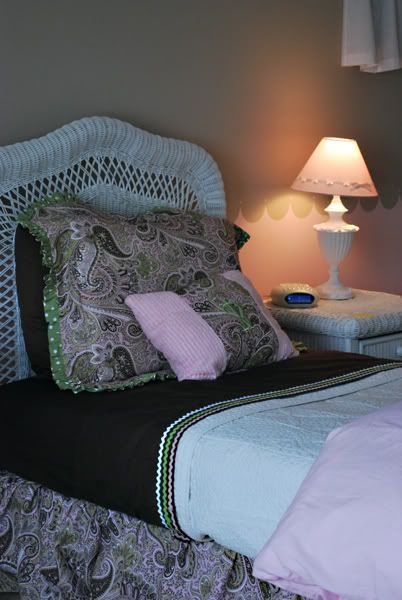
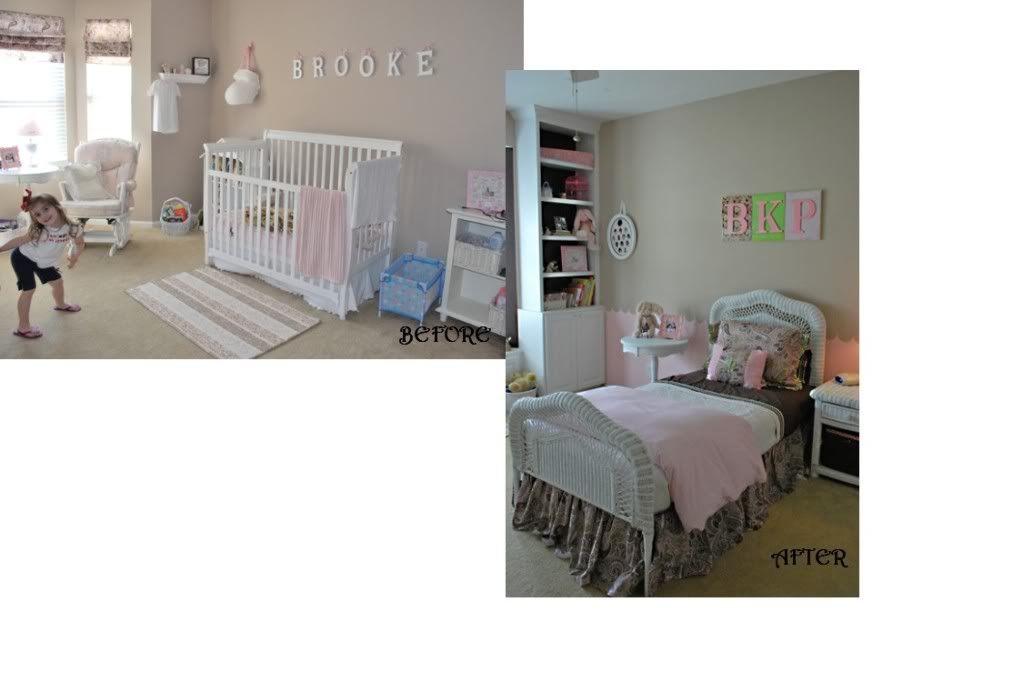
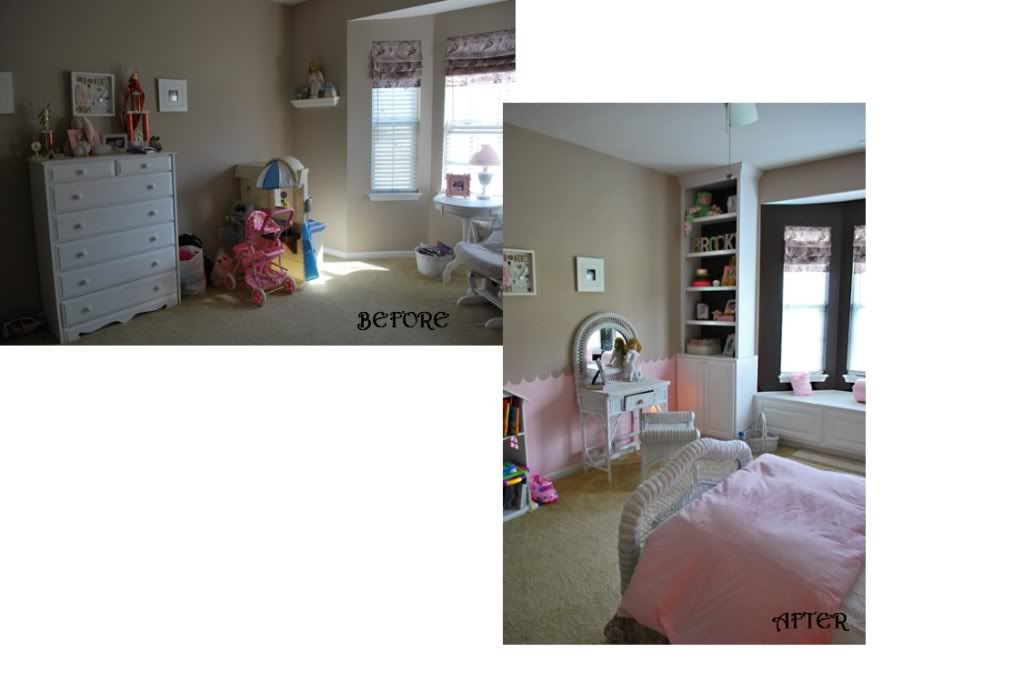
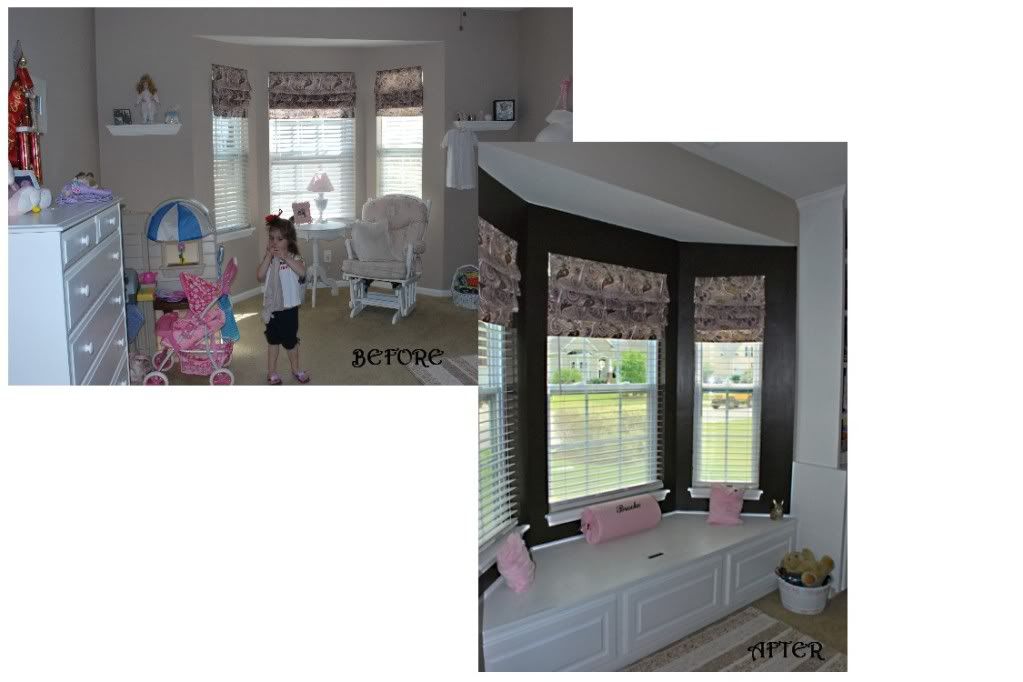
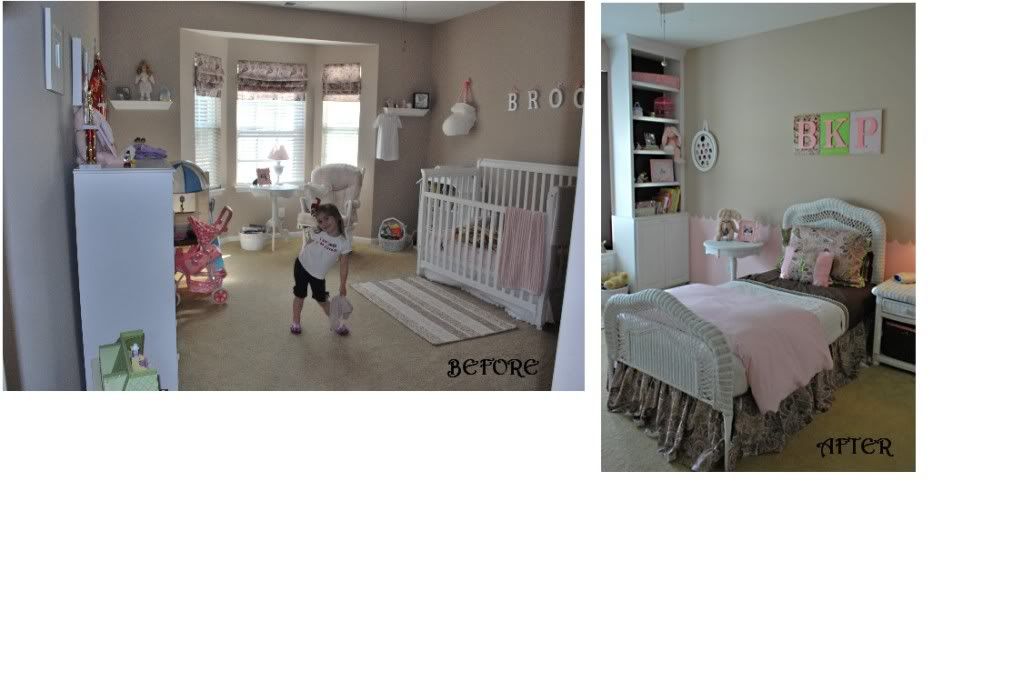
It's Finished!!!!!!!!!!!!  Well, not 100%, but I just can't stand to wait any longer.  My 3 year old's room is complete....minus a few tweaks here and there....  Remember when I showed you her room a few months ago?? (ClickHERE to go to that post)  Here is a refresher of what her room looked like BEFORE...


Photobucket


Photobucket


Photobucket

Photobucket

And now.....(Drum roll please....)

Photobucket
Photobucket

Photobucket


Photobucket


Photobucket
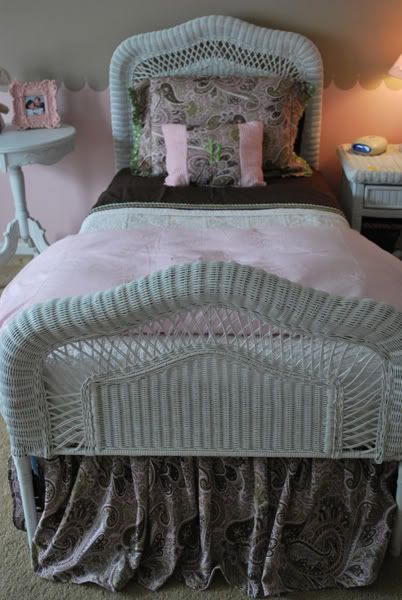
You can find the tutorial for my scalloped wall HERE...it's really easy!


Photobucket


Photobucket


The pink duvet was bought on Ebay for $14!!! Then I found the insert for it at Target for $15 on clearance!!! Yay for great deals!
Photobucket


Photobucket


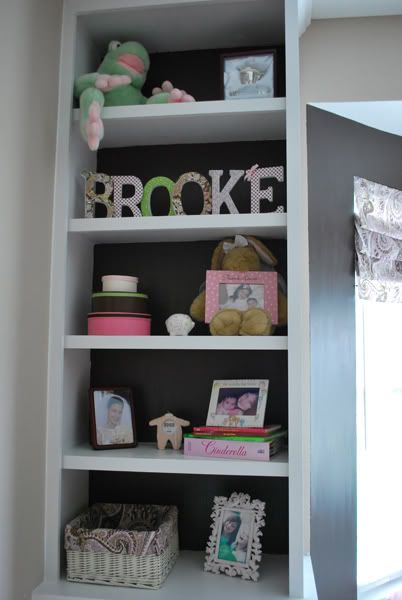
The letters on her bookshelf were once hanging above her crib. I used scrapbook paper and Mod Podge to cover the letters.
Photobucket


Photobucket


Photobucket
We had the bookshelves built in by professionals, since it was a job too big for us. You can read about it HERE.


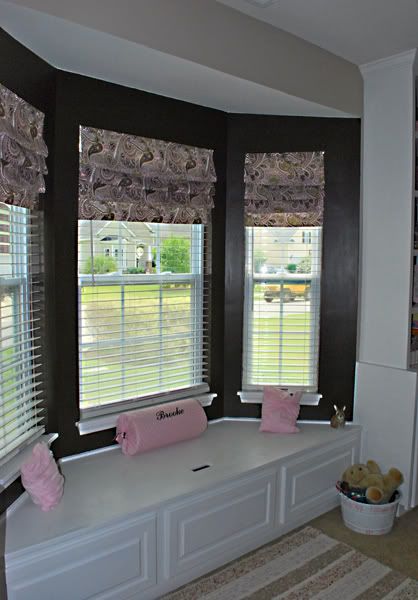
I made the roman shades you see in her window. Click HERE to see the tutorial on how I made them...


Here are a few other details in the room...

Photobucket
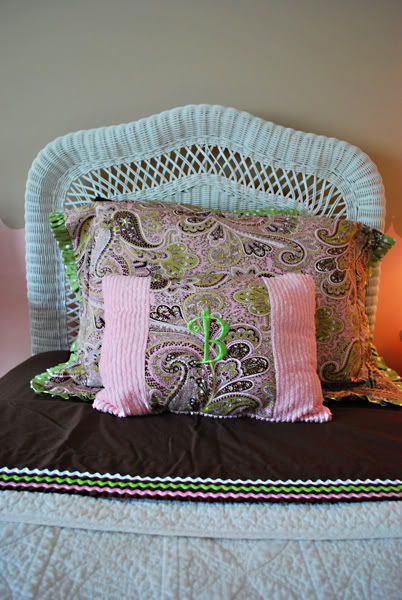
You can find the tutorial on how to make the pillowsham HERE

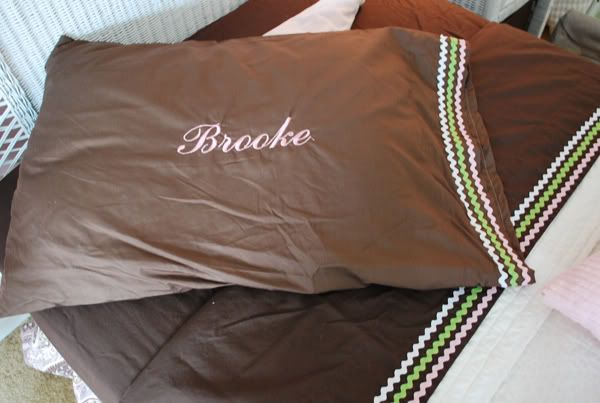
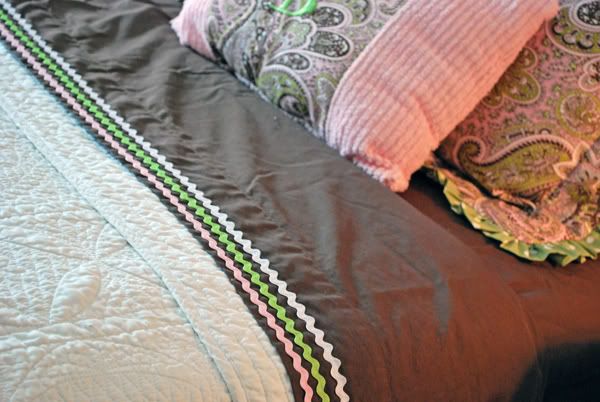
I made the pillowsham, monograms, the accent pillow and added ric rac to her sheet set for a little extra character...
Photobucket


Photobucket
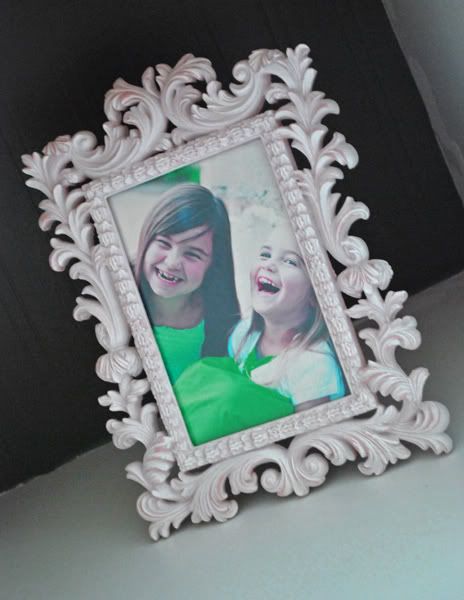
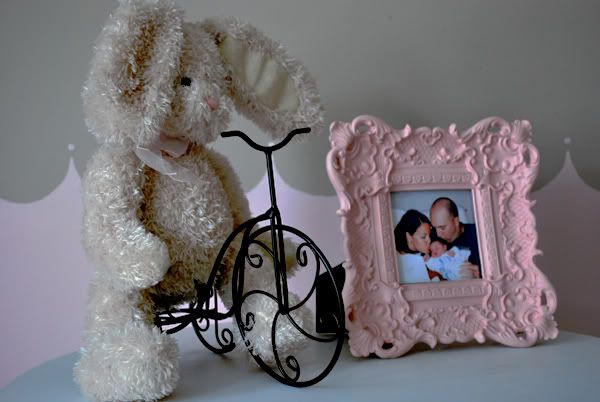
I found this cute picture frame at TJ Maxx on clearance for $4....SOLD!  I put a picture of my girls in it.... this picture is proof that they DO get a long every now and then!


Photobucket
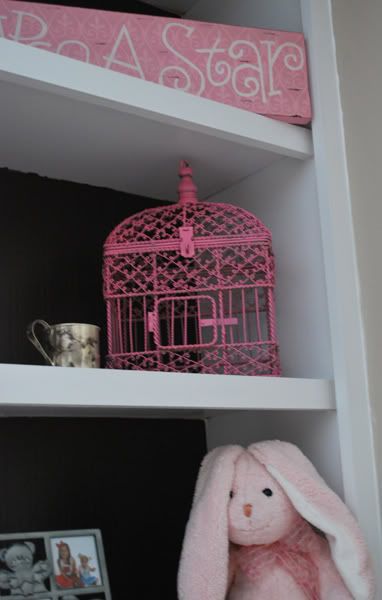
I picked up the birdcage at Goodwill for $1.91. It was an ugly brassy color...so I just grabbed my pink spray paint and gave it a makeover!
Photobucket


The iron bicycle is actually a garden decoration (the seat is a potholder), but I thought it was the perfect spot for this bunny. 

The photo is one of my all time favorites.

Photobucket

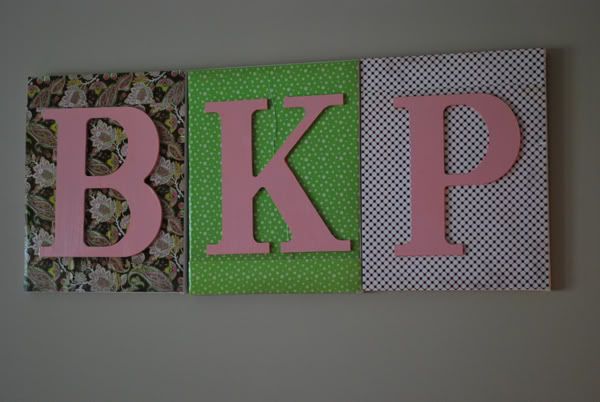
I made these canvases with her initials using scrapbook paper and Mod Podge. I believe this project was around $10 to make.


Photobucket


These baskets were in her nursery, but I took out the liners and used them as a pattern to make new ones.
Photobucket


I made this ruffled pillow using the tutorial from House of Smiths
Photobucket


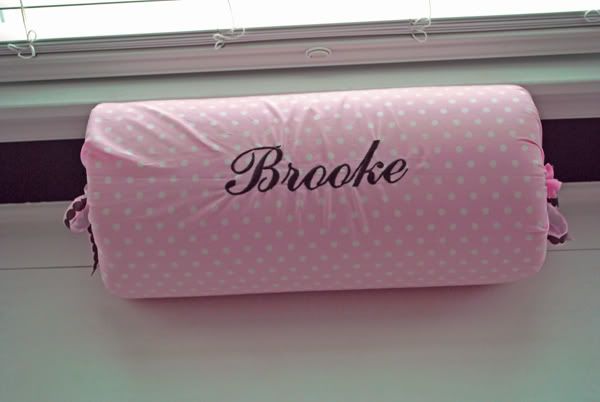
I ordered a pair of bolster pillows off Ebay (I think I paid $20 for both) and made this pillow to go in her bay window. I also monogrammed it and used ribbon to tie up the ends.
Photobucket


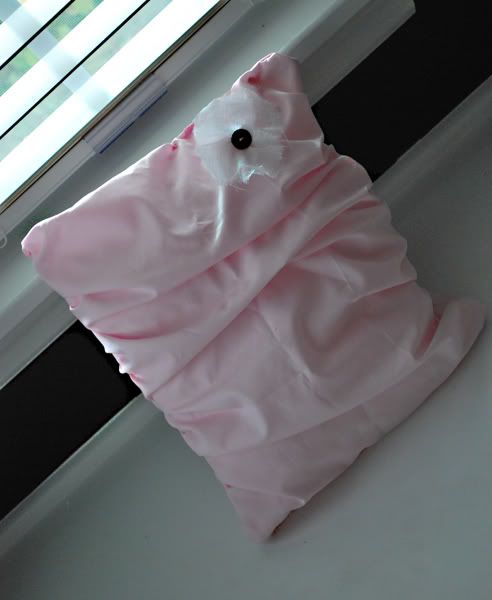
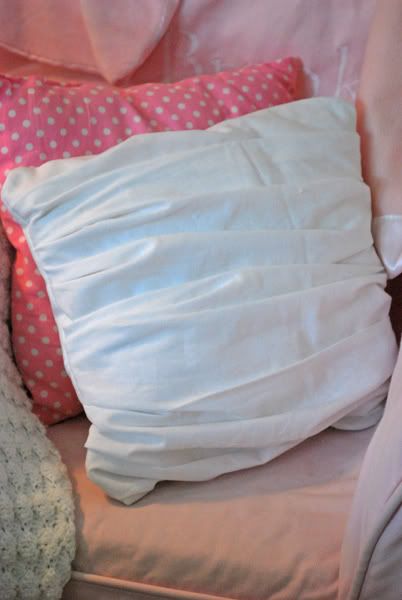
This white pillow was made from part of a shower curtain....you will see this again soon when I post my guest bath makeover (currently in progress).
Photobucket


Here is another view of the sheet set I did. I bought a set from Target for $11 and sewed ric rac trim on the flat sheet and pillowcase.....now you can't tell the difference from this set and one from Pottery Barn!!!

Soooooooo, let's take one more look at before & after....


Photobucket
Photobucket
Photobucket
Photobucket


And there you have it.....
a pink and chocolate room fit for a princess!!! 

I am extremly pleased with the way it turned out!!

Don't you love the scalloped edge between the two colors of paint?  And the wonderful window seat?  I have wanted one of those ALL. MY. LIFE. (I kid you not!  THe room is simply gorgeous!

Read more...
Related Posts with Thumbnails
Emealz - Easy Meals for Busy People!
Home & Garden Blogs Home & Garden Blogs - Blog Rankings

Blogging  tips, tutorials and SEO

From Here to Eternity

  © Blogger template On The Road by Ourblogtemplates.com 2009

Back to TOP