We’ve Moved!


If you aren’t redirected here is the link:


Remodelaholic!


THANKS!

Showing posts with label stripes. Show all posts

Striped Wall Laundry Room

07 September 2011

Striped Wall Laundry Room


I just got back from a very fun trip to Ruby Tequila's (mexican food....yum) with my two friends, Kaitlin and Jessica.  We have had a very busy week and it will only get busier when we head home to Colorado tomorrow! One of the reasons our week was so hectic is due to the fact that we finished our laundry room.

I am in LOVE with this room, even though it is only a 5'x5' box. As I've stated before, we decided to paint the stripes that I have been obsessed with for quite some time. Bryan and I also completely repainted all of the trim, doors, and cabinets to make it look and feel brand new. I added some pattern, baskets, and a couple of framed prints to top the whole thing off. We were on a very strict budget for this, and I am happy to say that I only spent about $40 for the whole thing! It's not much, but it makes me a heck of lot happier when I have to do laundry now!

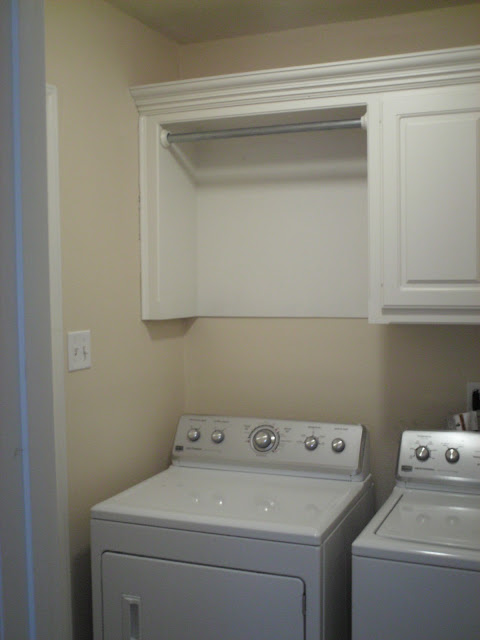
Here is the "before":
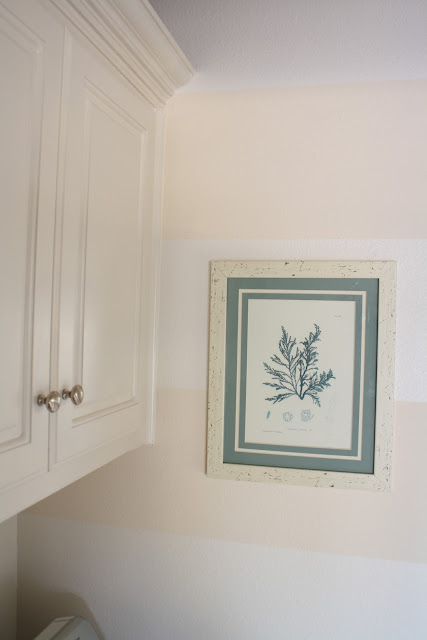


And the "after":


Love those stripes!


I made this curtain to hide the ugly drying rack in about 10 minutes with iron-on hem (aka my best friend). I love the fabric, I got it for like $4 at JoAnn's.


These prints are from TJMaxx. $10. Boom.


I also recieved this nice suprise in the mail today...


It's the Garden Issue! And guess what's next in our plans....that's right, our garden! Thank you, BHG, for making this girl's day.

Yay, love it!! Happy Spring Break!     

                                                            
This project was contributed by one of our fabulous readers! We love to share your projects with this great blogging community. So, if you have projects from kitchen renovation ideas to small bathroom remodels, overhauled and repurposed furniture, spray paint updates you name it please send it in! Thanks for reading Remodelaholic!


Check out more cute striped walls and laundry rooms!

Read more...

Cute Striped Wall Update for Half Bath

05 September 2011

Cute Striped Wall Update for Half Bath


Last time I used the words "half bath" in a post, it was the 21st of May and I was wrapping myself in painters tape in an attempt to make stripes on the walls. (I considered doing that again in red, white, and blue tape as a "GO AMERICA" salute to the upcoming holiday, but I decided that wouldn't be all that cute. Sorta like a Lady Gaga ensemble, but with less need for controversial refrigeration.)


Anyway, we still have some more things to do (ceiling light fixture, finish painting the trim, cover up the washer and dryer that currently share this space, update the sockets and switches so they aren't beige with all of our white...) but a month and several weeks of Rick singing Kumbaya tocoaxing under-sink pipes to stop leaking, we finally have some more updates on our half bath!

Read more...

Girls Room Makeover With Striped Walls

31 August 2011

Girls Room Makeover With Striped Walls

Wa-hoo! I am definitely and finally done with my daughter's bedroom. If you have been following along this is week 5. Not too shabby, considering I have been doing it myself when I've able to find some spare time.
blah, blah, blah...we all know you are here for the pictures, so here they are...

Read more...

Renovated Home Office with Stripes and Lots of Details

22 April 2011


Renovated Home Office 
with Stripes and Lots of Details
 contributed by 

(Yes, I love to use my ellipses...) 

Read more...

Updated Powder Room With Fancy Mirrored Vanity

15 March 2011

No More Brass Hardware: 
Updated Powder Room With 
Fancy Mirrored Vanity
contributed by View Along The Way


Finally! We have some "after" shots of the house. I'm going to post these one room at a time, starting today with our powder room!

Let's take a little journey back in time... to a time when you had to use THIS if you wanted to powder your nose downstairs:


The brass fixtures were a little less gleaming now than I imagine they were back in their heyday. The cabinet door was broken. There was a mysterious paper towel holder next to the vanity. (That's a new one for me. I guess the paper towels were there in case things got a little messier than usual?)

The grunge build-up on the laminate floors was enough to make you bulimic. And if you used the toilet (which we avoided), you quickly learned that it wasn't really screwed in to the floor, and rocked back and forth so you felt like you were on a fantastic roller coaster ride while taking care of your business. Not ideal.

You can't really tell in the picture above, but inside the old cabinet was a massive pile of hair. Er, weave. NASTY! And the walls were a much grosser color than they look here. I'd name it Green Baby Poo.

And then I'd throw it away.

Read more...

Remodeled Spare Bathroom With Painted Stripes

17 January 2011

Remodeled Spare Bathroom With Painted Stripes
contributed by Our Home In Progress
Here are the before & afters of our spare bathroom. It has come so far from it’s original state. I seriously cannot believe its the same room! Remember, we had to rip walls out, take off awful wallpaper borders, struggle with the stripes, and replace pretty much everything? Well, it was worth all of it! It is one of my favorite rooms.
*Forgive the photo quality, my battery started dying so the flash/colors came out somewhat off.
Before


After

Read more...

Striped Nursery Wall

13 December 2010

Striped Nursery Wall
contributed by This and That Creative

We just moved into a new rental house about
three months ago. This is the FIFTH place
we have lived in our four years of marriage!!
I was tired of spending money on each rental
to make it feel like home, so this time around
I was looking for an inexpensive way to turn
a bland bedroom into a sweet nursery.

Here is what the bland bedroom looked
like on move-in day.

And here is some inspiration I found:


And here is the finished nursery.


I painted the stripes on just one wall so it
will be easy to paint over when we move.
The total cost: TWELVE dollars.
I got a gallon of white paint on sale for $5
and a roll of painters tape for $7
It was inexpensive, easy, and perfect for my little one!

Read more...

DIY - Hand Painted Stripes On the Wall

06 December 2010

DIY - Hand Painted Stripes On the Wall
contributed by Entertain Exchange


I do have a love for decorating and DIY home projects. I have always stayed away from wallpaper as beautiful as some of it is. Mostly it is the thought of taking it off the walls when I'm tired of it that scares me. We have all heard many wallpaper removal horror stories. In my old house I did a lot of rag rolling with this Iridescent Pearl Glaze from Lowe's. I would paint my walls a color and go back and do the technique in the glaze. It always had a nice subtle effect on the walls that I loved.

I didn't really want that same look in this house, so I decided to use the same glaze in a striped pattern in this small area on the inside of my staircase. My colors there are silvery and mossy green. I am loving how it all turned out. It really didn't take that much time either - I love a quick project with fast impact! Look below for the how to...

First, I measured the wall length and decided how wide I wanted the stripes to be. I then took a small ruler and made tick marks across the wall - about 4 marks for each side of each stripe. I then took a yardstick placing along the tick marks to use as a guide for my painters tape. I did not draw lines down the wall with a pencil. The pencil will show through the glaze and not look very nice. I then taped the yardstick to the wall so that I had two hands to tape the stripes. I moved the yardstick up the stripe as I went along.


You want the tape to go on the outside of the stripe you are going to paint. This takes a little bit of concentration as I taped the wrong side more than once. When you are finished it should appear that you have thinner and wider strips. After the stripes are painted they will all be the same size. The thinner strips will remain the original wall color and the wider stripes will have the glaze.
Don't forget to tape the tops and bottoms of the stripes.

Here is the products that I used - Valspar Translucent Iridescent Glaze and a small roller. I also had a small paint brush handy for the few corners the roller could not reach.
I covered an old paint tray with foil so there was a clean fresh surface for my paint. I only added a small amount of a glaze at a time. You want the roller to only have a thin amount of glaze on it.

When wet, the glaze does not look very dark.
This photo shows the glaze in the stripes. I waited to the next day to remove the tape in case I need to re-roll anything...and I did in one stripe.
I love how it turned out. It adds a little interest without being overpowering. What I love about the glaze is it is highly reflective. As the light changes during the day so do the stripes. Sometimes it looks light and sometimes darker. It also has a nice elegant feel.


Now I have to decide if I want to add it to the larger curve going up the stairs. I am afraid it may be too much...your thoughts?


Read more...
Related Posts with Thumbnails
Emealz - Easy Meals for Busy People!
Home & Garden Blogs Home & Garden Blogs - Blog Rankings

Blogging  tips, tutorials and SEO

From Here to Eternity

  © Blogger template On The Road by Ourblogtemplates.com 2009

Back to TOP