We’ve Moved!


If you aren’t redirected here is the link:


Remodelaholic!


THANKS!

Showing posts with label Storage. Show all posts

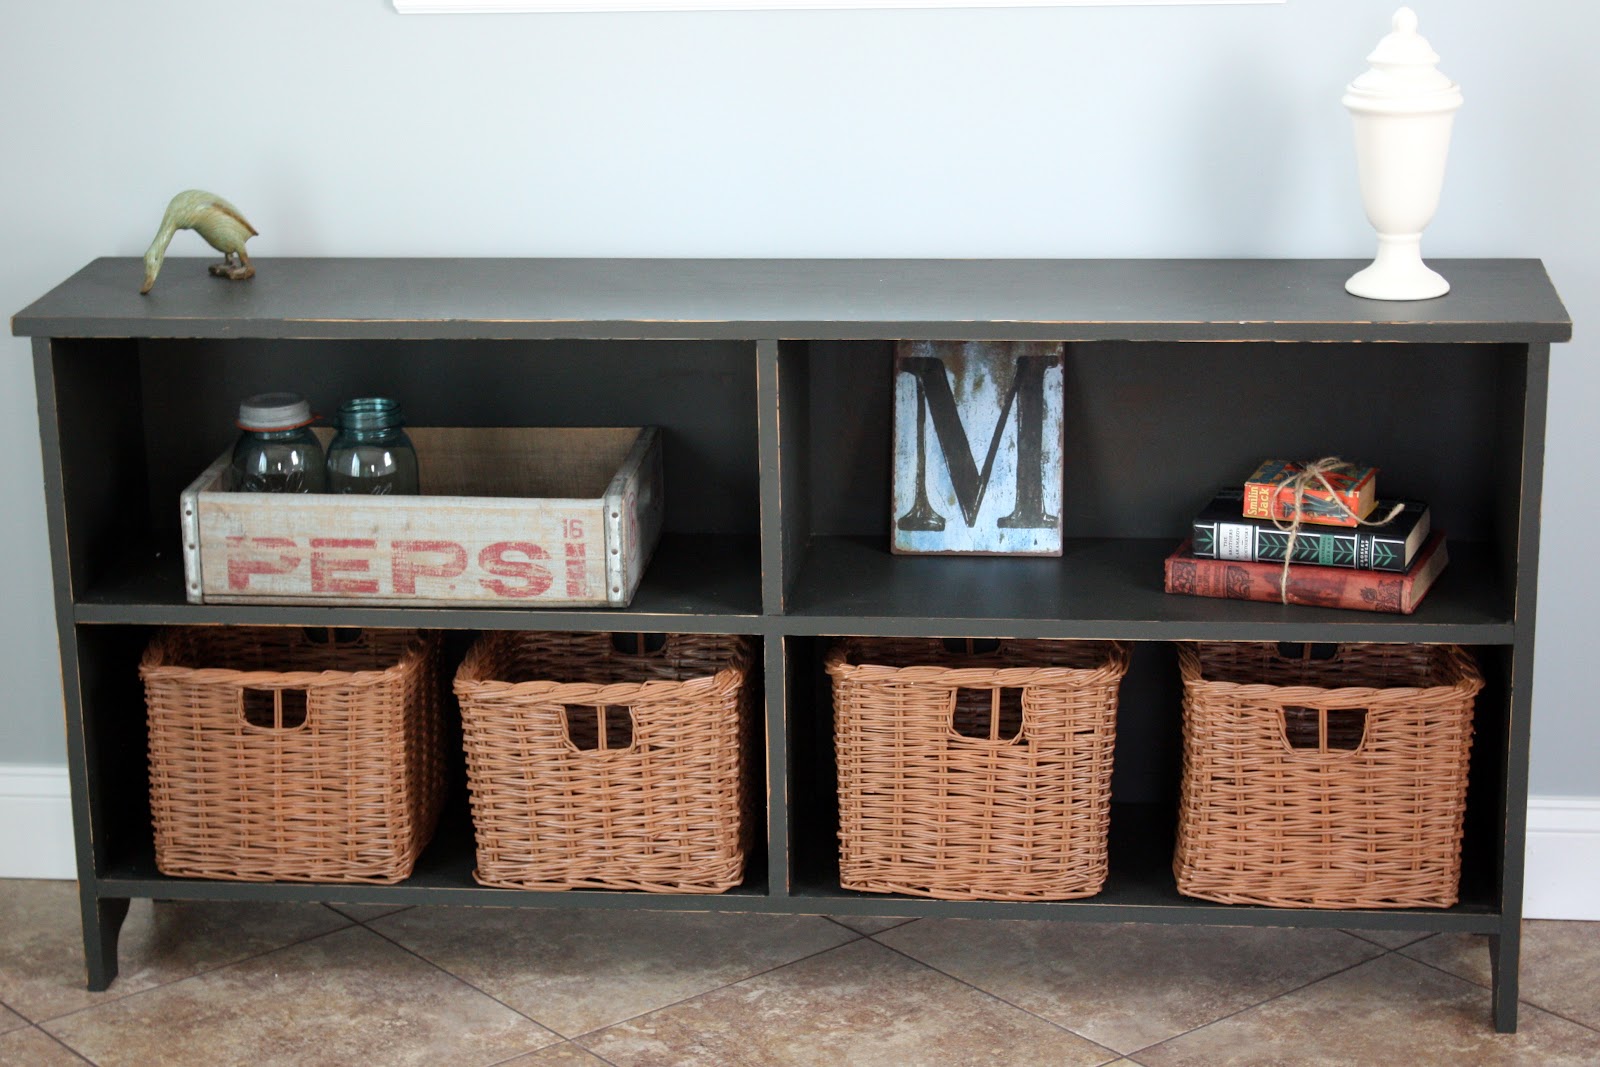
Trash to Treasure Bookshelves

11 October 2011

Trash to Treasure Bookshelves


Just in case you didn't see my guest post over at The Frugal Girls, I'm reposting it here for your viewing pleasure :)

I'm going to show you how we turned this...


into this.....


for a lot less than you might think!!

Read more...

Creating Beautiful Storage Space Within Bathroom Walls

16 December 2010

Creating Beautiful Storage Space
Within Bathroom Walls


I don't mind towel bars, but when a small bath is used by 3 people (soon 4), they just don't provide enough space for towels.

Introduce the hook.

They come in lots of finishes, shapes, and styles; I love them.  So I installed a row of hooks along the molding on top of my new beadboard wall.  Instant bling and lots of places to hang towels.

Now I want a place for some pretty apothecary jars with Q-tips, cotton balls, or whatever... up high enough to be safe from little hands.So I built my own crown molding shelf to top off the wall.


1. Cut crown molding (and 1x4 for the shelf)
I didn't need to figure out any corners (I've had to learn how to miter and cope corners more recently though).  If you are using molding for the ends, you'll want 45° cuts and mitered corners.  I just made straight (90°) cuts to my molding to fit the length of the wall, with a small piece cut out of the right side to fit around the door frame molding.

2. Get your angles right
Here's where it gets more complicated.  I need to fit the shelf to the molding.  I didn't take pics (who knew I'd blog about this 2 months later?)  So I'll do what I can with this piece of scrap I have left over.  See how the molding is angled 45° from the wall, but then also forms an angle with the 1x4 I used for the shelf top?  I want the 1x4 to fit behind the top lip of the crown molding, but the front of the shelf is flat and the molding is angled...


Not possessing a table saw (but I'll take one if you're giving one away...), I used a hand plane (love this tool for shaving down a "just a little too wide/long/thick" piece of wood or smoothing a rough one) to impart an angle to the edge of the 1x4.  Yes, it took an hour, but it was a very nice fit afterward.

3. Nail everything to stud (or a furring strip)
A 1x2 furring strip screwed into the studs provided a sturdy support to nail the back of my 1x4 shelf to, and then the crown molding was nailed to the 1x4 (top) and the studs (bottom) with finishing nails.

Finally, I cut a little triangle of wood to fill the space on the left side of the shelf.  (I guess I could have used a mitered joint, but I would still have had to cut part of it to fit around the edge of the shower insert.)  I like this better - nice and smooth.

4. Caulk and paint
I caulked any gaps (small ones between the molding and shelf and wall) and painted it all a nice bright white. A mold-resistant, scrubbable paint that spilled shampoo, hair gel and even toddlers would have to work hard to mess up.


I like it.  Nope, I love it!  But it's just not enough... I need more storage.  Stay tuned...


Part1: Beadboard
Part 2: Crown Molding Shelf


If part 1 was a 1 (in difficulty), then part 3 is definitely a 3, because I built recessed wall cubbbies/niches for storing towels and baskets of bath supplies (and it was tough, but fun).


1. Check for pipes/wiring
I was certain there were no pipes in this wall, but there was electrical cabling (these usually run along a stud), so I made my cuts with a space next to the studs (You can always cut more later, but not vice versa).

2. Cut into the drywall
OK. Moment of truth.  My husband, who hates putting nails in the wall, was having conniptions in the next room while I used my drywall saw to cut square rectangles into the wall between the studs.  I made my cubbies 12" tall and as wide as the studs allowed (usually 15").  The first "hole" was far from perfect, but "It doesn't have to be perfect to be beautiful". (I'm the Nester's biggest fan, you know.)  My other cubbies got better and better - yeah practice!  No worries either way; I knew I was going to have to frame them out later.

3. Make wooden boxes
I used 1/4" poplar boards ripped to the depth of the wall niche (~3¾), and cut just a little shorter than the height and width of the hole.  I should've used 1/2" general purpose molding boards, because the 1/4" poplar was too thin to nail together.  I used wood glue instead and it's holding up fine (knock on wood).  I also left the backs open (you could use luan or thin plywood to back).

4. Install boxes
If you measured right, they should come out even with the wall surface, sitting on the cut edge of the drywall.  If not, hold on to 'em so they don't fall into the wall (ha ha, one of  mine almost did).  Then I used finishing nails to nailed them in place. (Should I have used screws? Sturdier, yes, but also harder to hide.  The jury is still out on that one.)  For the box next to the wires, I nailed a 1/2" piece of wood "spacer" next to the wiring, and put my nail through that into stud (so there'd be no gap).

5. Frame it out
I used plain 1/4" poplar again (love that stuff) and cut it to the width of the space between the cubbies.  There were some painstaking careful adjustments to get this just right, but I'd say err on the side of too wide if you must.  Just nail these to the studs.  See how they're even with the top of the cubbies - I also tried really hard to make sure it was all level, because I took a thin piece of chair rail and ran that along the top.


6. Caulk and paint
Lots of caulk (along the back, between the box and shelf, and between the cubby and the frame) and then paint (3 coats).  Then I sat back to enjoy.  Worth the work?  Ummm... heck yes, I love pretty baskets (even if there's TP in them).

Remember the before!?


 Huge improvement!! I think I can finally say This wall is Done.

Read more...

Great Looking Storage: Wooden Antique Crate with Casters

08 December 2010

Great Looking Storage: Wooden Antique Crate with Casters


A few months ago,  I was at a tiny little flea market looking for goodies.  Nothing was calling my name. Sometimes it happens, you come home from a flea market empty handed.  (My husband is probably reading this and saying to himself "When does she evercome home empty handed?")

So.. as I was getting ready to leave the market empty handed, I saw it...

An old but perfect wooden crate (click on photo and you can see it tucked in under my sofa table).

I asked the seller "how much?" and she told me she didn't think it was for sale! She explained to me that it was her packing crate for bringing her breakable dishes to the flea market.

Honestly, I don't know what's worse, seeing a 'sold' sign on something you really really want or being told an item you want to buy is not for sale.. ugh!!

I got really lucky when the seller's husband overheard our conversation and he decided to sell me the wooden crate. Thank goodness for husbands!! I think I paid $15.00. (Note: the wheels did not come on the crate.. discussion to follow).


Things I love about this crate, first off would be the color of the wood. The tone of the pine is soft but warm and not orange. It has no water stains, no mold, and is really sturdy.
Best part..it doesn't smell. Been there, done that!


I love the wood grain, the graphic writing, even the font they used! (what this font is called?) 

I also love how deep the writing is impressed into the wood


Pine knots, roughness, and old nails


Love the side supports


So, back to the wheels which I added recently. I had a set stored in my garage waiting for the perfect project. Since this box gets heavy with all my magazines neatly organized inside {I mean thrown in}, I figured the wheels would help me move the crate around.  As you get to know me you will understand my obsession with moving everything around, constantly! 

The wheels were very rusty and I was concerned about damaging my carpet. I purchased some rust cleaner and had to soak the wheels in a bucket for three days! Even after a good soak and scrub, there was still some remaining rust. One of my friends suggested I spray the wheels with a clear protective sealant. It worked perfectly. I have no rust on the carpet.


These wheels are bigger and heavier than they appear. I had my husband pilot drill the holes and we used short screws so they would not penetrate into the inside of the crate.


Every so often, I have to empty the box and purge my magazine collection.. This is an actual picture of my room today...magazines all over the floor.. which inspired me to do this post...


Love that I can store so many magazines and books out of sight! And now with wheels, I can drag my magazine storage crate from room to room... oh, who am I kidding, it's way too heavy... 

It just looks better together with the wheels, don't-cha think?

I hope this will inspire you to add wheels to something.

Also Check out these posts for great uses for antique crates:
Vintage Crates for BookCases
Chicken Crate Coffee Table
Make your Own Wooden Crates

Read more...

Bright Play Room For Kids; Guest

15 July 2010

I saw this lovely playroom for kids on The Perfectly Imperfect Life and had to ask if I could show if off.  I love the colors and storage.  Check it out:


DSC_1706-2
They’re done!  The day bed and the play room are (mostly) done! 
I actually used the comforter from my bed and the pillows from my girls’ beds, so the bedrooms look a bit of a mess, but hey, maybe I’ll decide to keep it this way and get a new comforter for MY room!
Let me give you a tour.  You’ve seen the day bed, but here it is again.  Doesn’t it look nice?
DSC_1724
Mr. Harry sure thinks so…
DSC_1725
I also grabbed the curtains from the girls’ room and the little boxes that used to hang in my kitchen.  Those boxes were definitely a Eureka! moment.  I was driving down the road, chewing on what I could put there when I realized that the boxes were sitting in the garage doing nothing, but if I were to hang them in the play room, I would have a great little place to put all the girls’ 3-dimensional art work and doo-dads!
DSC_1708DSC_1707  
And, speaking of art work!  I finished the art wall.  Generally, Thing 1 produces reams of art work each day, but I actually had to harangue her a bit to actually get the wall filled in (and you can see there are actually still two frames empty).
DSC_1718
DSC_1732
   DSC_1713 

Usually, when I hang frames, I just eyeball it and move them around until I like where they end up.  Which leaves a lot of holes in the wall.  This time, I actually did the responsible, mature thing and created templates and taped them to the wall.  This turned out to be a really smart thing to do because my original plan turned out to require drastic re-working. 
I’ve seen a few bloggers do the template thing, but I might just post on it myself because I ran into a few gotchas that might be good to share.
In addition to the art work, I put up baby pictures of each of us.  Aren’t we cute?
DSC_1729DSC_1730
You may have noticed that you’ve only really seen one side of the room.  The left wall has a white board and a chalk board.  I still have some things I want to do with that, so that’s not going to be shared yet.
The wall opposite the bed holds this:    
DSC_1719
Notice that the door doesn’t shut all the way?  That’s because it looks like this on the inside:

DSC_1720
Actually, it was even worse on the inside.  I had to remove a bunch of stuff to even be able to open the doors.  I think that’s going to be next week’s project.  Should be fun!

But that’s messy.  Let’s finish with something nicer…
DSC_1706-2

Ahhh…ready for my sister’s visit.

I love the day bed, the colors and the art work!  What do you love about this play room?  Do you have any play rooms to show off?

Read more...
Related Posts with Thumbnails
Emealz - Easy Meals for Busy People!
Home & Garden Blogs Home & Garden Blogs - Blog Rankings

Blogging  tips, tutorials and SEO

From Here to Eternity

  © Blogger template On The Road by Ourblogtemplates.com 2009

Back to TOP