We’ve Moved!


If you aren’t redirected here is the link:


Remodelaholic!


THANKS!

Showing posts with label Sawdust and Paper Scraps. Show all posts

Spooky Candlestick DIY Project

28 September 2010

Hey!  This is Sandra for Sawdust and Paper Scraps here to show you one of my recent projects!

I bought about 5 old lamps when I was shopping for items to make my Halloween Candelabra tutorial.
I only used 2 for that So I had a couple left to make these Spooky Bad Boys.
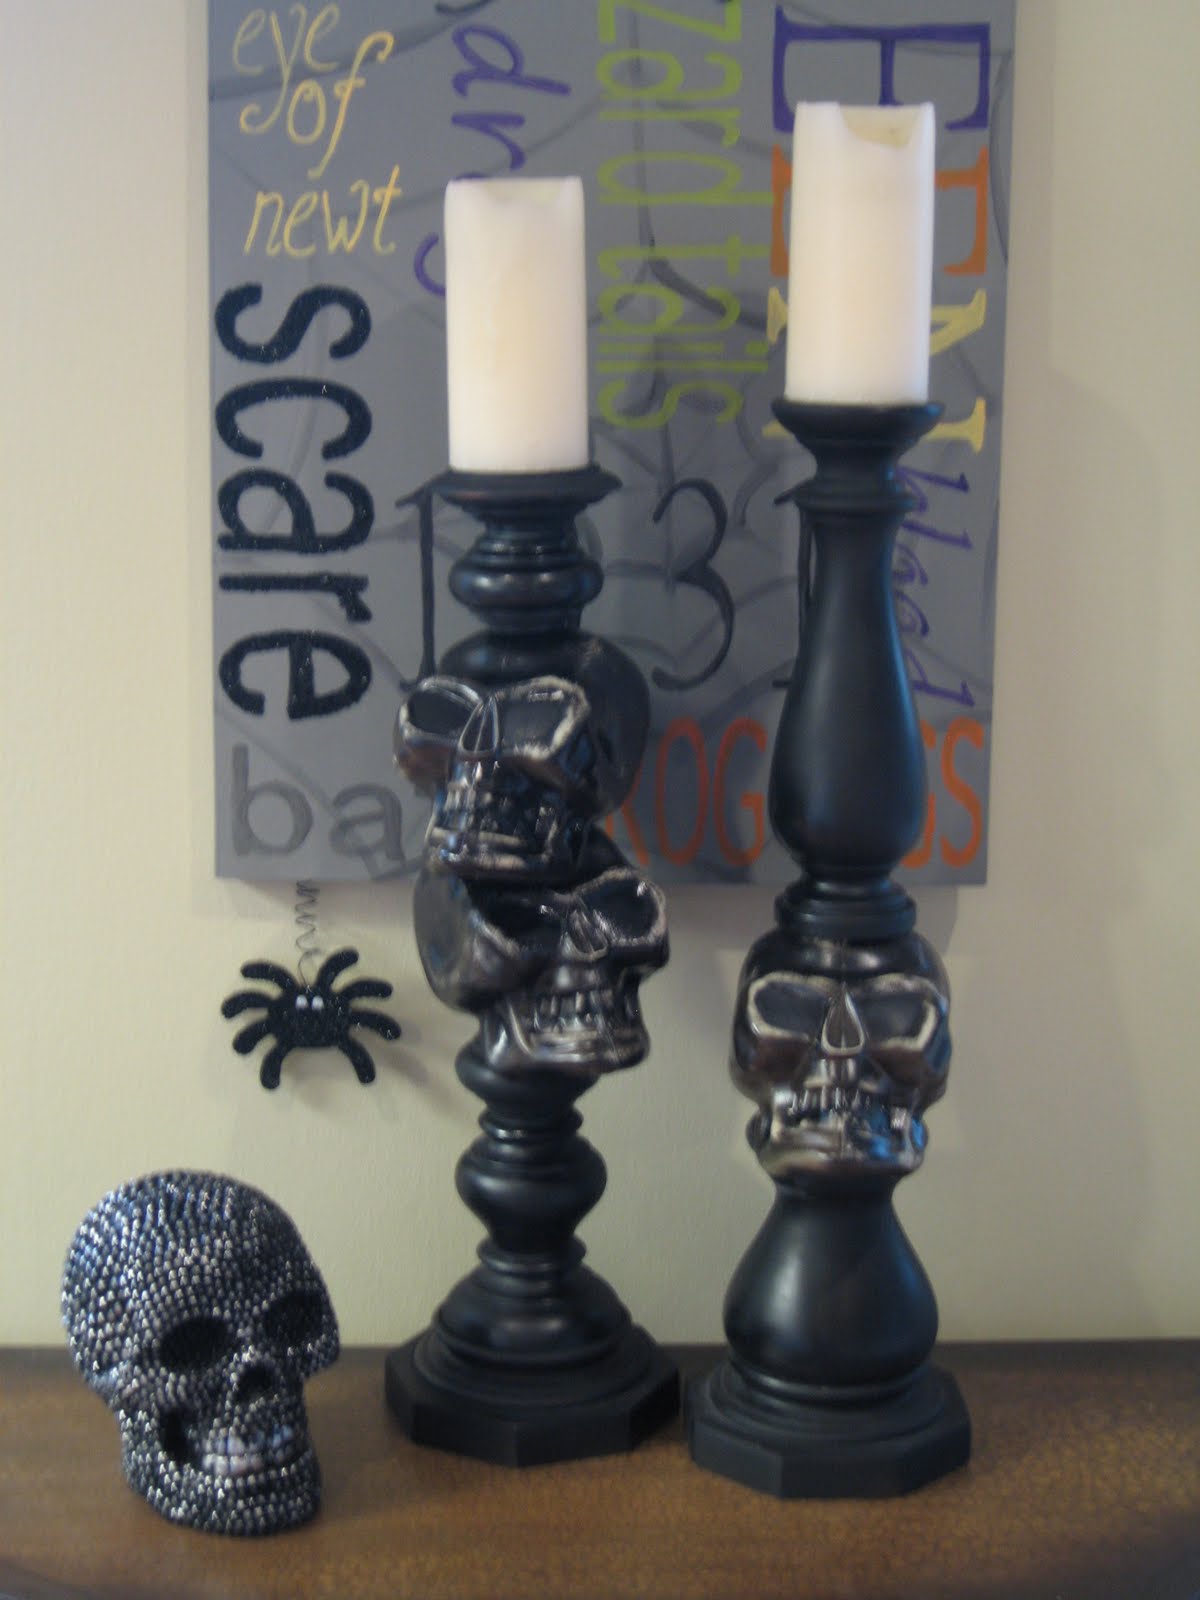

Remember I said I had a project in mind to use up the other half of the PVC and threaded rod?

Well, this was what I had in mind...
only I didn't actually end up using either the PVC or threaded rod
 so now I have to come up with another project altogether!
Darn!  

For this project I used :
-2 lamp purchased at Goodwill (about $3 each) 
-3 plastic skulls purchased at the dollar store ($1 each)
-1 can of satin black spray paint (the cheap stuff from Lowes- $1)
Oh yeah!  You know I alway have about 5 projects going on at once!

1.  Take your lamps apart and paint the pieces
2.  Drill holes in your Skulls.

3.  Mess around with configuring all the parts until you find a design your happy with.  

I put these together about 6 different ways before I decided on this particular arrangement.  I used the lamps original rods, which are threaded both ends, so I had to play with adding and taking away pieces to make them just the right height.

4.  Paint the SKULLS!


5. Distress.

6.  Put them back together.  
You could drill a hole in the tops that are deep enough for the nut to fit down inside
 so the top is flush.  I didn't want to take the time so I just screwed it right on top.

My candles are a little concave and it doesn't matter a bit.  
If you're candles are flat on the bottom, just melt a little wax away to make room.

And that's it folks.


Total cost- $10
No, that does not include the studded skull on the left, I just threw him in for decoration.  
But I still think it's quite a bargain!

Read more...

Beautiful Custom Built-in Home Office

24 August 2010


Hi, it's Sandra from Sawdust and Paper Scraps again.  Here is another room that is "mostly" finished.  It still needs a few touch ups but it's functional so I've moved on for now.  I don't have any pictures of my progress.  I'm amazed at how much I didn't take pictures before blogging.

It's impossible to get a picture of the whole room but here is my very 
best attempt at photoshopping all the parts into 
one photo of the whole unit. 
 I know, it's a total hack job but like I said, It's my best attempt!

 This house was all shades of ugly when I moved in.  You'll just have to use your imagination...it's an empty room with orangy-brown window, base and door moulding.


I hate wasted space and always try to get the most storage out of every space I design.  I built cabinets across the entire back wall,  creating 2 computer stations and a T shaped countertop that could be used from either side for crafts or work.

I built one cabinet with 2 drawers in which the bottom drawer is a file cabinet.
The other side has shelves and doors.
 
At the end of the T is an open shelf cabinet.  The countertop is made out of oak flooring that I installed over a plywood base.  I finished it with Tung oil.

The uppers are staggered.  It makes for trickier crown moulding installation but it's visually interesting.

I'm so excited about my new found photo-shopping 
skill that I'm going to show you again!
Yeah, I'll keep working on that one!

Read more...

Give Me A Sign, Wall art Project; Guest

27 July 2010

Hey This as Sandra from Sawdust and Paper Scraps back to share more with you.


When I was styling my basement entertainment center, I made a bunch of "old" signs that ended up being too small for the shelves.  So I made some larger signs for that space,

but I was left with all these that I didn't want to just throw away.


So, I decided to put them all together to create one big "art" piece.  I didn't have enough to make anything as big as I wanted so I actually had to create more small signs before I could create the "big one".


I cut and sanded some scrap wood in various sizes.  Then, printed out random words (and numbers) on computer paper and taped them to some whiteboard vinyl sticker I had leftover from a craft room backsplash.
I cut them out by hand using an exacto knive. 
HAND CRAMP!  So I got creative and found different words I could create using the same letters over and over.  {Take out the N and cut the B to make Peas out of Beans.}  {Hand paint some words..}

Then I took all my signs and layed them out.  It was kind of like a puzzle only I used my chop saw to make sure all the pieces fit together properly.  :o)

I screwed the pieces together with pocket hole screws.  
{You could use metal brackets if you don't have the pocket hole jig.}
(Sorry about these next 3 pictures but apparantly when I shut off the flash, my camera won't focus and I don't want to take the whole thing down off the wall to retake.)

 I used this heavy duty cable picture hanger although it's really not 100 lbs.  It's probably 10. 

This big empty wall needed some dressing anyway so it's OK that my original project didn't work out.  It forced me to find "something" to do with all those rejected signs.

Read more...

That's Entertaining, Custom Entertainment Center, Guest

15 June 2010

Hi , my name is Sandra of Sawdust and Paper Scraps.  I'm a Remodelaholic and this is my latest project.

I was flattered when Cassity invited me to be a guest contributor but I didn't know if I would have enough material to share on a monthly basis.  It seems to take me a really, really long time to complete a project.  My to-do list is comprised of mainly  "major projects" and I'm just one person so what can I say?  I'm lucky if I finish one project a month, but I'm going to give it a try!

I've been working on "finishing" my basement entertainment center for the last two weeks.  I started building it 6 months ago but stopped after I got to this point.   (So I could focus on my daughter's playroom.)              
I "mostly" finished her space and re-focused my energy on the TV room.   

2 weeks ago, I worked my way to this point.  (You can read this post if you're interested in those steps.)

Then all I had to do was build some doors and "style" the shelves.  (And of course, hook up the TV and components but that job, I'm thrilled to say, my husband was happy to take on himself.)  So, this is where I decided to say, "Yes, I'll do the guest post thing.  All I have to do is build some doors and style the shelves and I'll do the final reveal on Remodelaholic!" 

That was my plan and it seemed reasonable.

However...

While shopping for tchotchkes, I  saw some "old signs" and decided to make some myself.  They are just  pieces of wood with some words painted on them, after all!
 Additional Project #1:  "Old" Signs
I got carried away!  I made these but decided they were too small so I made some more and used these on something else.

I did a storage wall in my daughters playroom and it took me a week to shop for, try out and return the unwanted baskets, boxes and bins.  I hadabsolutely NO desire to go through all that again so I decided to make some kind of storage container myself.

Additional Project #3:  "Old" Crates

Now on to the doors!  (You'll find I get sidetracked easily.)  I'm just putting doors on the 7 lower openings.


If you happened to read my first Basement Entertainment Center post, I said I was going to make 16 doors.  I was originally planning on doing 2 doors per cabinet (which I realize would only be 14???  no idea where my brain was right then) but when it came down to it, I changed my mind and built one large door for each opening.  Half the work, half the hardware.  (Which I ordered before I changed my mind so I didn't really save any money but I can always use them later, on something else.)

Got the doors and knobs installed and put everything on the shelves and here's what I ended up with.


I made a couple like this to hold movies and video games.
 I found these when shopping initially and thought I'd do a beachy theme, old beach signs and some shipping crates.  I'm not sure where it took on the "garden/farm/orchard" theme but I really like these "balls" and think it all works together, even if the "themes" don't match. 

This little red crate I found at a thrift store a couple months ago for $1.50.  I totally forgot about it until cleaning out the garage today and there it was.  Perfect!
I didn't want to take the time to cut out hand holds like you see on most old crates so I bought some rope from Home Depot (45cents per foot) and used that as handles.

I have so much storage behind all those doors but they are completely empty right now because I haven't cut any shelves.  So, I guess I'm still not completely done but I have a million other - more important things to do right now.

We'll see if I get any of them finished before next month rolls around!  Ha ha!  See you then.

Read more...
Related Posts with Thumbnails
Emealz - Easy Meals for Busy People!
Home & Garden Blogs Home & Garden Blogs - Blog Rankings

Blogging  tips, tutorials and SEO

From Here to Eternity

  © Blogger template On The Road by Ourblogtemplates.com 2009

Back to TOP