We’ve Moved!


If you aren’t redirected here is the link:


Remodelaholic!


THANKS!

Showing posts with label Monthly Contributor. Show all posts

Beautiful Spring Inspired Mantle by 33 Shades of Green

10 March 2011


.
As always, thank you Cassity for having back to guest post again! You will find me at my blog, 33 Shades of Green, designing, crafting, cooking, and trying out all sorts of creative projects.
.
Spring is almost here and my mantel was in need of a new look.  I decided on yellow and green as a theme (because what's more Spring than that?!) and went form there.


Read more...

Installing Hexagon Tile for Beginners

24 February 2011

I'm excited to be guest posting again at Remodelaholic! Thanks to Cassity for having me! I'm Kim, half of NewlyWoodwards. At our online home, I gab about all our daily adventures - renovating, decorating, gardening and just generally DIYing. We're currently in the midst of renovating a (soon-to-be) great home from the late 19th century - our third remodel. I guess you could call us gluttons for punishment.

My husband recommended that I call this post Hexagon tile for dummies. In this situation, we would be the dummies (in case it wasn't clear). But you aren't a dummy... so let's just say this is for beginners.

Read more...

Remodeling a Small Bedroom into a Bathroom

27 January 2011

Remodeling a Small Bedroom into a Bathroom

I'm excited to be guest posting today at Remodelaholic! Thanks to Cassity for having me! I'm Kim, half of NewlyWoodwards. At our online home, I gab about all our daily adventures - renovating, decorating, gardening and just generally DIYing. We'recurrently in the midst of renovating a (soon-to-be) great home from the late 19th century - our third remodel. I guess you could call us gluttons for punishment.

Today, I'm here to share a 2007 renovation project from our current home that I hope you love as much as we do. It's probably my favorite room in our house. (I say that about every room, in case you were wondering.)

When we bought our first home, it had four teeny bedrooms and one bath. Oh yeah, and it was ugly.


Luckily, it got better.

But back to the bath. When we bought the house, the only bathroom was on the first floor. Because I'm a bit spoiled, I decided that we must have a bathroom on the second floor with our bedroom. I mean, can you imagine getting up in the middle of the night for a glass of water and having to go down 18 steps? And then up them again? Horrific!

Read more...

No Sew Way to Recover an Ottoman!

10 November 2010

.
A big thank you to Cassity for having me over again today.  You can find me at my blog, 33 Shades of Green, trying out all sorts of creative projects.
.
I recently recovered an ottoman with new fabric with a completely no-sew method!  It was so simple and easy and I love how it turned out.  The key to this project if finding an ottoman with separate legs.  The one I bought is no longer available but here is a similar ottoman I found at online at Target.
.
Supplies Needed:
- ottoman
- upholstery fabric
- staple gun & staples
- button covering kit
- upholstery needle
- tape measure
- upholstery thread
- buttons
- water soluble marking pen
.
The ottoman arrived needing assembly which was perfect for what I wanted to do.
.
 .
See that leopard print?  It wasn't exactly what I was looking for but I liked the style and I especially liked the button tufting.
.
.
You can find the upholstery I used here.
.
After deciding on fabric, you will need to cut it to size.  Make sure to leave enough overlap on each side to staple securely to the back of your ottoman.
.
.
If you are using a geometric pattern like I did, make sure you are careful about how the pattern will lay on the ottoman.  With my pattern, I thought it would be best to center the pattern.
.
Now, use a staple gun to attach the fabric. 
.
.
When doing this, I start with one staple on each of the four sides and then continue around.
.
.
.
Continue stapling all around but don't staple near the corners.
.
Here's my trick for clean, neat, corners. 
.
.
Pull fabric up tight to corner and staple as shown in photo above.
.
.
Then, fold fabric in until a straight edge is created. 
.
.
Pull tight and staple.  I know that sounds confusing, but I promise that it's not!
.
Once you are finished with all four corners, your ottoman will look like this:
.
.
You will want to trim the fabric so that it doesn't hang down when your ottoman is finished.
.
Here's how the front will look:
.
.
See, that was easy!
.
Now it's time to use the fabric button kit and cover the buttons.
.
.
Button kits like this are such an easy way to add a professional detail to a project.
.
.
 Now it's time to attach the buttons to the ottoman.  The first step is to determine where you want your buttons to be.  Use a tape measure and a water soluble marking pen to marl the locations.
.
Cut a long length of upholstery thread and tie to button.  Thread both ends through upholstery needle.
.
.
Push needle through from the front to the back.  Pull tightly.  At the back of the ottoman use a button to thread through.  Using a button allows you to secure the thread.  There is probably a better way to do this, but I sort of figured it out as I went along!
.
Sorry for the poor picture, but here's the button on the back side:
.
.
Continue until all buttons have been secured.
.
I think the buttons really make this project!
.
.
.
Attach the legs and you are finished!
.
Here's the finished product:
.
.
.
.
.
If you have any questions, please stop by and visit me at 33 Shades of Green.
.

Read more...

DIY Golf Club Art Display Project; 33 Shades of Green

14 October 2010

Thank you Cassity for having me over to guest post again! Come visit me at my blog 33 Shades of Green where you will find me crafting, cooking, decorating, and trying out all sorts of creative projects.
.
I have three golf clubs that once belonged to my Grandpa.  They aren't especially valuable or antique, but because they are meaningful to me, I wanted a special way to display them.  They leaned up against a wall in my lower level until I finally came up with a simple idea to show them off a little better.
.
.
Supplies you will need:
- Plywood board cut to desired size (Mine is 22" x 47")
- 1/2" x 1-1/2" moulding strips
- miter box
- nails
- mending brace
- fabric to cover board
- staple gun & staples
- nail head trim
- cup hooks
- picture hanging supplies
.
.
.
Measure moulding strips and miter corners.  This is not hard but requires a little bit of thinking to ensure that your measurements for the mitered corners are correct.  As the old saying goes - measure twice - cut once!
.
.
Once your moulding strips are cut & mitered, and the fit is good, you will need to attach them to your board. Use wood glue to attach them to the back of the board. Once dry, turn over and nail along all edges to secure from the front side of the board.
.
.
Attach a mending brace at each corner to ensure a sturdy finished piece.
.
.
Now it's time for the fun part!  Use a staple gun to attach fabric to board.
.
.
.
I decided to add a little nail head trim at each corner for a decorative accent.
.
.
.
You will need a way to hang your new wall art.  Attach "D-ring" hangers to each side and then attach picture hanging wire.
.
.
.
.
Next, determine where you want your golf clubs to lay on the board.
.
.
Use a pencil to mark where you need to install the cup hooks.
.
.
Attach cup hooks and your project is finished and ready to hang!
.
.
.
.
This project could easily be modified to for many sports - I think tennis rackets, hockey
sticks, or baseball bats would be fun.
.
The fabric I used is by Waverly and is called Cross Section, color: green.  You can purchase it here.
.
I hope you enjoyed this project!  If you have any questions or would like to know more, visit me at 33 Shades of Green.
.

Read more...

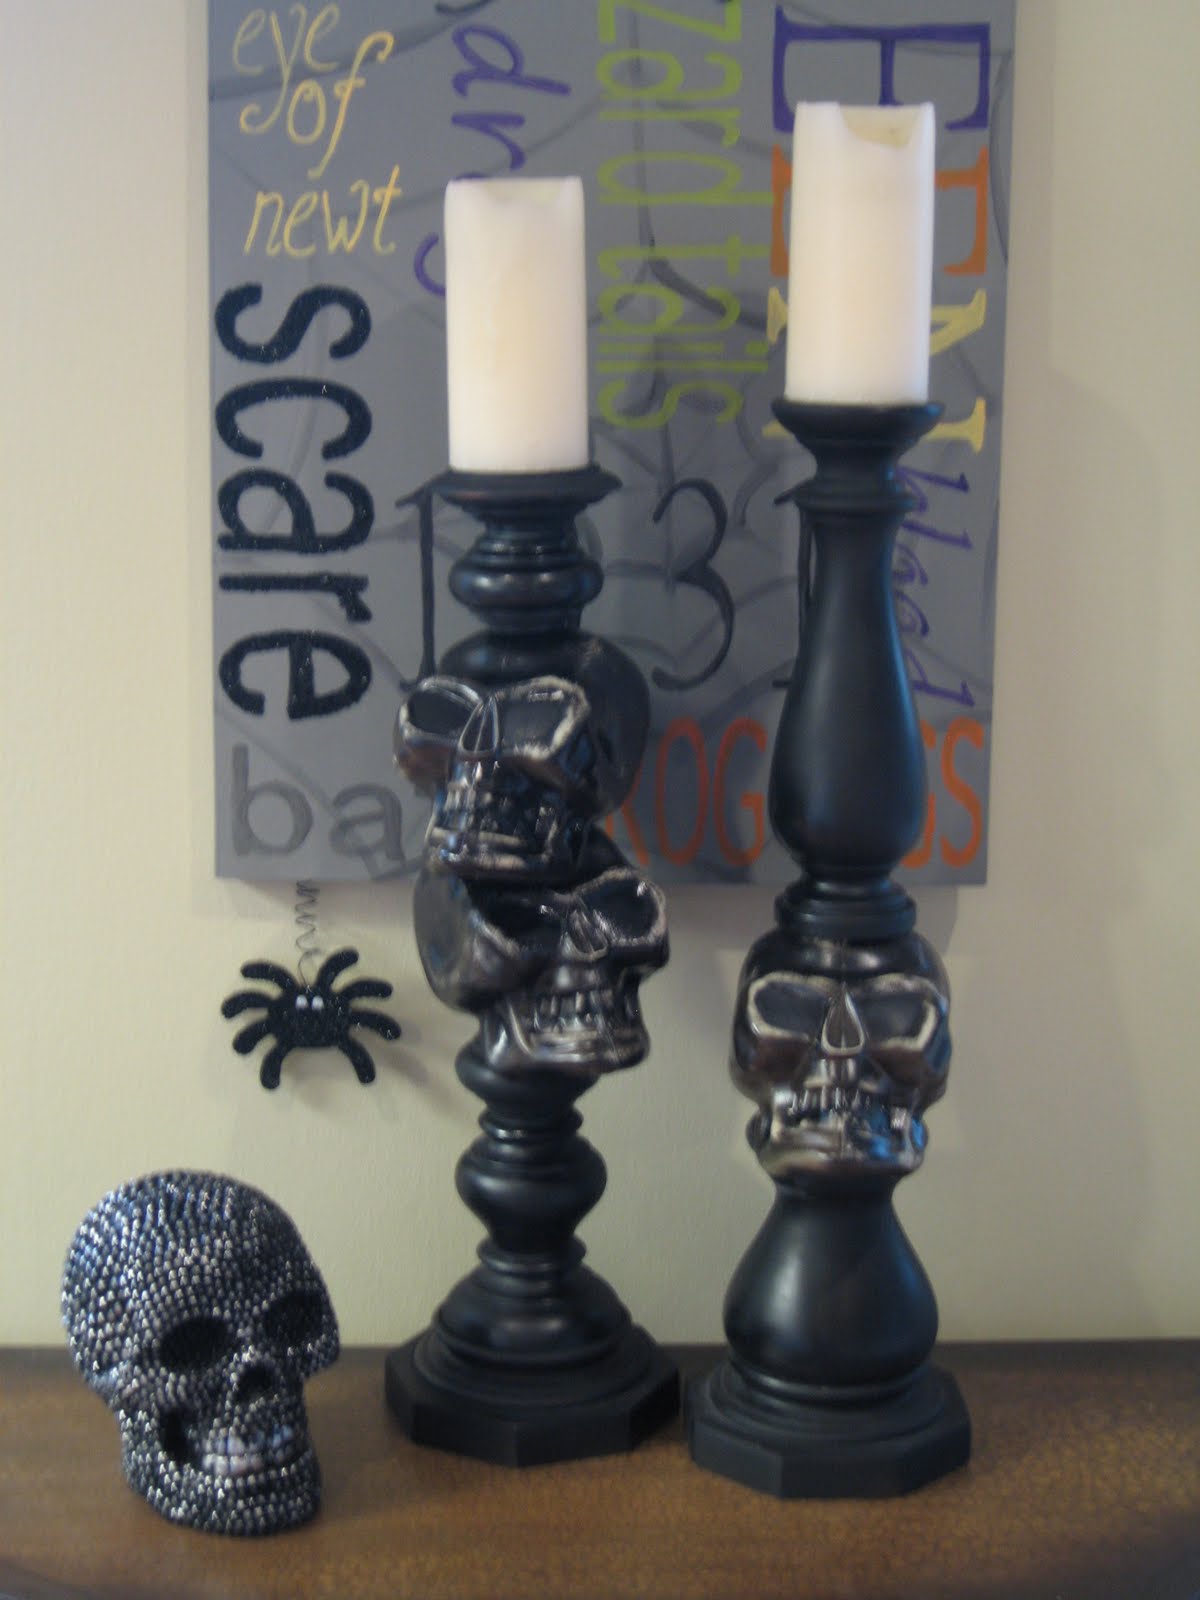
Spooky Candlestick DIY Project

28 September 2010

Hey!  This is Sandra for Sawdust and Paper Scraps here to show you one of my recent projects!

I bought about 5 old lamps when I was shopping for items to make my Halloween Candelabra tutorial.
I only used 2 for that So I had a couple left to make these Spooky Bad Boys.


Remember I said I had a project in mind to use up the other half of the PVC and threaded rod?

Well, this was what I had in mind...
only I didn't actually end up using either the PVC or threaded rod
 so now I have to come up with another project altogether!
Darn!  

For this project I used :
-2 lamp purchased at Goodwill (about $3 each) 
-3 plastic skulls purchased at the dollar store ($1 each)
-1 can of satin black spray paint (the cheap stuff from Lowes- $1)
Oh yeah!  You know I alway have about 5 projects going on at once!

1.  Take your lamps apart and paint the pieces
2.  Drill holes in your Skulls.

3.  Mess around with configuring all the parts until you find a design your happy with.  

I put these together about 6 different ways before I decided on this particular arrangement.  I used the lamps original rods, which are threaded both ends, so I had to play with adding and taking away pieces to make them just the right height.

4.  Paint the SKULLS!


5. Distress.

6.  Put them back together.  
You could drill a hole in the tops that are deep enough for the nut to fit down inside
 so the top is flush.  I didn't want to take the time so I just screwed it right on top.

My candles are a little concave and it doesn't matter a bit.  
If you're candles are flat on the bottom, just melt a little wax away to make room.

And that's it folks.


Total cost- $10
No, that does not include the studded skull on the left, I just threw him in for decoration.  
But I still think it's quite a bargain!

Read more...
Related Posts with Thumbnails
Emealz - Easy Meals for Busy People!
Home & Garden Blogs Home & Garden Blogs - Blog Rankings

Blogging  tips, tutorials and SEO

From Here to Eternity

  © Blogger template On The Road by Ourblogtemplates.com 2009

Back to TOP