We’ve Moved!


If you aren’t redirected here is the link:


Remodelaholic!


THANKS!

Showing posts with label Upholstery. Show all posts

Hints for Recovering a Wingback Chair

02 June 2011

Hints for Recovering a Wingback Chair by Lindsay

When Cassity asked me to write a post for Remodelaholic, I had to
pinch myself. I have been blogging for less than a year and my posts
are scattered at that. Diffendwelling is my way of paying back all the
other amazing bloggers out there who share their project how-tos and a
little bit of their life along the way. So without further ado, here's
a glimpse into one of my (semi) recent projects:

I've always had a thing for wing chairs. There's something so stately
and timeless about them. So when I got the urge to put a new chair in
my living room, I knew exactly what I wanted- a wing chair.

Being married to a medical school student, I knew that I was going to
have to make this happen on the cheap. My initial thought: slip
covering ...then I realized that I don't really sew well and most slip
covers I have seen don't make my heart skip a beat. So I (without the
slightest idea of where to begin) decided that I was going to teach
myself to reupholster. I learned completely via blogs and YouTube. You
can find all the links I used on my site.

Because I usually scroll down to see the "after" photo, I'll spare you
the agony. Here's the finished product:

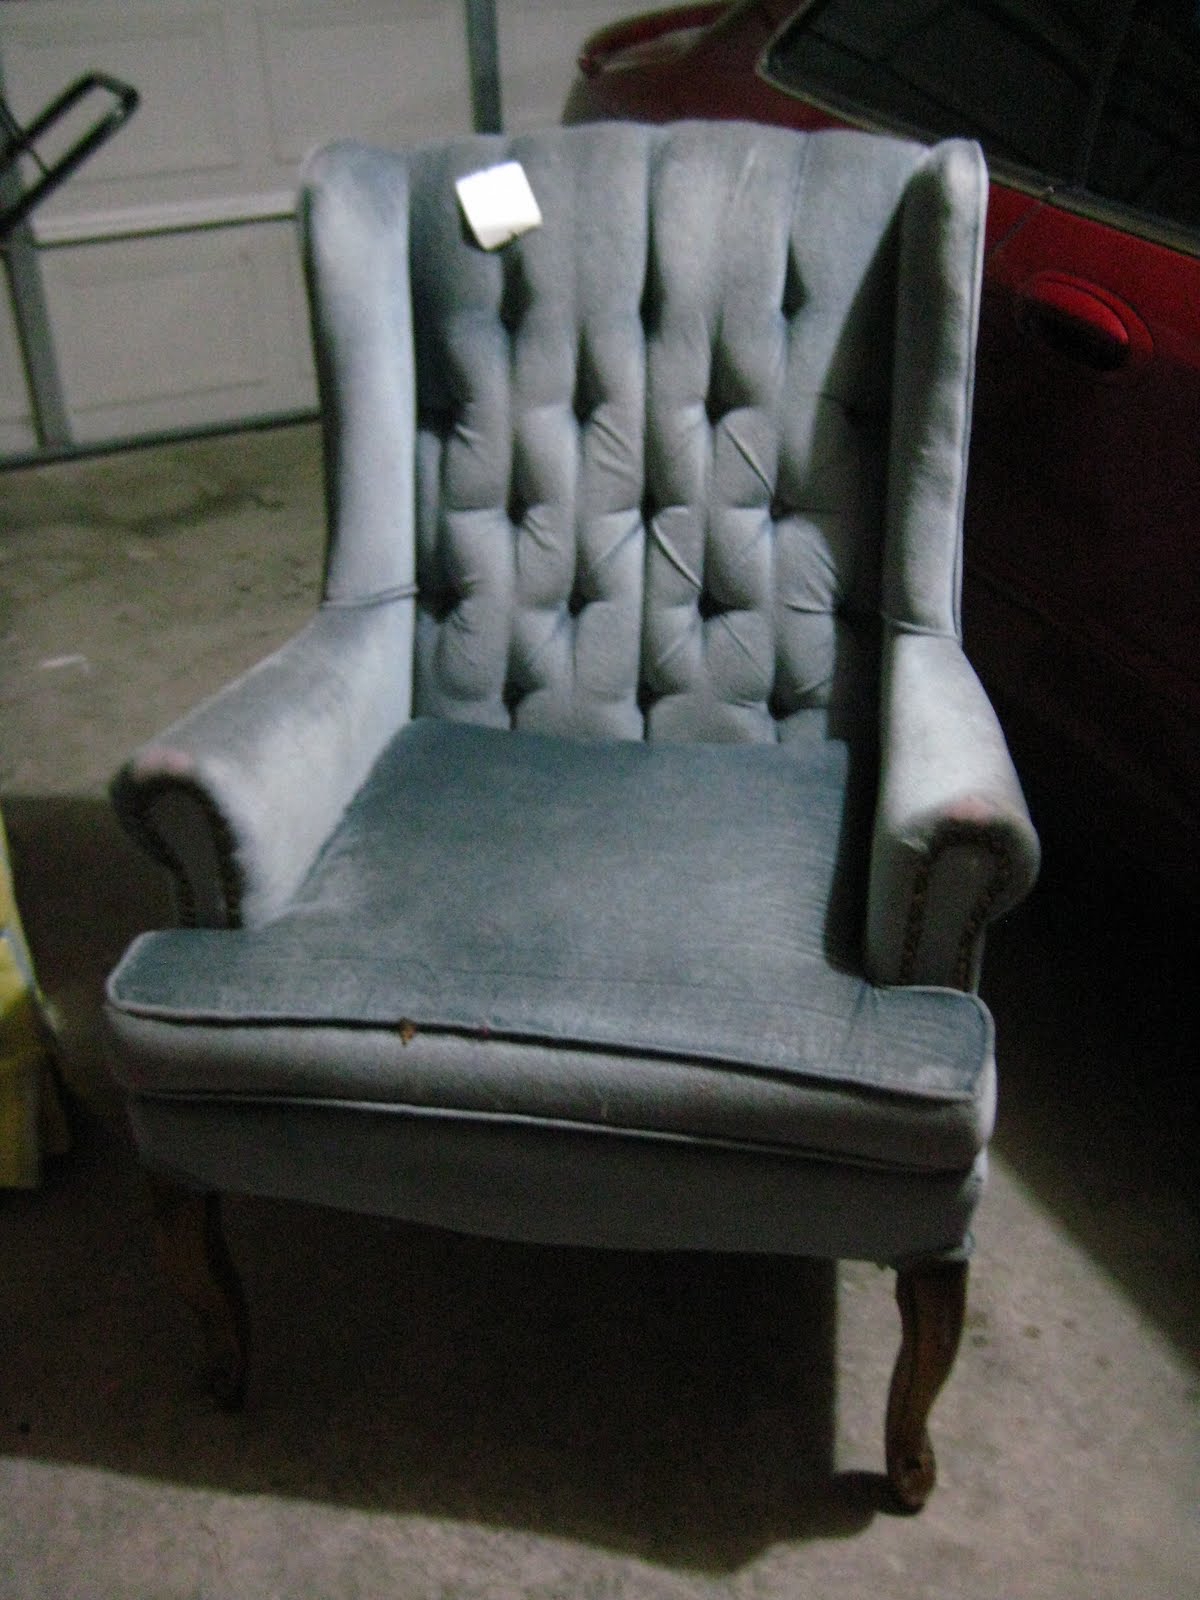
It all started with this $20 find from a local resale store:

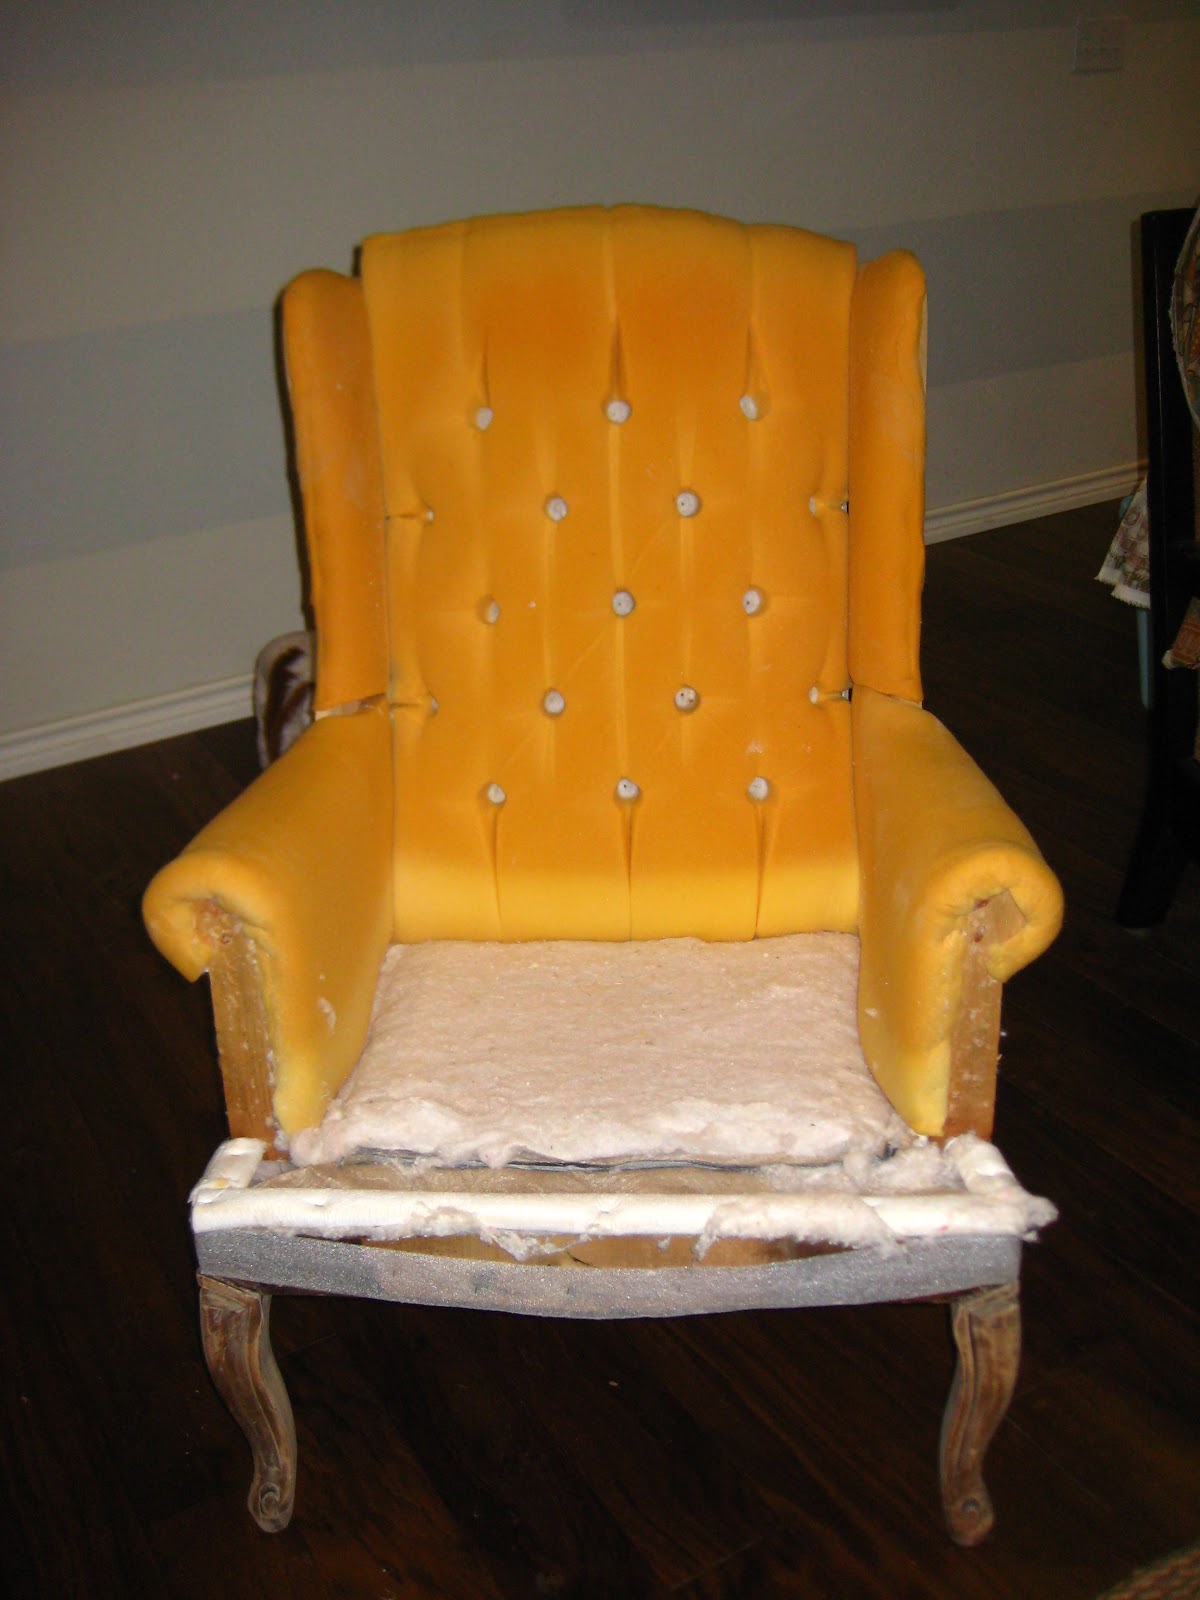
From there, I completely stripped the chair down to the bare bones.
You can read about it here:
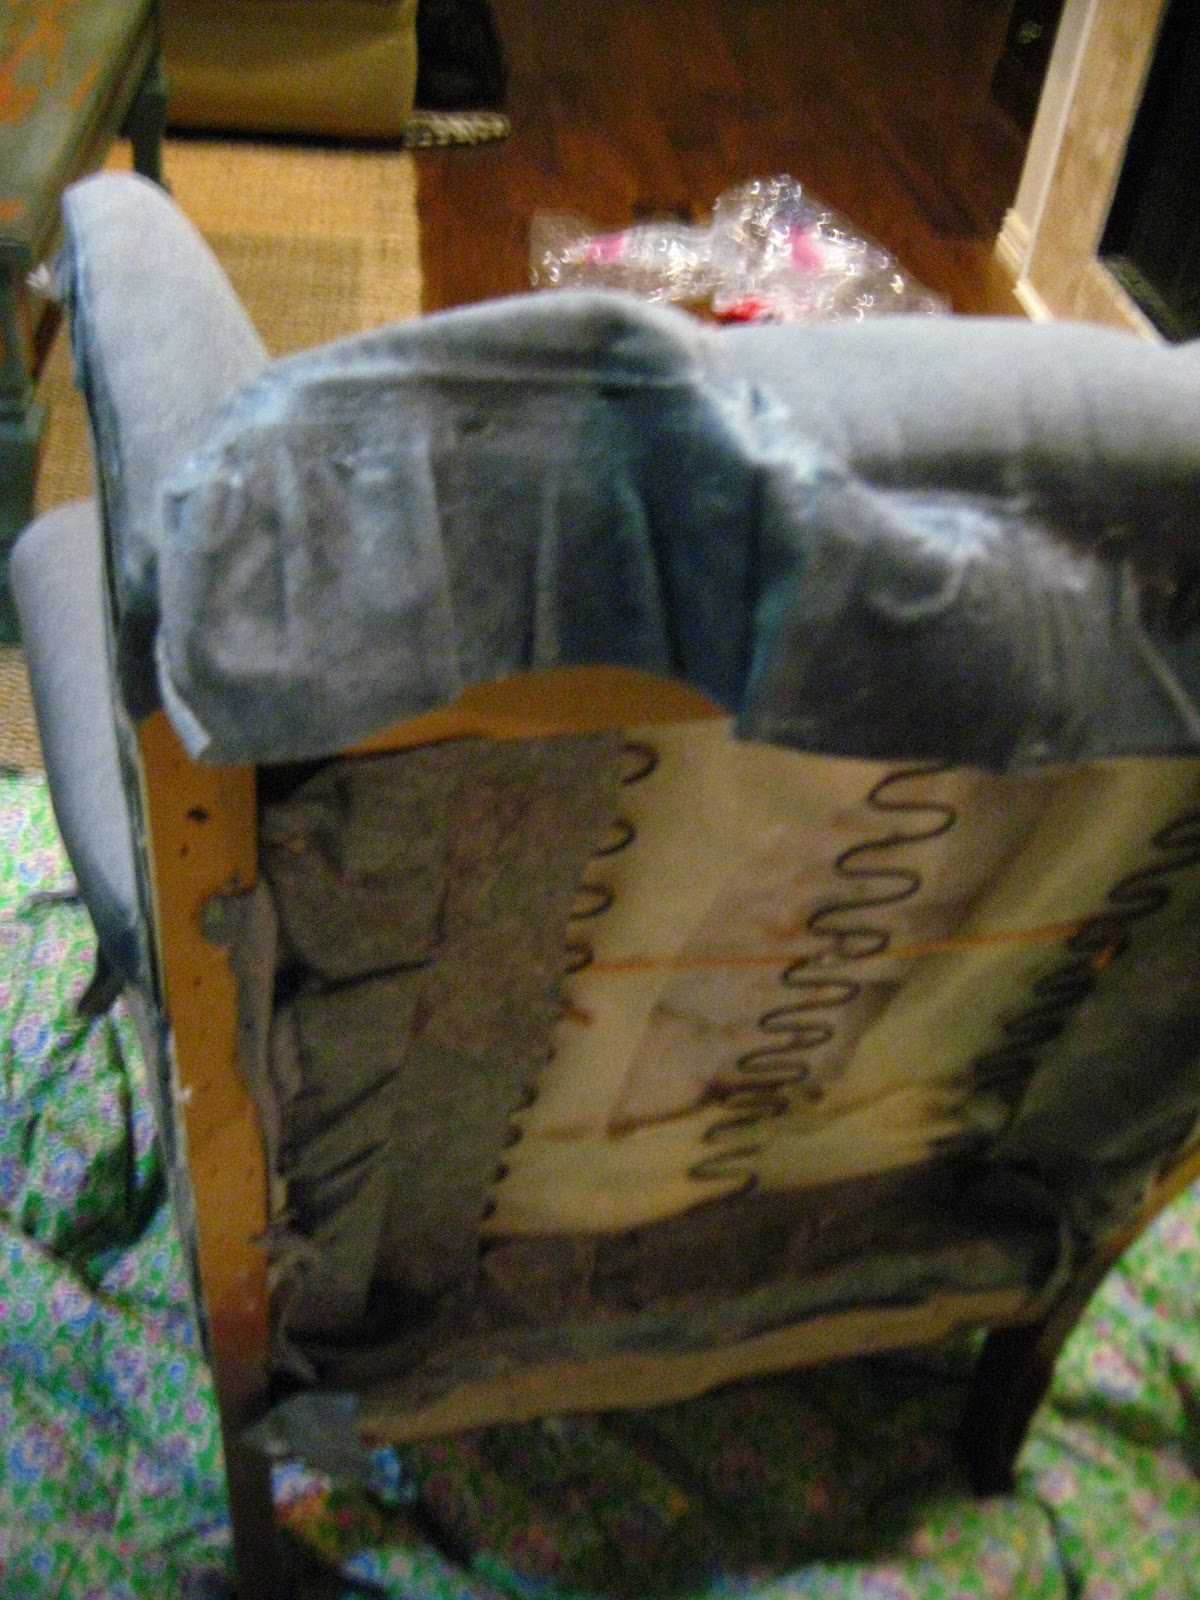
It was just like peeling an onion, each piece layered behind another.
I made sure to number all of my pieces in the order that I took them
off (which was amazingly helpful for the reupholstering part). I also
did everything I could to keep what I removed in tact.

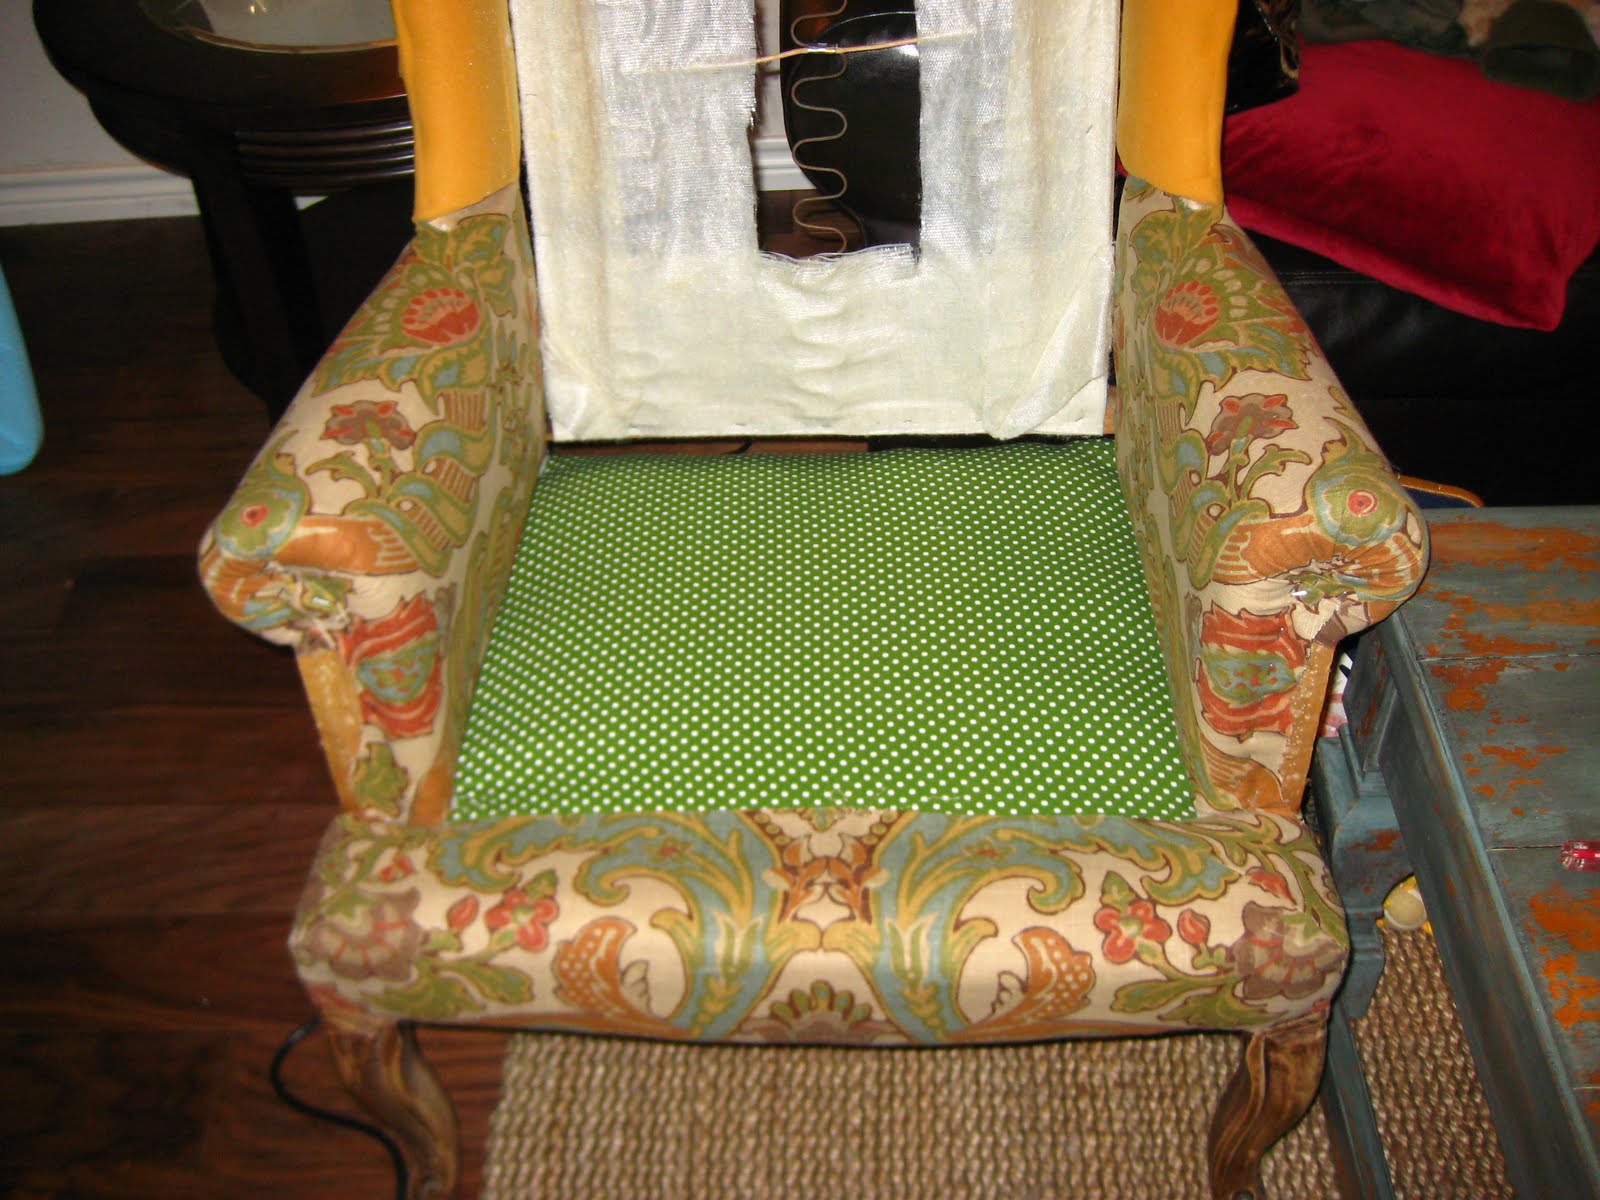
Once everything was removed, I began with the last piece that I
removed, laid it on top of my new fabric to use as a template, traced
it, and stapled it into place onto the chair. I continued to do that,
working backward, using my number system.

Tracing the
fabric


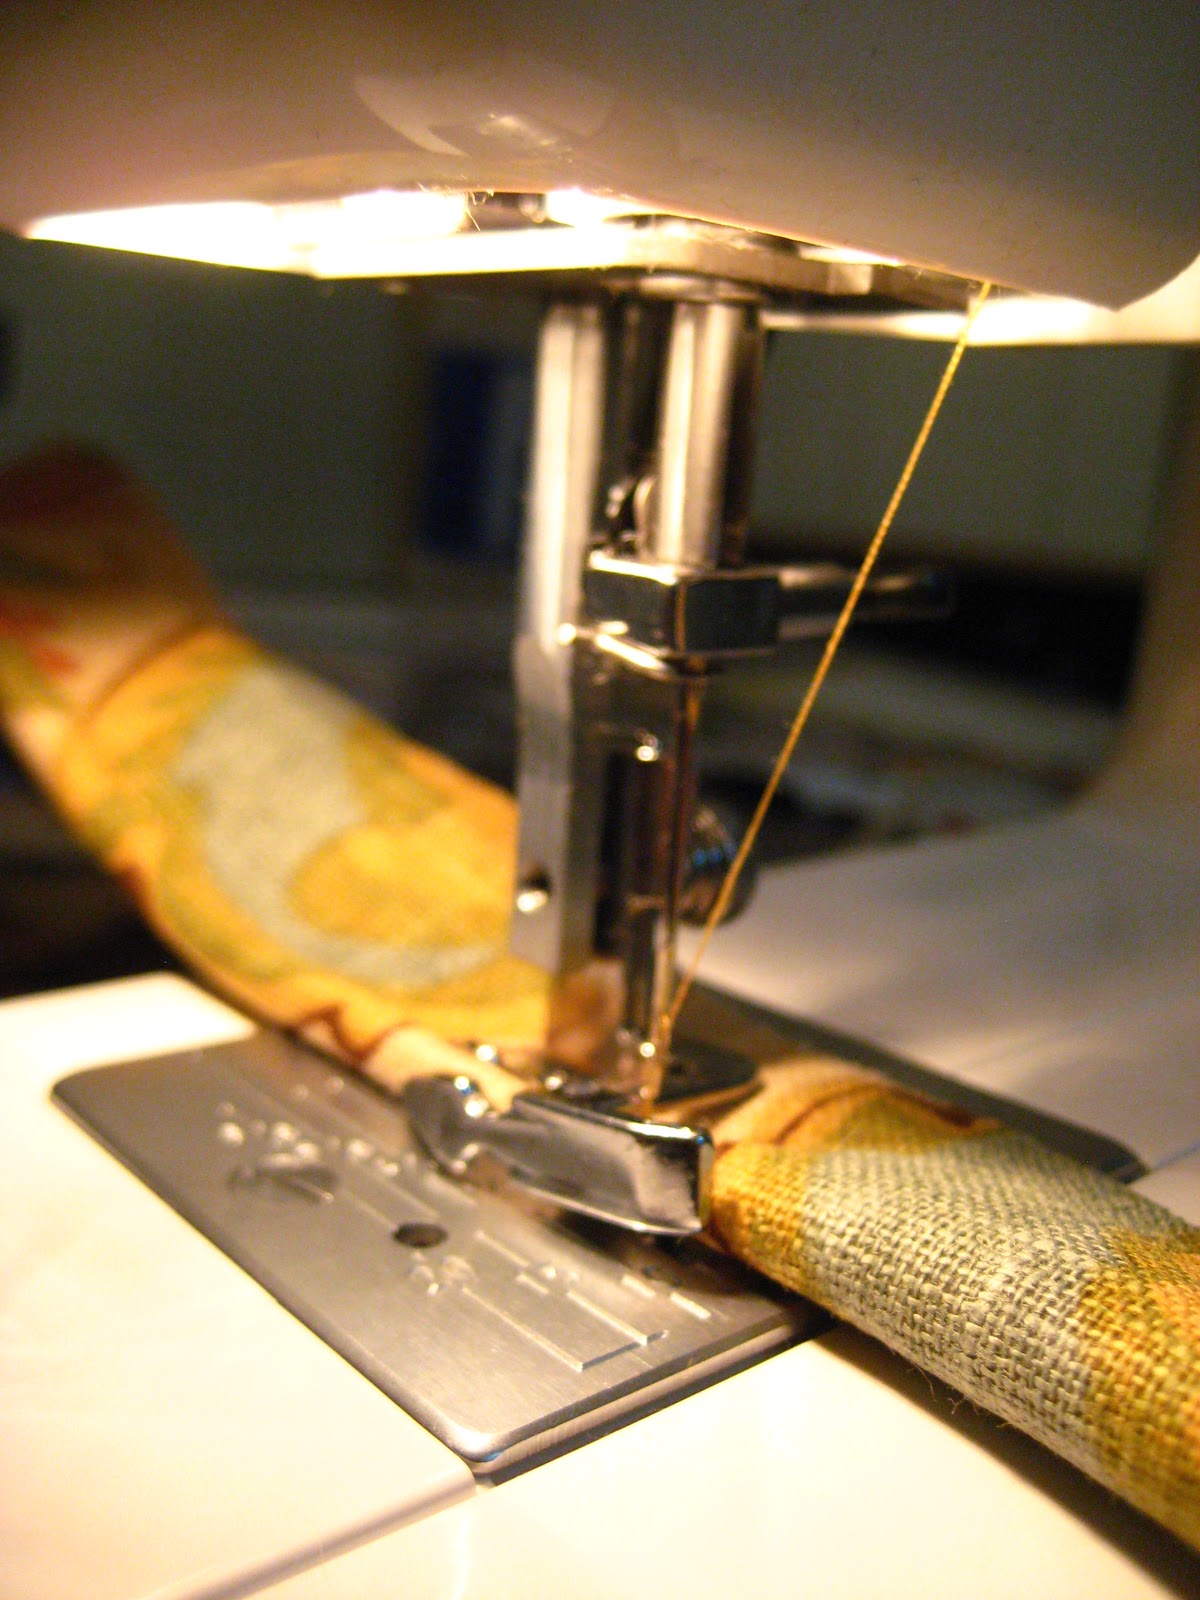
Oh, and I made some piping, using a zipper foot (and broke about 10
sewing machine needles in the process).
Do you recognize that fabric from somewhere? It's Pottery Barn's
Simone print. But I found it's actual name (Lutron Vintage) and got it
for $10 less a yard than PB was selling it for.

(You can get the full how-to on this here.)

And after more tracing and cutting and a whole bunch of staples later
(and soliciting my grandma to make the cushion cover for me), I

had the finished


For your viewing pleasure, my wing chair:


Wally tested, Wally approved.

 
Thanks for stopping by to see my transformation! Be sure to let me
know if you have any questions, as I will be more than happy (with the
limited knowledge that I have) to answer them!

And come follow me over at Diffendwelling. I'd
love to stay in touch.  


Read more...

Amazing Armchair Makeover

18 April 2011

Amazing Armchair Makeover by That's My Letter

“J” is for Jaime – Today I’m the guest blogger here at Remodelaholic. I jumped at the chance to
be part of Cassity’s great collection, thank you for asking.

My blog, That’s My Letter,
has evolved into a make this, change that, do-it-yourself virtual scrapbook for my
little hobby of working with my hands.  The title came from my kids, when they were
younger they’d always point out the first letter of their name and say ‘that’s my letter’ mom so I
went with it. And now I title every post with a letter and one word to describe the project. It has
become my signature.

I’m a Midwestern girl born and raised in Minnesota but married to a New Yorker so we're
here on the East Coast. All my life I’ve been creating, I was a studio art major in college and
worked a bit for an interior designer. Now I have three young kids and life is busy but I love the
challenge and always search for the best way to make it work.
My recent project, an armchair makeover, is the focus of today’s post. A quick before and
after:


Read more...

Simple Ikea Bed Turned Chic

28 March 2011


Simple Ikea Bed Turned Chic
by Organized Design

Hey guys... I'm Jen from Organized Design. I love to blog about all things interior design and organizing. When I'm not busy doing the mommy thing, I enjoy creating functional finished spaces. My little girly is almost three and was in need of a big girl bed, so I took this bed...
and made it into this bed!
I am so pleased with how this bed turned out I can hardly stand it. I knew I wanted an upholstered bed for her, but wasn't finding anything I loved. They were either too boring, no style, or way out of a very descent price range. I first wanted to make the bed from scratch headboard, side rails, foot board and all, but wasn't mentally prepared for that undertaking. So I decided to take the easy way out and use a bed from Ikea. I started out by purchasing some particle board and cutting it down to the size of the headboard.

Read more...

Lingerie Inspire Slipcovers: Beautiful Details

24 March 2011

Lingerie Inspire Slipcovers: Beautiful Details


My old dining room armchair is now an occasional chair in the guest room. But I wasn’t so crazy about the dated forest-green velvet cushion. Slipcover to the rescue with a tiny twist – sweet feminine ties reminiscent of an old fashioned corset.

Here are some detail shots:

Read more...

A New Look for and Old Chair: Painted Upholstery

23 March 2011

A New Look for and Old Chair: Painted Upholstery

Cassity asked me to guest blog and I was so excited. What a great blog to get to guest blog on! This was my FIRST time to be asked to guest blog.  I’m new to blogging.  I haven’t been blogging for a full month yet!  So, thank you, Cassity; Too kind.

My current ongoing project is my master bedroom.  I have documented the process on my blog from the conception of ideas to making it happen.  I’m in the final stages now – just waiting to make some art and get the final table.  Then, I’ll be ready to reveal!   As part of the process, I painted the upholstery on a chair!  Crazy, I know… but I do think this risk was worthwhile.   Follow me as I explain the process below!

How do you get a chair to go from drab to fab?

I recently painted an upholstered chair that I purchased.   Below are before and after photos.  Walk with me as I explain why I did this and how it was done.

IMG_4609   IMG_4793 (465x640)

Read more...

Ballard Design Inspired DIY Striped Bench Tutorial

17 November 2010

Ballard Designs Inspired 
DIY Striped Bench Tutorial


I love Ballard Designs.  I get giddy when I open the mailbox and find a clean, crisp Ballard Designs magazine waiting for me.  I love the simplicity mixed with some vintage and mixed a little more with modern…unbelievable inspiration is found on every page.
Sweet P loves Ballard Designs too…taking an old magazine and designing a house for her ZhuZhu pets with cut out pictures of tables, chairs, mirrors and accessories.  I think we have a budding designer on our hands.
So this bench has been on my radar for years.  I love the honeycomb fabric that is all the rage and that was always how I envisioned the bench in my entry.  We definitely cannot nor would I ever pay the big price tag for the bench but I really, really wanted it.  So I was on a mission and searched the internet for ‘how to’ projects and tutorials but found nothing that looked like the Ballard Designs style bench.
And then my partner in crime, Angie, posted this and changed everything…for the good.  I fell in love with that chair!
After looking in a 10 mile radius of my house ended in utter failure, I drove clear across Houston to mother of all fabric stores, Glick’s.  I walked in and sweetly asked if they had a ‘large black and white stripe’ fabric.  She smiles and says ‘I don’t think so but let’s go look’.  My heart sank but I followed her to the back…it was like slow motion in a crazy dream where Javier Bardem is waiting for me in a dark alley.  Oh, sorry…did I just say that?
Ok, so I followed her, she points and says ‘something like this?’  I screamed YES!  Jumped up and down and I think I might have hugged her too….
$10 bucks later and I walked out with the most perfect black and white stripe fabric ever.
So…my wheels starting turning.  I couldn’t find a tutorial on a bench like I wanted…so the next best thing was to make it myself.  And I drove to Lowe’s…and this is how it all went down:
72″ MDF, cut down at Lowe’s to 60″:  $2.14
4 pine legs, 15″ tall: $6 each on sale
Valspar Black spray paint, satin finish:  $3.97
Foam padding from Hobby Lobby:  $16 after 25% off coupon
Quilt batting for softness:  $4.99 at Hobby Lobby
Fabric: $10
Dowel Screws: $3
My neighbor’s drill because ours was dead:  FREE
ballard designs bench
I measured the center of the pre-drilled hole in the table leg and marked the same spot on the corner of the MDF board.
do it yourself bench
I found old spindles in Round Top for $1 each…kept going back and eventually couldn’t figure out what I would do with them so left them behind.  Got home the next day and cried a river because I could have used them for my bench legs…live and learn.
Laid the legs in the driveway on painter’s plastic which has been used over…and over…and over….
do it yourself bench legs
This is 1 coat…I eventually used 4 coats of paint…did not take long at all.
do it yourself bench legs black
My thought was to use the below screws, drill them in the board from the top and after the board was covered, screw the legs up into them.  That is WRONG! HA!  Didn’t work at all….
Another trip to Lowe’s and learned “Dowel Screws” are just what I needed.  They are double ended…one end screws up into the board underneath and the legs screw onto the other end.  Simple.  Who knew??  Now you do too!
dowel screws
Laid the foam on top of the board.  It was pretty wide and I was able to cut 3 layers of foam:
do it yourself bench foam
Using my kitchen serrated knife…don’t hate me because I am inventive…or crazy…or weird for using my knife.
Covered the 3 layers with quilt batting to give a more softer look and feel…
Stapled the quilt batting underneath to help stabilize the foam….and you can see one end of the dowel screw underneath.
dowel screw
Tightened it up with pliers…those are pliers, right??
Okay…this is interesting….the fabric I bought was only 54″ wide which is pretty much the standard.
Since I am making a ‘custom’ bench, I had to make custom fabric to fit the 60″ length.
So I laid the fabric on the bench, cut a piece to fit the remaining 12 inches.  I choose to match up the black stripe.  I flipped it so right sides were facing eachother, and pinned the pieces together…
Borrowed my neighbor’s sewing machine…because mine bit the dust and I haven’t had time to buy another one.  But I am completely in love with her machine, which she admits she never uses.
Sewed a straight line…and there you go…62″ fabric created..and no seams Mom!
Laid the new 62″ fabric on the bench (notice my little helper…she keeps me company)
Flipped the entire bench over.
Got out the staple gun which I did NOT borrow….and went to town.
Screwed the legs into the dowel screws once all the fabric was pulled tightly and stapled.  I did trim all the fabric underneath too.
There she is…standing on her legs for the first time.  I feel so proud…sniff, sniff.
And here she is…her new home in my entry.  The pillows are not staying…that is another tutorial coming your way.
black and white stripe bench fabric
Making this bench was my first ever ‘made from scratch’ piece I have ever done. I can paint the heck out of anything but was completely intimidated by drilling, cutting, tools, and stapling.
It was definitely a learning process and had I not made the second trip to Lowe’s for the dowel screws, the entire project probably took less than 2 hours to make.
$599 for a ready made bench OR 2 hours of creating and learning and about $65 of my pennies saved?
I’d do it again in heartbeat and it was so much fun.
Now I don’t know if I would sit on the bench but it sure does look pretty in my house!
Now go build something!

Read more...

No Sew Way to Recover an Ottoman!

10 November 2010

.
A big thank you to Cassity for having me over again today.  You can find me at my blog, 33 Shades of Green, trying out all sorts of creative projects.
.
I recently recovered an ottoman with new fabric with a completely no-sew method!  It was so simple and easy and I love how it turned out.  The key to this project if finding an ottoman with separate legs.  The one I bought is no longer available but here is a similar ottoman I found at online at Target.
.
Supplies Needed:
- ottoman
- upholstery fabric
- staple gun & staples
- button covering kit
- upholstery needle
- tape measure
- upholstery thread
- buttons
- water soluble marking pen
.
The ottoman arrived needing assembly which was perfect for what I wanted to do.
.
 .
See that leopard print?  It wasn't exactly what I was looking for but I liked the style and I especially liked the button tufting.
.
.
You can find the upholstery I used here.
.
After deciding on fabric, you will need to cut it to size.  Make sure to leave enough overlap on each side to staple securely to the back of your ottoman.
.
.
If you are using a geometric pattern like I did, make sure you are careful about how the pattern will lay on the ottoman.  With my pattern, I thought it would be best to center the pattern.
.
Now, use a staple gun to attach the fabric. 
.
.
When doing this, I start with one staple on each of the four sides and then continue around.
.
.
.
Continue stapling all around but don't staple near the corners.
.
Here's my trick for clean, neat, corners. 
.
.
Pull fabric up tight to corner and staple as shown in photo above.
.
.
Then, fold fabric in until a straight edge is created. 
.
.
Pull tight and staple.  I know that sounds confusing, but I promise that it's not!
.
Once you are finished with all four corners, your ottoman will look like this:
.
.
You will want to trim the fabric so that it doesn't hang down when your ottoman is finished.
.
Here's how the front will look:
.
.
See, that was easy!
.
Now it's time to use the fabric button kit and cover the buttons.
.
.
Button kits like this are such an easy way to add a professional detail to a project.
.
.
 Now it's time to attach the buttons to the ottoman.  The first step is to determine where you want your buttons to be.  Use a tape measure and a water soluble marking pen to marl the locations.
.
Cut a long length of upholstery thread and tie to button.  Thread both ends through upholstery needle.
.
.
Push needle through from the front to the back.  Pull tightly.  At the back of the ottoman use a button to thread through.  Using a button allows you to secure the thread.  There is probably a better way to do this, but I sort of figured it out as I went along!
.
Sorry for the poor picture, but here's the button on the back side:
.
.
Continue until all buttons have been secured.
.
I think the buttons really make this project!
.
.
.
Attach the legs and you are finished!
.
Here's the finished product:
.
.
.
.
.
If you have any questions, please stop by and visit me at 33 Shades of Green.
.

Read more...
Related Posts with Thumbnails
Emealz - Easy Meals for Busy People!
Home & Garden Blogs Home & Garden Blogs - Blog Rankings

Blogging  tips, tutorials and SEO

From Here to Eternity

  © Blogger template On The Road by Ourblogtemplates.com 2009

Back to TOP