We’ve Moved!


If you aren’t redirected here is the link:


Remodelaholic!


THANKS!

Showing posts with label Mudrooms. Show all posts

Reinterpreting the Hall Closet to a Mini Mudroom

29 September 2011

Reinterpreting the Hall Closet to a Mini Mudroom


One of my biggest gripes with our home is our coat closet.  It is a very crucial area for us and all we get is a dinky closet.


My dreams are filled with large mudrooms...

So last year I thought about what I could do to maximize space in our tiny closet.  

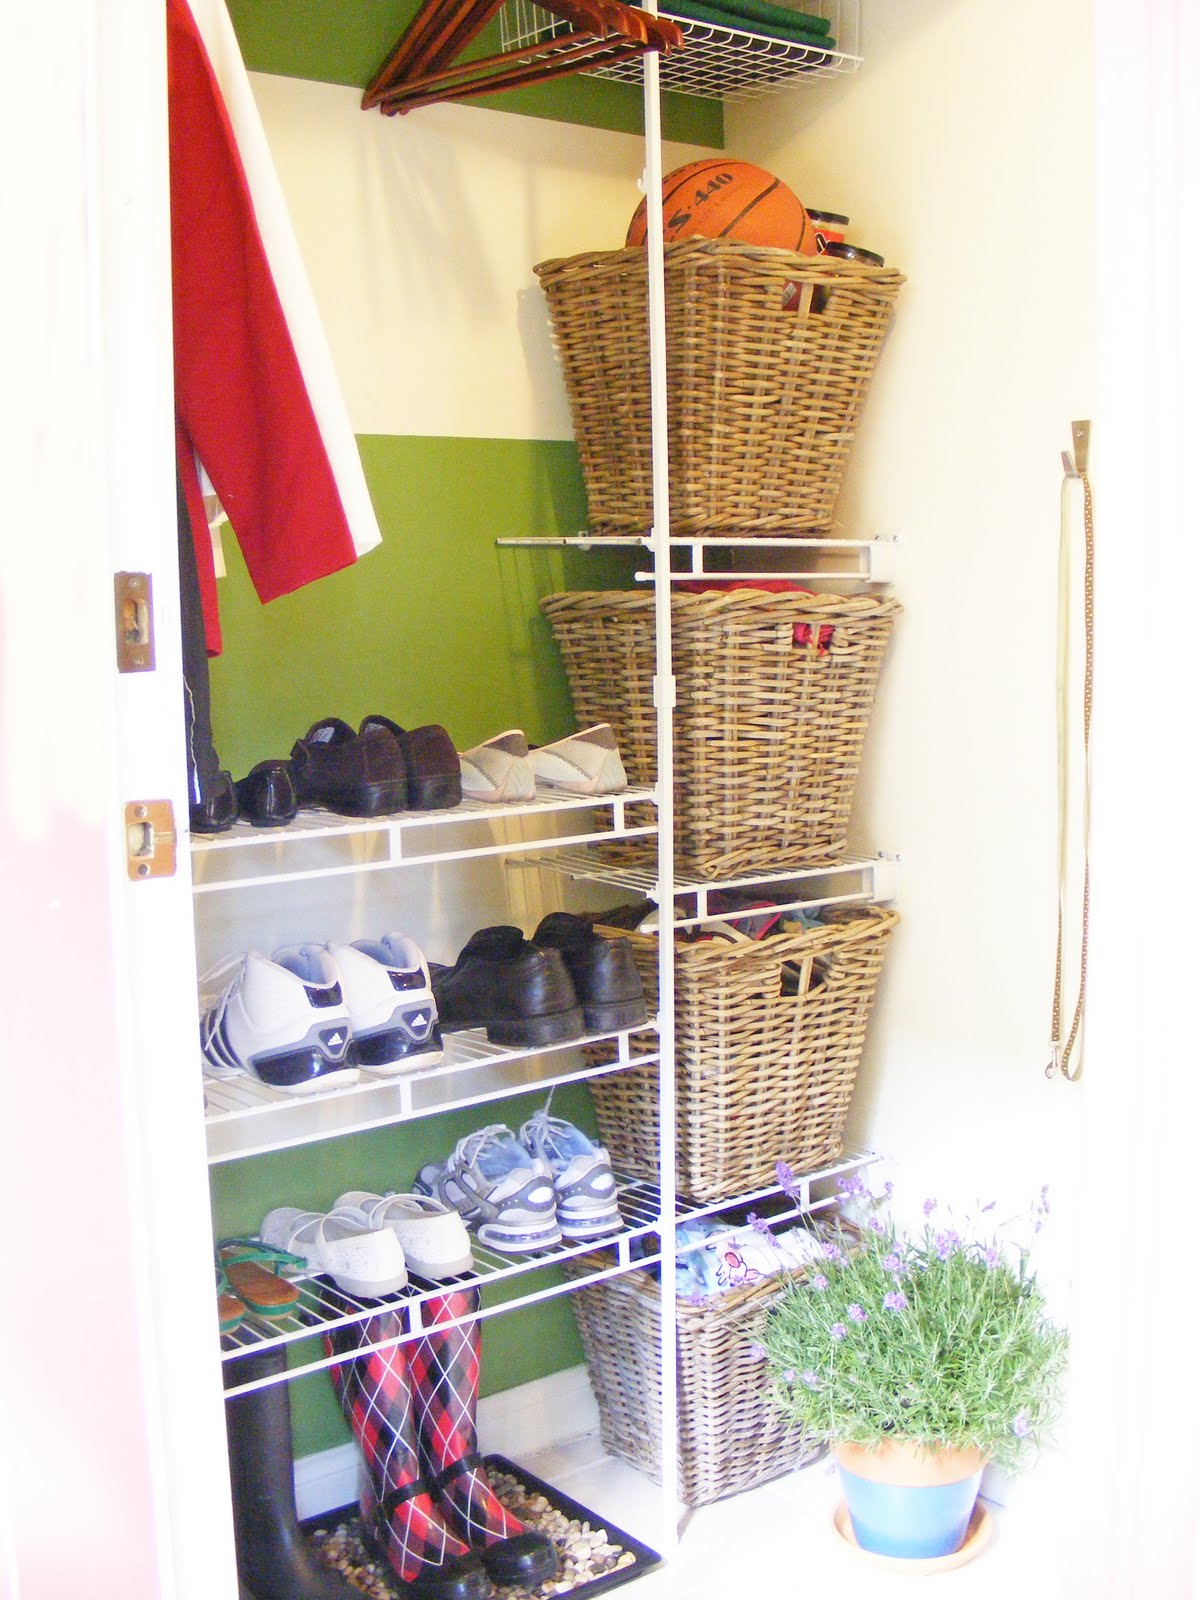
First and foremost, we took off the door.  Didn't help it's cause when within an hour or two of arriving in our home (before the movers even showed up) a nice little hole was punched into it from the door to the garage opening and hitting it.  Nice design there.  {To see our home's layout, scroll to the bottom of this post, although it's backwards, but you'll get the point of our awkward garage entry way.}   I never filled in the hinge holes though, just painted them...can't decide if it's worth it or not....  Then I took down the standard white wire hanging shelf (that was too high for the kids to reach so their coats were constantly lining the floor), and I created 2 hanging hook racks for one side and searched high and low for the perfect shelf for the other side.  Well, when the closet is only a little wider than the door frame itself, it was very difficult.  So I made do with our old shoe rack and a couple baskets (one for hats, gloves and other *extras* and the other for the kids shoes).  This design worked out alright.  The girls could hang up and get their own coats and backpacks, but it still seemed like it could be better...especially when the kids dumped the basket to find their shoes...


Read more...

From Hallway to Organized Mudroom

23 September 2010


When I saw this party link, I felt like I had entered mudroom heaven.   Check out what Megan of Honey We're Home did to liven up the hallway entrance from her garage into a functional and beautiful mudroom!

It’s been quite a week for our little mudroom or mud “hallway”.  My goal was to transform this transition space into something a bit cherrier since it’s the way we enter our home from the garage.  We started with this:
Mudroom 003
Cleared the decks and began fresh:
Mudroom 005
Painted some stripes and inserted decorative storage baskets {Target $9.99} into the cubbies:
Mudroom 014
Made a no-sew bench seat and added a mirror {Hobby Lobby- $25 on sale}:
Giraffe, bench, pillows 011  Giraffe, bench, pillows 006Giraffe, bench, pillows 002 


{mirror before a couple of coats of white spray paint}
Bedroom furniture makeover 003
And finally, adorned the bench with a few pillows made from scratch with my brand new sewing machine!  I’ve never sewn before, so this is a new adventure for me.  Be kind. 
HOW TO SEW A PILLOW
I basically followed the tutorial by Janell at Isabella & Max Rooms, except I didn’t use a pillow insert, I used poly stuffing.  And although I did iron my fabric before sewing, I didn’t iron the seams. 
1.  Lay the fabric inside out, use chalk to make an outline for where to sew, and secure with straight pins.
Giraffe, bench, pillows 028   Giraffe, bench, pillows 017 Giraffe, bench, pillows 018
2.  Sew your stitches leaving a 6-inch opening to insert the stuffing, trim the excess fabric.
 Giraffe, bench, pillows 020 Giraffe, bench, pillows 021   Giraffe, bench, pillows 022
3.  Turn the fabric right-side out and stuff the pillow full being mindful of lumps.
Giraffe, bench, pillows 023 Giraffe, bench, pillows 024 Giraffe, bench, pillows 025
4.  Pin the final opening and handstitch closed while watching Top Chef.
Giraffe, bench, pillows 026  Giraffe, bench, pillows 027
After adding a few more pillows, our mudroom now looks like this:
bench pillows 010
bench pillows 009
bench pillows 013 
And because I love a good “before” and “after”:
 BEFORE
Mudroom 005
AFTER
bench pillows 011
 bench pillows 015

Now that’s a space I’m happy to come home to!  Have a great weekend y’all!  I’ve got fall decor on my mind for the weekend, hmmm . . . .

Aren't we all dreaming of a space like this for our own houses? I know I have it on my dream house list!  What about you?  What is your favorite part about the space?

Read more...

From Closet to Mudroom, Makeover and Reveal!

20 September 2010


This closet to mudroom transformation is amaz-z-zing (name that movie, although I have only sen it once, and can't remember it's title...) You may have already seen it, but I have to share it anyway. Because it goes to show a well organized space is a beauty to behold. Check out what Ashli of Maillardville Manor had done:

Well it's been a long time coming but we finally finished our mudroom/ front entrance. It's really a hybrid of the two, since it's the only entrance to our house technically it's a front entrance. But because it's the only entrance we needed it to function, well, like a mudroom.

The room is only 4 feet by 5 feet and that included the closet space. It had bi-fold doors on the closet. The doors took up way too much space when opened and made the already tiny room smaller when closed, so the first thing we did was remove them.
Once the doors were off 
we Lee painted Large Green Stripes on the wall using Martha Stewarts new line of paint. We used her Bay Leaf color and I couldn't be more in love with it. Lee also said he really liked her paint, it went on smoothly, although bubbled a bit when rolling, he suggested using a foam roller when painting. As an added bonus, we only had to purchase a $5 tester and that was enough for the stripes. Talk about big impact, low price. 

Then we installed a simple, very inexpensive closet unit. I know they aren't the most attractive unit's but the price was right, and with a few lovely baskets they looked a lot nicer.

We installed a mirror for a quick hair checks on the way out the door, but to add a little extra to it, we ordered a vinyl decal from Etsy. The decal came in four pieces. The Big M was one, The Malinek Family was another and Established 2006 was another. In case you were wondering why 2006 it's because we were married in January of 2006.

Underneath the mirror are these fabulous 
Ikea hooks. Because the room is so tiny, any amount of saved space is welcomed, even if it is only an inch. These little hooks unfold to hold jackets and purses, and fold away to save space when they aren't in use. Genius, Ikea has such smart ideas sometimes.

Of coarse you remember the boot tray project from 
Mondays Post. I love the boot tray so much I still wanted to show you more pictures about it! It's pretty and functional. And anytime function and style meet makes me happy!

We also added two little hooks, also from Ikea, to hang the dog leash from.

So there is our Mudroom. I tried to add as much style without compromising at all on the function. And all on a budget.
Budget Breakdown:
Mirror: Home Depot $19.99
Decal: Etsy $12.99
Hooks: Ikea $10.00 / 3Leash Hooks: Ikea$4.99/ 2
Closet unit: Home Depot $40.00
Baskets: Ikea $45.00 /3 ($14.99 each)Boot Tray Project: (Rocks Ikea, tray Bed Bath and Beyond) $17.50Small Baskets: Ikea $18.00 /3 ($5.99 each)
Hangers: $5.99 
Paint: Home Depot $4.99 (Martha Stewart's Bay Leaf)

Grand Total: $179.45

Oh, and Max Loves the New Mudroom too:


Doesn't it look beautiful?
What is your favorite part?

Read more...
Related Posts with Thumbnails
Emealz - Easy Meals for Busy People!
Home & Garden Blogs Home & Garden Blogs - Blog Rankings

Blogging  tips, tutorials and SEO

From Here to Eternity

  © Blogger template On The Road by Ourblogtemplates.com 2009

Back to TOP