We’ve Moved!


If you aren’t redirected here is the link:


Remodelaholic!


THANKS!

Showing posts with label Bedding. Show all posts

West Elm’s Window Headboard Knock Off Tutorial

04 May 2011

West Elm’s Window Headboard Knock Off Tutorial 

Are you in love with West Elm? I am.  Are you not in love with their prices?  Yeah, same here.
I’m Michelle from Decor and the Dog and I’m very excited to be guest posting on Remodelaholic today. My husband and I built our second home 3 years ago. We did a lot of the work ourselves which allowed us to build our dream home without breaking the bank. (You can take a peek here.) We recently started blogging about our DIY decorating/home improvement adventures.

One of those adventures includes building a headboard for our master bedroom.

We were inspired by West Elm’s Window Headboard.
The $299.00 plus $60.00 shipping price tag was less inspiring.

We decided we were going to build this headboard for a lot less.  How hard could it be?

Six hours and $57.06 we ended up with our copy cat version…
How can you make your own copy cat?

Read more...

Great Blue and Brown Bedroom Design

29 September 2010

This party link is so great we had to show it off!  It is from Cindy at Cottage Instinct's great blue and brown bedroom, and she has a great blue and brown link party with this post ( I think the link up is closed but there are great projects to see) you should go check out!
Ok, ready?  I’m gonna share my BLUE & BROWN bedroom.  We’ll call it a psuedo-reveal because I’ve shown it to you before, and I mostly just rearranged stuff, moved stuff in, moved stuff out, and vacuumed.  But I did make (or am in the process of making) stuff too, so I’ll point those things out as we take the tour.

Ta da!  I didn’t paint or sand or do anything to the thingamabob….I just backed it with some tan/beige fabric using a staple gun, then hung a twig wreath I found in the black hole of my cra(p)ft room with some clearanced blue linen.  Kept the edges raw.  Just because.  I’m darn happy with the outcome.  Darn happy.IMG_3198

So below is the view going into my bedroom.  We moved the antique corner hutch and dresser from the family room back here.  I took the curtains and rod from the dining nook,  and pinned on added some more of that clearanced blue linen to the bottom ‘cause they were a wee bit on the short side…also plan on adding a bamboo-ish shade in the near future.

IMG_3212

Coming around the corner, you can see my quick fix closet doors.  Ick.  Hate ‘em, but I haven’t found a solution I like.

IMG_3187

I set up a clothes dumping ground little reading corner with my white rattan chair.  I covered the seat with the same fabric I lined the back of the thingamabob.  The bookshelf was a thrift find from last fall.  Today she finally got cleaned, sanded, painted, distressed, and glazed.
  
IMG_3188

Here’s the view when I turn around.  Let’s see….there’s the ruffled pillow cases I made awhile back with some vintage sheets, a couple quilted shams from Walmart, and that striped sham (quilted floral on the other side)  everyone emailed me about.

IMG_3189

See how perfectly lined up my side table lamps are?  I cheated by sticking some of my hubby’s vintage books under my side so they’d be the same height.  See the beige blanket at the end of the bed?  Just several yards of fabric I hope to make into a throw eventually.  I’m such a cheater.

The nightstand is actually my gramma’s old sewing storage thingy.  She painted and glazed it back in the 50’s.  A perfect turquoise!

IMG_3228

Close up of my reading corner.  Wasn’t my hubs a cute baby?  The top shelf are old Landmark History books.  I removed the covers to find all different colors.  I took the pale blue/greens and pale beiges. 
 IMG_3207

Close up of my handiwork out in the garage this morning…..

IMG_3209

View from the reading corner to hubby’s side of the bed.  His bedside table also traveled the wilds of our hallway, coming from the family room (yes there’s furniture in the family room.  That will be another post though…..)  That nightstand as well as the dresser were in my bedroom growing up.  ‘Tain’t never selling or painting them.  Nevah evah.  Oh, and I love to decorate with cords.  *rolling eyes*

IMG_3217

Love my simple wreath.  I fiddled with the colors so you could see the right shade of blue….but gave up.  Just know it’s perfection.  

IMG_3204

Looking back across to the corner hutch, which also sat in my mama’s house as I grew up.

IMG_3218

Filled it with some big ole pitchers (comodes?), some tiny pitchers and some vintage pitchers….er, pictures of hubs and me as kids.  Not crazy about the arrangement, but dude, the party was about to start.

IMG_3206

Weren’t I a cutie?  How ‘bout that black and yellow bathing suit, eh?  

IMG_3225

Up top I stuck my chippy wicker vase and a vintage basket that belonged to my mama with dried hydrangeas from her garden.  Please ignore the nasty ceilings.  They definitely do not say ‘cottage instincts’.  They say ‘cottage cheese’.  Bleck.

IMG_3224

Now here are a pair of chippy old windows that I’ve never figured out what to do with.  I’ve decided they’re getting hung in here.  That’s that.  The fabric is a remnant I think I like.  Just checking.  Might stick it behind the glass.  Or something.

IMG_3214   
Again, using some vintage books that belonged to my hubs when he was a kiddo to prop up some silk fallishness in a thrift store vase.

IMG_3219    
And that’ll do pig it for the bedroom.  
Now I linked this post up to Jen’s place today too ‘cause she’s having a hook up your hutch party.  Unfortuately she’s gonna have to scroll thru lots of pics to see my hutches, but I’m hopin’ she won’t mind.  Do ya Jen?
So here's my other hutch in the dining nook.  My kitchen is painted the same color as my bedroom, so I get to play with blues and browns in here too :)  This wee hutch was a craigslist find.   It’s a perfect fit….love.

IMG_3229IMG_3232

I’m slowly filling it with toned down fall colors, and the whole thing just looks delish against my blue walls.  I’m considering repainting the back the same blue or a titch darker blue than the walls.  Dunno.  Bigger fish to fry right now.

IMG_3234

And there ya have it.  My blue and brown bedroom and a wee bit of my blue and brown kitchen.

Now I want to see what YOU all came up with. Can't wait!  Pass me the blue and brown M & M's please.
IMG_3193

I love the soft colors and especially love the corner cabinet, it looks so great!  What is your favorite part of the room?

Read more...

Building Your Own Daybeds

08 September 2010

Here is a great project from Kara of Kara's Korner.    She made two matching daybeds, and they look fabulous, check out her creations:


I made my first daybed back in May, and immediately decided I wanted to build another one for the same room.  Ana White of Knock Off Wood is so amazing for providing free plans to make this possible.  If you haven't checked out her plans yet, please do so!  I wanted the beds to match up like this picture and put a table in between them.


Image courtesy of Pottery Barn
When my sister and I planned a date for her family to come over, I immediately went out and got the wood to build another daybed so that both of my nieces could have a place to sleep.


I have had this picture in my sneak peak section for forever...close to three months...entirely too long!  In my first daybed post, I wrote that next time I'd paint before building.  So that's exactly what I did.  I sanded, primed, sanded, painted, sanded, painted, and then built.

The problem with this approach for me is that I'm not a professional builder, and my pieces don't go together perfectly.  So, I sanded and sanded and sanded once I got the boxes together, which meant inevitably, I removed a lot of my paint and had to repaint the entire thing a million times (paint, sand, paint, sand, etc.)

I did manage to get the bed put together before my nieces came over, but I hadn't re-painted any of it yet and you could definitely tell it needed quite a few more coats.  I thought I took pictures of this, but I can't find them, so you only get the finishing pictures.  I did exactly the same as the daybed back in May, so if you'd like more step by step pictures, or the finishing details, go here to see them.

Ready to see the finished product?!

Here she is!


Of course I have to add a few details shots too.  I sanded down the edges again so I could emphasize the clean lines look, stained them, and repainted around the faces to keep it bright and white.


Here's a picture of both daybeds in the room next to each other.  Yes, the pillows have changed.  I'm still working on getting everything there...I stole the yellow and white pillows from my living room.


You'll never be able to see these sides most of the time...I plan on putting a table here, but I still wanted to show that I at least finished them.

I've made so much progress in this room, but it still has a ways to go.  It's not perfect, but it's miles upon miles better (and at a reasonable cost!) than what I started out with...which was this:


I've painted the floors, painted the trim, painted the doors and door knobbuilt a daybedrevamped an old sewing machine cabinet, and now finished building another daybed.

Let's end on one last cheery picture...


Ahhh...SO much better!  Do you agree?!

They look absolutely perfect!  AND I really love the way she distressed the corners!  Great job!

Read more...

Easy Placemat Pillows Tutorial

31 August 2010

This great Placemat Pillow Tutorial was linked to our last party from Meredith at Welcome to Heardmont, I love how they turned out and the way the room looks!


The other day I came across these cute yellow placemats at Target.
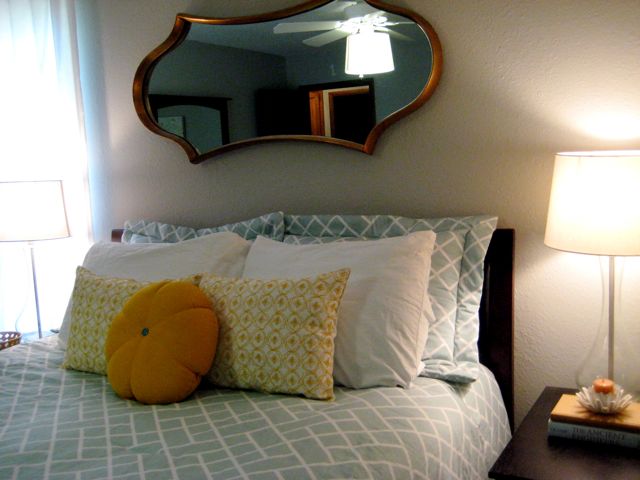
They reminded me so much of the colors in our master bedroom that I decided to get a couple and turn them into accent pillows!
I’ve seen tutorials on turning placemats into pillows on several other blogs, but here’s how I did it.
Step 1: Iron your placemats
Step 2: With scissors or a seam ripper, take out the stitches in one edge of the placemat
Step 3: Using your favorite polyester filling, stuff the placemat/ pillow cover
Step 4: Close the seam – I chose to hot glue mine shut (sooo easy)
Step 5:  Admire your new pillows!
Here’s a reminder of what our bedroom looked like before our new pillows.
And here it is now!
I hope you liked the quick and easy placemat pillow tutorial.  Now go grab some placemats and start stuffing!

Doesn't it look Great?
I also really love that mirror!

Read more...

Updating a bed skirt the easy way! Guest

05 August 2010

My friend Autumn from Design Dump linked this up to our last party and I think it is quite genius!  We all want the easiest way, right?  Well check out what she did to give her daughters bed skirt a little more umph!:  (p.s.  If you want to see some AWESOME! no, SPECTACULAR home remodels, please click over to her site and scroll down her sidebar, your jaw will drop!!)

i am still working on a few small projects for my oldest daughters room.
one of those projects was to add some trim to her existing bedskirt.
the problem?
i didn't want to remove the bedskirt to add the trim.
so.
i.
didn't.
(tooooo lazy)
so, i came up with the following strategy...
here's what i used:
 pom pom trim 
(this is a box pleated queen bedskirt, 
and i used about 9 yards of trim)
fabric adhesive
LOTS (and lots) of binder clips
so, basically, i just applied a thin strip of fabric adhesive to
the bottom of the skirt, and attached a binder clip to help
hold the trim in place until it dried.
like i said, i used a LOT of clips...
about one every 2-3 inches.
when i got to a corner, i applied some glue to  the backside of
the skirt, wrapped the trim, and held it in place with a large binder clip.
my bedskirt has three sections, and so i did this in three stages.
as soon as the glue dried (about an hour), 
i moved on to the next section.
ta---da!
the perfect way for a lazy girl
to add trim to a bedskirt without
removing it. 

Isn't that such a great idea, it would work for drapes and possibly pillows too!  Any other ideas of where you could use this great quick tip?

Read more...
Related Posts with Thumbnails
Emealz - Easy Meals for Busy People!
Home & Garden Blogs Home & Garden Blogs - Blog Rankings

Blogging  tips, tutorials and SEO

From Here to Eternity

  © Blogger template On The Road by Ourblogtemplates.com 2009

Back to TOP