


Installing A Floating Wood Floor; Living Room Update; Part 6
07 April 2011
Installing A Floating Wood Floor;
Living Room Update; Part 6
If you wanna read about our current project
First of all we had to decide what wood floors to use. It had to be engineered, because we are on a slab and we wanted it to add to the resale value so ultimately we choose wood. Although I should say we considered the new plank laminates too.
We went with the Lumber Liquidators Virginia Mill Works 5", Hand-scraped, Yorktown Plank. Picture below:

Dear Lumber Liquidators,
If you are listening, I would love some free wood floors so we can finish our master bedroom and possibly our kitchen with it too. Thanks (hopefully) in advance!
Anyway, it was over what we initially wanted to spend, but when we saw it on the floor at the showroom and how well scrapes and scratches disappeared with cleaning, we figured it was the one for us. Especially with kids running around!.. pushing chairs, cars and baby doll strollers across our brand new floor while we bite our nails and pray nothing scratches!
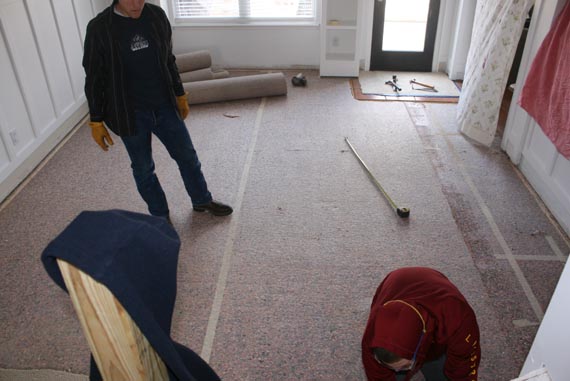
Well we had to get the exisiting floors out, and I was still pregnant at the time, so we asked our local LDS missionaries to come help us rip them out and they were life savers. We also got sorta funny pictures.... thanks to my husband being the photographer.
Here are the before pics. There are 3 types of flooring in the room, an entry of wood, fraying-nasty carpet and a back landing of tile. They all had to come out, some things were harder than others.

Yes, duct tape does many thing, including holding our carpet together for that last year! That is quality flooring people!


You can see the wood entry floor in this picture.
Let the fun begin... (our helpers, thanks Elders!)


(yes, this is what boys take pictures of...)

This is what our kitchen looked like for about 3 weeks. We only had weekends to work on the floor and one weekend Justin had to go do something else completely so it took twice as long as we planned. We also had to get a level floor and drying time took the days that we had. We went all over town for half a day trying to find a concrete grinder, only to use our friend's grinder which died in the first 2 minutes of use. So. we bought another, and it vibrated the screws right out of its self... needless to say third time was a charm. We finally got the high spots ground down and the floor flat.


The good thing about living like this for 3 weeks, is how much you appreciate more your space when you are all done. Etta however, would have LOVED to keep this wide open space for playing in. She learned a new special word too "echo" it was a very loud space, and she loves to scream...

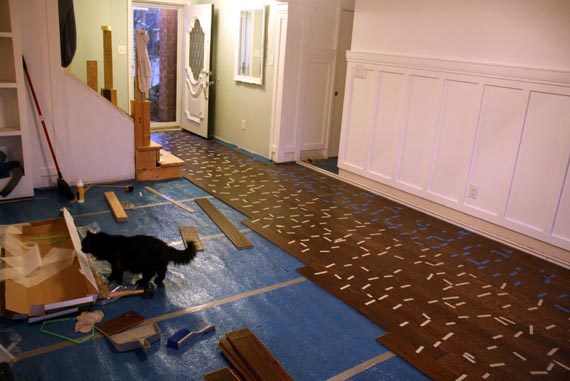
Once the floor was flat as we could make it after grinding down high spots and bringing up low spots with leveler, we started laying down the underlayment for the flooring. The cats were curious of course...


Etta did her best to help... which may or may not have actually helped, but at least is was cute.


The installers at the flooring store said they used masking tape to hold seams together. So we used a couple rolls. We probably went over board, but, we learned the hard way in our last house how annoying it is down the lin when the seams don't line up perfectly, and I didn't want it moving till the glued seams had dried.


Can I tell you, I was about three weeks from having Lydia in this picture. I sat this way for about 4 hours finishing up the floor cuz the next day was Sunday and I didn't want to have to wait til next weekend to finish it up. My hips KILLED me for about a week after this!
Don't laugh at the tape... okay go ahead and laugh, but the seams on that floor are tight and PERFECT!


Almost totally done! (a few edges Justin did later and they are still taped on)

Testing it out with the rug I bought... which I love, but just not for this space...
so we will be looking around again! urgh! Buddy loved it though, it is wool and my cats have a thing for wool, so it is funny to watch!
so we will be looking around again! urgh! Buddy loved it though, it is wool and my cats have a thing for wool, so it is funny to watch!


Okay... so really this is about as far as we've gotten. We have all our old furniture in the space, but we need to buy some new pieces, but I think I will just keep you all posted with the small progress report posts from here on out!
What do you think about the floors?

Remodelaholic is written by Cassity and Justin. Cassity has a degree in interior design and Justin is a landscape architect, so we adore everything that makes up a HOME! We love to share home remodeling ideas and projects we’re working on. From huge kitchen renovation ideas to small bathroom remodels, there isn’t anything we won't try to tackle (at least once!). We are in the midst of our third whole home renovation, so there should be a lot more inspiration coming your way. We hope that you will stop by often for home design inspiration, tutorials, interior design tips, delicious recipes and what is going on in our family life.
 Labels:
Living Rooms,
Our Projects
Labels:
Living Rooms,
Our Projects


15 comments:
I know how time consuming this can be. It looks great though. Thanks for the tape tip.
Love the new floors, and I like the rug too! I'm totally loving houndstooth right now.
Lovely! That was a lot of hard work.... to be doing in your condition. :) It looks really nice now! ~Rachel @ The Olde Farmhouse
Love the new floors! I can't believe you sat like that when you were so close to your due date!! I painted the nursery dresser and got stuck because my hips locked, and that was at t-minus 8 weeks to go! Great tip with the masking tape too...thanks for sharing!
Love the new floors! Such a beautiful rich color! Thanks for sharing.
Your floors are beautiful! LOVE the color too.
I'm curious what brand/type of wood floors they are and where to buy them? They look like they are hand-scrapped too, right?
Any help is appreciated.
Looks great! What are you planning to do with the stairs?
Looking good! I love watching your transformation!
L.O.V.E the new floors! They turned out great and are making me want to rip out my year and a half old carpet and put some in!
The floor is beautiful! Just what I want in my entry, kitchen, and dining room. Fabulous job!
Love the new floors!
The new floors are beautiful! I have floor envy right now. :)
Great post, and the floor looks fantastic! I've been dithering between traditional hardwood and engineered, and I think you just made up my mind for me.
We're in the middle of installing floating engineered floors too. Of 1400 sq ft, we've accomplished 1000. Now we just have to move out appliances in the kitchen...I was inspired by seeing your house in upheaval to finally do it this weekend.
Lumber Liquidators is good people. Fingers crossed you get your free beautiful wood!
LURVE!!!!!
Post a Comment