


Woven Pear Decorations; Party Highlight
05 September 2010
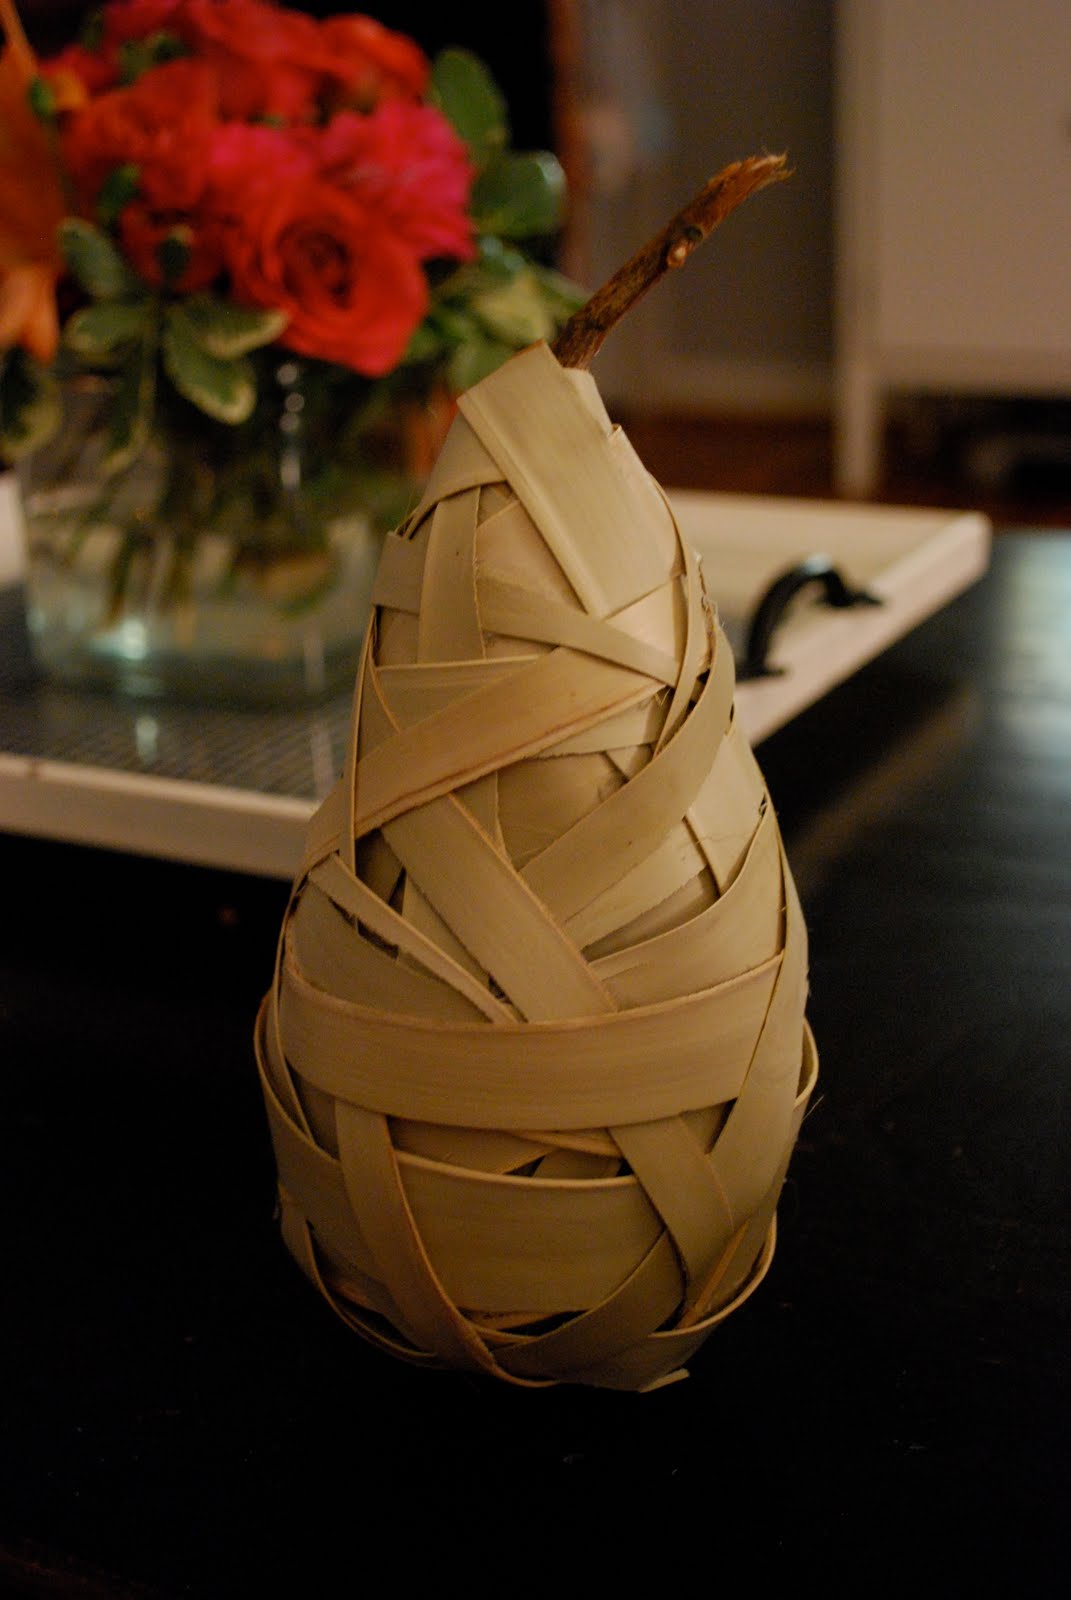
This great craft from Patrice at Lemon Tree Creations is such a cool decoration. Check out how she made these woven pears:
A few weeks ago, when posting about my living room redo here, I got many questions about these pears...

Much of this process will require some ad libbing on your part, but here is the general idea of what I did to create my living room pears.
1)Collected my materials: Purchased long, cheap grass reeds at a local craft store (a whopping $1.59 for more than 20!), used styrofoam balls I already had, picked a dead branch of my small magnolia tree, and gathered my hot glue gun and sticks.
1)Collected my materials: Purchased long, cheap grass reeds at a local craft store (a whopping $1.59 for more than 20!), used styrofoam balls I already had, picked a dead branch of my small magnolia tree, and gathered my hot glue gun and sticks.

2)Hot glued the branch into a hole on my styrofoam ball.

3)Wrapped and glued some pillow stuffing onto the ball and stick, trying to create an ideal shape or outline. (This is probably somewhat unecessary, but it made me feel as though I was wrapping around something?)

4) Hot glued the reeds, which I split in hald to make thinner, onthe the styrofoam ball and began wrapping them up and around the stick like crazy.


5) Continued wrapping and gluing reeds until we acheived full coverage.

And VOILA! We had a pear. The tricky part was getting the pear to stand up. The ones I purchased clearly had some built in weighting system. In the end I manuvered the reeds on the bottom to creat a flat, even surface on which they could stand.

I am very happy with the final product, even if it isn't quite as neat and tight at the original ones I purchased. And I am even happier to have found their current resting place, my new living room bookshelf!


Be honest and let me know what you think! You certainly have the option of painting them to acheive the nice green color the purchased ones had. I opted out because I like the mixture of that natural look! Good luck, and don't forget to link to their flickr account if you try them out yourself. I am sure someone will out do my feeble attempts soon enough!
Aren't they cool?
I love that she figured out how to make them!
Great Job!
 Labels:
Crafting spaces,
Decorating,
Guest Projects,
Party Highlight
Labels:
Crafting spaces,
Decorating,
Guest Projects,
Party Highlight


2 comments:
Wow - I do have to say - you did a great job of re-creating the store bought ones - only yours are better because they are handmade. I really like them alot. I may have to copy this one of these days...thanks for sharing the details on how to make them.
Once again, I am so thankful for your highlight. I love your blog SO much, and everytime I see an LTC highlight, it makes my day! Thank you!
Post a Comment