We’ve Moved!


If you aren’t redirected here is the link:


Remodelaholic!


THANKS!

Showing posts with label Patios. Show all posts

Backyard Overhaul With New Landscape, Patio and Furniture

16 November 2010


Backyard Overhaul With 
New Landscape, Patio and Furniture
party highlight by Involving Color

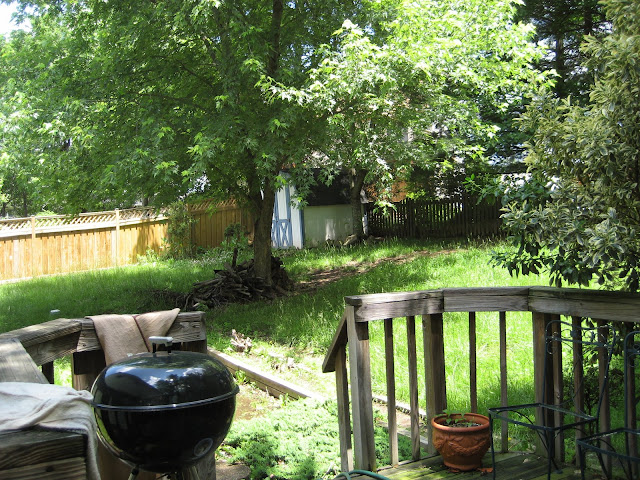
Over this past year our back yard went from this:
Backyard Before
Back Yard Before
To this:
flagstone patio
Patio After
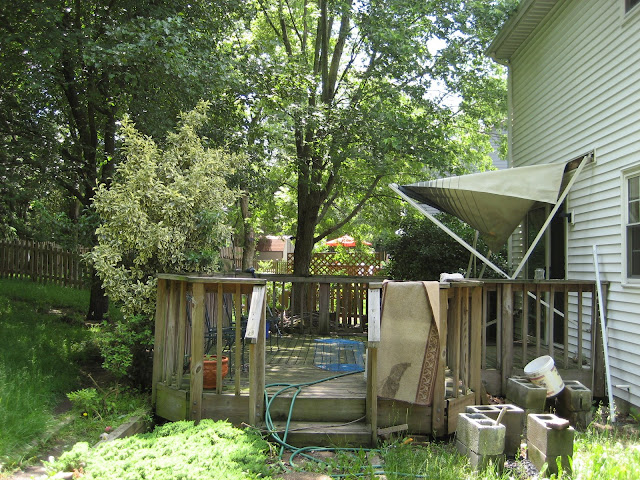
This:
Backyard Before
Back Yard Before
To this:
flagstone patio
Patio After
(We have also been hard at work on our front yard which I posted about here and here)
We knew when purchasing the house that we would have to invest time and money into fixing up the back yard. There was a stagnant pool of water under the low deck, which was a very happy breeding ground for mosquitoes, and it had a slight smell. The yard needed a lot of cleaning up and the deck was in poor condition.
We took the before pics during our home inspection. It was in much the same condition when we moved in.
The process kicked off in the summer of 2009 by having three trees removed from the yard. We risked foundation damage from the roots of one of the maples closest to the house, branches falling from a bradford pear that was next to the maple, and the third maple in the middle of the yard blocked too much light from entering our kitchen. We had a fourth maple removed from our front yard at the same time as these trees, also to allow more light to enter the house. We like a nice, bright house!
We met with lots of contractors to determine the best way to fix the water problem and repair or replace the deck. No two contractors had the same suggestions. Some said we could keep the deck, most said we should rip out the deck, some said we should build a retaining wall, others said no wall was needed, some said we should do a paver patio, some said we should do a concrete base patio, some said to do a french drain, others said not to.
Decisions decisions.
We talked to companies all through the summer of 2009 and still had not decided. This turned out to be a good move because we ended up talking to a contractor in the fall of 2009 that offered us a really good deal on a 400 sq. ft. flagstone patio with a concrete base plus a drainage system. The fall is their slow period, so they gave us a better deal than had we talked to them in the spring. Their solution included a drainage system which would use the patio as a way to collect the water coming down the hill and funnel it to drains which would then take the water through underground PVC pipes ending at the sidewalk in front of our house. We liked the mortared flagstone option because it is low maintenance and tends to last over time. We felt comfortable going with this company because they have a great reputation in our area, were licensed and insured, and offered a good warranty on the work. The plan was to have this company do the work in the fall of 2009, but then we got hit with unseasonably cold temperatures and early, heavy snowfall, so we ended up waiting until the spring so the ground could thaw out.
In April 2010 we were finally able to have the patio and drainage system installed. Before the work started, Marty and I were able to go out to their stone yard and pick the pallets of flagstone that we liked. We chose pallets that had a mix of blues and red-oranges. It took the contractors about a week to do everything which included tearing out our old deck, installing the drainage system, pouring a concrete base, and cutting, laying, and mortaring the flagstone.
Once the patio was in, Marty and I came up with a landscaping design to enclose the patio. We planted hydrangeas, azaleas, and Shenandoah grass. You might have noticed our azaleas have a few blooms. These are Encore azaleas and bloom twice a year, once in the spring and once in the fall. We were nearing the end of their blooming cycle when I took these pics.
encore azalea
Encore Azalea
Since we had those trees removed in 2009, we had huge bare patches of dirt in the yard, so a couple weeks ago we laid sod in those bare areas. We talked about seeding rather than sod, but since we are on a hill we were worried that the seed would just come running down the hill with the first rain. Plus, the instant gratification of sod is kind of nice! It turned out to be the perfect time to plant grass because we had a tropical depression hit us last week which resulted in lots and lots of rain. Good for the grass and good for our water bill.
flagstone patio
Patio After
Once the patio was done, we began the search for furniture. I hunted around for deals and ended up mixing and matching from Sears, Home Depot, Ballard Designs, and my favorite purchase – Restoration Hardware pillows that I got for $10 each! (posted about here)
Restoration Hardware Pillows
RH Pillows
Our goal in buying furniture was to get something low maintenance, comfortable, nice looking, and a good value. We like to hang out on the patio for long periods of time, so comfortable cushioned dining chairs were a must. We liked the mesh lounge chairs because they are easy to keep clean and are surprisingly comfortable.
sears garden oasis dining set
Dining Set
home depot martha stewart chaise lounge patio chairs
Lounge Chairs
Since we purchased the dining set, I think we have had dinner on the patio every nice evening possible. I wake up before Marty most weekends, and I have been enjoying my Saturday and Sunday morning latte and Google Reader blog fix out there. We have lots of other inhabitants that hang out with us, particularly in the mornings. There are tons of chipmunks, birds, rabbits, and even a couple groundhogs that run through our yard. Supposedly groundhogs are considered a nuisance (I think they are kind of cute!), but they don’t live in our yard, and by the time we say, “ooh look the groundhog!” he is off and running through another neighbor’s yard. We get the occasional deer, though I have never spotted one, but they did munch on our hydrangeas once.
It’s our little private oasis back there, and we are so happy with how it turned out!
flagstone patio
Patio After
The decor details:
Dining table and chairs- Garden Oasis sold at Sears
Lounge chairs – Martha Stewart from Home Depot
Umbrellas – Home Depot (not sure of the brand)
Faux stone umbrella stand/table – Ballard Designs
Lounge chair pillows – Restoration Hardware

Read more...

Brick Paver Patio How To

26 October 2010


Brick Paver Patio How To
contributed by Alexson 


As Alexson left for Mexico (probably headed for a chair on a patio), my brother, a friend and I got to work on the patio. The first thing that had to be done was to compact the gravel with a plate compactor. If I were to develop a difficulty scale of all the tools we've rented from Home Depot with the 2-man auger being a 10 and the cement mixer being a 1, the compactor would be a 2. While it was pretty heavy to lift in and out of the car, it was as easy to operate as a lawn mower.

After a quick comment by my friend the pharmacist that the patio looked like a thyroid gland (I'm not quite sure it would do too well as Iowa doesn't have the highest concentration of iodine in the soil), we started on the edging. Other than having to deal with some gigantic nails, the edging went down quick and painless.

After laying down the sand with the help of some 1" guides we were able to get started on the pavers

We all took a minute to review the herringbone patter and were off to haul bricks. The middle part of the patio was fairly straight-forward, but the edging was a little more tricky. I found it was better to take off small slices off the bricks to form a gradual curve than to curve suddenly with only a few bricks. Good progress for Saturday.


Read more...

Back Patio Updated With Deck And Furniture

21 October 2010

Back Patio Updated With Deck And Furniture 

contributed by Stefanie @ 


In the summer, I spend as much time as I can on my back deck and patio.  I've worked really hard to make the back area an inviting space, with lots of color and comfortable places to sit, read, work, and eat.  The patio is shady enough that even on the hottest D.C. summer day, it's still quite pleasant.


When I moved into my house, my back "yard" was in a sorry state.  A previous owner had poured concrete where there was probably once some grass.  The rusted fence and abandoned ladders were the only ornamentation.  (Do you recognize a certain four-legged someone in the second picture below?) 


I have grand plans to put an addition on the back of the house, so I don't want to put a lot of time, money, and/or effort into landscaping the back patio until I have a better sense of what's going to happen to the back of the house.  But obviously I had to do something with the back to make it a space where I would want to spend time.

So I had a temporary deck built, planted some trees and shrubs, and got some furniture and great cushions.  I'm super happy with the overall result, given the minimal investment on my part, though--like the rest of the house--it continues to evolve.  My latest and greatest ideas are to stain the deck a fun color or to have a couple of pieces of old metal furniture painted PINK.  And when I look at that concrete slab, in my mind, I already see a lovely brick patio . . . .


I particularly like the black and white cushions. Note that there are three different black and white patterns, but the stripe is definitely the dominant patterns.  I think black and white complements all of colors in the flowers, rather than completing with them.  


But what I love most of all are all of the potted plants.  Each year, I go crazy buying plants for all of my flower pots, and I usually buy a few new pots each year, which of course means I need to buy more flowers.  (There must be a support group for people who buy too many plants.)  Probably even when I have my beautifully landscaped back patio, I'll still fill up any empty space with flower pots.  


Read more...

Backyard Beauty; Deck Makeover Galore! Guest

09 August 2010

I love seeing new projects, and when this one arrived in my inbox I knew that  I had to share it with you.  This project from Coco of Cococozy is absolutely stunning.  She had a great space to begin with and very nice pieces, but look at the difference, it is really incredible.  The colors are fabulous  and they weave in and out of the separate spaces bringing them together, yet the spaces are defined.  What are your thoughts, I really LOVE, LOVE it all....


All photos in this post by Coco of Cococozy

After a whirlwind makeover, my outdoor living room! My little deck in the Hollywood Hills refreshed! (above)

About two months ago, I received an email from a reader saying something like: "Coco, you had said you were going to makeover your deck at the beginning of the year. I've been waiting. Where is your deck makeover?". Meaning no disrespect at all, I archived the email...a haunting reminder of all of the things on my to-do list that I hadn't done. I do appreciate all of the notes I receive from readers...but for some reason, this one email really hit home (literally).

So rather than jumping on the task of doing my deck right after I received said email...I procrastinated even more...days went by...weeks...and then months. It was on my to-do list but I knew it would take weeks and weeks to makeover the deck the way I wanted...maybe even a month.

Well lucky for me CF, related to best of friend FF, popped into the picture. CF emailed me about a week ago saying she was coming to town and that FF had suggested she reach out to me...I was thrilled. I wanted CF to come stay with me at my tiny little house in the hills...lucky for me she accepted my invite for one night and then she was heading off to Malibu for a bachelorette party!

After CF accepted my invite, I started to think...this is so great...a friend from New Orleans coming to visit...lah dee dah...where will go to dinner...how much fun...we'll have a blast...!

But then the thoughts got a little more involved (a little darker perhaps)...hmmm...CF lives with FF and CCF in a huge mansion in New Orleans...I live in a tiny cottage in the Hollywood Hills...I have a guest coming to visit who lives in a house that is about 18,000 square feet...I live in a flea size cottage with all rooms in under 750 square feet...hmmmm...oh no...my house is small...oh dear...hmmmm....ohhhhhh dear....oh no.....ohhhhh boy ohhhhh boy....

It was after this mansion vs. cottage realization that I went into literal shock. Inertia set in. I was frozen with fear.

Well dear readers...fear is sometimes the best motivator. Remember my deck that I had not redecorated for 6 months...well, for no apparent reason, I decided a deck redecorate in less than a week would be the solution to the mansion vs. cottage issue. Makes no sense...I know...but this is the way my mind works. (Btw, one person at my office laughed at my dilemma and said I should just put up a bunch of mirrors around the house and maybe it would give the illusion of more space...grrrrrrr)

All of this to say...here is the Part 1 of a series on my deck redecorate...will share with you details on fabrics, accessories and costs in upcoming post(s).

It took me exactly 5 days to do it all...deck refinished, fences painted, all furniture reupholstered, teak furniture refinished, custom pillows made, accessories bought and flowers added in...

Take a look at the before and after...I actually liked the way it looked before...very rustic...canyon style living...but I think this new look is good for a bit of change.

BEFORE, my deck was rustic and woodsy and covered with leaves!(above)

AFTER, a corner of my deck is more tailored and bright colors nicely contrast with the white fence. (above)

AFTER, my new outdoor fabrics in a mix of playful prints! (above)

WAY BEFORE, my deck back in 2002 when I first moved into my house...it was well worn, dreary and was about to collapse. (above)

BEFORE, back in 2009 when this photo was taken and until last week, my deck was monochromatic in browns and tans...it blended right in with the natural setting (I liked that by the way...the blending). (above)

AFTER, I introduced a color palette of greens, browns, off whites and blues to compliment the outdoor hillside setting. (above)


AFTER, a tall centerpiece floral arrangement on the dining table of white Daisies and Pom Poms blends well with the setting and these flowers last for eons outdoors! (above)

BEFORE, the main seating area in this outdoor living room lacked style or pops of color. (above)


AFTER, the outdoor living room area is grounded with a geometric cane pattern outdoor rug and reupholstered cushions on the teak outdoor furniture. (above and below)


I love a pretty white daisy! (above)

I know this outdoor room makeover did not turn my house into a mansion...but I'm pretty happy with the results!

Please let me know what you think...good or bad...(you are welcome to not like the results too...if you don't just let me know...I love hearing all opinions and feedback...). Comment below.

Also, thank you to the reader and CF who both motivated me to hop into action.

xoxo
Coco

P.S. I struggle a bit with this makeover as I did like the rough unfinished look of the deck before...now I feel like I'll have to polish and shine and wash and primp the space all summer long and into the winter. Before, I just let the leaves pile up, let the furniture get dirty, let the teak weather...it was what you might call the "lazy look". LOL!

P.P.S. Stay tuned for more posts on the deck including resources on where I got everything and a post on how the deck can go from colorful to all white - I'll tell you how later! - (this will be on Coco's blog linked at the top of the page!)


Is your jaw on the floor too?
I LOVE the new look and hope to someday have an awesome space like this too!
What do you like the most?

Read more...
Related Posts with Thumbnails
Emealz - Easy Meals for Busy People!
Home & Garden Blogs Home & Garden Blogs - Blog Rankings

Blogging  tips, tutorials and SEO

From Here to Eternity

  © Blogger template On The Road by Ourblogtemplates.com 2009

Back to TOP