


AMAZING Master Closet Transformation!
30 August 2011
AMAZING Master Closet Transformation!

Honey & Fitz is where I chronicle everything from flea market finds and my love for organization to DIY projects and my adventures as a new mom. I love fabric, I love paint, I love making something out of nothing. I also love (in no particular order) peonies, old barns, cobblestone streets, French macarons, Sunday mornings and tacos. I'm on a never ending quest to create a home that I love that is full of love. If this sounds like you, come join me!
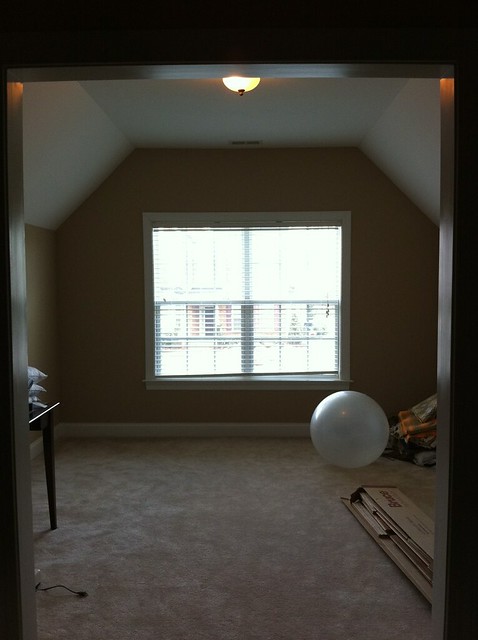
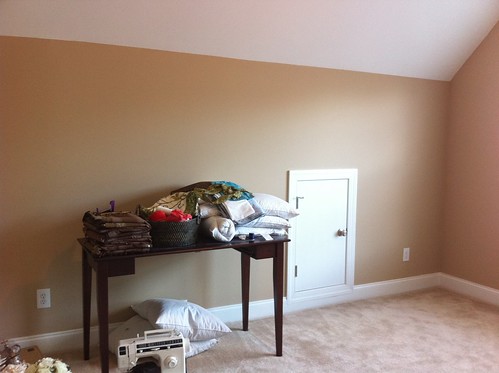
Our dressing room started off as quite literally nothing. It is technically a sitting room off of our master bedroom and it sat empty and sad looking for a very long time. I just couldn't justify furnishing it with chairs and sitting room-esque furniture because, quite frankly, I don't need another place to sit.
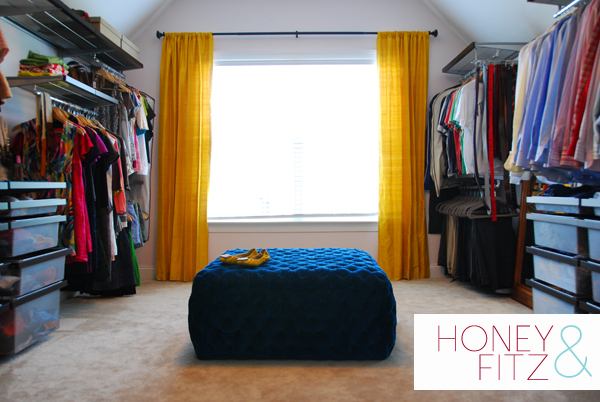
One day, inspiration struck in the form of this image. I can't even deal with how fabulous everything in this room is. The mirrored dresser...the lucite leopard vanity stool...the teal velvet ottoman!!! Suddenly it was clear what I needed to do with this wasted space - A DRESSING ROOM!!!

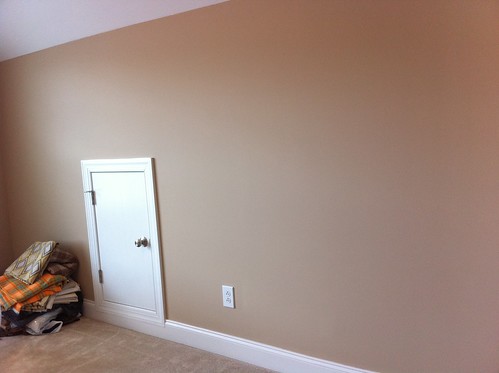
After showing this image to my husband, he quickly reminded me that he would have to get dressed in there as well and apparently he is not a fan of poodles and cheetah print. What a buzz kill! So I got busy brainstorming how to maximize storage in this space while keeping things gender neutral but still satisfying my need for a little bit of glam. The added challenge was designing around these small doors in the middle of both walls. They lead to a storage space so I need to cover them but not block access to the space behind them entirely.
I like to start off projects like this by identifying the problem and then how I'm going to solve it.
Problem #1: An awkwardly shaped master closet with a single hanging rod/shelf. There was about 3' of wasted space above that shelf and at least that much below our clothing.

Problem #2: Because of problem #1, we had a lot of our clothes folded and stored in a dresser and armoire. I found that we were wearing less than 40% of our wardrobe - pretty much just the stuff that ended up on top after a laundry rotation.
My goal with this project was to eliminate the need for our bedroom dresser and armoire entirely. That meant mostly open storage with some closed drawer storage for things no one needs on display (like socks and bras, etc).
After I zeroed in on these goals, I jotted down my wants for the room:
- bright & happy colors to make this a welcoming place to start the day
- a great ottoman for laying out outfits and putting on shoes
- a full length mirror
- a vanity space to display & put on my jewelry


Things to keep in mind when designing your own walk in closet:
FOR HIS SIDE (men 6'2" and shorter):
- Men's shirts need a minimum of 40" of space for hanging
- Men's pants need a minimum of 39" of space for hanging (assuming they are folded over on a hanger)
- This means that you will need a minimum of 80 1/4" to install double hanging (shirts over pants for example).
FOR HER SIDE:
- Women's clothing is less predictable in terms of length so make sure you do an inventory of your tunics, skirts, shirts, etc in order to plan your double hanging
- Allocate room for long hanging of things like dresses
- Allocate shelf space for handbags
- If you plan to put your shoes on shelves, remember they need to be solid shelves otherwise your heels will wobble through wire shelving.


I sacrificed hanging space to have this vanity area but I'm so happy I did. I love fun, bold necklaces and having them out on display like this inspires me to wear them more.


I used this vintage glove mold to hold some of my chunkier necklaces. They're like art! Why not keep them out?!

I mounted 2 drawer knobs directly into the wall to give me extra storage for even more jewelry.


I used wooden hangers throughout the closet but switched to non-slip hangers for the men's dress pants.

A pull out tie and belt valet keeps this area tidy and easily accessible.


Bright yellow silk curtains provide the perfect punch of color I was looking for. I start almost every day in this room and this happy yellow makes it impossible to be in a bad mood!

My absolute favorite thing in the room has to be this uber-tufted velvet ottoman I had made by a local upholsterer. It adds just the right bit of gender neutral glam to the room I wanted and provides for a great spot to put on shoes.


Hooks mounted on both sides of the room ensure that the ottoman doesn't get littered with unfolded clothes or odds & ends.


One last side-by-side view of this transformation!

I love that we are now getting daily use out of what was once "dead space" in our home. It's also been great for keeping us really honest about what we need and don't need. When everything is on display, it becomes hard to justify "another black skirt" for example. We are living by the "one in, one out" mantra and I love it.
 This project was contributed by one of our fabulous readers! We love to share your projects with this great blogging community. So, if you have projects from kitchen renovation ideas to small bathroom remodels, overhauled and repurposed furniture, spray paint updates you name it please send it in! Thanks for reading Remodelaholic!
Do you like LOVE this closet? Check out these other great closet ideas:
 Labels:
Closets,
Master Bedrooms
Labels:
Closets,
Master Bedrooms


9 comments:
What a fabulous space! The curtains and ottoman are perfect!
Love this! And I really love the use of doorknobs as extra jewelry hanging space. Brilliant!
I absolutely love it. But if it were in my house that ottoman would be hidden under a pile of stuff no matter how many hooks I had. :( It's just tooooo convenient! ha
gorgeous colors!
That pop of blue does make the area perfect! It's a beautiful shade of blue :)
I want a room like that. Great makeover!
where are the precious yellow shoes from? and how do you tell an upholster to make an ottoman like that? Describe it... need that! xo
OMG it's totally stunning and I'm extremely jealous!
Stacy
Jeni - the yellow shoes are from Apepazza. I got them on Zappos about a year ago but I'm not sure if they still carry them.
http://www.zappos.com/apepazza
The ottoman has been one of those things that I've dreamed about for a long time. I sketched it out for my upholsterer and told him the dimensions I wanted the final piece to be and just said I want it "super tufted" and rounded. With that description and my sketch, we were able to make it work. He was great and kept me looped in throughout the creation of it so I could make any little tweaks I wanted. I ended up making the tufts closer together than my original drawing to make it look a little daintier...it was looking a little too pouf-ish with the tufts further apart. Find someone really good that you trust and then draw them what you want. That's the best advice I can give you.
Covet, covet, covet.
Wow. Great job.
Post a Comment