


Installing Hexagon Tile for Beginners
24 February 2011
I'm excited to be guest posting again at Remodelaholic! Thanks to Cassity for having me! I'm Kim, half of NewlyWoodwards. At our online home, I gab about all our daily adventures - renovating, decorating, gardening and just generally DIYing. We're currently in the midst of renovating a (soon-to-be) great home from the late 19th century - our third remodel. I guess you could call us gluttons for punishment.
Here are the steps we took to get the flooring down.
Fitting
After installed cement board on top of the sub floor, the first step was to lay out the 2ft x 1ft sheets of tile and make any cuts to fit. After nearly 8 hours of attempting to dry-fit the tiles in the space, Ryan was on the verge of a melt-down. (Okay, he was having a melt-down.) Our house is old and far from square and it was darn near impossible to get the tiles to fit properly and with equal spacing.
Because the definition of insanity is doing the same thing over and over and expecting a different result, Ryan was officially insane. So, we had a little heart-to-heart and headed to our favorite home improvement store (Menards!) to find a square to replace my husband's missing square. We also picked up 1/8 inch spacers. This was our turning point.
Squaring
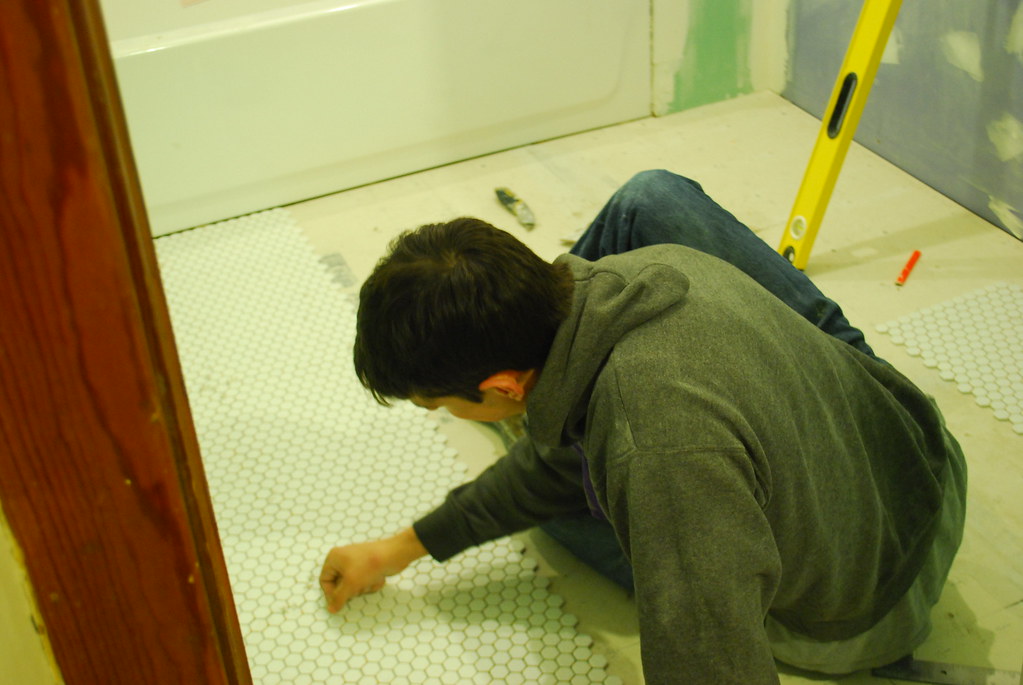
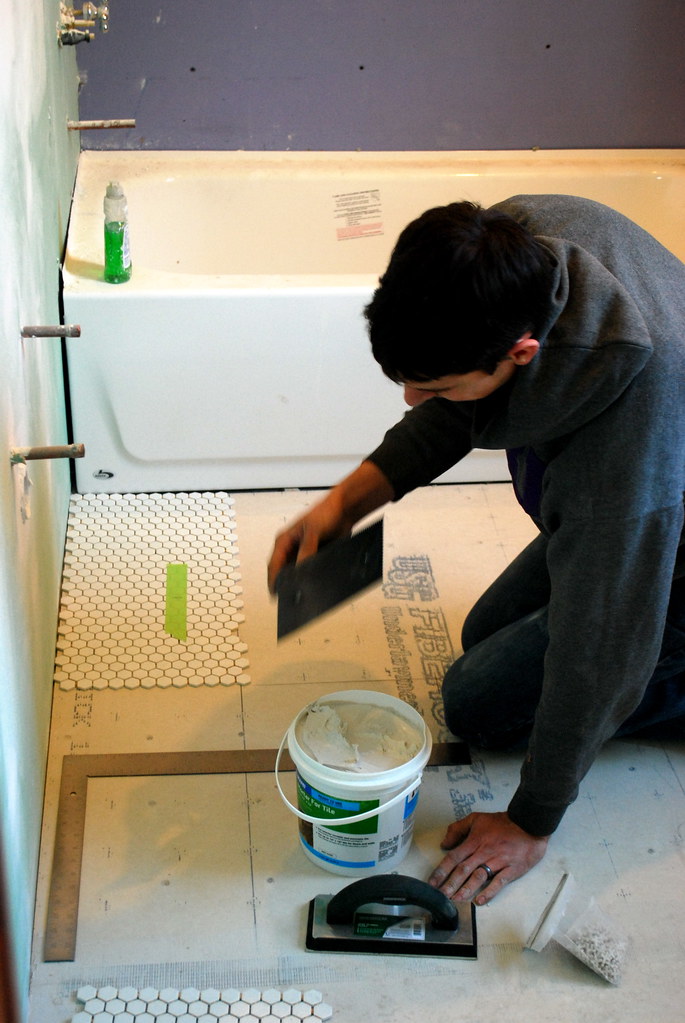
A square is essential, in our opinion. If none of your walls are perfectly square (welcome to the joy of an old house), use a square to draw a perpendicular line from the wall you want to begin the tile on. We ran a perpendicular line from the left wall below and used it as a guide for the bottom of the sheet of tile. We cut the sheets along the tub to fit, if necessary. (You can see our pencil line next to Ryan's knee and the level.)
Spacing
Maybe you will be able to find spacers that are made for hexagon tile. If you are like us, you won't. So, use the tiles from normal square tile and turn it on it's side. Don't skip this step. You may think that you can eye-ball it. You cannot. Trust us.

Our tiles were spaced approximately 1/8 inch apart. This means that if we weren't exact in spacing, after a few sheets, the tile sheet wouldn't even fit.
The great thing about using lots of spacers when placing the sheets together is that the spacers allow the individual tiles to shift just slightly. This means that an individual hexagon may be off by a smidge, but the entire sheet is in-place and it's not noticeable. This is great for anyone - and particularly those of us who have no clue what we are doing. (We're raising our hands.)
Cutting
While laying out the tiles on the floor, now is a good time to make any necessary cuts to fit the sheets flat up to the wall. If you are dealing with non-square walls, now is also a good time to let go of any perfectionism. The tiles won't be perfectly aligned against the length of every wall. My husband was very worried about this, but it's truly not noticeable. We used a small wet saw that we borrowed from Ryan's parents.
Adding details
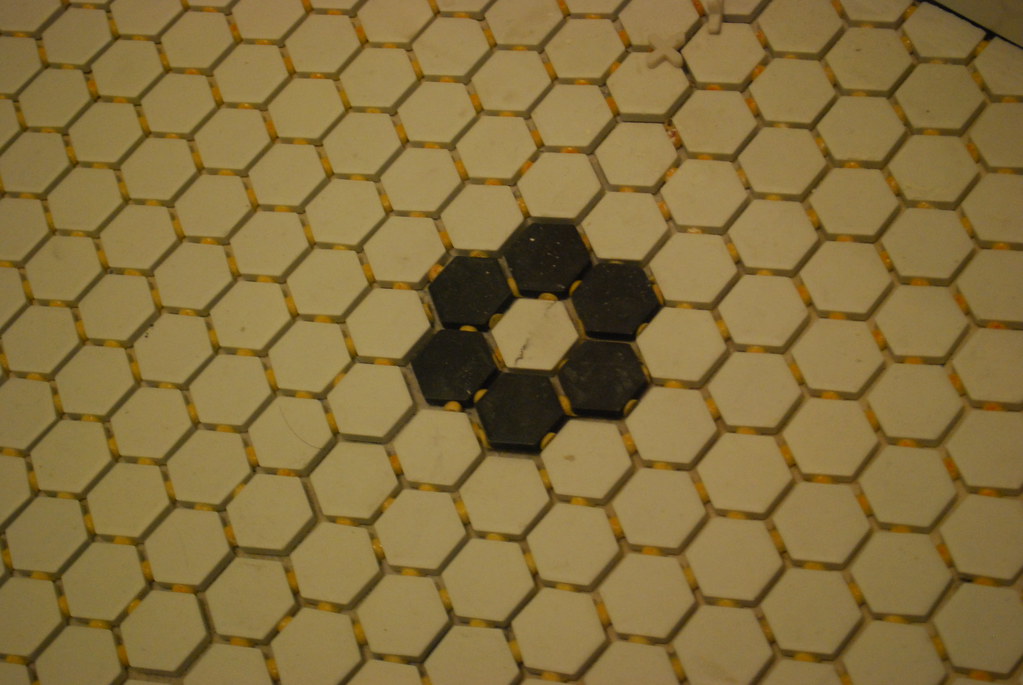
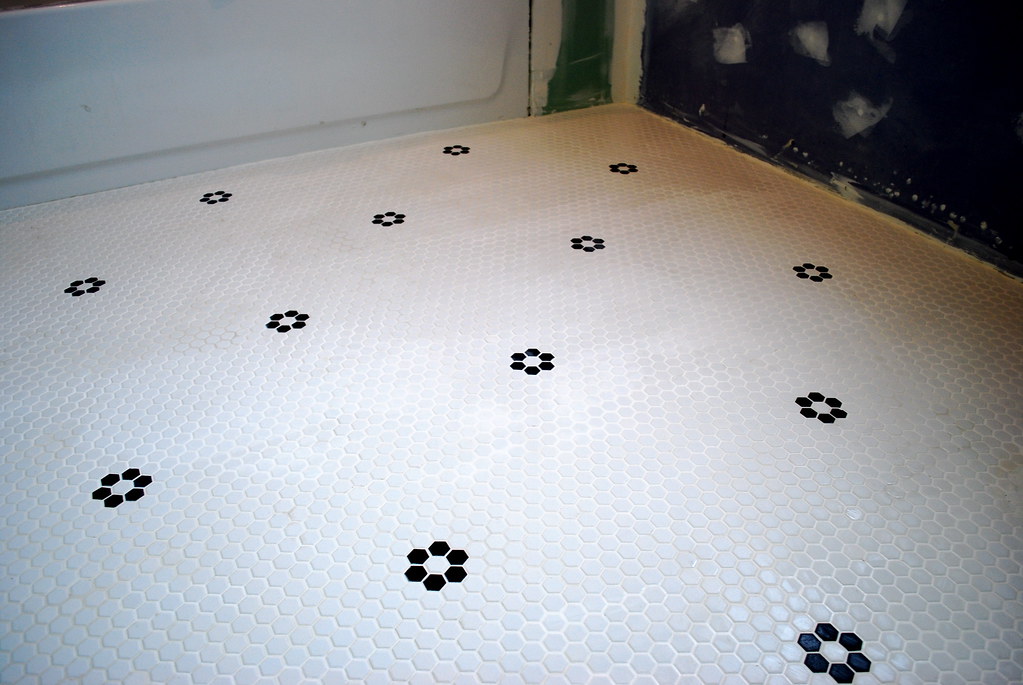
We wanted to add a little period detail to the floor, so we cut black 'daisies' out of the black hexagon tiles and placed them at this point. We just measured from the center and spaced them evenly in the room. Once we were happy with the layout, we cut out the white tile to set the flowers in place.
When we put down the tile, we decided to install the base board after the tile, so we didn't worry about the small gaps by the wall because they will be covered by trim.

Once you are all done, take a good look at your floor and make sure there aren't large gaps or other issues. If it looks good, it's time to move on.

And give yourself a pat on the back. Because you rock.
Labeling
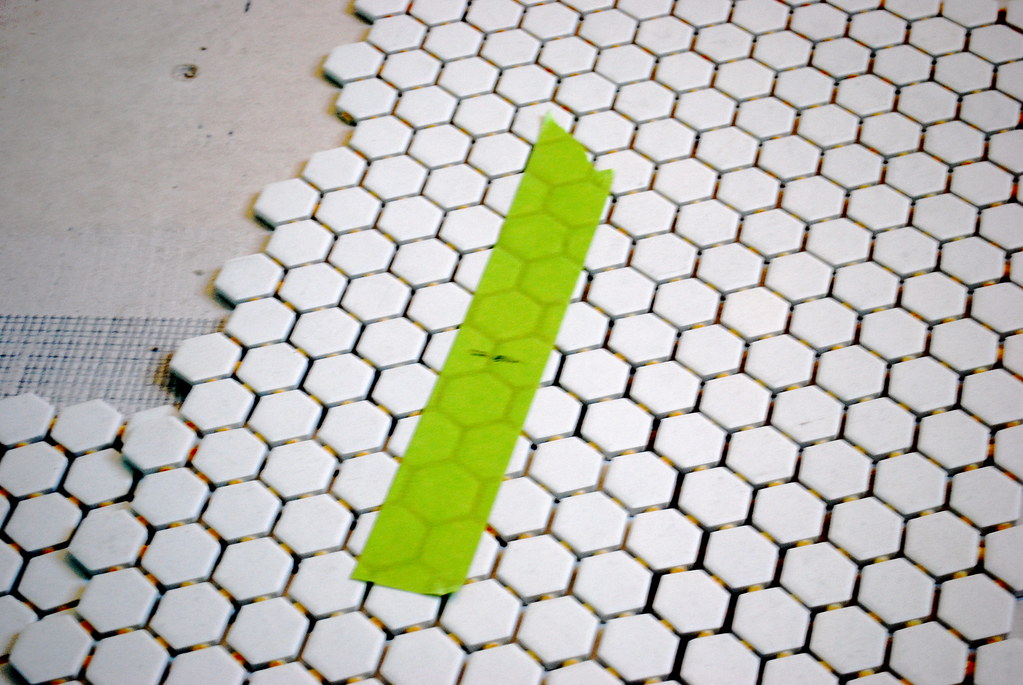
At this point, you'll need to remove all the tiles and clean the cement board really well. When you pull out the sheets of tile, number the sheets in order of installation so the sheets you cut will end up in the correct place. We labeled with a roll of painter's tape.
Then, we swept and swept to get any loose dust or debris out from under the tile and then began to lay the tile with mortar, following the instructions on the container. I don't think there's any need to rehash that. But, do check with with the person you bought your tile from to make sure you have the right trowel and type of mortar. We ended up with a 3/16 trowel.
Ryan went slowly and carefully, making sure to level and space out the tile as he went. We did have some issues with oozing mortar, and if we were to do it again, we would try to control this more. This can show through your grout if it oozes too much.

Once you've completed the floor, let it set. (Our mortar said to allow 24 hours.) Then, we cleaned it really well several times with a clean, barely-damp sponge. Once dry, we sealed the tile twice since the tile was unglazed.
Pre-sealing
If your tile is glazed, you won't need this step. If you are working with unglazed tile (the top of the tiles don't have a clear, smooth feel to them), then you may want to seal them before grouting. This will help keep the grout from soaking into and staining the tile. Which is a good thing if you just spent a lot of money and time getting that tile down.
We talked to the tile person at our hardware store and picked out a good sealer. The I just sponged it on with a special sponge. I did two coats according to the instructions.
Grouting
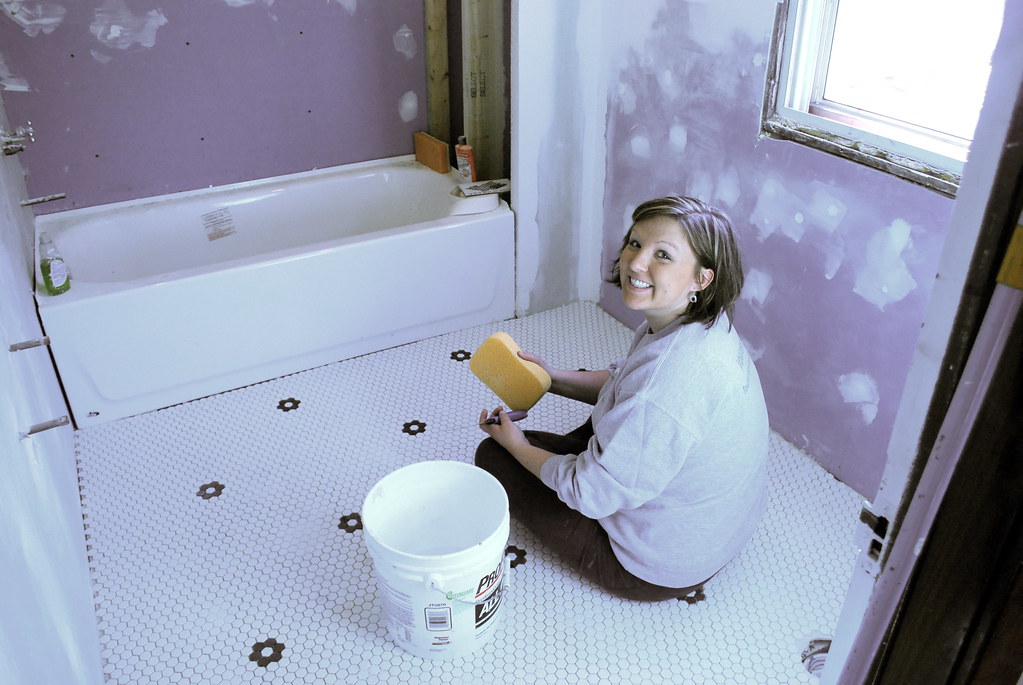
We chose a white grout for the floor. We went with a non-sanded variety, based on the size of the spacing (1/8 inch). It is pretty much as you expect and according to instructions. Force the grout into the joints with a float, wait and wipe, wipe, wipe. Repeat.
Cleaning
It ended up taking a long time for us to get all the grout residue from the tile. Ryan wiped it down with a barely-moist sponge. Then, we cleaned it again when the grout cured on the entire floor. I also used a dry white cloth to remove the final residue. Just keep cleaning until there aren't any streaks left.
You'll think that it may never get clean. But, it will.
Sealing
To keep the tiles protected and the grout lines clean, I applied sealer again to the top of the surface after the floors were cleaned. I hope this will keep the floor clean and pretty for years to come.
The moral of the story is that laying hexagon tile floors takes some time, a little brainpower and lots of patience. But the end result is just pure beauty, in our opinion.
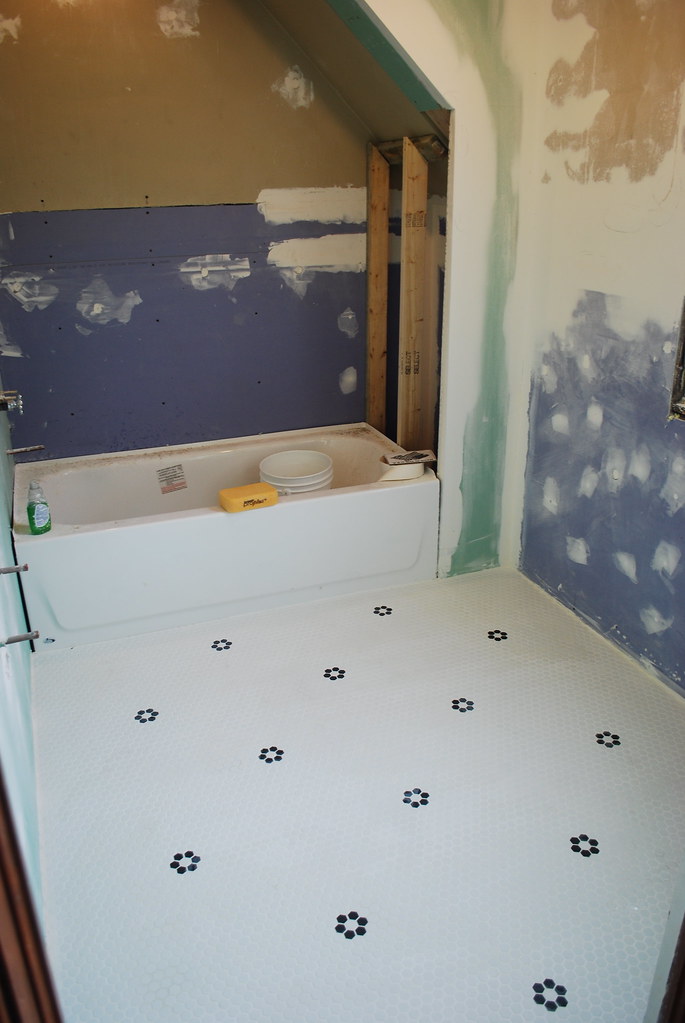
I'm really pleased with how it turned out. Now, it's just time to finish up the rest of the room (and house). I hope you'll check out the progress over at NewlyWoodwards.
What do you think? Do you have any tips for laying tile floors?
My husband recommended that I call this post Hexagon tile for dummies. In this situation, we would be the dummies (in case it wasn't clear). But you aren't a dummy... so let's just say this is for beginners.

We've done a lot of things in a few years of renovation. Siding, windows, garage-building, refinishing floors, plumbing, electrical... But, can you even believe that we were tile-laying virgins?
And if you haven't done it, laying tile can be a pretty intense feat.
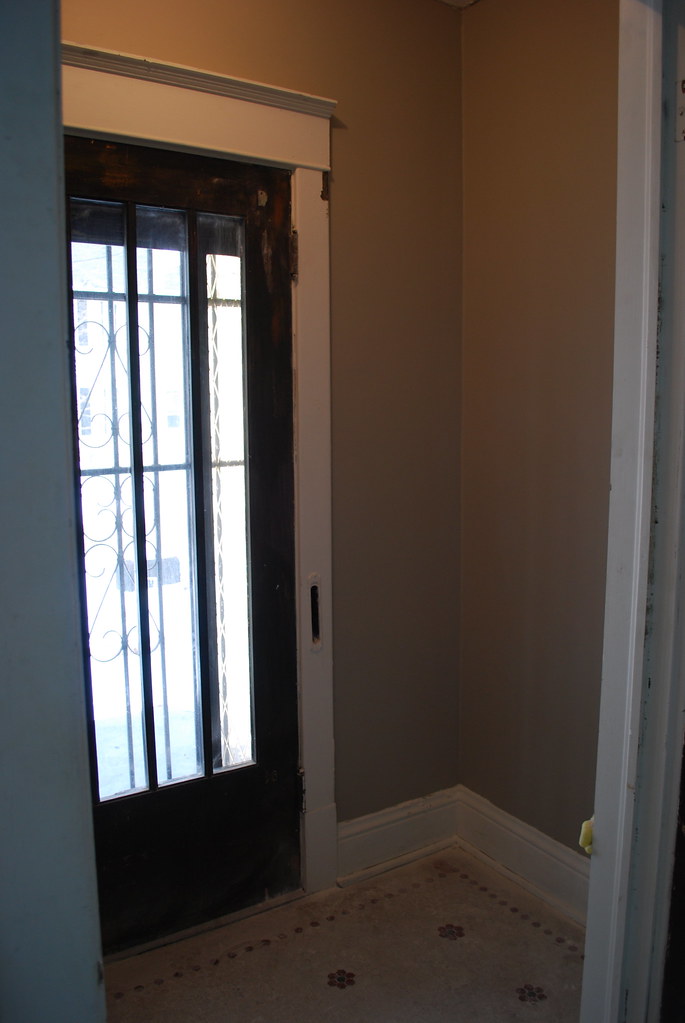
Since we've never worked with tile, it's pretty obvious that it was a mean little trick to fall in love with 1-inch hexagon tiles. But, Ryan loved the hexagon tile, too, and it went with our house perfectly. In fact, the floor in our entry way is a beautiful hexagon tile from the late 19th century.
The bathroom tile will be a tribute to this charming detail. And we thought it couldn't be that difficult.
Hardy-har-har.... that's a good one.
You can laugh with me.
And while it ended up not being super simple for us, I hope that outlining our steps and challenges can help you install the floor of your dreams. Even with little experience.
(Let's just ignore the fact that the room isn't even close to complete. Rome wasn't built in a day.)
And while it ended up not being super simple for us, I hope that outlining our steps and challenges can help you install the floor of your dreams. Even with little experience.
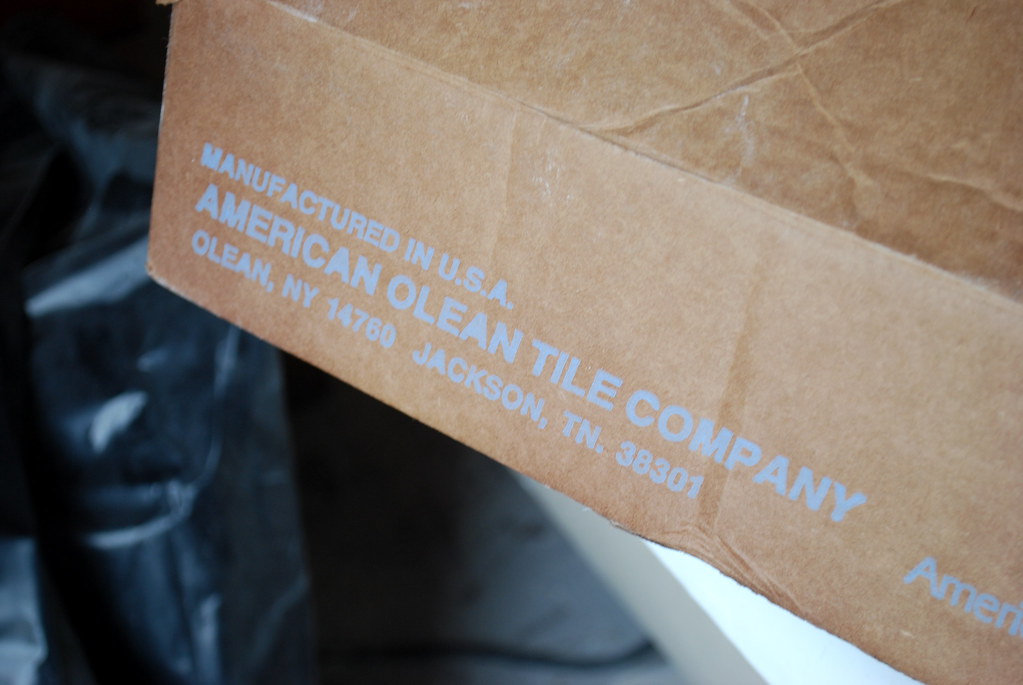
We chose white and black sheets of 1-inch hexagon ceramic unglazed tile. Finding tile was the easiest part of the process.
Here are the steps we took to get the flooring down.
Fitting
After installed cement board on top of the sub floor, the first step was to lay out the 2ft x 1ft sheets of tile and make any cuts to fit. After nearly 8 hours of attempting to dry-fit the tiles in the space, Ryan was on the verge of a melt-down. (Okay, he was having a melt-down.) Our house is old and far from square and it was darn near impossible to get the tiles to fit properly and with equal spacing.
Because the definition of insanity is doing the same thing over and over and expecting a different result, Ryan was officially insane. So, we had a little heart-to-heart and headed to our favorite home improvement store (Menards!) to find a square to replace my husband's missing square. We also picked up 1/8 inch spacers. This was our turning point.
Squaring
A square is essential, in our opinion. If none of your walls are perfectly square (welcome to the joy of an old house), use a square to draw a perpendicular line from the wall you want to begin the tile on. We ran a perpendicular line from the left wall below and used it as a guide for the bottom of the sheet of tile. We cut the sheets along the tub to fit, if necessary. (You can see our pencil line next to Ryan's knee and the level.)
Spacing
Maybe you will be able to find spacers that are made for hexagon tile. If you are like us, you won't. So, use the tiles from normal square tile and turn it on it's side. Don't skip this step. You may think that you can eye-ball it. You cannot. Trust us.
Our tiles were spaced approximately 1/8 inch apart. This means that if we weren't exact in spacing, after a few sheets, the tile sheet wouldn't even fit.
The great thing about using lots of spacers when placing the sheets together is that the spacers allow the individual tiles to shift just slightly. This means that an individual hexagon may be off by a smidge, but the entire sheet is in-place and it's not noticeable. This is great for anyone - and particularly those of us who have no clue what we are doing. (We're raising our hands.)
Cutting
While laying out the tiles on the floor, now is a good time to make any necessary cuts to fit the sheets flat up to the wall. If you are dealing with non-square walls, now is also a good time to let go of any perfectionism. The tiles won't be perfectly aligned against the length of every wall. My husband was very worried about this, but it's truly not noticeable. We used a small wet saw that we borrowed from Ryan's parents.
Adding details
We wanted to add a little period detail to the floor, so we cut black 'daisies' out of the black hexagon tiles and placed them at this point. We just measured from the center and spaced them evenly in the room. Once we were happy with the layout, we cut out the white tile to set the flowers in place.
When we put down the tile, we decided to install the base board after the tile, so we didn't worry about the small gaps by the wall because they will be covered by trim.
Once you are all done, take a good look at your floor and make sure there aren't large gaps or other issues. If it looks good, it's time to move on.
And give yourself a pat on the back. Because you rock.
Labeling
At this point, you'll need to remove all the tiles and clean the cement board really well. When you pull out the sheets of tile, number the sheets in order of installation so the sheets you cut will end up in the correct place. We labeled with a roll of painter's tape.
Then, we swept and swept to get any loose dust or debris out from under the tile and then began to lay the tile with mortar, following the instructions on the container. I don't think there's any need to rehash that. But, do check with with the person you bought your tile from to make sure you have the right trowel and type of mortar. We ended up with a 3/16 trowel.
Ryan went slowly and carefully, making sure to level and space out the tile as he went. We did have some issues with oozing mortar, and if we were to do it again, we would try to control this more. This can show through your grout if it oozes too much.
Once you've completed the floor, let it set. (Our mortar said to allow 24 hours.) Then, we cleaned it really well several times with a clean, barely-damp sponge. Once dry, we sealed the tile twice since the tile was unglazed.
Pre-sealing
If your tile is glazed, you won't need this step. If you are working with unglazed tile (the top of the tiles don't have a clear, smooth feel to them), then you may want to seal them before grouting. This will help keep the grout from soaking into and staining the tile. Which is a good thing if you just spent a lot of money and time getting that tile down.
We talked to the tile person at our hardware store and picked out a good sealer. The I just sponged it on with a special sponge. I did two coats according to the instructions.
Grouting
We chose a white grout for the floor. We went with a non-sanded variety, based on the size of the spacing (1/8 inch). It is pretty much as you expect and according to instructions. Force the grout into the joints with a float, wait and wipe, wipe, wipe. Repeat.
Cleaning
It ended up taking a long time for us to get all the grout residue from the tile. Ryan wiped it down with a barely-moist sponge. Then, we cleaned it again when the grout cured on the entire floor. I also used a dry white cloth to remove the final residue. Just keep cleaning until there aren't any streaks left.
Sealing
To keep the tiles protected and the grout lines clean, I applied sealer again to the top of the surface after the floors were cleaned. I hope this will keep the floor clean and pretty for years to come.
The moral of the story is that laying hexagon tile floors takes some time, a little brainpower and lots of patience. But the end result is just pure beauty, in our opinion.
I'm really pleased with how it turned out. Now, it's just time to finish up the rest of the room (and house). I hope you'll check out the progress over at NewlyWoodwards.
What do you think? Do you have any tips for laying tile floors?
 Labels:
Bathrooms,
Flooring,
How To,
Monthly Contributor,
NewlyWoodwards,
Tile
Labels:
Bathrooms,
Flooring,
How To,
Monthly Contributor,
NewlyWoodwards,
Tile


2 comments:
That looks great! I think adding the daisies really made it pop. I can't wait to see the completed room...of course, take a few days and rest after that project! :)
You're on Apartment Therapy's Re-Nest!! http://www.re-nest.com/re-nest/diy/diy-ideainstall-your-own-hextileremodelaholic-140190
Post a Comment