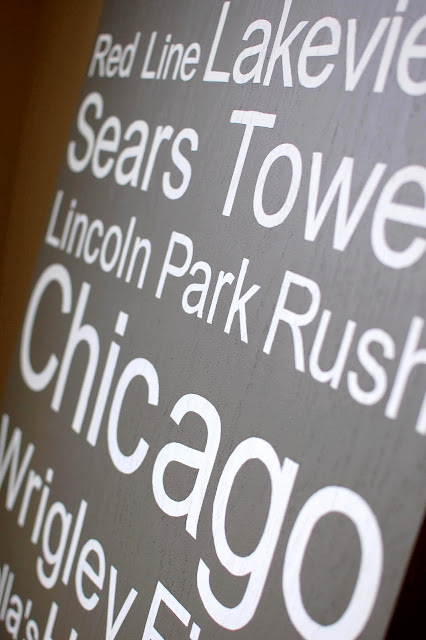
Subway Art Tutorial! 33 Shades of Green
13 January 2011
- contact paper
.

.
1. Use a saw and miter box to cut your wood moulding strips to size. The goal is to crate a frame with the wood strips to add depth to the sign.
.
.
Remember to "measure twice and cut once!"
.
.
2. Use wood glue to attach the moulding strips to the back of the board.
.
.
.
3. For added strength, use finishing nails every 6" or so around the board. Use a hammer and counter sink to recess the nails.
.

.
4. You will want the front of the board to have a nice, smooth finish, so use paintable wood filler at every location where there is a nail.
.

.
The front of the board now looks like this:
.
.
And the back of the board looks like this:
.
.
{ Please excuse my messy garage! }
.
And the side:
.
.
4. Use sandpaper to sand the front and sides of the board.
.
.
7. Draw guidelines. Tape your paper to the board with a small opening at the edge. Use a ruler or triangle to draw a dash at the edge of your board for each line of words on your sign. Take off the sheet of paper and use a level to draw the guidelines all the way across the board. Having these guidelines will make it much easier to line up your letter after you have cut them.
.
.
8. Cut your paper into sheets that will fit on the width of your contact paper. Use spray adhesive to attach the back side of the paper to the front side of the contact paper. My favorite spray adhesive is Super 77 by 3M. Make sure to spray on the front of the contact paper, not the side with the peel-off adhesive.
.
.
9. Now grab a glass of wine or hot chocolate and get ready to cut out all of the letters. This took me a few nights in front of the TV watching Christmas movies. It's not hard - just time consuming. It helps to use a small pair or craft scissors - it's easier to get into the smaller spaces of the letters.
.
.
.
As you cut out the letters, place on your board.
.
.
10. After all the letters are cut, peel the contact paper off the back and attach to the board. Use a scraper to make sure the letters are firmly attached.
.
.
11. Paint the front and sides of board. I used Martha Stewart Paint, color: Crevecoeur in an eggshell finish. It took me a few coats to get the finish and coverage I wanted.
.
.
12. Once paint is dry, peel off letters. I had to touch up areas of my letters where the paint had seeped through.
.
.
I had planned on making this sign for my sister for almost a year, but of course, I didn't finish it until December 23rd - just in time!
.
Here are a few shots of the finished project:
.
.
.
.
.
.
I hope you enjoyed this project! Please visit me at 33 Shades of Green if you have any questions..
Social Retargeting by Chango


8 comments:
Wow...that's just amazing, Alissa. I love it! And, step #9 made me smile. :)
Beautiful, Alissa! Great gift idea, too.
Great Tutorial! Thanks!
Ohh I love this.. Very Very Nice.
I'm planning on doing one of these for my friend's wedding present, but I'm wussing out and using the Cricut machine I got for Christmas. You get patience bonus points for cutting out all your letters by hand!
bec@theiheartblog
Great idea using contact paper!
I love the sign. It's simple and affordable (just like us at My Design Guide.com). I would love to see it in a kids room with inspiring phrases, life lessons on it....One single larger piece is always so right.
Amazing! I'm constantly amazed by Alissa's creativity!! Thanks for sharing!
Post a Comment