Complete Half Bath Remodel: Guest
18 August 2010
This little party link is such a gem the room is totally perfect now ( and I think I like it even more because it reminds me of our very first bathroom remodel), and what makes it even better is the fact that the before was so incredibly hideous! I love a good healthy complete makeover like this one, so I must thank the good people at Cozy.Cottage.Cute Check out what she had to say about it:
Compared to most of the other rooms we've worked on, this reno was a bit crazy. Alex ripped so much of this bathroom out that I could pass him tools through the floor while he was in the basement. Um, yeah. Scary. I am very proud to say that Alex built the whole thing back up again. He did all of the plumbing, electrical, tiling, beadboard, crown moulding, and trimwork all by himself on evenings and weekends. I can take credit for choosing the fixtures, finishes, paint colours, and accessories, but Alex basically did all of the important stuff. He's the man!
Before I show off share some of the after photos, please take a moment to take in how utterly beautiful our half-bath was when we first moved in (double click to enlarge all photos).

 Gotta love the before and after pics! :)
 Had to have beadboard and chunky moulding. Of course.
 We searched high and low for the tiniest sink known to man. We finally found the perfect one online at Vintage Tub and Bath. We actually got the matching sink/toilet shipped from the States. I will admit that it was expensive to do, but totally worth it.
 For now, we've left the window bare of any window treatments. Nothing will fit because it's such a tiny window! We did add some decorative window film from Home Depot for privacy.
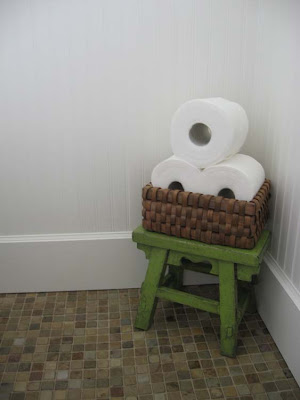
 I found this sweet little stool at a local home decor store called Rustic Craft.
 The faucet we also ordered from Vintage Tub and Bath in a brushed nickel finish.
 We wanted to replace the light fixture with something new but that still matched the character of the house. I love it!
 The brushed nickel towel holder is from Home Depot and the hand towel is from Superstore.
 We chose this t.p. holder to match the light fixture. Also from Home Depot.
 Ooooh, stripy accessories!
 Soap pump: Canadian Tire, Tiny plate: Pier One Imports, Plant pot: Ikea
 We kept the original door hardware. The bathroom door doesn't have a regular lock from the inside so I used some jute twine to tie the original key around the doorknob.
 On the inside of the door I have this adorable hanging basket for extra storage.
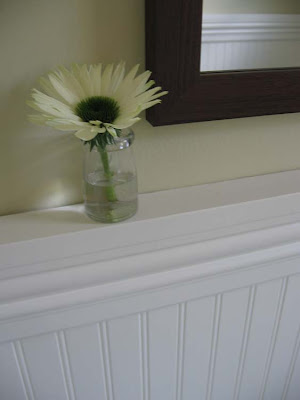
I had a terrible time trying to find a small, square mirror that would fit the tiny space between the beadboard ledge and the light fixture. Finally, I ended up creating my own by purchasing a (cheap, ugly) picture and replacing the print with a mirror tile from Home Depot. Truthfully, it's not my favourite but it will do for now.


12 comments:
Beautiful! Love the makeover! Great job!
This is beautiful land inspiring! Thanks for sharing :)
You made it wonderful....... great ideas...... perfect details........ it is small but beautiful......congratulations
Sonia
This is GORGEOUS! Since we're currently remodeling our master bath right now and I love everything about bathrooms at this moment, I linked this over to my blog for today. I hope that was OK.
P.S. TOTALLY know what she meant about handing things through the floor. We had a catastrophe here last night so we were doing the same thing.:(
Sarah
HandbagsnPigtails.blogspot.com
I LOVE this! Such a transformation! Don't ya just love beadboard?!
So relaxing! What lovely simplicity! Gorgeous!
I love the stool with the tiny little basket! The bathrooms in my house aren't very large, nor do they have underutilized corners, so I'm always looking for tiny ideas that give the illusion of a little more luxury. Great idea.
SO lovely.. Good job! I gather you're from Canada as you mentioned about having the toilet/sink shipped from the states.. So am I! I find it frustrating at times when I'm unable to order things but I see them online (eg. efaucets won't take a Canadian credit card!) A couple of questions please -- did your beadboard have a tongue and groove? If not, how did you ensure the seams didn't show? (or maybe since your room is small, you didn't need to seam it?) Also, did you paint your beadboard? Before or after installing it? I am wanting to do beadboard on the bottom half of my family room.
Its awesome! Thanks for the pics and all the info of where you bought the items!
Looks beautiful! Love the key on a rope!
Sue
xo
Hi Cassity,
Thank you so much for featuring our bathroom remodel!! I was grinning from ear to ear when I saw the picture in my Google Reader this morning. Hee hee.
Just wanted to add that Alex and I are also waiting to adopt (waiting 1 year 6 months so far). Gotta give a shout out to all of the other adoption-folks!!! :)
To answer a reader's question:
We used panels of beadboard. We hid the seams by using a thin line of paintable caulking where each panel met. We also painted over the beadboard with two coats of Simply White by Benjamin Moore (pearl finish so it would be washable).
LOve it. Great remodel! And I can't believe that is the original door hardware with that gorgeous key!!!! Lucky girl! :)
That makes me wish I had a small powder room to re-do! It turned out awesome. Good work!
Post a Comment