


Big Girl Room Design
26 August 2010
This is another project I asked to feature a while ago, such is blog life... I love the way the big girl room looks! This is from the Price family blog check it out:
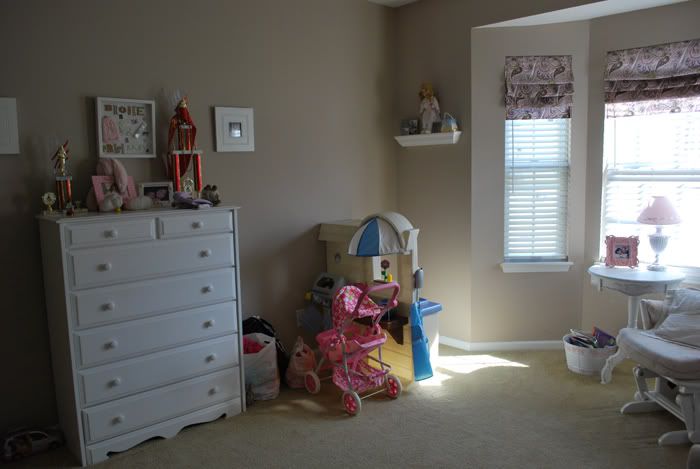
It's Finished!!!!!!!!!!!! Well, not 100%, but I just can't stand to wait any longer. My 3 year old's room is complete....minus a few tweaks here and there.... Remember when I showed you her room a few months ago?? (ClickHERE to go to that post) Here is a refresher of what her room looked like BEFORE...


And now.....(Drum roll please....)


The pink duvet was bought on Ebay for $14!!! Then I found the insert for it at Target for $15 on clearance!!! Yay for great deals!


The letters on her bookshelf were once hanging above her crib. I used scrapbook paper and Mod Podge to cover the letters.


We had the bookshelves built in by professionals, since it was a job too big for us. You can read about it HERE.
Here are a few other details in the room...

You can find the tutorial on how to make the pillowsham HERE
I made the pillowsham, monograms, the accent pillow and added ric rac to her sheet set for a little extra character...


I found this cute picture frame at TJ Maxx on clearance for $4....SOLD! I put a picture of my girls in it.... this picture is proof that they DO get a long every now and then!

I picked up the birdcage at Goodwill for $1.91. It was an ugly brassy color...so I just grabbed my pink spray paint and gave it a makeover!

The iron bicycle is actually a garden decoration (the seat is a potholder), but I thought it was the perfect spot for this bunny.
The photo is one of my all time favorites.

I made these canvases with her initials using scrapbook paper and Mod Podge. I believe this project was around $10 to make.

These baskets were in her nursery, but I took out the liners and used them as a pattern to make new ones.

I made this ruffled pillow using the tutorial from House of Smiths

I ordered a pair of bolster pillows off Ebay (I think I paid $20 for both) and made this pillow to go in her bay window. I also monogrammed it and used ribbon to tie up the ends.

This white pillow was made from part of a shower curtain....you will see this again soon when I post my guest bath makeover (currently in progress).

Here is another view of the sheet set I did. I bought a set from Target for $11 and sewed ric rac trim on the flat sheet and pillowcase.....now you can't tell the difference from this set and one from Pottery Barn!!!
Soooooooo, let's take one more look at before & after....


And there you have it.....
a pink and chocolate room fit for a princess!!!
I am extremly pleased with the way it turned out!!
Don't you love the scalloped edge between the two colors of paint? And the wonderful window seat? I have wanted one of those ALL. MY. LIFE. (I kid you not! THe room is simply gorgeous!
 Labels:
Girls Rooms,
Kids,
Nurseries
Labels:
Girls Rooms,
Kids,
Nurseries


10 comments:
I love this room makeover! It gave me some great ideas for my girls room. They want a princess room. I love the scalloped line on the wall. Great job!
Love it! Love the paisley and all the monogramed stuff, especially the initials over the bed! And thanks for the link to the roman shades tutorial!
Darling! It has so many fun details and the pillows are my favorites!
What a transformation! And so beautiful! Looks like you really put a lot of work into it and it paid off!
What a great change! It looks so cute!
How adorable,is fun doing girls room
I love everything you have done in this room!
WOW what a change. Thanks for showing before and after pictures.
I think the paint around the window area makes such a difference.
Fabulous job!
~Hugs~
Denise
Oh, you've got to love the big girl fabric and colors alongside the pretty pink. Job well done...L.
absolutely darling transformation! my favorite was the scalloped wall - really the details just look amazing! :)
great ideas turned into a darling girl's room. thought you should know the K is upside down in the BKP arrangement.
Post a Comment