


Affordable Decorative Wall Panel: Guest Remodel
09 August 2010
Missy at My Cottage Charm wants to show us how she created an expensive decorative wall panel look with a budget friendly price.
You guys know I have been working on Carson's room with the built-ins and all, but what I haven't shown you is what I've been doing to the bottom half of his room.
:-D
I know, I know, I'm sneaky.....you're really gonna have to keep an eye on me in the future! lol :)
I've been doing this to his room............
 |
Installing board and batten on the cheap! |
When I say cheap, I mean the lattice strips were about 5 bucks for each 8' piece and I used 10,
so $50.00 for the lattice and then the chair rail was about another $50.
Around $100.00 to do the whole room...but he has a large room and oh what a difference it makes!
Sorry the pics are a little dark...it's hard to get a good picture in there sometimes!
Anyway, I started with lattice strips and cut them 28" long.
I made them 28" because the height of the base board was 5" and when I added the chair rail on top it made it come out to 36" high, which is the standard height of a chair rail...and also happens to be the same height as the top of the built-ins I made for his room.
This is what they looked like when I installed them below the chair rail.....

They are "about" 12" apart, some we had to fudge slightly because of outlets, etc, but none are more than about 13 1/2".
You'll notice I just sat them right on top of the baseboards, the lattice is very thin and doesn't stick out beyond the baseboards at all.
I used finishing nails to attach it to the walls. You could use construction adhesive, but I wanted to be able to have the choice to remove them one day without all the gunk left on the walls. (or worse yet, the walls coming down with the wood...YIKES!)
and here it is with one coat of primer on the lattice strips.
I used semi-gloss paint because I wanted it to look like wood wainscotting.
Trimwork is almost always painted a semi-gloss, and that's the look I was trying to achieve.
It does look just like wood!
-as a matter of fact-...
My daddy came over the other day to look at the progress in the room and he asked me if I had built the walls out with wood before I started adding the lattice strips.
Victory!...it must look like wainscotting if my dad thought I built the walls out!!
Woo Hoo!

Here is my mess in progress....
don't ask me how many coats I had to put on the walls!!!
Okay, 4, it took FOUR!
I have painted more in the last month than I have in the last year!!
(but it's SO been worth it, his room is looking SO cute..and you haven't even seen the progress I'm making on the built-ins!!!)
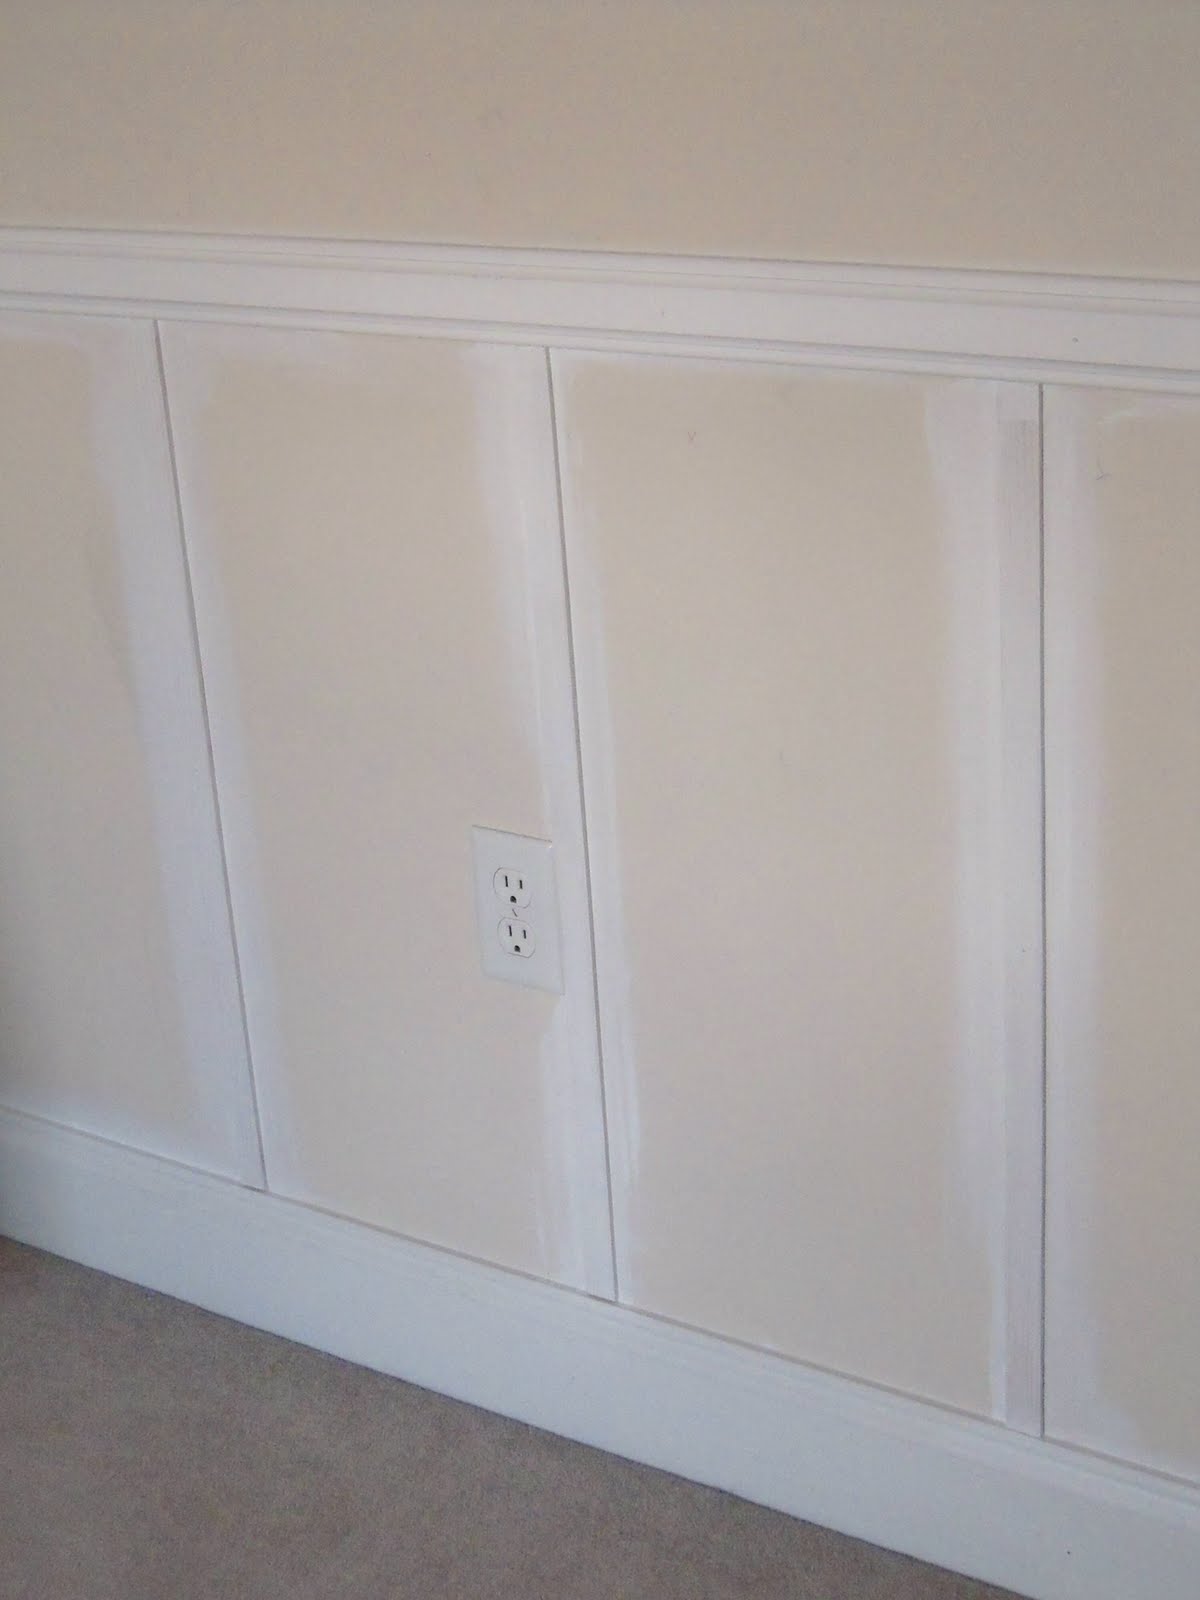
Here are the nice, bright white results!
I LOVE board and batten!!
Keep going for a sneak peek on the cabinets...

Very smart way to get a good expensive look for decorative wall paneling!
What do you think of this simple remodel technique?
 Labels:
Guest Projects,
Wainscoting,
Wall Finishes
Labels:
Guest Projects,
Wainscoting,
Wall Finishes


12 comments:
Great idea. It really does look like wainscoting! So creative! :)
I thinks it looks like a million! Wanna do my house?
Sie
That is so wonderful, Something I have to remember for my next project, i learn sooo much from blogs, Thank you!
Carol
Thanks for letting me be a guest on your blog! :) I'm so honored. Can't wait to show you Carson's room all finished! :)
Thanks so much
Missy
Wow! Nice job! Makes me feel like painting!
That looks great! It's amazing what a difference a bit of molding can make.
I bought a router bit made by Freud that is called a 'reverse wainscotting bit' and it makes the board and batten styles and rails out of MDF.
Ingenious!
Amazing what a little wood and paint will do! Your room looks great - congratulations! And what a great price.
A tip I read on another blog: paint the wall your semi-gloss white first. When you add the batens and caulk it will be easier to paint and take less time (hopefully!).
Thanks for sharing your great room and I can't wait to see the cabinetry.
I can think of at least 3 places in my own house I could use this idea...and it doesn't look too hard, either.
L.
Hello!
It looks amazing!
I'm wondering, where did you find the strips of wood? What would I ask for in the hardware store? Did you have to cut them down?
LOVE. It. Thanks for a great post.
Christi
I think it's pretty genius!!!! So it's just the wall below the chair rail, with strips?!?
The strips of wood are just lattice strips...bought in 8 foot long segments at Lowes. Just ask for lattice strips (not lattice sections) :).
Oh and yes Cassie, the lattice is just strips below the chair rail...then it's all painted out white. :)
Hope this helps!
You guys can come over to my blog and watch the progress of the built-ins I'm building in his room too if you'd like!
Missy
Post a Comment