


Buffet With Hutch: Guest Remodel
26 July 2010

I have a buffet. It was a gift from the Mr. for my birthday several years ago - and it was second hand. Does he know how to make me happy, or what??

There it is back there, in our old house.
Back in the day, I painted it black. Loved it. I paired it with a large mirror hung vertically & two buffet lamps. It looked so very Pottery Barn-ish.
My tastes have changed a bit. No more buffet lamps. Too ornate. Sold them on craigslist for a little more than what I bought them for several years ago. No more mirror. It's in storage. I may or may not keep it. No more black. I'm all about painting EVERYTHING white. Well, a few things will end up aqua, but mostly white.
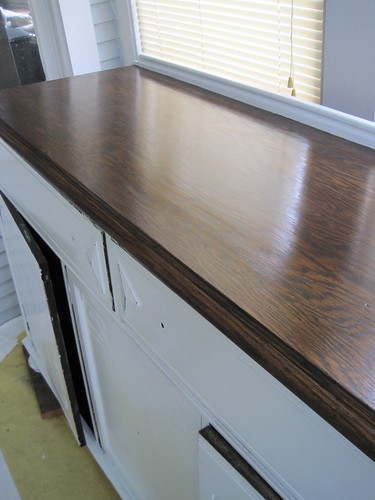
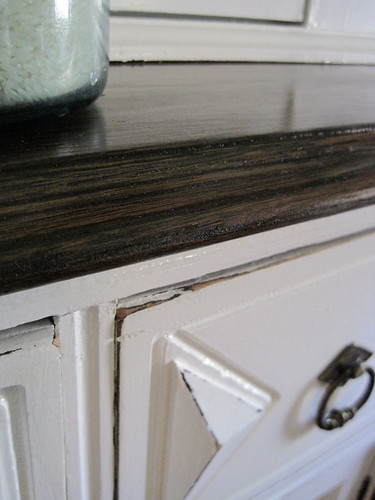
So I scraped the black paint off of the top of the buffet. Fortunately my previous paint job was pretty poorly executed and it came right off! A little sanding, a little cleaning, then I stained & sealed the top piece. I think it looks pretty good! I've never stained anything before. It always scared me. Not anymore!

I also primed & painted the rest of the buffet. I used leftover paint from the trim in our house. Since I'm not the best at painting, I decided that a nice distressed finish would be just the thing for covering up my mistakes. Something always peels when I paint furniture. A corner here, a leg there - but if it's distressed, it all blends in and looks intentional!
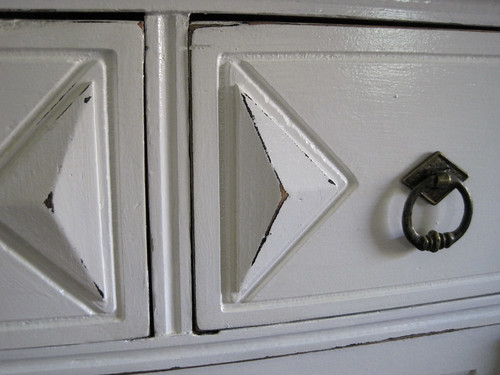
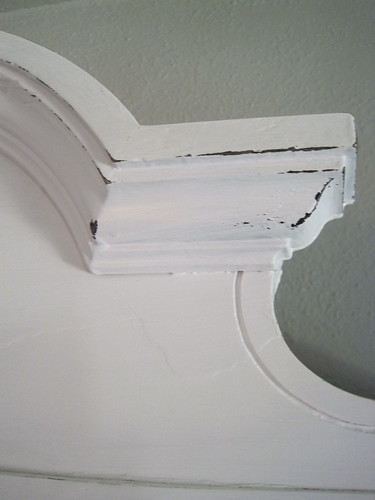
So after about 3 coats of paint, I fired up the palm sander & went to town on the corners & raised parts. Then a couple of coats of non-yellowing sealer. I love how it turned out!
I have decided that I want a place to display my china and the cherished china my Aunt Jean gave me (I'll save that story for another post). So I started looking for a hutch to put on top of my buffet (thus the reason for not using the mirror). I blogged a little bit about it here.

Free hutch. Can't beat it. So this is what it looked like before I painted it. No wonder someone gave it away. Gross.
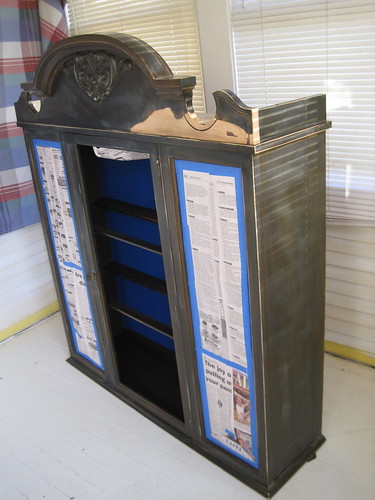
And this is what it looks like after. Nice!
You'll notice, though, that it's not completely painted on the inside and the light at the top is still covered in newspaper. Silly me, I closed the door after the paint was dried. It was dried & cured. Really. But the hutch sat in a corner of our living room for a long time. Summer came, with all of it's humidity. Wood expands.
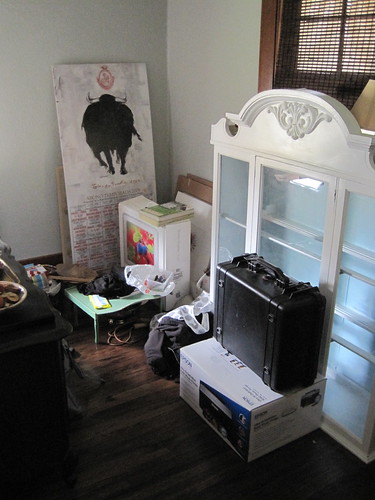
This is the embarrassing corner of the living room that never made it into
photos until now. Thankfully it doesn't look like this anymore!
photos until now. Thankfully it doesn't look like this anymore!
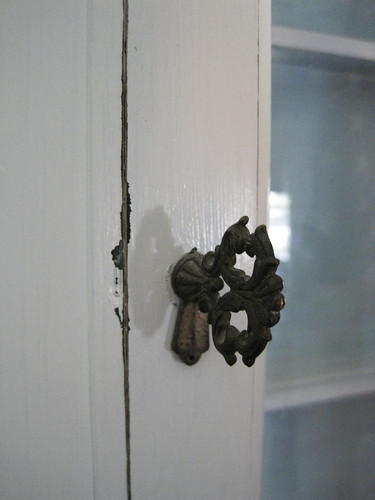
SO....I can't get the door open. I don't know if it will ever open. It's wedged so tightly that I can't get a razor blade in between. I was hoping that once it was in place it would acclimate to the air conditioning & open again. That hasn't happened. Last resort will be to remove the back of the piece and work at it from that angle. I'm having a similar issue with the buffet.

The doors won't close. It was in a non-climate controlled place for three years, poor warped baby. I may need to do some tricky carpentry work on them. For now, picture it complete.

Look for new artwork on that blank wall next week...
The hutch with a pale aqua backing, glass in the shelves and white china displayed. It will be just what I imagined it to be. Or...still imagine it to be.
But for now it's in place, and that alone makes me happy.
I can fill it with stuff later.
Baby steps.
Absolutely beautiful! Very nice thinking to bring two pieces together and the white, I totally agree.
I love white buffet with hutch!
What do you think of the changes?
I love white buffet with hutch!
What do you think of the changes?
 Labels:
Furniture,
Guest Projects
Labels:
Furniture,
Guest Projects


9 comments:
I love this re-do! I have a buffet and hutch that I was to refurbish... I like the idea of leaving the top of the buffet wood and painting everything else. CUTE. Need to decide now if I want to paint it white or turquoise!!! :)
Absolutely beautiful... love it!
Love this and especially all the distressing!
Rondell
This is lovely. I'm sorry to hear about your warping issues, but it made me feel better about mine! I always thought maybe I didn't get the hinges on right!
Fabulous job.. I have never distressed anything, but love the look... I should try it..
What kind of "non-yellowing" sealer did you use? You recommend using that? I'm in the middle of painting my kitchen cupboards white.. with oil.. do you think I should use the sealer?
THanks,
Judy
Just beautiful!
Thanks so much everyone for the kind words! I'm excited about being featured! Judy, I used DEFT clear wood finish brushing lacquer. I think I got it at Home Depot. It worked well, but I didn't realize until after I bought it that it was oil based. I don't like oil myself (messy & smelly), but it would be perfect for over your kitchen cabinets. I think for a kitchen, that takes a lot of wear & tear, a few coats would make your paint job last a lot longer. Someday I'll get around to painting my cabinets. Good luck!
The buffet and hutch look wonderful!! Too bad about the warping issues, maybe with time it will settle back down. Nontheless, great job!
Thanks for sharing.
Jeanette
Thanks so much for the lacquer info..
Post a Comment