


Sweet Dreams, Headboard Tutorial: Guest
08 June 2010
Mrs. Mac at Little Mac Shack has dreamed up a nice headboard. Check it out.
We were obviously quite busy on Monday. Today the hit parade continues with the highlight. Our new headboard! I ordered the fabric a few weeks ago and couldn't wait for it to come in...

Luckily for me, I didn't have to wait long. Within two weeks, my three yards were sitting in our bedroom corner...

Unfortunately, I couldn't make up my mind about what to do with it. I toyed with various cornice options, but couldn't find coordinating fabric to do what I had originally planned. Eventually, I decided to go with an upholstered headboard, because, well, I've always wanted one. ('Always' as in 'for the last year'.)
Thankfully, Mr. Mac was on board and ready to help.
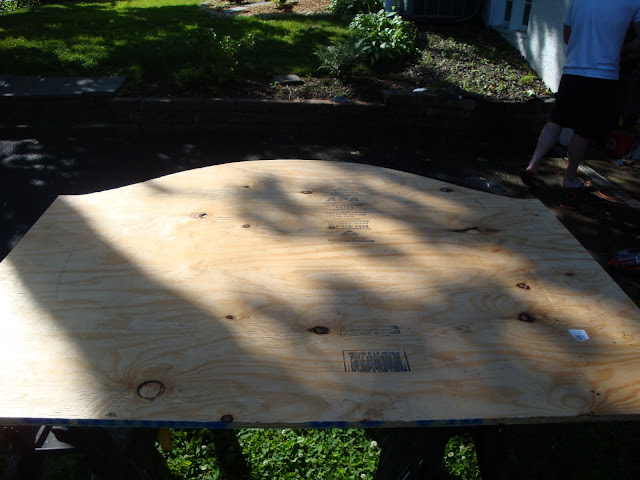
Friday night, we went to pick up supplies at the Depot. I have no pictures. That is probably a good thing. You wouldn't want to see me hanging out of the car window, clinging to a giant sheet of plywood, screaming at Mr. Mac to 'hurry up and get home' and 'SLOW the hell down' before our plywood on the roof decided to take flight. Luckily, for us and the cars behind us, our plywood never did take flight and we all made it home safely. Once home, I drew out the shape I envisioned on the back of some wrapping paper...

This is the roll of wrapping paper that will not die. I bought it from Costco probably about 5 years ago. There is still so much left and the paper is really nice and thick. Buy your wrapping paper from Costco- you can use it for headboard templates, too!

We decided to tape up our template to get look before deciding for sure to go with it. Loved it...

Mr. Mac did the cutting while I was at work on Saturday.

He did a wonderful job...
Before I headed back to work on Sunday, I measured and cut...


With proper ventilation, of course...

And Mr. Mac made our soon to be finished headboard some legs to stand on (Oh yeah, and he painted everything.)...

By Monday, our wood and our fabric were ready!
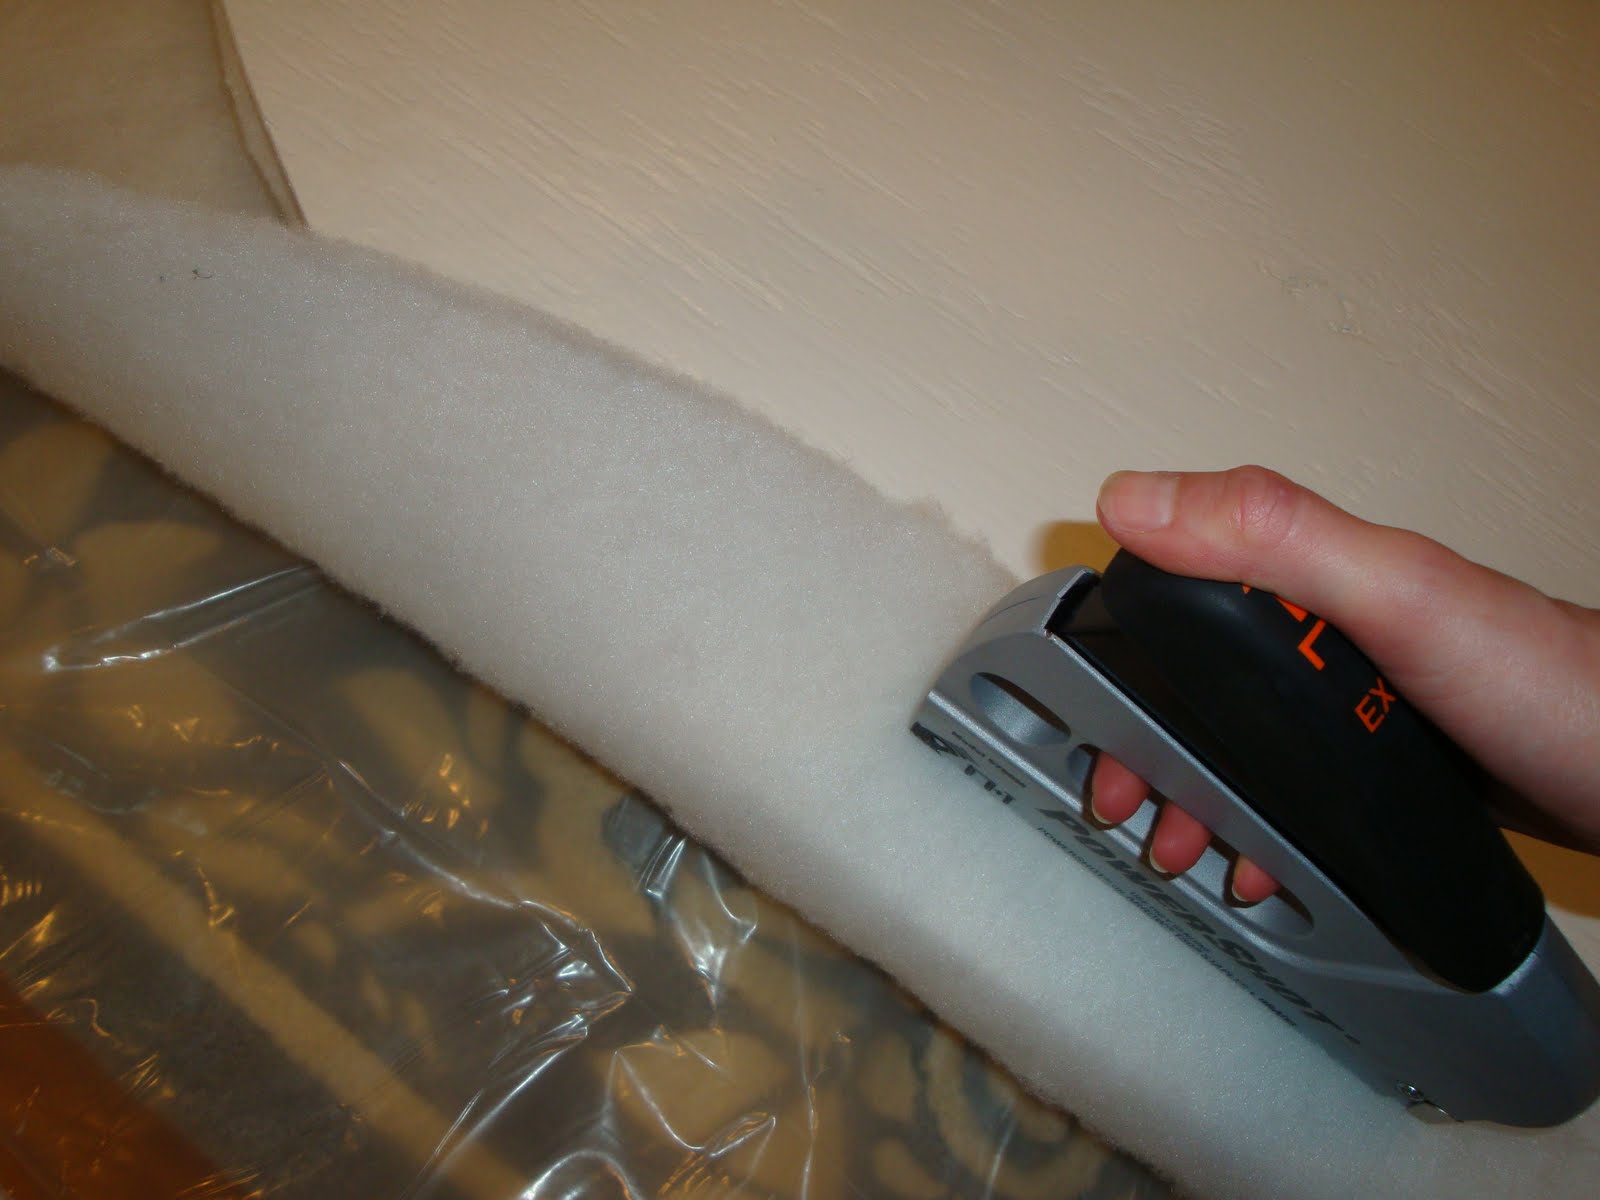
Time to put on the 2 inch foam. Spray adhesive is key, as is a mask (and apparently a dress)...

A couple that DIYs together, stays together?

We opted to trim around the plywood once the foam was attached, rather than trying to cut it exactly right beforehand. Worked out fine...

Mr. Mac (who did a bit of shopping on his own while I was at work) picked out this white foam. When I first saw it my reaction was not pleasant. As in "What did you buy?! That does not look or feel like any tutorial foam I've seen!" However, turns out it was both cheaper and more eco-friendly. It also did the job just fine. WIN!
Time to move into the living room. The basement was too dirty for the remainder of the project...

Our batting was too short but we managed to patch together some extra strips. It's the bottom. No one will notice. I had fun with the staple gun, but it did not function so well and we needed to finish up each staple with a hammer. UGH!

Time for the fabric! For this first upholstery project it might have been a good idea to choose an easy shape and an easy fabric. I decided to do neither (hello stripes!). So, this is the only picture of the fabric step. I was too busy sweating bullets and tensing every muscle in my body to bother with the camera. Lining up and stretching the fabric with exactly the same tension on either side of the headboard = stress! Let's just say I did a lot of measuring and counting of circles.

And it finally looks like a headboard...

I'm crazy proud of the corners...

We attached the legs...

And we have a real bed...


A real bed all dressed up...

Where did we get those huge euro pillows? Oh, that would be another fab find. $10 each at Home Goods! My goal is to eventually get some covers I have my eye on from BB&B. However, those pricey babies will have to wait until I accumulate a few more 20% off coupons. For now I'll stick with these stripey numbers as is- at half the price of the cheapest euro fill pillow I found elsewhere. SCORE!
So, let's review. An amazing DIY headboard and some fab find pillows take us from drab...


Luckily for me, I didn't have to wait long. Within two weeks, my three yards were sitting in our bedroom corner...

Unfortunately, I couldn't make up my mind about what to do with it. I toyed with various cornice options, but couldn't find coordinating fabric to do what I had originally planned. Eventually, I decided to go with an upholstered headboard, because, well, I've always wanted one. ('Always' as in 'for the last year'.)
Thankfully, Mr. Mac was on board and ready to help.
Friday night, we went to pick up supplies at the Depot. I have no pictures. That is probably a good thing. You wouldn't want to see me hanging out of the car window, clinging to a giant sheet of plywood, screaming at Mr. Mac to 'hurry up and get home' and 'SLOW the hell down' before our plywood on the roof decided to take flight. Luckily, for us and the cars behind us, our plywood never did take flight and we all made it home safely. Once home, I drew out the shape I envisioned on the back of some wrapping paper...

This is the roll of wrapping paper that will not die. I bought it from Costco probably about 5 years ago. There is still so much left and the paper is really nice and thick. Buy your wrapping paper from Costco- you can use it for headboard templates, too!
Anyhoo, I drew and I cut. Ta-da...
We decided to tape up our template to get look before deciding for sure to go with it. Loved it...

Mr. Mac did the cutting while I was at work on Saturday.

He did a wonderful job...

Before I headed back to work on Sunday, I measured and cut...

and Scotch Garded (white is so DANGEROUS!)...
With proper ventilation, of course...

And Mr. Mac made our soon to be finished headboard some legs to stand on (Oh yeah, and he painted everything.)...

By Monday, our wood and our fabric were ready!
Time to put on the 2 inch foam. Spray adhesive is key, as is a mask (and apparently a dress)...

A couple that DIYs together, stays together?

We opted to trim around the plywood once the foam was attached, rather than trying to cut it exactly right beforehand. Worked out fine...

Mr. Mac (who did a bit of shopping on his own while I was at work) picked out this white foam. When I first saw it my reaction was not pleasant. As in "What did you buy?! That does not look or feel like any tutorial foam I've seen!" However, turns out it was both cheaper and more eco-friendly. It also did the job just fine. WIN!
Time to move into the living room. The basement was too dirty for the remainder of the project...

Our batting was too short but we managed to patch together some extra strips. It's the bottom. No one will notice. I had fun with the staple gun, but it did not function so well and we needed to finish up each staple with a hammer. UGH!
Time for the fabric! For this first upholstery project it might have been a good idea to choose an easy shape and an easy fabric. I decided to do neither (hello stripes!). So, this is the only picture of the fabric step. I was too busy sweating bullets and tensing every muscle in my body to bother with the camera. Lining up and stretching the fabric with exactly the same tension on either side of the headboard = stress! Let's just say I did a lot of measuring and counting of circles.

And it finally looks like a headboard...

I'm crazy proud of the corners...

We attached the legs...

And we have a real bed...


A real bed all dressed up...

Where did we get those huge euro pillows? Oh, that would be another fab find. $10 each at Home Goods! My goal is to eventually get some covers I have my eye on from BB&B. However, those pricey babies will have to wait until I accumulate a few more 20% off coupons. For now I'll stick with these stripey numbers as is- at half the price of the cheapest euro fill pillow I found elsewhere. SCORE!
So, let's review. An amazing DIY headboard and some fab find pillows take us from drab...

to FAB!
Definitely FAB! Great job and thanks for the detailed information!
Is it "dreamy" or what?
 Labels:
Bedrooms,
Furniture,
Guest Projects,
Interiors,
Sewing Projects,
Tutorials
Labels:
Bedrooms,
Furniture,
Guest Projects,
Interiors,
Sewing Projects,
Tutorials


15 comments:
beautiful job!
What an awesome project! So neat that you two can work like this together. Love the photo of your hands! Super-sweet!!! I do think you're your right. The headboard is fab and really looks great in your room with the end tables, the beadboard, and then the lovely colorful pillows. Congrats!
~ Autumn Clark
Great job! Well done. That is awesome you can do projects together.
That fabric is luscious. What a beautiful headboard. I need a headboard so bad. There are so many options out there (including your door one) I can't flippin decide. I just need to do something!
That has to be one of my favorite upholstered headboard. You should be crazy proud.
Love this! We need to upgrade to a king but haven't bc of buying a whole new bed. Making our own would be perfect!
It's beautiful! About how much did this project run you? We've been debating something similar for the bedroom - and by "we", I mean "I".
Nice job! The fabric is great!
I would like to invite you to visit the cottage, and join in on all the fun for my three linky parties:
ASK THE YANKEE - MONDAYS
TIPS & TRICKS TUESDAY
TIME TRAVEL THURSDAY
You can get the details here:
http://thebrambleberrycottage.blogspot.com/2010/06/brambleberry-cottage-linky-party.html
Hope to see ya there!
Liz @ the Brambleberry Cottage
http://thebrambleberrycottage.blogspot.com/
I LOVE it!!!! Love the fabric!
You did a fantastic job. It looks great!!
I love that headboard! So beautiful and elegant.
Following you from Social Parade. :) Better late than never!! I hope you can stop by my blog and follow as well.
http://theartsymom.tk
I love this. I really want to make a headboard like this.
and I totally have the same wrapping paper, and I swear it is the never ending roll.
It it just beautiful! I love the shape and the fabric! You guys did a great job!!!
Loved the headboard - it's so very clean and crisp! What was the brand of the batting that you thought wouldn't work but did turn out fine?
And if you need BB&B coupons email me - I have TONS and I'll be happy to send you some.
Cat
Beautiful headboard! What a great team effort! That fabric is great.....I used a white matelasse coverlet to cover a headboard for the same effect. I love the curve on yours - I might have to take mine apart and get out the saw!
Post a Comment