


Green With Envy: Big Girl's Room
19 October 2011
Green With Envy: Big Girl's Room
Submitted By The Weekend Homemaker
My daughter’s big girl bedroom has been a year (or so) in the making and I’ve shared some pictures and projects along the way. However, I’ve never shown the whole room or a before and after. I think I’m most proud of this room because I was able to use Craigslist, garage sales, eBay and my own handiwork for most of the items in her room and to lower cost.
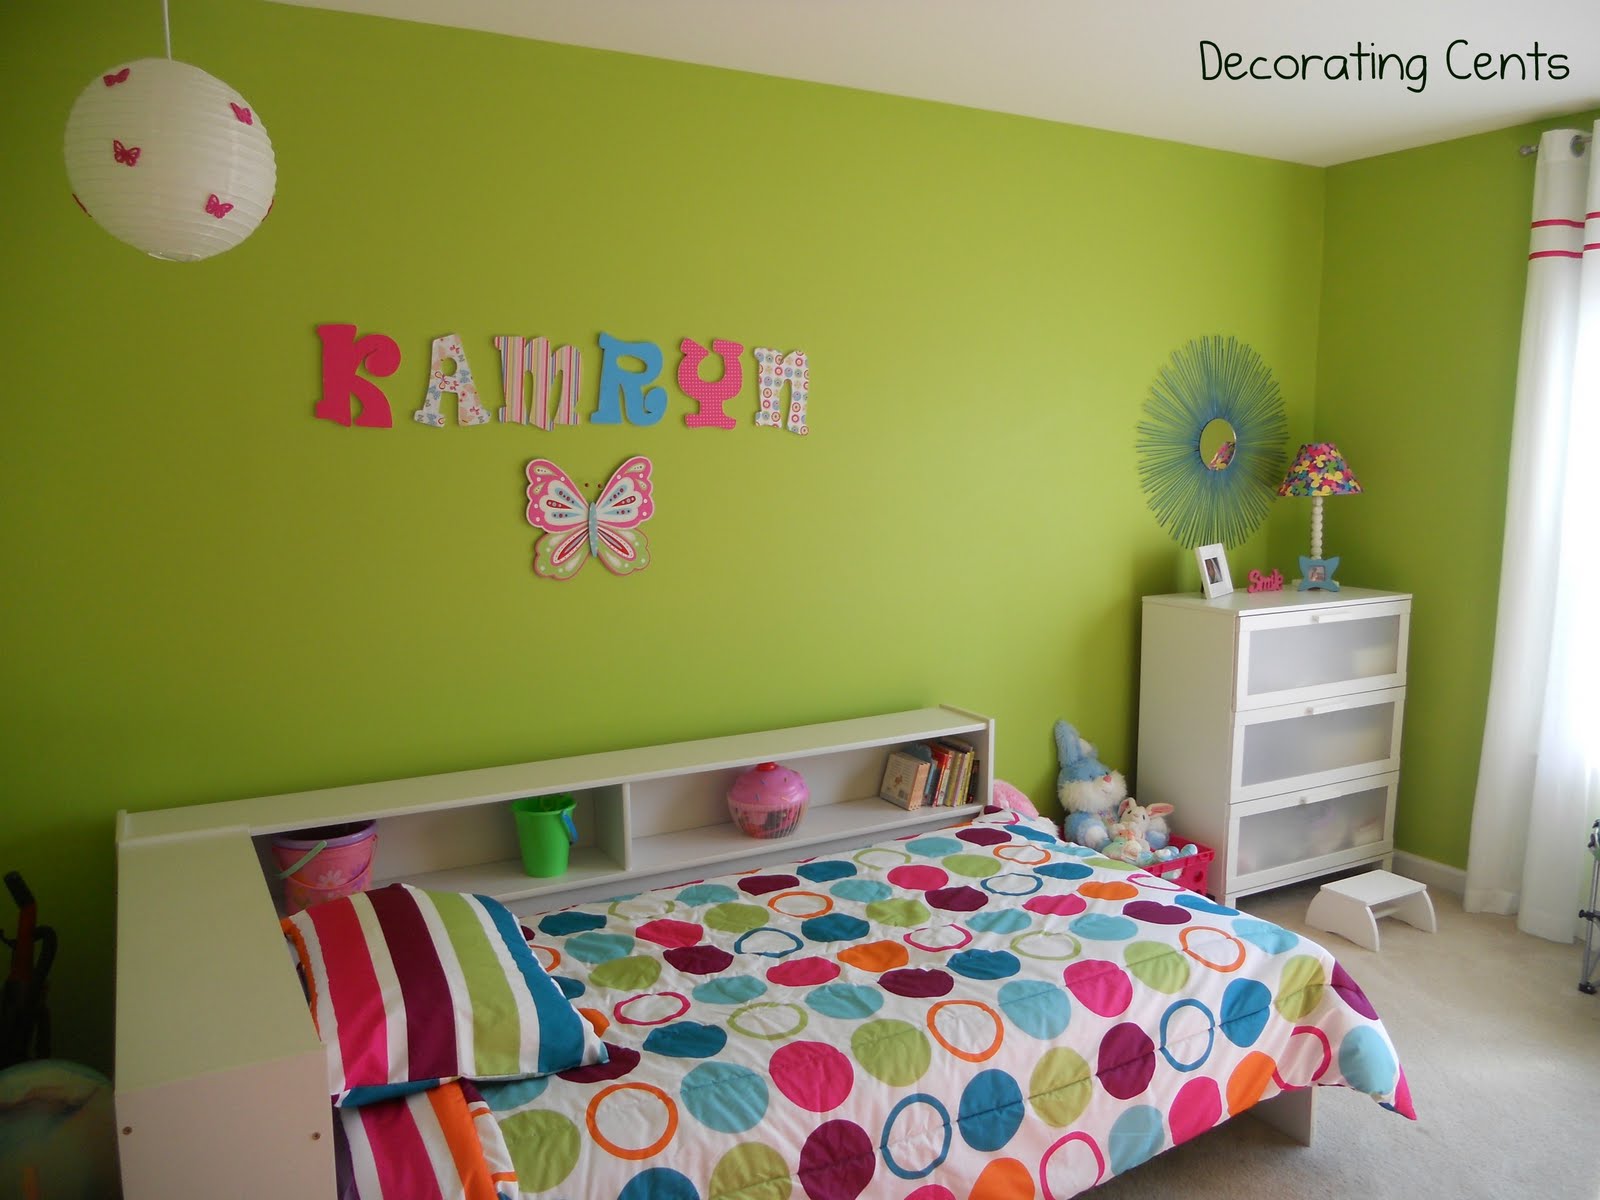
Although her nursery and big girl bedroom use the same color combinations (greens, pinks, yellows, and whites), her nursery colors were more pastel. They were very soothing for a baby but for a big girl, we wanted something more vibrant and fun.
NURSERY BEFORE:
BIG GIRL ROOM AFTER:


Below are some links to other posts or websites for additional information about certain pieces.
Paint: Benjamin More Pale Sea Mist
Chandelier: Lowes
Curtains & Bolster Pillow Fabric: P Kaufman Gypsy Watermelon
Headboard: Restoration Hardware Baby and Child, Parker Upholstered Headboard (I bought it on clearance and it is no longer available)
Headboard Fabric: P Kaufman Slubby Basket in ParrotBedding: Pottery Barn Kids Isabelle duvet and shams (They are no longer available at Pottery Barn Kids. I bought them on ebay.)
Dresser: Craigslist
Que Sera Print: From the Making It Lovely blog, Nicole shared this free printable. I love the colors and am a closet Doris Day fan.
Bird Decals: Leen the Graphics Queen Etsy Shop
Wall mounted Bookshelf: Land of NodNightstand & Drawer Pull: Nightstand from garage sale and drawer pull from AnthropologieWall Flowers: Ikea Smila Blomma Wall Lamps (I found both of them brand new still in the shrink wrap at a garage sale for $8 for both)
 This project was contributed by one of our fabulous readers! We love to share your projects with this great blogging community. So, if you have projects from kitchen renovation ideas to small bathroom remodels, overhauled and repurposed furniture, spray paint updates you name it please send it in! Thanks for reading Remodelaholic!
Submitted By The Weekend Homemaker
My daughter’s big girl bedroom has been a year (or so) in the making and I’ve shared some pictures and projects along the way. However, I’ve never shown the whole room or a before and after. I think I’m most proud of this room because I was able to use Craigslist, garage sales, eBay and my own handiwork for most of the items in her room and to lower cost.
Although her nursery and big girl bedroom use the same color combinations (greens, pinks, yellows, and whites), her nursery colors were more pastel. They were very soothing for a baby but for a big girl, we wanted something more vibrant and fun.
NURSERY BEFORE:
BIG GIRL ROOM AFTER:
Below are some links to other posts or websites for additional information about certain pieces.
Paint: Benjamin More Pale Sea Mist
Chandelier: Lowes
Curtains & Bolster Pillow Fabric: P Kaufman Gypsy Watermelon
Headboard: Restoration Hardware Baby and Child, Parker Upholstered Headboard (I bought it on clearance and it is no longer available)
Headboard Fabric: P Kaufman Slubby Basket in ParrotBedding: Pottery Barn Kids Isabelle duvet and shams (They are no longer available at Pottery Barn Kids. I bought them on ebay.)
Dresser: Craigslist
Que Sera Print: From the Making It Lovely blog, Nicole shared this free printable. I love the colors and am a closet Doris Day fan.
Bird Decals: Leen the Graphics Queen Etsy Shop
Wall mounted Bookshelf: Land of NodNightstand & Drawer Pull: Nightstand from garage sale and drawer pull from AnthropologieWall Flowers: Ikea Smila Blomma Wall Lamps (I found both of them brand new still in the shrink wrap at a garage sale for $8 for both)
 This project was contributed by one of our fabulous readers! We love to share your projects with this great blogging community. So, if you have projects from kitchen renovation ideas to small bathroom remodels, overhauled and repurposed furniture, spray paint updates you name it please send it in! Thanks for reading Remodelaholic!
More adorable little girl's bedrooms:
Read more...
 Labels:
Bedrooms,
Girls Rooms,
Green
Labels:
Bedrooms,
Girls Rooms,
Green


