We’ve Moved!


If you aren’t redirected here is the link:


Remodelaholic!


THANKS!

Showing posts with label Clocks. Show all posts

R-epurposed Door to Large Wall Clock DIY

26 August 2010


Rene from Bargain Hoot sent over this very imaginative re-purpose project.  Check out how this old screen door became a cool large format clock:
So recently I purchased an old screen door with a diy project in mind. I saw a clock on a door somewhere, I think it was Dreamy Whites… and thought… what a cute idea. Then I thought to myself, self, you could easily use the Upper Case Living rub on clock face for 39.95 to embellish your door and give away an uppercase living $4o credit to boot!  So here I am today sharing the door info along with the Uppercase expression giveaway. Thank you Judi!!! Not only is Judi a dear friend, but also my Uppercase Living Demonstrator!!. Go check out her UL online catalog herePS: the hands and clock parts are ALL from Uppercase. They are sold in a set for $39.95.
Here is the scoop on the door…. it’s as easy as 1,2,3,…oops 4.
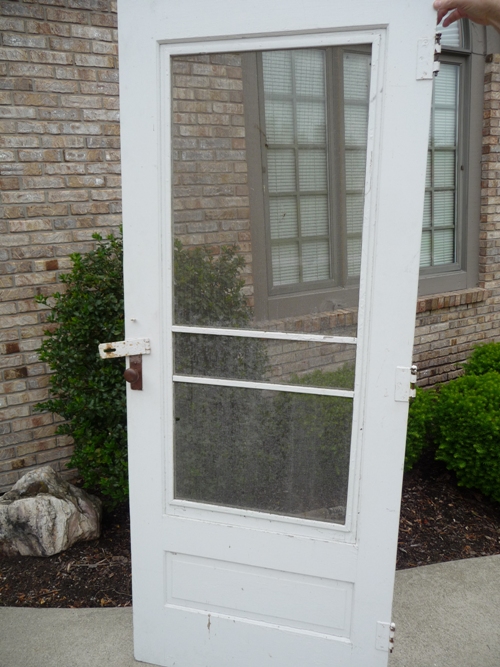
1. Get a door,but not just any door, it has to have a smooth wide enough surface to fit the expression like 23″…Here’s the door and my wonderful husbands hand holding it while I snap the photo. The dilemma with my door, which is somewhat obvious, is that it is a screen door. This could pose a problem to some, but nooo this is an easy peasy fix to all us DIYers (or DIYers whose husbands execute grand ideas of their DIYer wives). Just pop out the screen section and put a piece of wood in its place. ….This leads me to my next photo.
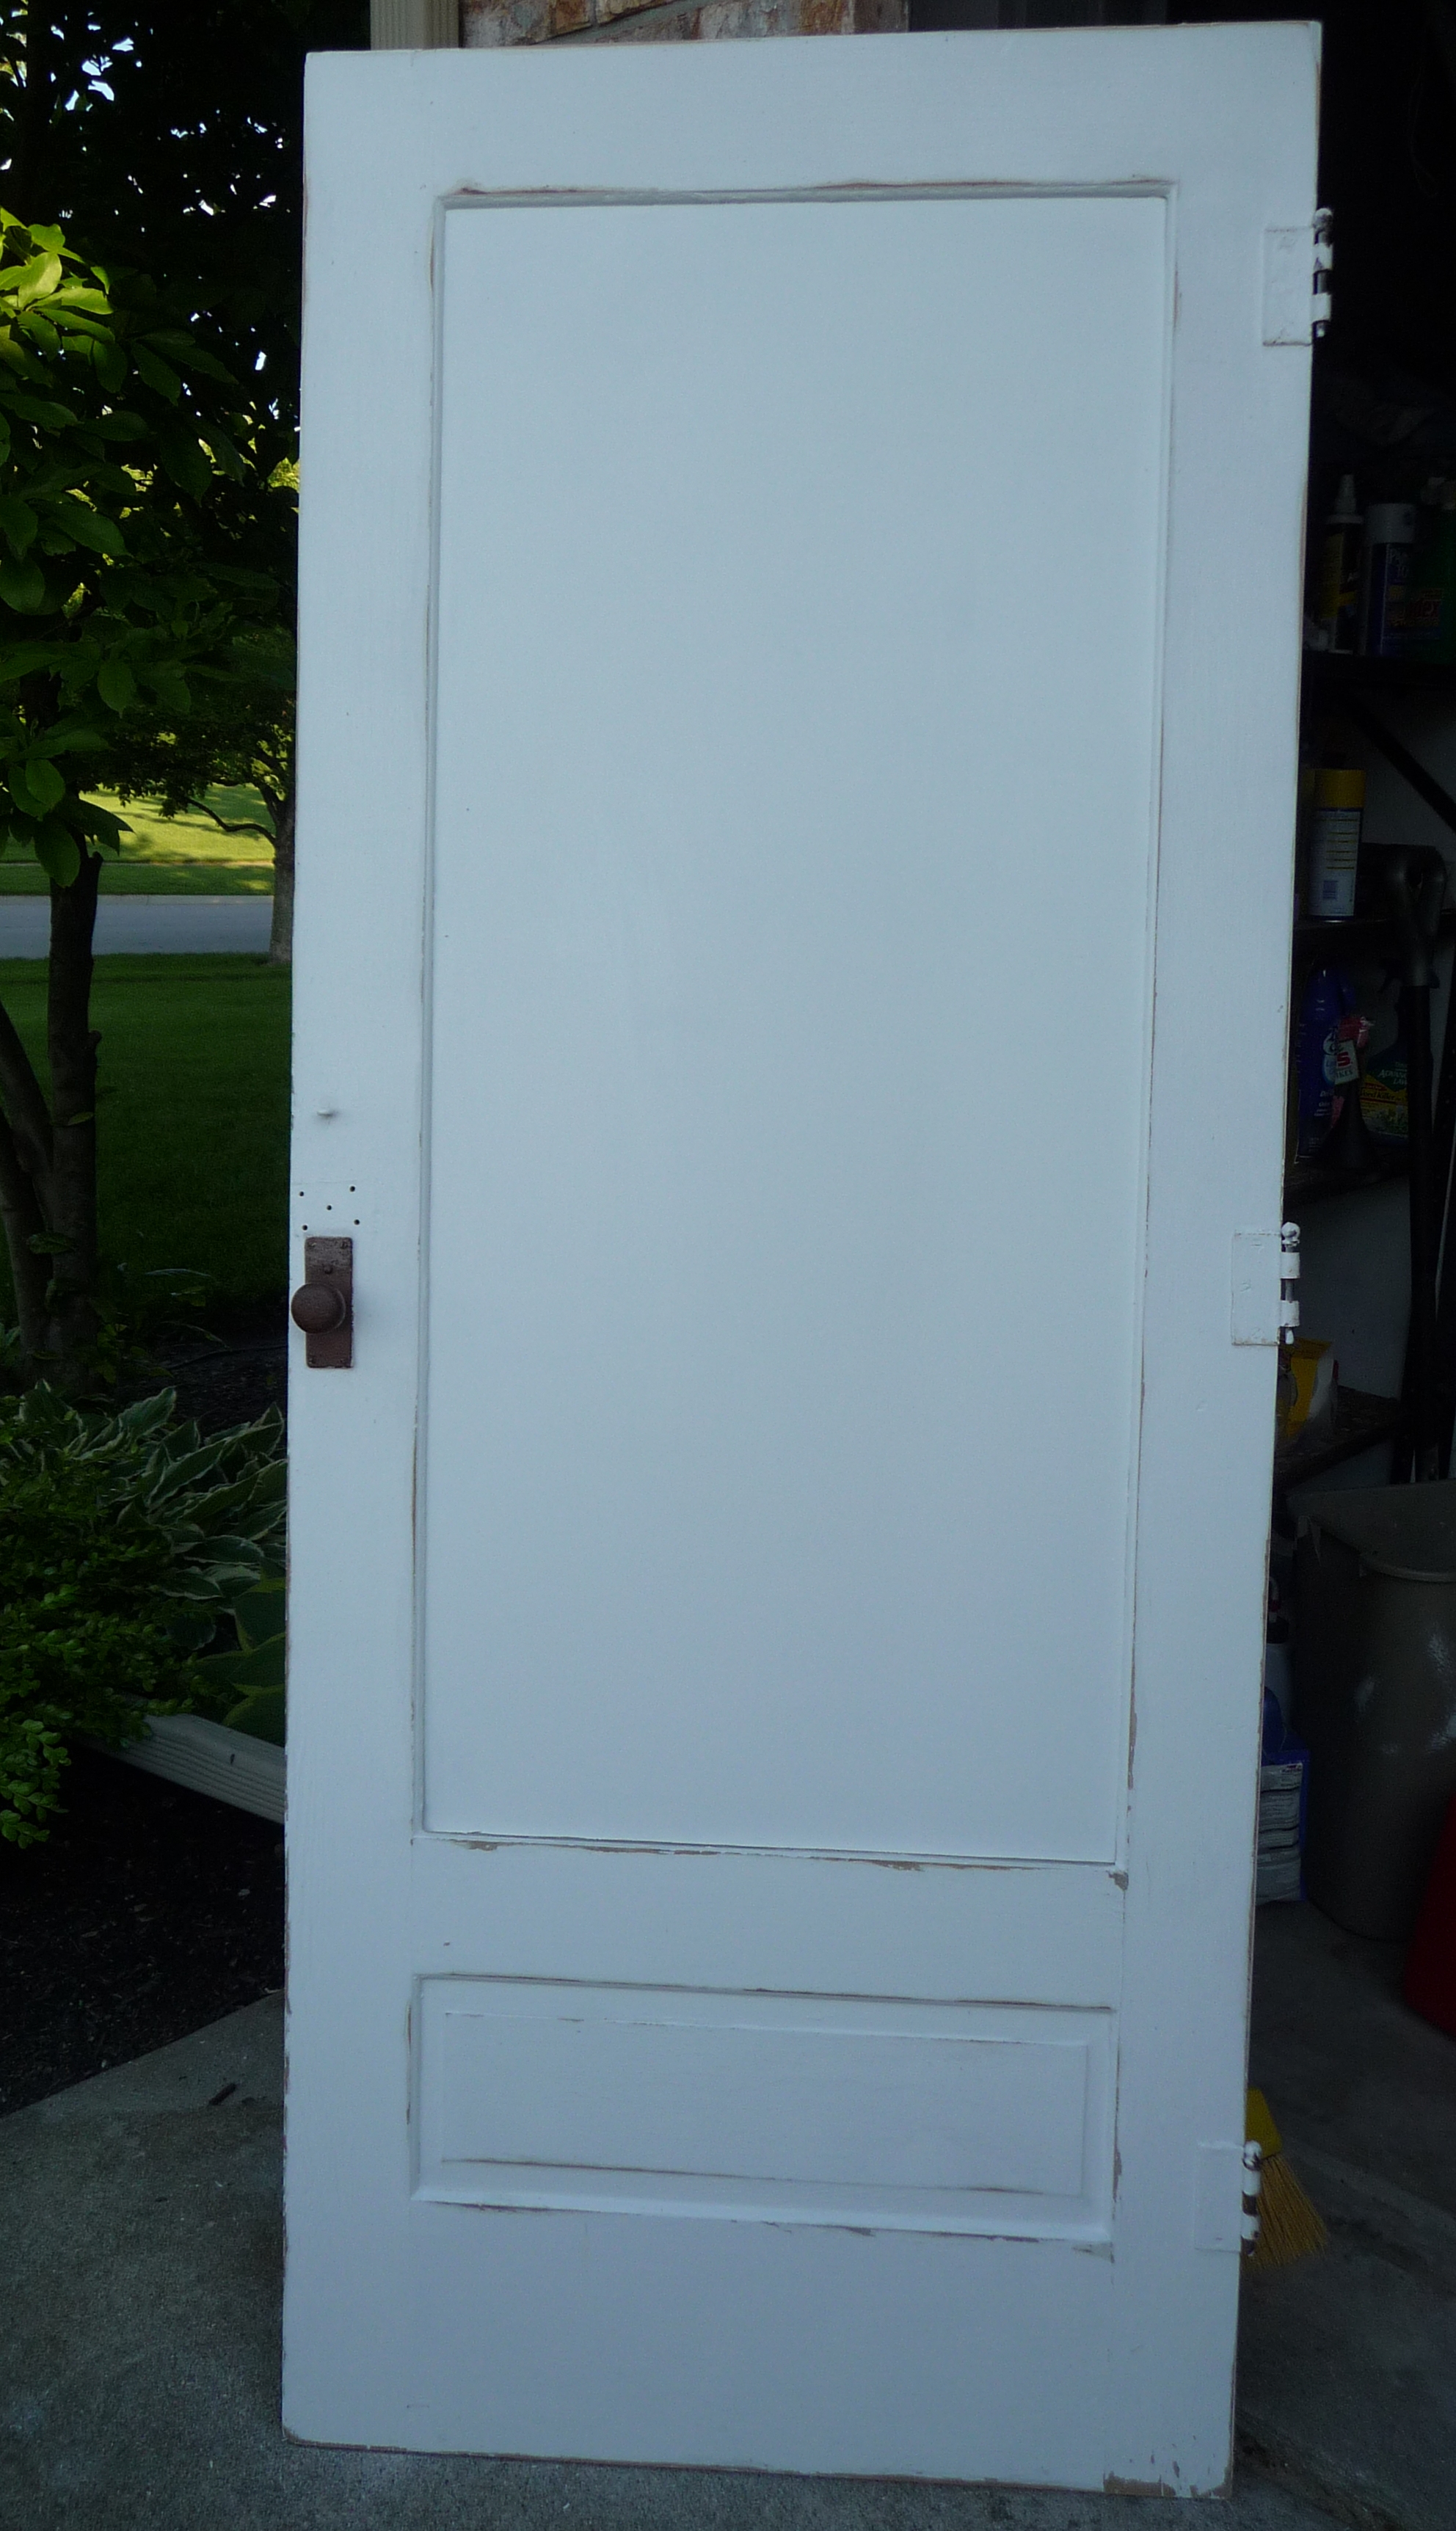
 2. Here is the same door with the screen replaced by a piece of wood. It has been painted and aged with some sanding.
We decided to remove the metal latch. Hmmm, wonder if we should have removed the hinges too…..
Now it is all ready for the clock face… which leads me to number 3.  Note my husbands hand is not in this photo.
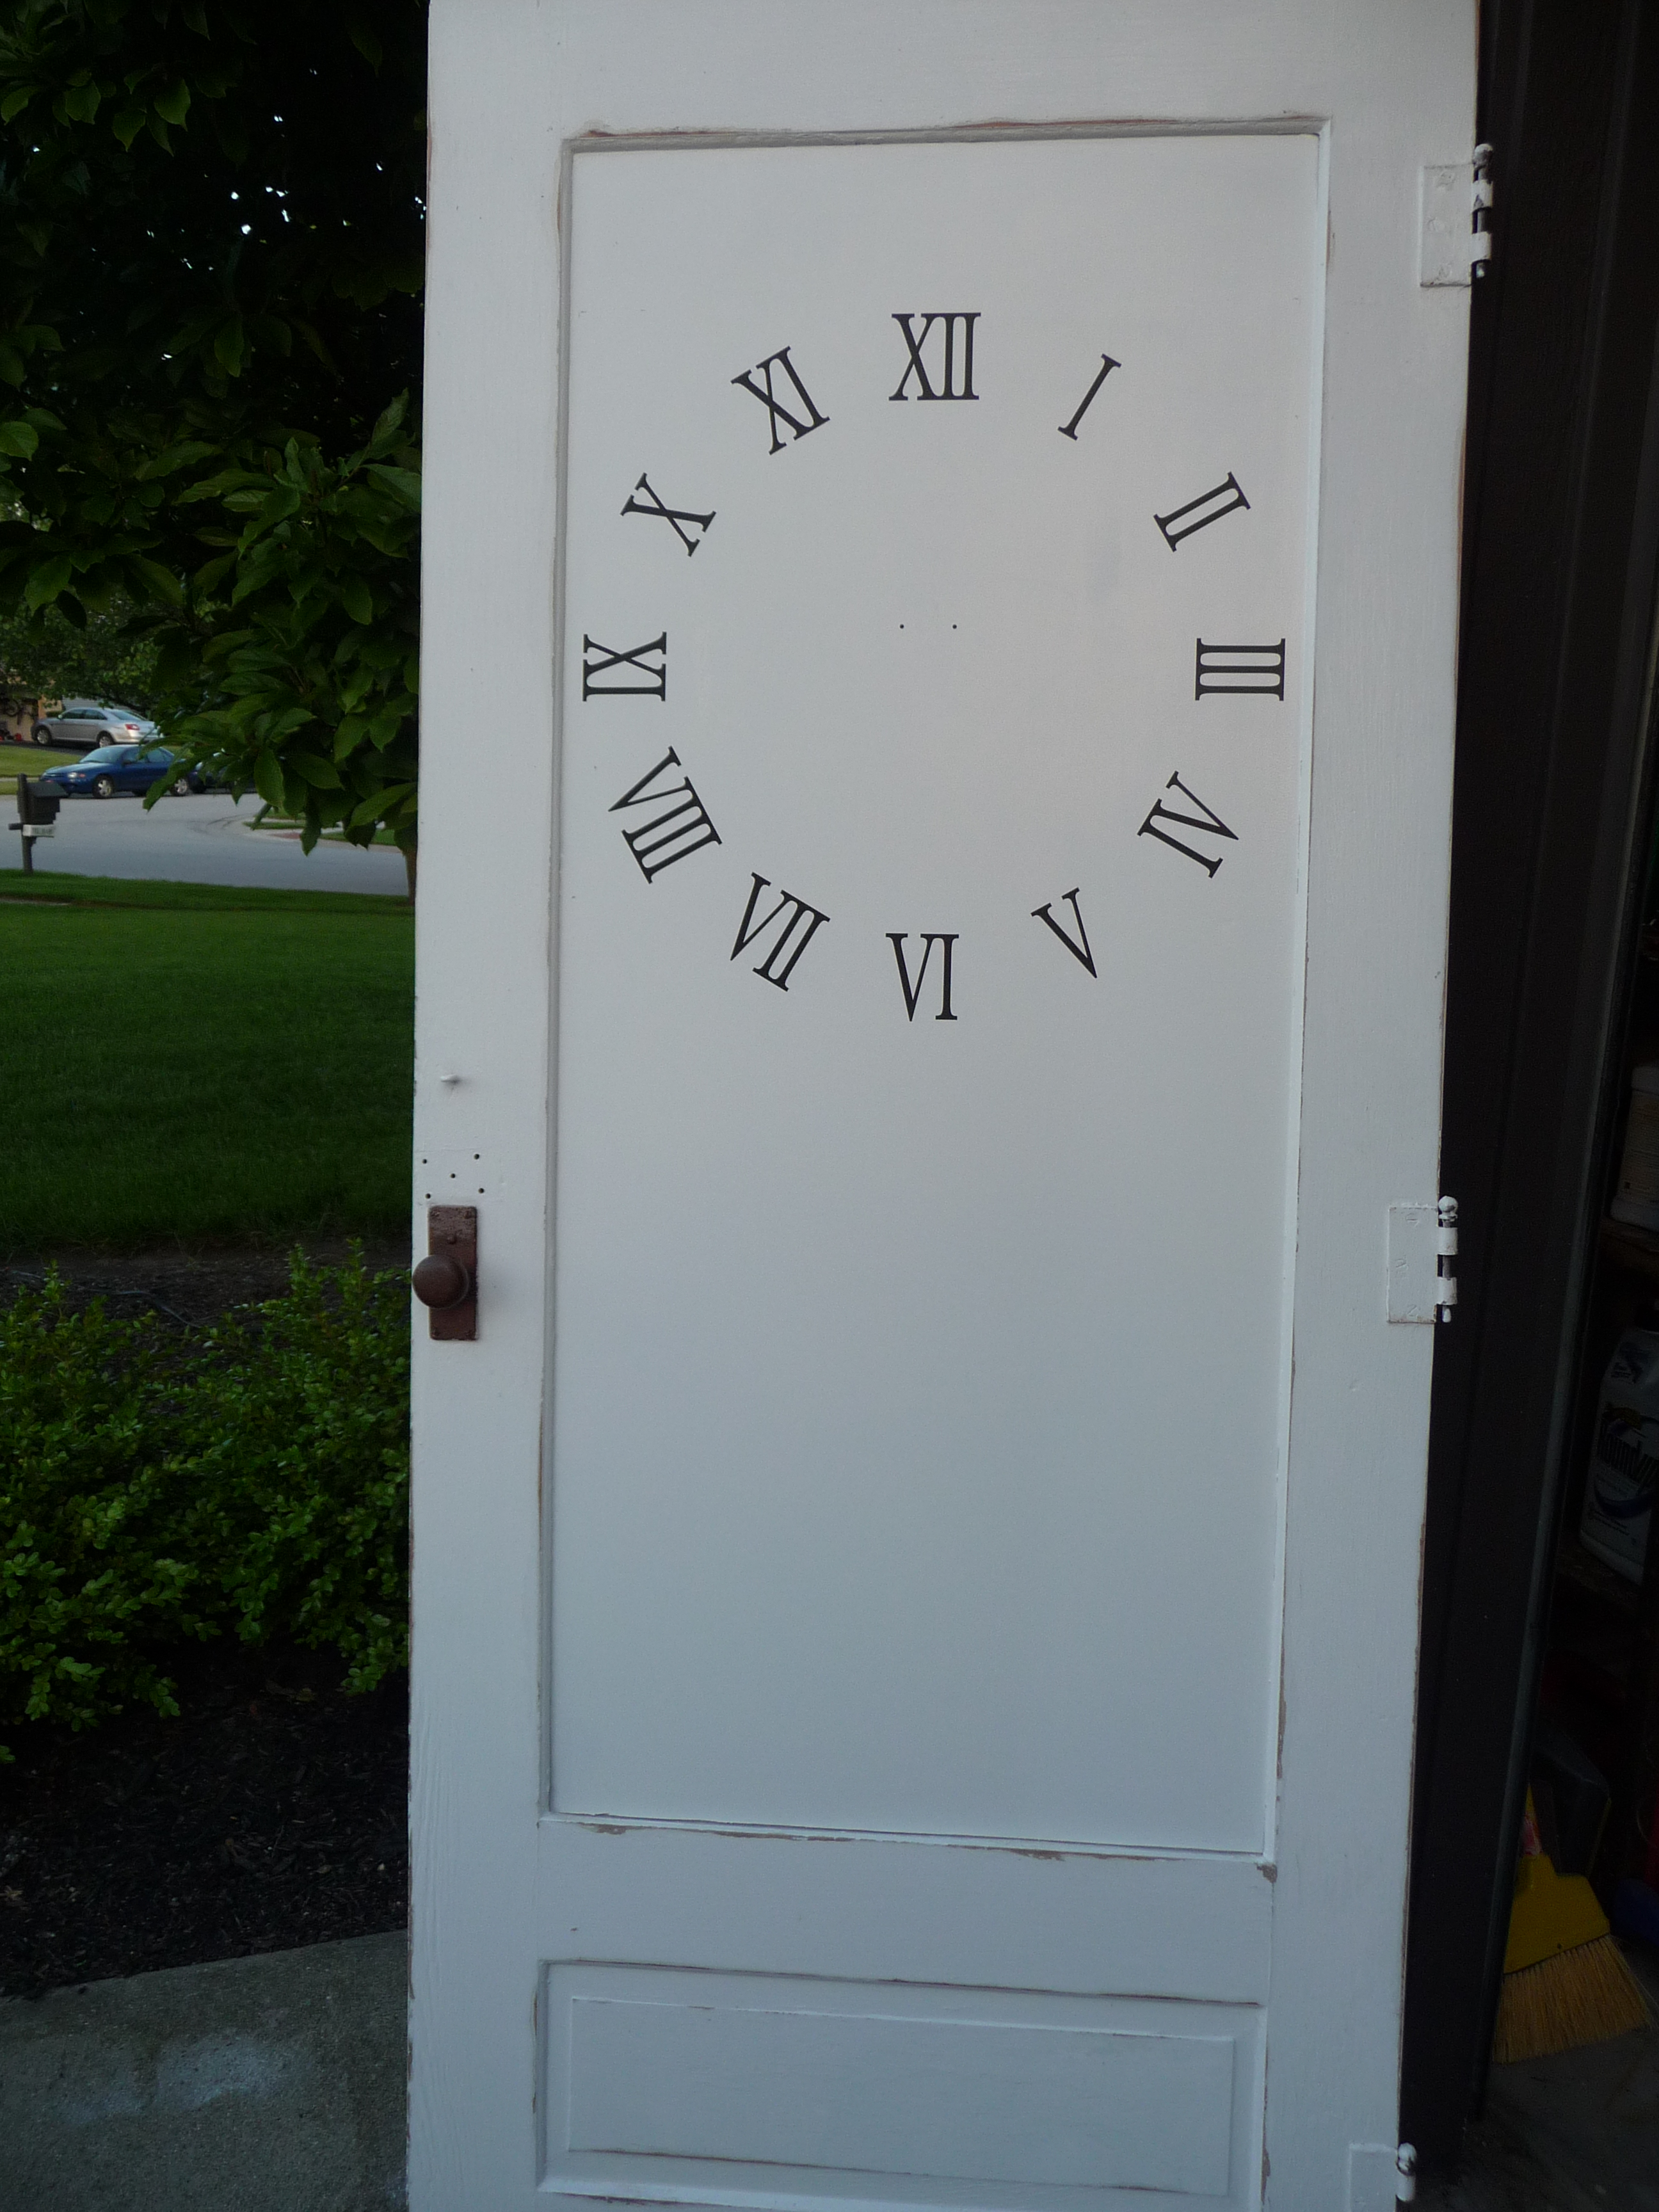
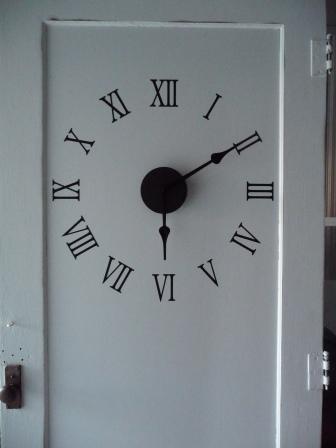
 3. Here’s the door after Uppercase Roman numerals are rubbed on (note I didn’t use the whole expression for this project, I left off the large round clock face circle and just used the numbers). You’ll know what I’m talking about if you look at the uppercase website. Look here at the 2010 spring catalog page 102-103
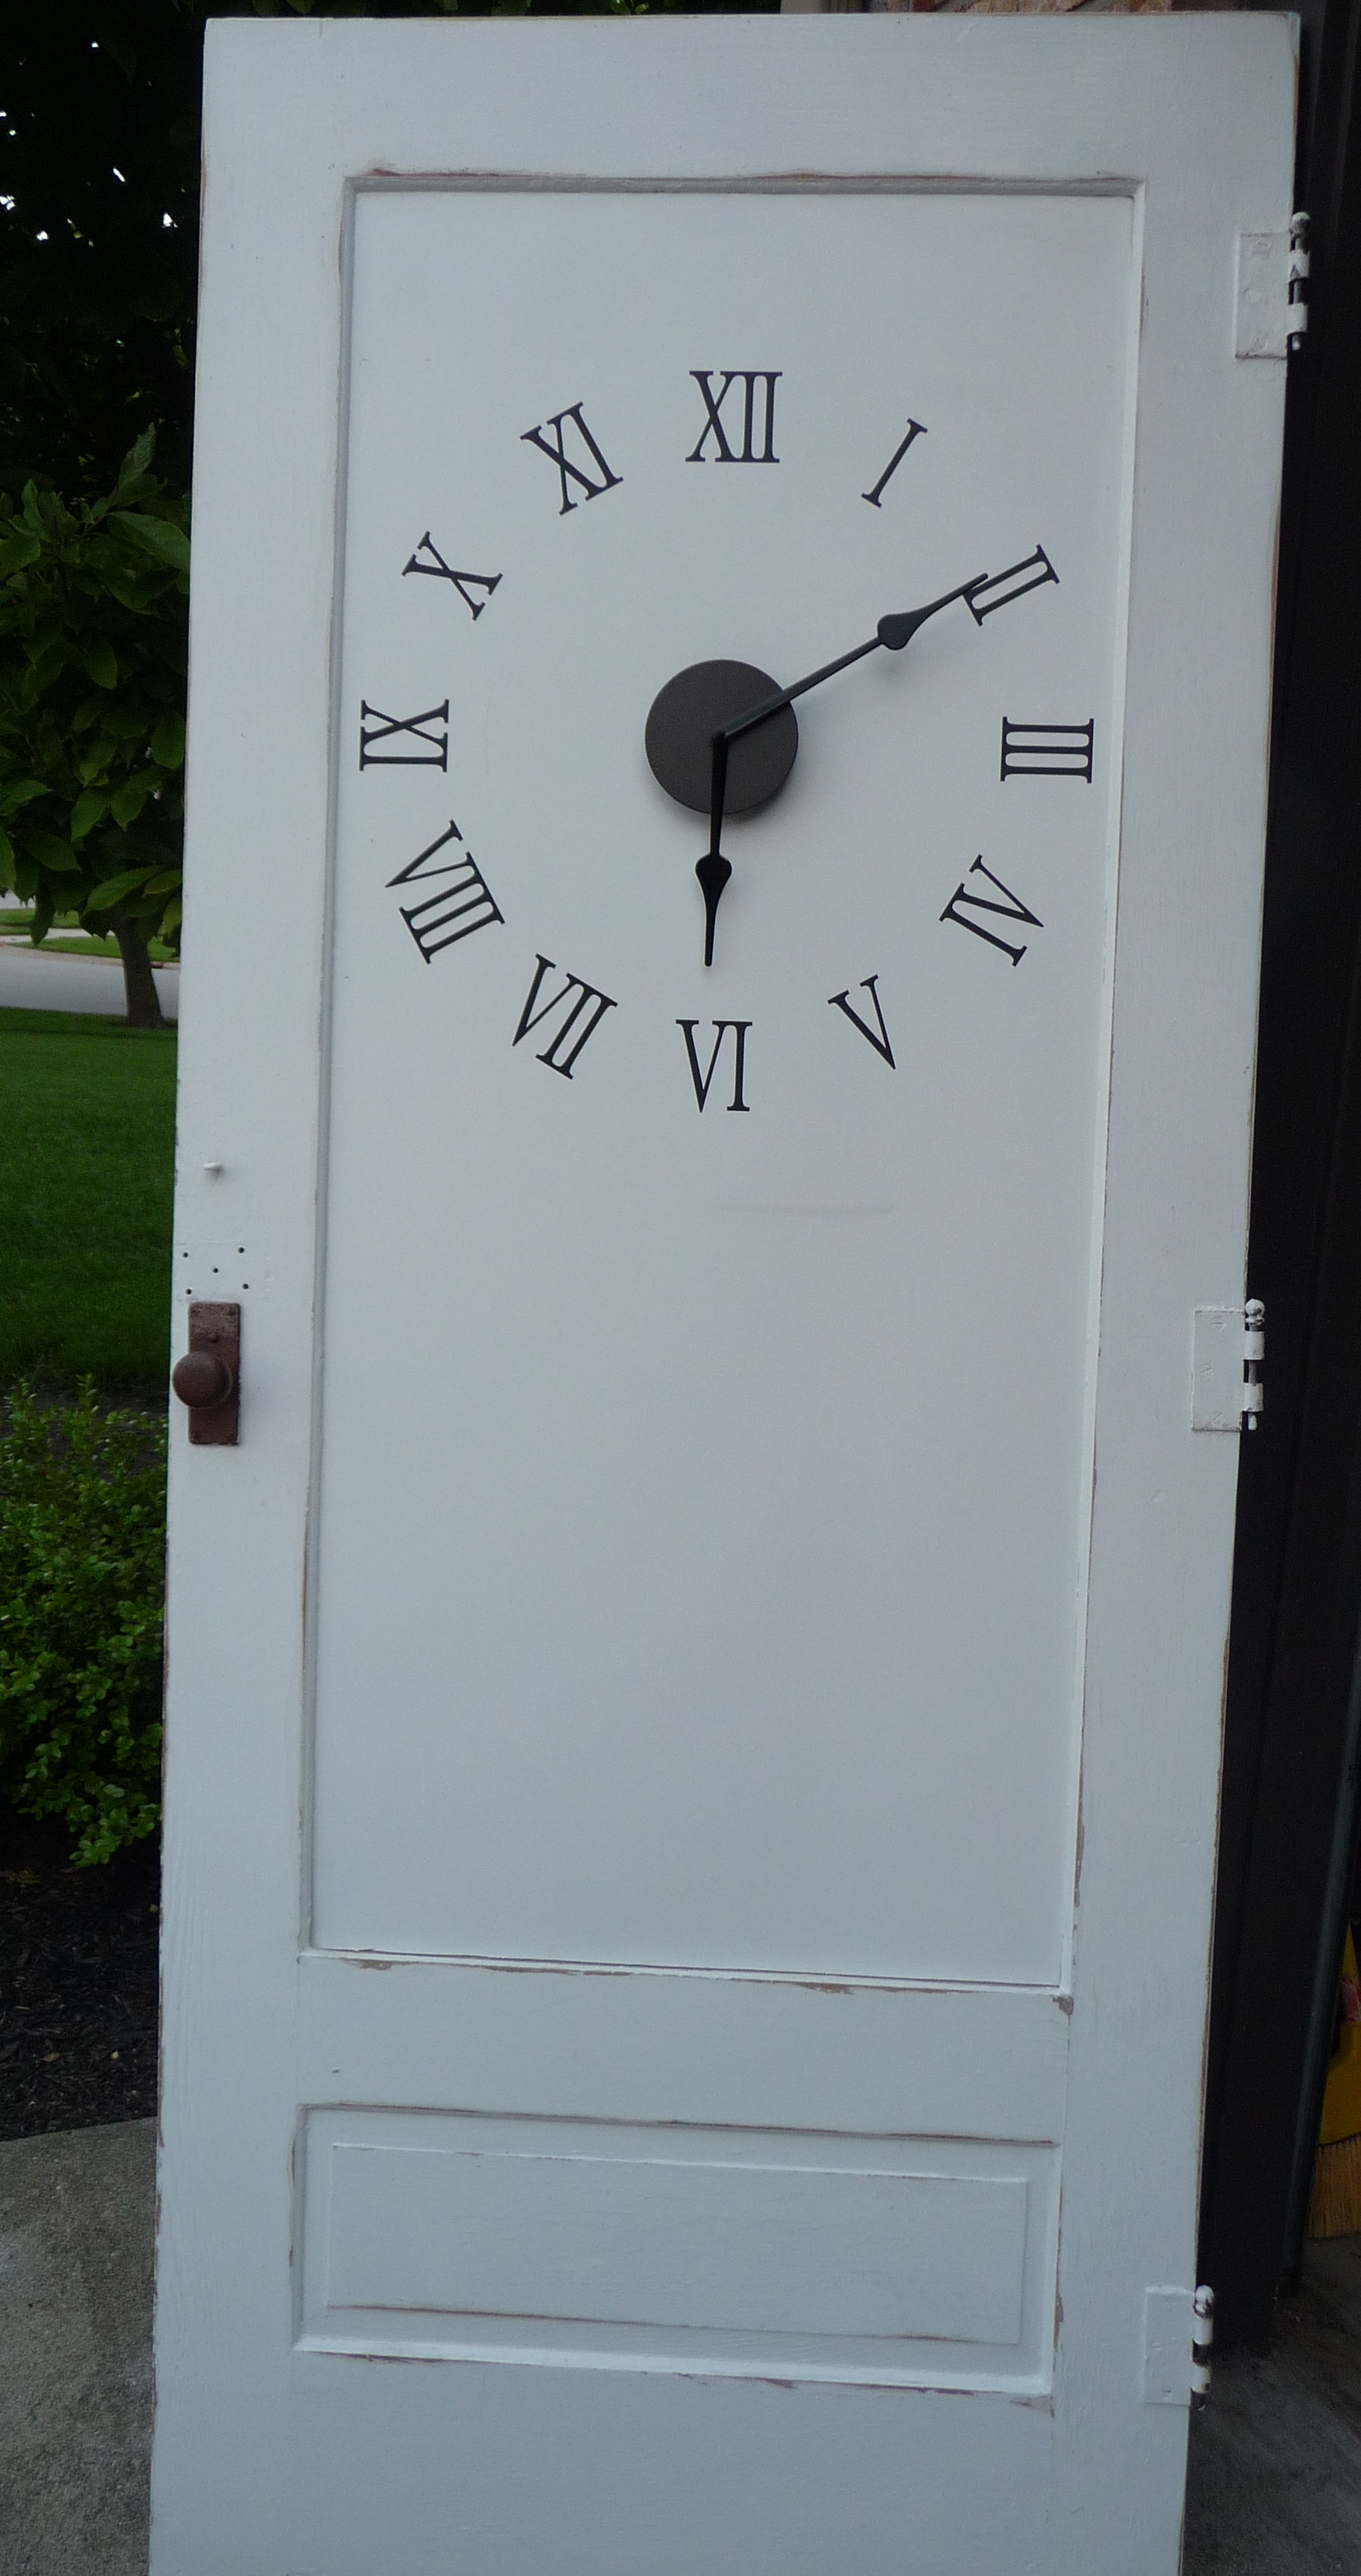
 4. Door complete with Uppercase Living clock face. Photo again without my husbands hand (he’s inside watching the H channel after doing all that work…Thank you honey bunches of oats!!!)…it’s leaning against the house. Why is it outside you ask. Well I have allergy stinky paint issues, so I have to let it dry really really really well before bringing it indoors to its new home. How you likey???
Isn't that such a fun idea?  I love it!

Read more...

DIY Clock from frames, Guest

02 August 2010


I guess we have a  bit of a theme today for posts, totally unplanned!  But this little clock  is such a fun project from Amanda @ The Hand Me Down House, and I think she has a giveaway on it at here site til Wednesday so check it out!

So by now I'm sure you have realized that the thrift store is my friend (it should be your friend too).  I visit the thrift store weekly -- sometimes I leave with nothing, sometimes I leave with a bag of stuff.    For example, last week when I was there I found a sham for our bedding set from Target still new in the package.  SCORE!  And for two measly dollars I snatched that puppy right up.  Well I ALSO found these two sets of frames:


YIKES, right!?!  But I have to say I'm in LOVE with oval frames right now., and these frames had some character.  I was so excited when I found the first set and then I was ecstatic when I saw the second set.  I was actually going to make these into cute little hooks by adding glass knobs to them, but ended up changing my mind (I've been known to do that).

I decided on making a clock for our living room.  I spray-painted my frames a lovely shade of greyish blue.  I left the glass out of the frames for this project (I'm getting quite the collection of glass from frames -- I better find a project to use it all up!) 

I added some elegant scrapbook paper to the background of each frame.  Next I glued the smaller frame inside the bigger frame. 

Then it was time to add the clock kit, which I painted black.  I found the clock kit at Joann's and followed the instructions on it to install my clock and hands.  I cut holes in each of the frames to push the clock peices through, like this:


After the clock hands were in, I placed my frame on a picture frame stand and VIOLA!


Isn't that a great idea for some old frames you have kicking around?  Great Job Amanda!

Read more...

Wall Clock Face Knockoff: Guest Remodel

Angela @ Unexpected Elegance replicated a Pottery Barn wall clock face.

Alright, I'll admit it...I'm a little bit of a NERD! In my spare time, meaning minutes at a time, I look back over catalogs. So, yesterday, while the girls were taking their nap, I revisited my Pottery Barn mag. Here's something that caught my eye. (It's different every time!)


Pottery Barn
I loved the clock face on the wall!

My husband is normally really great about letting me run with my ideas. So after we put the girls to bed last night I "ran" to Joann. I bought two hoops and some wooden sticks.


I removed the outer hoop and started working around the, soon to be, clock face. I used Gorilla Glue, but I'm sure wood glue would work too. I did not cut any of the sticks before I put them on, I just tried to line up the inside and leave the overhang on the outer edge.


The "X" was the trickiest and I just used whatever I could find to hold them down. I let it dry overnight.

This morning I took a razor and scored the sticks where I needed to remove them.


Then I used a pair of pliers to break them off. Try not to pull on the wood, it will splinter. Just hold the stick, so it doesn't detach and work the pliers up and down. It will remove the wood clean.

Here's the "cleaned up" version.

Then I used some leftover spray paint. (My husband jokes that I am loosing "LOTS" of brain cells with all the spray painting I do...but it truly will transform just about anything!)


And here's the finished project. I am not sure where it will go permanently, but I was so excited, I wanted to share it!


The wall clock face turned out great!
 I love how it looks!  
What do you think?

Read more...

Such a Pretty Face, Clock Tutorial, Guest Highlight

26 April 2010

2010_04_05_7730

This party highlight is a great tutorial from Lemon Tree Creations.  The girls over there usually have fabulous ideas be sure to check their blog out.  I know we have seen this clock around.  A lot of us, including myself noticed how cool it was in the Pottery barn magazine (picture below).  I sent the image to my sponsor The Big Clock Store (which happens to be my sister's incredible business by the way) so she could check it out.  (But as for blogs I first saw this idea on Alchemy Junk, which seem s to be inspiring us all)

Her is what the Erin at Lemon tree has to say:  We have lived in our house for about a year and a half at this point, and up until now I have been angry with my long blank kitchen wall for it’s inability to be decorated. Until now. Thank you Pottery Barn, as always. Look past the couch, to the table, and there it is! Cool, old, worn out looking clock face.
pottery barn clock_thumb[2]

Alchemy Junk made a beautiful copy of this a few months ago, and I was inspired to take matters into my own hands to get a beautiful worn out clock face for my long empty wall. I made my way to Lowes for some wood as soon as I could after seeing this PB picture. I couldn’t find flat piece of wood for under $30 and I really wanted to spend a lot less than that, so I headed out with a 2x2 piece of oak plywood, (ugh, plywood), and some poly wood planks to cover up the plywood evidence. (In the picture below the planks are already stained, and the plywood is not.)
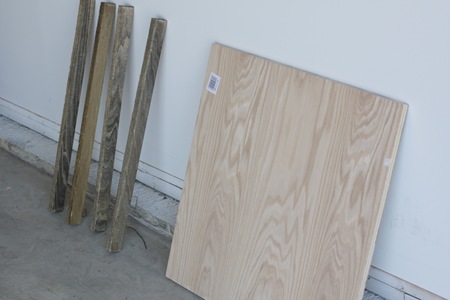
2010_04_03_7660

I knew that I wanted the wood color to show through underneath the white of the clock, so I first stained the board a dark walnut color. I let that dry for a few days so that it was completely dry and non-oily. I then whitewashed it, using some watered-down white paint, to give it a grayish sort of look, and after that was dry, I dry brushed white paint on top being careful to let some of the walnut and grayish colors peek through. I wanted a worn look and layering the colors seemed the best way to go.

2010_03_22_7295

I printed off some different sized fonts from my computer, and ended up with Bodini MT Condensed, size 250, because I wanted the numbers to be big, but slender. I then used my tried and true transfer method: traced the backs of the numbers in pencil, placed them where I wanted them on my board, rubbed over the front of the letters so that the outline would transfer, and then filled them in with paint. I didn’t actually get any pictures of this stage of the process, but I used a similar method with my Welcome sign, which you can see here. I painted on the 12, 3 and 6, and then lost my patience and decided to get on with the distressing.

2010_03_22_7307

I took my scraper and started kind of beating up the wood. I wanted it to have lots of dings and scratches in the finish. I also carved out a big hole in the center of the wood where the clock hands would have been.

2010_03_22_7311

I scraped roughly across the edge of the wood, and since I had never sanded it, the wood chipped off nicely.

2010_03_22_7318

I then held my scraper so that it was parallel with the grain of the wood, and scraped across the face of the clock letting it pull out little splinters here and there. The wood was relatively soft, so I randomly stabbed the scraper into the wood and pulled out a few more splinters.

2010_03_22_7323

I got my wire bristled brush and used that to rough up the wood a bit more. I rubbed it on the wood in the direction of the grain, and I was pleased to see that it was even more helpful than I had expected.

2010_03_22_7328


The wires not only put scratches in the white paint, but they also rubbed a dark grey finish on the paint. So I could either leave the dark grey patches,

2010_03_22_7345

or wipe it off a little bit with a damp cloth to get back down to the white and wood.

2010_03_22_7348

(All of the really grey spots in the picture below are from using the wire brush.)

2010_03_22_7332

And now it was time for the glazing. I dipped a wet rag into the glaze, and started rubbing it all over the clock. I made sure to get a concentrated amount into each of the cracks in the wood and along the edges. I took a thin paintbrush and painted undiluted glaze into the big cracks because I wanted a dark black look in the bigger holes. I then rewet my cloth and randomly wiped the glaze off, letting the whitewash effect and the brown wood peek through.

2010_03_22_7352

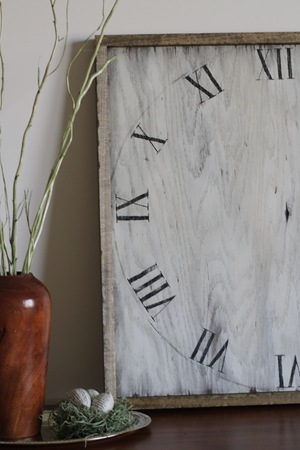
I tied one end of a string around a pushpin and put it in the middle of the board, and the other end around a pencil, and used this to trace a circle all around the wood. This was a lot more difficult than it sounds, the pencil kept wanting to follow along the grooves in the wood instead of making a nice curve, but after several tries I finally got it. I filled in the pencil line with undiluted glaze, and used the glaze to paint on all of my numbers as well. Then I simply wiped across the numbers and circle to fade them. {Edited to add: Once finished, I thought the glazed and faded numbers were a bit too light, so I painted back over them with black acrylic paint, and gave them a light sanding.}

2010_03_23_7354

I stained the poly wood planks the same dark walnut shade that I had used originally on the board, and when they were dry, I took each plank and banged it against the concrete stoop in the garage so that the edges would be roughed up as well. I was a little nervous that the boards would bounce back and hit me in the face, but it didn’t take too much force to bang them up and luckily I remained unharmed.

2010_04_03_7662

I then used Gorilla Glue and glued each of the boards around the clock face. Since this glue foams up as it dries, I made sure to put the line of glue towards the back of the board so that any foam would seep out onto the back of the clock face. And this is what I ended up with…


2010_04_05_7736
2010_04_04_7719

2010_04_05_7734

Now I just need to decide where to put my clock face, because it turns out that it doesn’t look as good in the kitchen as it does in every other room! Back to the drawing board…


LOVE IT!  
What do you all think of Erin's Creation?

Read more...

Time Flies! Clock Inspiration!

22 March 2010

We have a giveaway coming up at noon today, and I wanted to inspire you with ideas of how you could use this great item that we are giving away.  If yoy like any of these ideas check out The Big Clock Store.com!


(Source Cote De Texas)

(Source Velvet and Linen)

(Source Traditional Home)

(Source Things That Inspire)
(Source Country Living)

Does that make you excited for the giveaway?  
IT TOTALLY SHOULD!  

Because I am just counting down the time 
till I get to tell you what you can enter to win!!

Read more...
Related Posts with Thumbnails
Emealz - Easy Meals for Busy People!
Home & Garden Blogs Home & Garden Blogs - Blog Rankings

Blogging  tips, tutorials and SEO

From Here to Eternity

  © Blogger template On The Road by Ourblogtemplates.com 2009

Back to TOP