We’ve Moved!


If you aren’t redirected here is the link:


Remodelaholic!


THANKS!

Showing posts with label Backsplash. Show all posts

Faux Painted Tile Backsplash

03 December 2010

Faux Painted Tile Backsplash
contributed by Sawdust And Embryos


I know, I know... it's Monday. But be of good cheer! We've got a backsplash to share! And we're really excited about this one!

Sarah's been wanting a backsplash in her kitchen for quite some time, but with the business of life and having other projects taking priority, the backsplash has been sitting dormant and on the back burner. Or, I guess I should say: 'on the wall behind the back burner.'

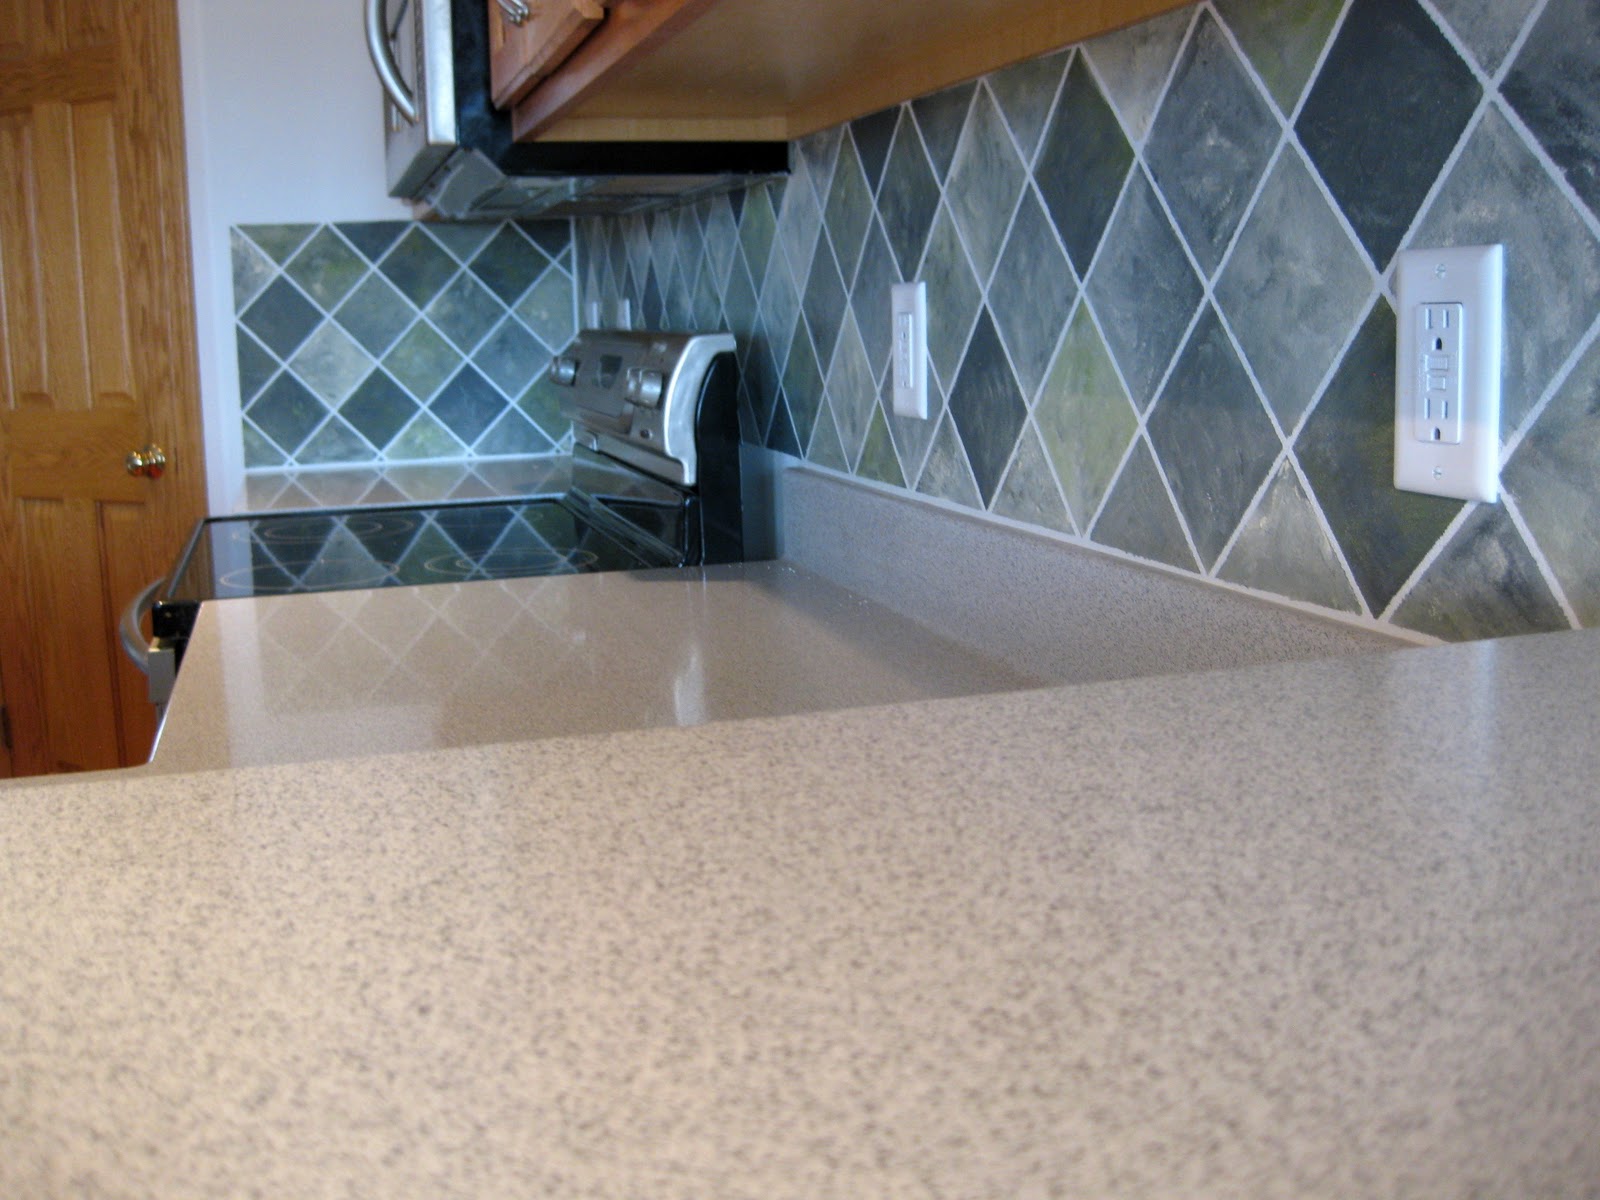
Sarah has a sage-green-thing going on in the attached dining area, and we collectively decided on a color palate for the backsplash to include smokey grays and sage green! We love it when we can change things up with color instead of the typical beigy browns! The gray/sage combo has just the right amount of class and color without being obnoxiously funky. We love it!

The camera didn't pick up the sage very well.  Sad face  :(


You can see the sage better in this photo.

Dear Green,
Thank you for existing. Your such the perfect combination of blue and yellow, and you come in so many different shades... from celery to olive, mint to kelly, sage to hunter... (speaking of hunter green, do not EVER pair it with peach or light pink). Thanks again green, you rock my world.
Love, Bethany

Read more...

Quick and Painless Backsplash Makeover

08 November 2010

Quick and Painless Backsplash Makeover 
With Contact Paper
contributed by Kathleen Katydid And Kid


Even though I'm knee-deep in the painting-of-the-living-room project, I thought I'd take a break and update the backsplash in the kitchen. I hate how ugly it is, and because I don't have the time, energy, or skills to do tile job on the backsplash, I decided to just cover it up.
My ideal situation would be bluish-green glass tiles, but that probably won't happen until we fully makeover our kitchen.

Today, I picked up some contact paper for 5 bucks at Target and went to town, cutting and pressing it on top of the tiles. For the project, I also needed scissors, a tape measure and X-Acto knife.It took all of about 10 minutes to do, between rolling out the paper, measuring, and pressing it into place. contact paper is really nice in that it has a grid on the back that makes for easy cutting and measuring.

I did take off the electrical cover as well as the soap dish that is drilled into the wall. It just made things so much easier than trying to cut around them neatly.
I trimmed a bit around the edges with the knife, as well as around the electrical socket, though I made sure not to cut off too much so it was sealed nicely under the cover.
Now honestly, it doesn't look amazing up close, since you can slightly see the grout lines of the tiles, but who cares? I like that this was so cheap to do, and I still have yards and yards of it left for other projects, like lining the shelves. When it gets too grimy, I'll just replace it either with the same pattern or something else. I've also considered cutting them to fit each tile, so the grout still shows, but that is much beyond my attention span at the moment.

It also goes so much better with the color of the living room than that turquoise.
Next up: dealing with this mess (Goodwill stuff and things to be put away).
Keepin' it real, y'all, keepin' it real.

Read more...

Kitchen Backsplash Tiles, Now Beadboard

07 September 2010

Over at the Little Mac Shack they have been working on covering up their kitchen backsplach tiles with a new updated beadboard look.  See how they accomplish it with no tile demolition.


So, we've been plugging away on our kitchen project and I'm finally ready to reveal our grand transformation! (As a side note, please understand that most of the "we"s throughout this post really mean "Mr. Mac." Oh, and this room NEVER gets good natural light. Sorry!)

Now, I must say we were very lucky to purchase our Little Mac Shack from an architect. He had already upgraded our 1930s bungalow in many ways. The once three bedroom home is now two bedrooms with a spacious master closet, we've got built-ins galore and TONS of great recessed lighting. Unfortunately, some of the decorative finishes are not what we would have chosen. We'd done some painting, but the one thing we hadn't touched was the kitchen tile.


OH, the kitchen tile. The thing is it wasn't hideous. It wasn't puke green, or cracked or stain. It just wasn't what we would have picked. Most of it was a dingy cream color with a gray-ish decorative band near the top.


Hrm... I'm more of a crisp white gal. We've painstakingly painted all of our cream trim Delicate White and the cream tile just did NOT fit in. What to do? Well, we definitely were not excited about breaking out all of the existing tile and attempting a new tile job. So, I cannot tell you how excited I was when I stumbled upon Thrifty Decor's Chick's kitchen beadboard project. HELLO! You can put beadboard on top of existing tile?!?! Sign us up!

First step, a good scrub down...


Then, time to deal with a pesky vent.


Finally, time to get some beadboard on the wall!


We used PowerGrab adhesive and went with these vinyl wainscot panels from HD. Why vinyl? Good for kitchen clean-up.  Smaller, easier to work with pieces. No dealing with warped beadboard sheets. I was initially worried that the final result would look too "plastic" but it turned out perfectly.  (When the pieces first went up, you could see the break between the panels. If you look closely at the above picture, you can tell there are four panels up on that wall. However, a tiny bead of caulk where the panels met killed the shadow and made it all seamless. Beautiful!)

The toughest part was working around all of the odd edges and our TONS of outlets. (I just counted, we have 9 outlets in that little kitchen.)


About halfway through the project, we had to pause and wait for a special delivery...

New cabinets! Our kitchen had a secret. With a quick glance, you saw crisp white cabinet. Lovely. However, a closer look revealed FOUR different styles of cabinets. Yes, four.

Predominant style...


Above the stove...


Original(?) metal sink unit...


Cheap wooden cabinets to the left of the sink...


I would never part with that sink unit and the cabinets over the stove were close enough, but the cheap wooden number had to go!
The new cabinets look much better and Mr. Mac even built me another corner shelf to fill the space between the cabinets and the window...


And because there is nothing better than a good before and after...

BEFORE...

AFTER

BEFORE

AFTER

BEFORE

AFTER

BEFORE

AFTER

BEFORE

AFTER

We are loving our freshened up kitchen! Didn't Mr. Mac do a fantastic job?


And because I can't do a post this long without a dog shot...
What a helpful pup!

That is a nice kitchen update with new beadboard and cabinet doors.  What are your thoughts on their process with the beadboard?

Read more...

Temporary Kitchen Back splash Fix; Guest

29 July 2010

I just got this little update sent into me and I wanted to share it with you.  I like this feature especially because it is a temporary quick fix that can be done in an apartment or, if you can't splurge on the whole deal, but need a lift.  Check out what Liz of The Chronology of Him and Me did to update her rental kitchen:


 and Its spring break. We are not laying on a beach.

However, I am trying my best to distract myself and refrain from wallowing in vacationless-spring-break-self-pity by taking advantage of these nights sans night class and get some things done in our house that I can't do when my time is devoted to staring at a textbook.

We live in a little farm style house. We LOVE it. However, the home is not ours and the overwhelming majority of walls in the house are a lovely shade of stark white. As a result, I am constantly looking for landlord approved ways to make the place interesting when we can't paint, re-do, or alter anything.

So...in one of my many google-quests for removable/reversible decorating ideas for our house, I discovered the directions for homemade fabric wallpaper, so I tried it.

Here is what you need:


Photobucket

-Lightweight fabric
-Liquid Starch
-Sponge or Paint Roller
-Container to pour starch into
-Not pictured: Patient husband who allows you to follow through on your harebrained decorating schemes


Just measure your fabric to match the wall, cut it, pour your starch into your bucket,
dip your sponge in it, then start wiping the walls with it.


Photobucket


Smooth the fabric against the starch coated wall, brushing and smoothing it to get out any bumps, then wet your sponge again and go over the top of the fabric with the starch. Mine stuck immediately to the wall, but if yours doesn't, you can tack or tape the fabric so it will stay in place until it is dry. Then just wait for it to dry.

To remove, all you have to do is soak the fabric with water and it will peel off.


Before:
Photobucket

After:
Photobucket


Photobucket
Before:
Photobucket


After:
Photobucket


Photobucket


Photobucket


I like it, it wasn't hard, and there is a little less white in our little house.
Happy Spring Break/Home-Makeover-No-Vacation-Distraction-Week to you and yours.
Hope its a great one!

Such a fun transformation, and 
excitingly changeable when ever the fancy strikes you!  
AND this idea, could work anywhere...

Read more...
Related Posts with Thumbnails
Emealz - Easy Meals for Busy People!
Home & Garden Blogs Home & Garden Blogs - Blog Rankings

Blogging  tips, tutorials and SEO

From Here to Eternity

  © Blogger template On The Road by Ourblogtemplates.com 2009

Back to TOP