Staging A Bookcase Beautifully
09 August 2011
My husband and I have been busy the last few months, working hard to give our master bedroom a much needed face lift. One wall of our bedroom is occupied by two Ikea Billy Bookcases (joined together by screws) that were handed down to me by my sister. They were taken apart and stored in my garage in Texas for a while before we moved, then transported 1,600 miles to New Jersey in a tightly packed Uhaul truck. They were in serious need of some TLC. Not only that, but we were not happy with overall appearance of the bookcase arrangement. It was far too busy and colorful. In our bedroom, we are going for what I call a cool and crisp look. Simple, clean, and bright. It was clear to us that the rainbow effect created by the colorful book bindings was making it impossible for us to achieve this overall look. Add to that the less than appealing appearance of some of the books and we had a real challenge on our hands. (we have many
Here is a picture of the bedroom so you can get an idea of the color pallet we are working with and the overall feel of the room.


We began our bookcase makeover by removing all the books and knickknacks, focusing our attention on the bookcases themselves.
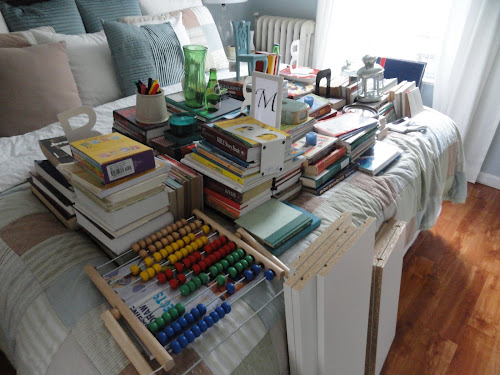
The particle board backing, which was suppose to be nailed with small nails to the middle shelf, had been nailed so many times it would no longer hold up. Not only did it not hold up, but the numerous attempts to nail it had left unsightly holes. We gave up on the nails altogether, aligned the boards, and used a staple gun to secure the backing instead. After the backing was secured we used caulk to cover the holes left behind by the numerous nailing attempts.


Once the backing was secured and the holes sealed, we were ready to choose a paint color for the inside/back of the bookcase. We chose a sandy tan to match with our bedding and pillows.

Once we were finished with the bookcase itself, we were able to move on to the books. After much discussion and deliberation (and scouring the internet for ideas), we decided upon a rather unorthodox solution for our “too colorful and timeworn” books. We would cover them all, making our own book covers with white paper and printing the titles on the binding. Although I immediately got very excited at the thought of how amazing the bookcase would look, the task of covering each book was rather daunting. I decided not to ponder too much the amount of work and time the project would take, knowing that if I did, I might be too intimidated to begin. I just jumped right into the chaos and I have not regretted it. (Here’s a step-by-step tutorial of how we covered them.)

After the books were covered, we were able to move on to the fun part, collecting and arranging the accent pieces that would be displayed along with the books. This being our bedroom, we wanted a few pieces that would tell a story about our relationship and our family. I also wanted to include a few DIY crafts I'd worked on to give the bookcase that personalized and unique feel. Due to our restricted budget, the majority of the items were purchased secondhand at a nearby thrift store. So, without further ado, before and after pics of our new and improve bookcase!
The "too busy and too colorful" BEFORE
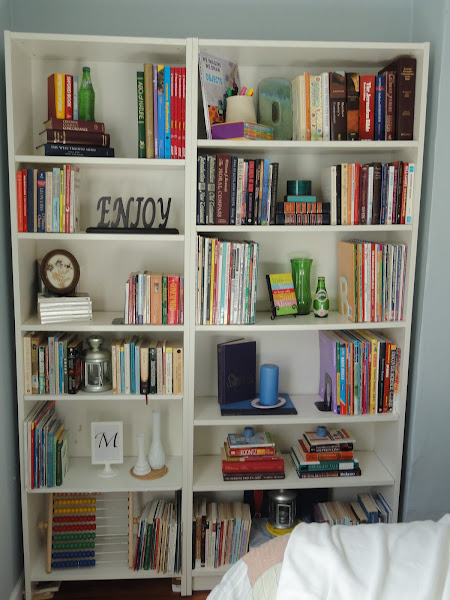
The "cool, crisp, clean, simple, and bright" AFTER

BEFORE
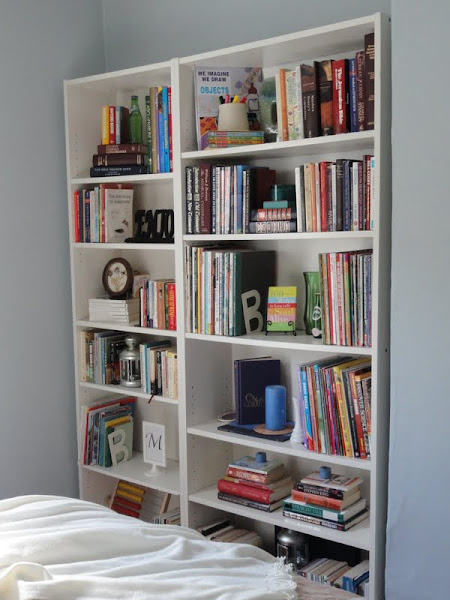
AFTER

BEFORE

AFTER

You may notice that the books are not very evenly distributed, that the bottom shelves have more books than the top shelves. The thing is, I like the way the shelves look when they are not overly crowded with books, but we have a lot of books Due to the layout of our room, the bottom shelves can only be seen if you stand right in front of the window, so I decided early on that I wanted the bulk of the books to go on the bottom shelves.
Now for a quick shelf by shelf breakdown.
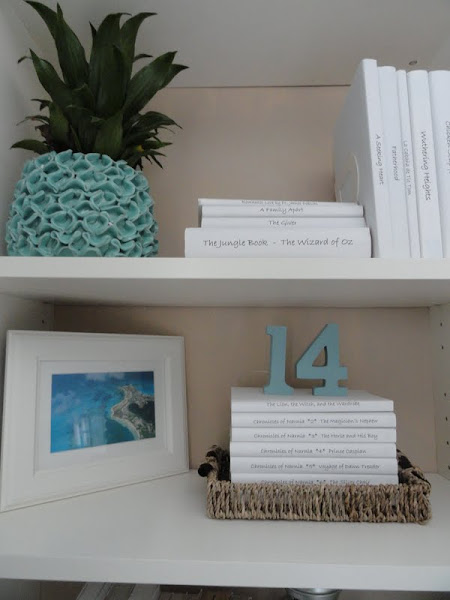


Third shelf on the right: Glass Bottle thrift store $1.41, Candle gift, Wooden tray thrift store $1.61

Third shelf on the left: Lantern garage sale 1.50, Book bracket thrift store $.99, Basket weave coaster gift
Forth shelf on the right side: Letter M craft store $1.99 Texture with rolled up book pages by me, tutorial here, Picture frame Ribba from Ikea $19.99, Print inside frame printed on our computer, MapQuest map with highlighted path from Houston (where my hubby lived while we were dating) to Fort Worth (where I lived). We had a long distance relationship and this 4 hour trip was much traveled by the two of us, Plant and Pot Ikea $5, Crystal candle holder wedding gift, Candle already owned.

Fifth shelf on the right: Round frame with real pressed flowers thrift store already owned for many years.
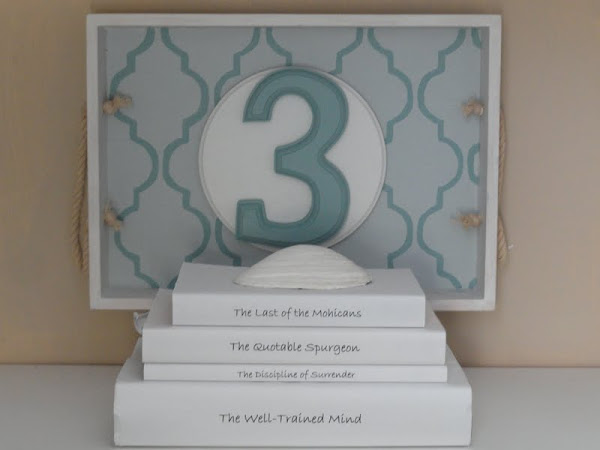
Fourth Shelf on the left: Tray with number 3 for our three children tray purchased at thrift store and then transformed by me, tutorial to come soon tray $1.61 number $1.99 paint, $2.94, Shell from this trip down the shore on Mother's Day.


Bottom Shelf on both sides: Wooden box containing a few of our love letters, thrift store $.99 design painted by me, Letter "O" not pictured HomeGoods $3.99
Overview of Complete Bookcase Transformation Costs:
Accent Pieces- $81.03
Bookcovers - free (used paper that was given to us)
Paint sample used to paint bookcase backing: $2.94
Paint sample used to paint tray and numbers: $2.94
______________________________
Total Spent: $86.91 (Jump for Joy!)
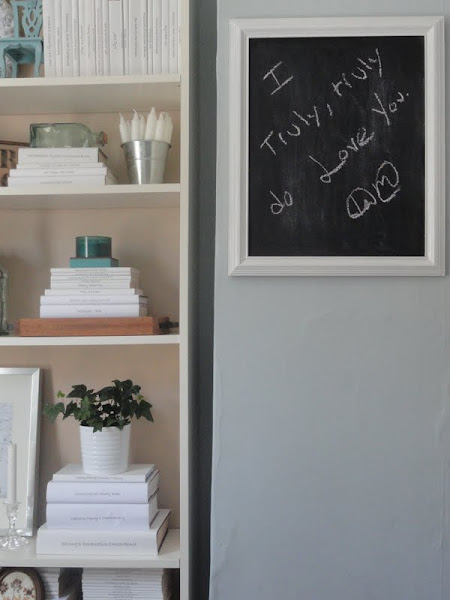
You notice the chalkboard on the column next to the bookcase? This is something I've dreamt of having in our bedroom for a long time; a place where my honey and I can leave each other notes of love and encouragement. What woman would not want to wake up to this sweet note from her man? (made using this old mirror and chalkboard paint; read our love story here)

I hope you enjoyed reading about this project and that it inspired you to think outside the box when it comes to your own bookcases. I'd love it if you'd visit my little corner of blogsville, The Precious Little Things In Life. Drop by, say hello, stay a while. =)
Ya take care now, ya here?

 This project was contributed by one of our fabulous readers! We love to share your projects with this great blogging community. So, if you have projects from kitchen renovation ideas to small bathroom remodels, overhauled and repurposed furniture, spray paint updates you name it please send it in! Thanks for reading Remodelaholic!


13 comments:
I love, love, love your bookshelf look now. So clean, uncluttered and wow, it must have taken a long time to cover all the books, but it looks amazing.
Wow! Pinned it!
Kelli @ theturquoisepiano.blogspot.com
I cannot believe you featured awesome bookcase project today...I had seen this on your site and loved it. I was looking at all of the things I still need to pack for the move and thought, I want my bookcases to be pretty just like the ones I saw with the white book covers. Thank goodness, I saw this today!!! I need to really be more diligent about marking my fav projects on other blogs. Hugs to you, Jan
HOLY MOLY! What a transformation! Can I borrow you for a day or two:) Absolutely beautiful....and am impressed with on top of home schooling your kids, you found the time to take this on...WOW! Great job.
Wow, looks great!! I love what you did with it. : ) All the little details are lovely.
I actually liked your first styling of your bookcase, but then when I saw what you did after I was amazed. I bet it is a lot more relaxing to view from your bed now. Love, love the way you styled it, you really have a good eye for this, it looks terrific.
LOVE this!!!
Wow, it's absolutely beautiful! I thought it looked really nice before, but now? An oasis of calm and peace. What a lot of work it must have been to cover all of your books... The chalkboard idea is very sweet.
Wow....beautiful staging!
Thank you all! Your flattery has me blushing profusely. It's been such a pleasure sharing this with all of you and I am all the more pleased now every time I see my bookcases, remembering your kind words of praise. =)
looks very soothing, the other bookcase gave me nightmares....
Wow, looks really fantastic. Congrats.
MY-MY... I new look is amazing. The simple act of covering the books and writing the names was the key!! The pops of blue add to the overall look. Pinning a picture. Thanks for sharing.
-Tanya
http://tanyaanurag.blogspot.com/
Post a Comment