Armoire Makeover: Before and After
contributed by A Little Paint
I don’t know why everyone complains or could ever get burned out. All kids need are candy, movies and puppies. Bam, entertained.
I was babysitting ALL weekend, but still managed to get my own stuff done. I wasn't about to let the weekend disappear without accomplishing something. On Thursday, I saw an interesting piece on craigslist. HOWEVER, I work during the day AND don’t have a car big enough to pick up big furniture pieces on a whim so I had my servant mom go pick it up for me. She is the best So for the rest of that day I was so anxious ready to get home to meet this monster.
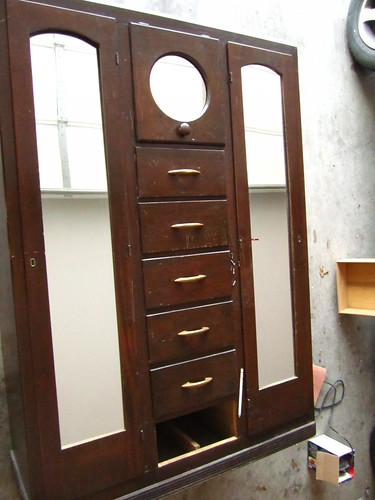
And if you don’t like painted furniture, don’t read any further. This guy needed some attention. I thought it was a wonderfully unique piece, but it had A LOT of cat scratch fever. You just can’t see it in this photo. I always forget to take the “Before”
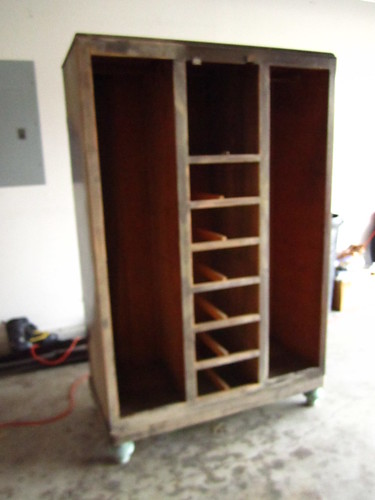
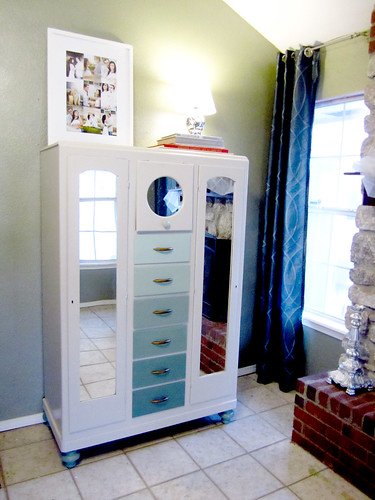
Yeah, I really suck at before pictures, it looked in focus on my camera screen! This is the armoire after sanding and putting pretty little feet on it. It needed the height. It was suffering from a little man complex.
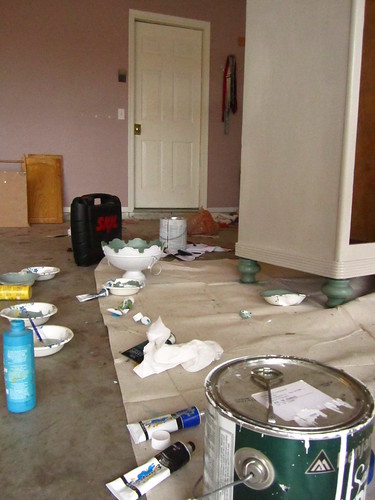
In case you couldn’t tell, I have this awesome process that I turn to when painting a piece. Its call CHAY-OS. Works like a charm. Sometimes, when other items just happen to be in close vicinity, I gets painted with the same color on my paint brush at the time…. Notice the white bowl? Happens more than you think, more than I think for that matter.
When I went to the store, I couldn’t find anyone working the paint mixer, so I left empty handed. I really didn’t want to paint it bright white, but after going through dried up paint bucket after paint bucket, I thought I would have to postpone this project. Fortunately I found some paint left over from the previous owners. It was label back door, and since I’ve already painted the back door turquoise, I don’t need the color for touch ups. It ended up being the most awesome solution ever. It was exterior semi gloss, and I loved the finish on it. I didn’t need to put any kind of protective coat on it. Totally saved me a step. I could even use this baby outside! Kidding, there are absolutely no plans to do that.
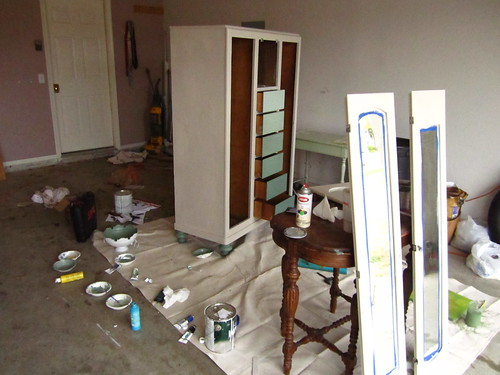
Anyways, I had to mix in some white paint to lighten the color up. It was perfect! Other than the main color, I really wanted to do something special with the paint job. There wasn’t too much detail in the wood to highlight, so I opted to paint the 6 drawers to look like a gradient.
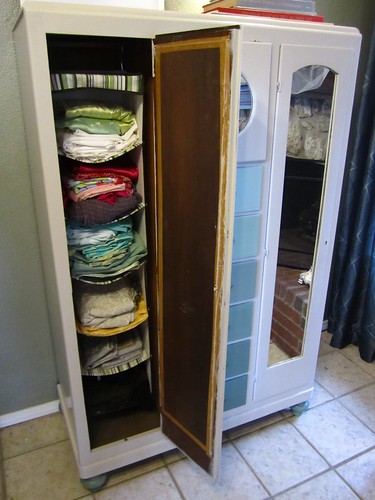
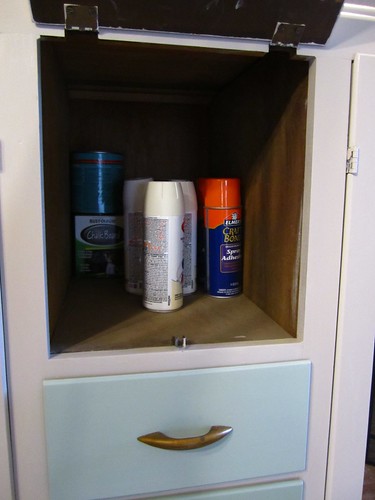
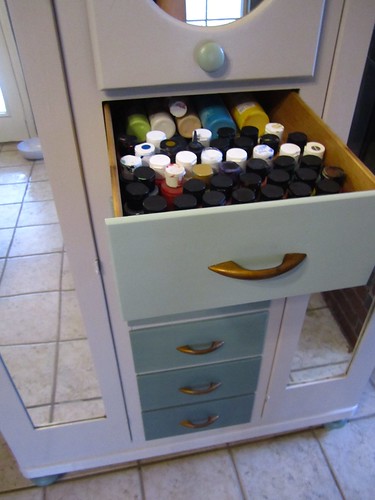
So much storage, its awesome.
I would like to paint the insides and maybe add some fabric to the back of the doors. Just need to go shopping now!
Post a Comment
I love comments! Thanks for taking your time to tell me what you think! I read them all and enjoy your enthusiasm for the work shown here!
Please remember that people have worked hard on these projects. Each person's budget and goals are different, so please try to make kind, constructive comments. Remember if it isn't nice, please don't say anything at all.
Please no business links. Remodelaholic reserves the right to remove any comment that we feel is malicious, spammy or otherwise inappropriate. Thanks.
Sorry there is no longer the option for anonymous comments, unfortunately people have been abusing that option!
Subscribe to:
Post Comments (Atom)




25 comments:
I love the gradient on the drawers-very cool! Reminded me of a Montessori color box!
The graduated color scale is such a fun idea! Love the look.
It looks great, love the style!
Great job! The drawers are so neat! I love the colors. Very creative!
Pam
I want one!
So cool!
I love the color. you did a great job! I would love to find something like that.
Great job! Loved the gradient blue drawers, original and creative touch.
Whoa, so cool!
Well, that is just the best idea EVAH!
Oh WOW~! I love that so much!!
Those drawers are perfect for all your bits and pieces, the magic of paint strikes again :)
I DID notice the bowl! I hope to see it in a future post. This armoire is super-cute and unusual. What a find! So cute finished, you did a great job!
Terri
I love it!
What a super cool craigslist score! I have never seen another armoire quite like it. I'm dyin' ta know...how much did you pay for it?! And love the gradient effect...niiice!
~Laura
www.hayestone.blogspot.com
Stunning! What a great find.
Love the gradient drawers! What a creative idea! Great job!
Love the gradient! It reminds me of my Color Fundamentals class in my BFA program at college.:) I might have to steal that idea in the future! Thanks for sharing it.
So happy you all like it! It means so much to me, thanks for the sweet comments!
Laura, I paid $110 for the armoire. I've never seen one like that before so I definitely jumped on it. Things are way over priced on craigslist in Tulsa and I thought it was a great deal compared to others I've seen. Ironically, I was looking on the Oklahoma City listings because I was going on a weekend trip and I'm ADDICTED to craigslist. I thought if I saw something awesome we would see about getting it, well I found the exact same style armoire minus the large side compartment for $225. So twice as much for less space! Just so funny to never see something before and then see it twice in a week.
I want to marry this piece of furniture! It's gorgeous. I love how you did the drawers. Did you just add more white to the paint as you went up?
Just wanted to let you know that I featured this on my blog. You did an amazing job.....Monica
Tammigirl, Adding white to the paint would have been the EASIEST way to go, but NO I rarely choose that way. I mixed each one separately because I didn't have a dark color to begin with. You'll notice the hues aren't all exactly the same, but I did my best. For most everything I paint, I mix until it looks "right".
Monica, thank you so much for featuring it! I'm coming over right now!
Great job. I would have never thought of using exterior semi-gloss - but what a great option.
Oh, I love it! What a great storage space for all the art supplies. I need something like that I have a armoire that I found recently. It's getting a similar makeover. You'll have to come visit my blog and see the transformation. http://beeinteriors.blogspot.com/2011/04/its-official.html
Mine will be going to my booth, though. I'll have to find me another to keep:)
This looks great! I love seeing your make-new projects. They are very inspirational.
Post a Comment