


Faux Crown Molding
08 March 2011
Faux Crown Molding
contributed by Hi Sugarplum!
Are you ready to be
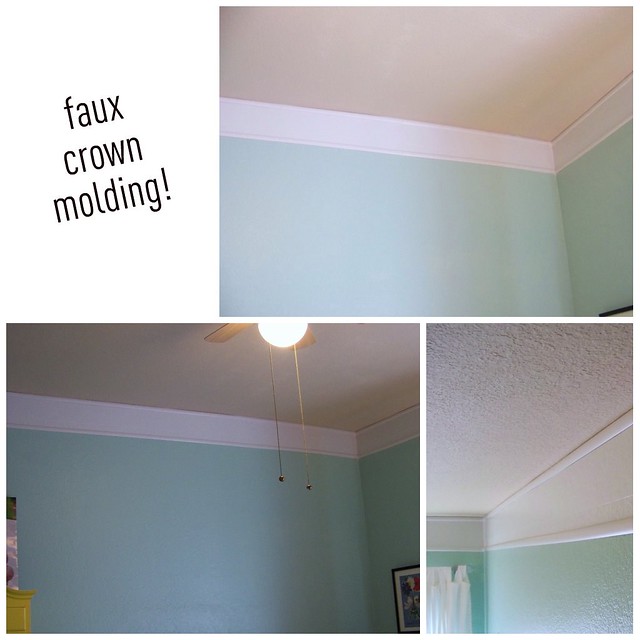
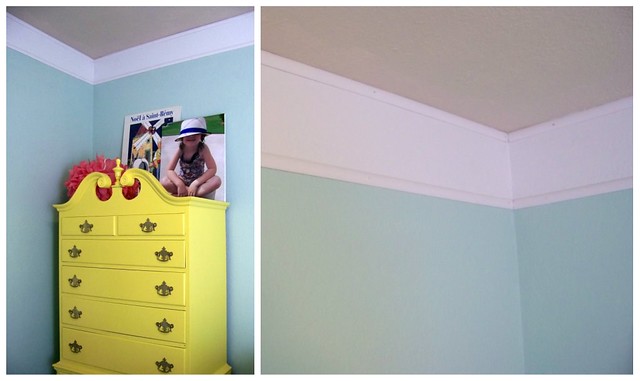
A major component in Babygirl's Room is complete....the Faux Crown Molding!!
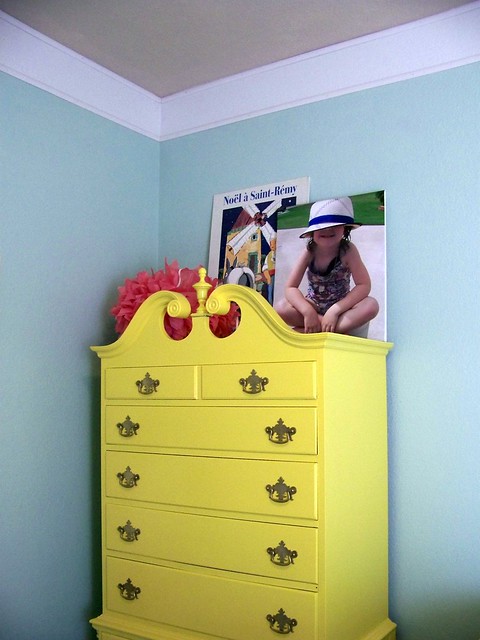
Love it? What if I told you the total cost was $30?!? Now you're impressed! Here's the 'How-To.'
I'll save you oodles of time wandering the aisles of Home Depot, while on the phone describing every possible option to your aunt, and just tell you what to get!
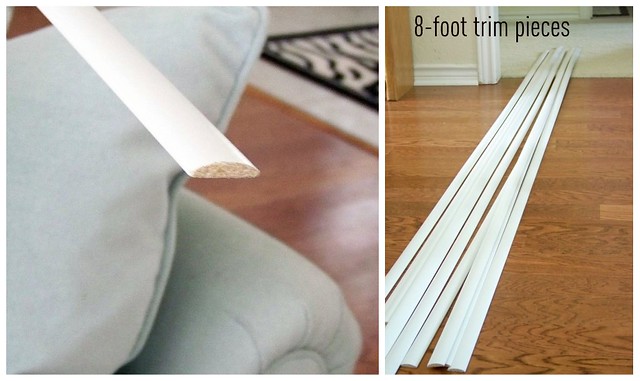
This 1-inch trim is literally like a condensed foam (you could dent it with your fingernail), weighs virtually nothing, comes in 8-foot strips, and costs $2.38 each!
First measure the perimeter of your room, then double it (for two rows of trim). Then divide that number by 8 (length of each trim piece). That's how many pieces of trim you'll need. I needed 95 feet, or 12 pieces, for a total cost of $29! I was feeling spendy and picked up an extra piece in case I goofed.
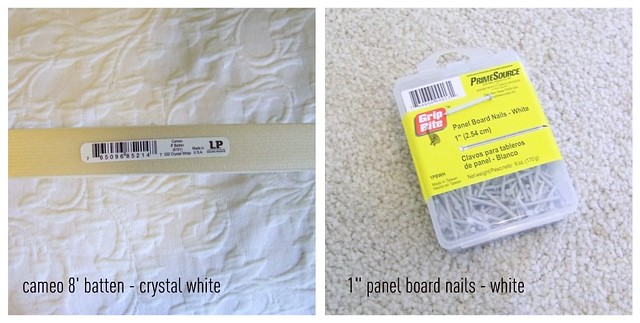
I'll help you out again and tell you that even though these things are light as a feather, they do not want to be glued to the wall (even if you tape them in place and curse them up and down). But since they are so lightweight, and not a solid material, a simple finishing nail with a little teeth is all you need to adhere them to the wall.
Most average rooms will require very few cuts since there are 4 straight walls and these pieces are so long. Babygirl's Room has a bit of an alcove where the door is, so we had some smaller sections to contend with.
First I started with a full 8-foot piece and hung it by tapping in a nail every 18-24 inches. I did this on all the main walls and was left with a single space on each wall that required a smaller piece (plus the alcove).
To cut smaller pieces, simply measure the space and follow this pictorial demonstrated by my cute helper:
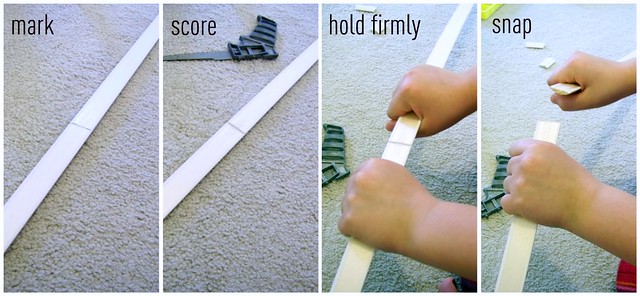
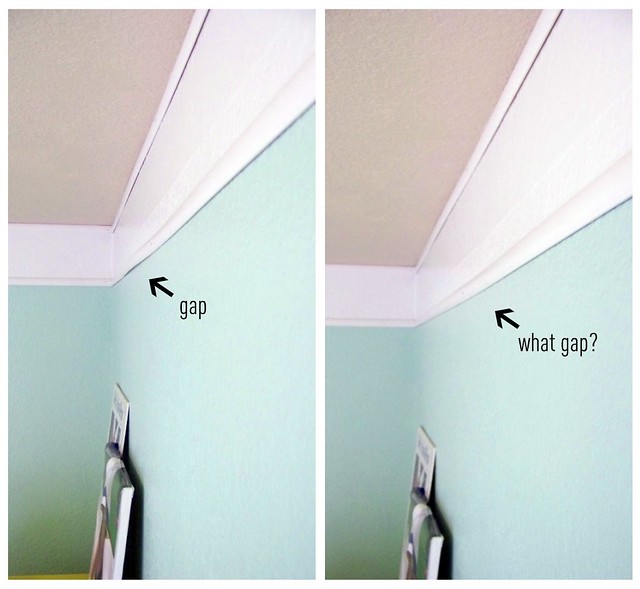
Don't worry if it's not a completely clean break. Mr. Sugarplum rubbed a little spackle (so much easier than caulk)over the seams to bridge the gaps, then lightly sanded it down once dry. I didn't bother covering the nails since they are white and teeny-tiny, you don't even see them from the floor.

Of course I found some discrepancies in the wall and the trim bowed in a few spots. No problem, just tap in a nail and it will lay flat.,
A few trips up-and-down the ladder, and Voila!
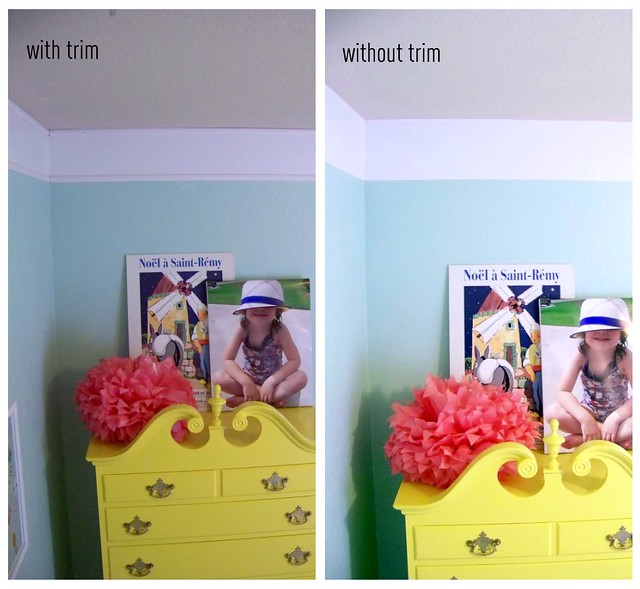
I could have left it with just the stripe and it'd have a similar effect. But the trim gives it a little heft and dimension.
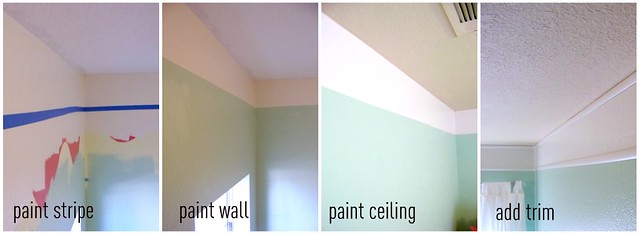
Here's the process again (read about it here and here):
I am thrilled with the outcome. I think it gives her room the added interest I was looking for, and my mishap became a blessing in disguise because I'm in love with the painted ceiling!
True I could have installed a traditional crown molding...but it would have cost a lot more, and been extremely labor intensive (anything requiring a saw becomes too laborious for me!) My investment for this project was $30 in materials and a couple hours of time. And the trim pops out pretty easily and leaves only a pin hole if I change my mind later.
Here's the door alcove I mentioned (and a glimpse into the Dining Room, where drapery samples are taped up!)
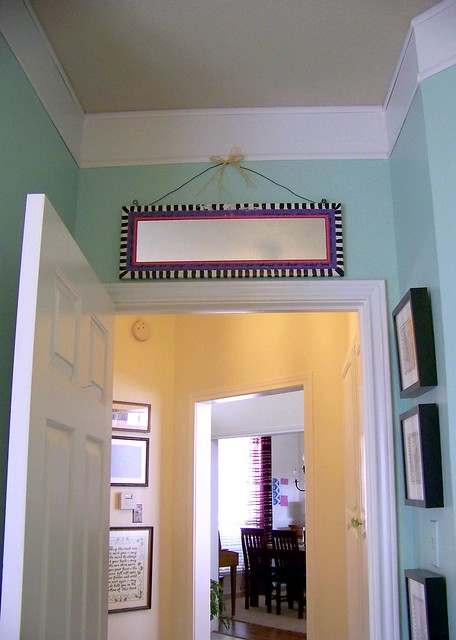
I love the mirror hanging over her door...it reminds me of a transom, and reflects the beautiful ceiling! I'm forcing myself to
So what do you think of my Faux Crown Molding? Do you have any faux treatments in your home?
 Labels:
Guest Projects,
Moldings,
Painting,
Wall Finishes
Labels:
Guest Projects,
Moldings,
Painting,
Wall Finishes


11 comments:
This faux crown molding is super duper awesome!!!
this would be great for my boys' room as our colonial has really funky angles that would make real crown a headache...
looks great!
p.s. {I am with you on the anonymous comments...got a freaky one the other day...going to off that on my own blog as well...if you write it, you should own it, right???}
What a great idea! I love it!
That was brilliant. I can think of using that trim technique is other areas. Thank you for starting a new train of thought.
- Joy
love it! i never would have thought to do that!
Thanks so much Cassity!!! Honored to be featured here!!
what am amazing idea! i might have to try this!
I didn't know about the light weight trim. I'm going to use that for "framing" in my bedroom.
Your daughter's room looks great.
When I get around to painting my daughters rooms again upstairs with all the different angles,i am going to try this. First, I will go to home Depot and check the molding out. Thanks so much for the insight to the room. I love what you did and the mirror just added a extra touch.
How did you do the corners? Did you miter them... or did one corner overlap the other?
Oops... and sorry, one last question... how wide of a stripe did you paint? I have 8' ceilings... Thanks!
Post a Comment