DIY Paneled Wall Tutorial
contributed by Decor Chick
Thanks for all of the love on my stepson’s new paneled wall! We just love it, and so does he!
Ok, now on to the tutorial. I have to give a special thanks to Rambling Renovatorsfirst and foremost for the inspiration behind this project. If you haven’t checked out their paneled wall yet, you must do that. They even went the extra step and added some pretty trim to each of the boards. I LOVE the look. We didn’t add any trim to our version so it’s a little more modern for the boy’s room, but both styles look great!
THE STEPS:
1st: Since there is no need to change what’s already a good thing, I used RR’s measurements for the boards and had them cut the same width. I bought 2, 4×8 sheets of MDF a 1/2 inch thick at Home Depot for $20 each, and had them cut the sheets into 4 inch wide, 8ft long strips for me.
NOTE: If I were to do this again, I would splurge and buy primed MDF to cut back the painting time a little. I’m not sure if the primed MDF is sold in big sheets like this, but I would think so?
2nd: Paint your wall white, or whatever color you will be doing this BEFORE you add the boards. Trust me. :) You should also lightly sand the boards so they are very smooth and clean up any rough edges. And if you want to be super efficient, you could paint your boards before you nail them up too. I didn’t do that of course. :)
3rd: I made a frame around the wall with the boards first, and just nailed them up with the nail gun.
4th: Then me and my husband measured the wall and marked the center, and nailed a board up. We thought it would be easier this way to figure out the rest of the sizes of the boxes. But I’m not sure if that was the easiest way or not…
5th: Now this is the fun part. And I swear, if “Dumb and Dumber” had a sequel, me and hubby could have the starring roles. For this part, you need to do some math (or just keep measuring over and over and over like we did) and figure out the spacing for your next vertical boards. I’ve never really done that math formula that is out there to figure out spacing of boxes–that is why my Dad usually plugs all of that into his drafting program. But my Dad wasn’t lucky enough to work on this project, so D&D got er’ done by the grace of God. Somehow, we got them all spaced correctly. And that’s all I can really say about this step. :)
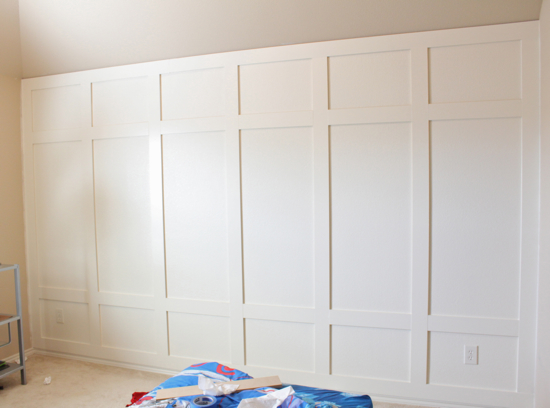
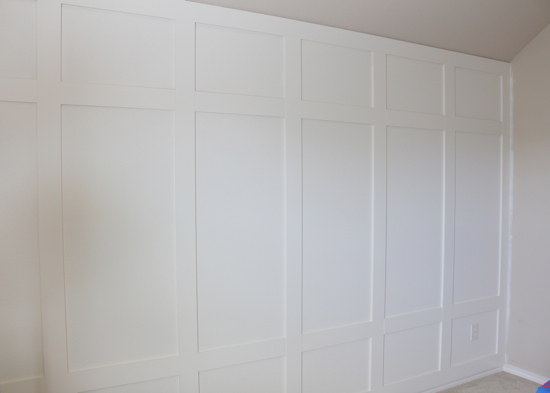
6th: And for this step, you again need to figure out where you want your next smaller pieces to fit to make the “boxes.” And again with God’s help, we spaced them out correctly. :) This is the part where you decide if you want squares, rectangles, lots of boxes, not a lot of boxes, etc, etc. We chose a smaller row up top and on bottom, so we would have big rectangles in the middle. My husband used our miter saw to cut all of the pieces of MDF to fit in between the vertical boards.
7th: And when everything is all nailed up, all you have to do now is caulk all of the seams and spackle the nail holes. You will want to lightly sand your nail holes when finished.
8th: Then paint! I painted about 4 coats of a white semi-gloss (SW Navajo White, our trim color in the house). The first coat I used the small foam roller, and for the 2nd coat I used a brush. Then switched back to the foam roller. I’d use just the roller next time around so you don’t have to worry about brush strokes.
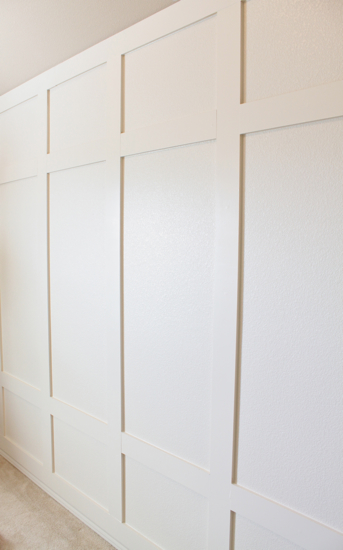
And if you are curious about the MDF sticking out from the baseboards because it is 1/2 thick, yes it does overlap a bit but it surprisingly doesn’t bother me. I’m not going to let our wimpy 1/4 inch baseboards prevent me from adding chunky molding anymore. :) And since no one will be looking at this particular wall from a side view, it really does not matter at all.
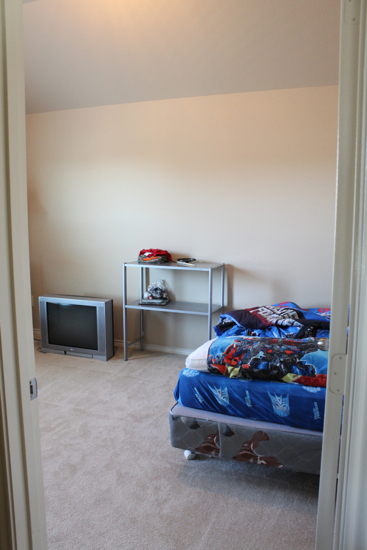
And as we look back, this is what the wall looked like before…
And after!
Not bad for $40 right?? :) I still have a few areas I need to touch up but nothing major. Just a few nail holes that I didn’t sand well enough before I painted.
You CAN do this!! I am totally jealous of my stepson’s room now. I want it in ours. :)
More progress to come in his room!
I hope I covered everything, and hope you like it!
Post a Comment
I love comments! Thanks for taking your time to tell me what you think! I read them all and enjoy your enthusiasm for the work shown here!
Please remember that people have worked hard on these projects. Each person's budget and goals are different, so please try to make kind, constructive comments. Remember if it isn't nice, please don't say anything at all.
Please no business links. Remodelaholic reserves the right to remove any comment that we feel is malicious, spammy or otherwise inappropriate. Thanks.
Sorry there is no longer the option for anonymous comments, unfortunately people have been abusing that option!
Subscribe to:
Post Comments (Atom)


7 comments:
I have to comment on the bottom kitchen- JUST Beautiful. LOVE IT.. Great job and so inspiring..
Karryann
Beautiful! When we did this in our house, we took off the baseboards and placed the bottom piece of MDF against the floor (made it taller so 3" stuck up over the baseboards. We then placed the baseboard over it. I love that you took this all the way up the wall!
I love it! So simple, yet makes such a big statement. You're very creative
So lovely! It's a really great look... even more impressive that it only cost you $40!
wow, that looks really great !
That is impressive. I love the look of it. I'm already wondering if I have a wall I can do this to. Great job!
I LOOOVE IT! It seems so simple to do and it it looks amazing!! Thanks for sharing!!
Post a Comment