


Ballard Knockoff Spool Side Table DIY
27 October 2010
Do you ever have one of those projects that sits in your head for a while and sticks and you can’t get it out?
Fester fester fester rot rot rot.
(2 points if you get the reference)
This is one of those projects for me. When I saw the little Spool Side Table at Ballard several months ago I fell in love.
I pointed it out to Mr. F.T. and said, “I want to make That!”
(You have to love a guy that doesn’t blink an eye when you point out a table wrapped in rope but instead just rolls with it and helps you figure it out.)
Well for months (on and off – not continuously) we have been toying with rope and wood options and cost. Then one day while we were thrift store shopping (Yes. Mr. F.T. gets points for that too) we spotted this rope basket . . .

(Aaaaaaaaaa – those are the angels singing and a little spotlight shining down from heaven)
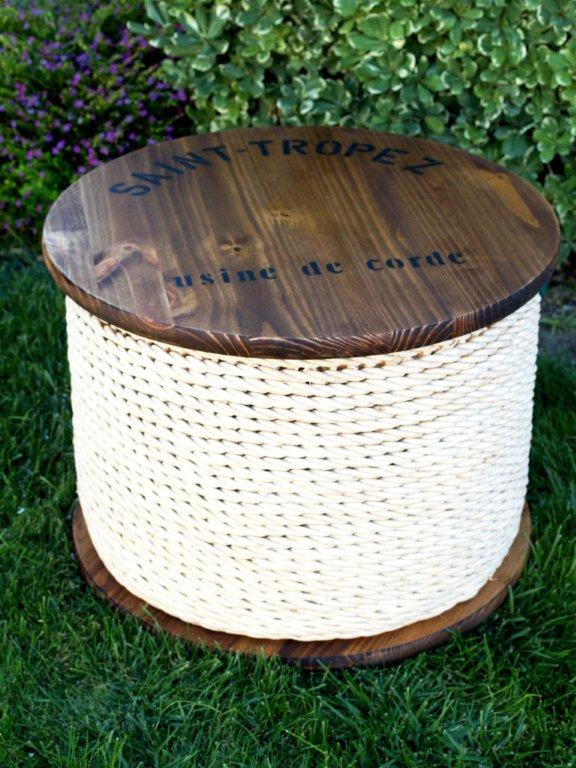
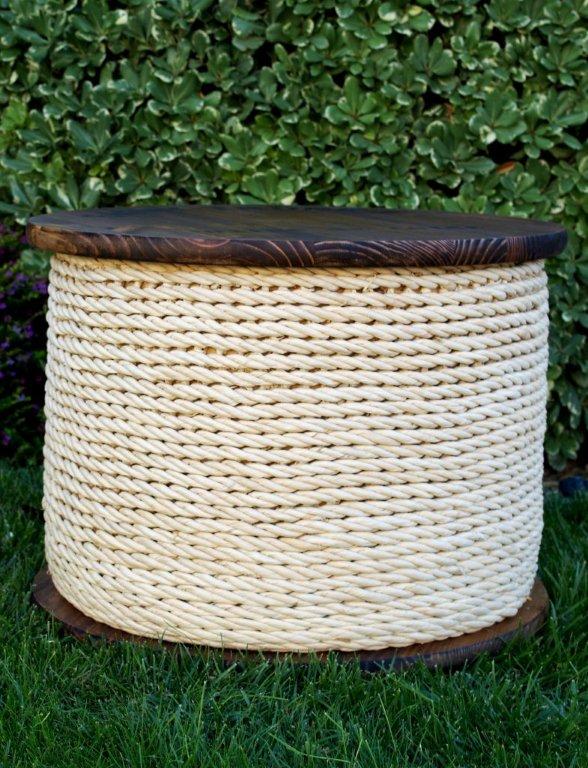
We snatched it right up and were ready to rock and roll. Let me introduce you to my new little spool side table.
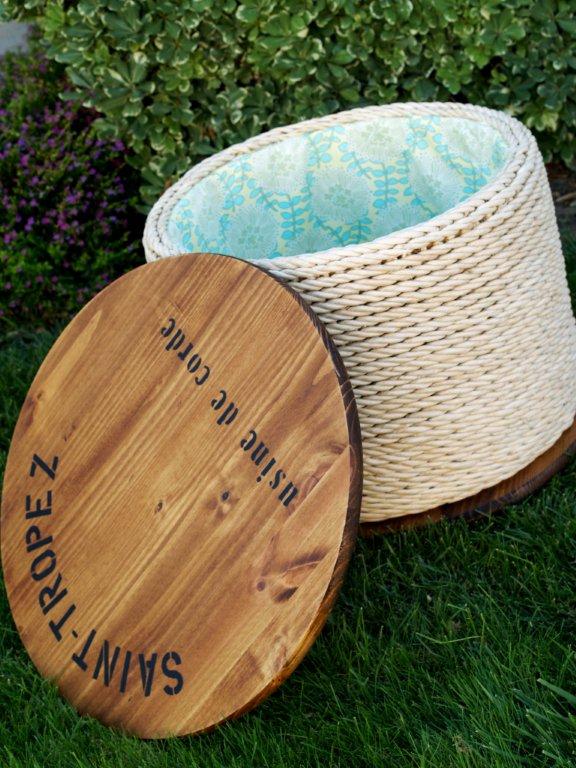
Complete with removable lid for storage . . .
Here’s the Ballard Designs Inspiration:

I even have a nifty tutorial for you in case you are also in love with this little rope table and you find/own a little basket too. :)
You’ll need:
- A basket (or something similar with rope wrapped around it)
- 2 Round wood pieces (mine are 24″ circles from Home Depot)
- 1 dowel
- stencils for top
- Stain (I used Minwax satin all in one)
- Paint for lettering (black craft paint)
- Brushes
- glue
- screws
- fabric for lining (optional)
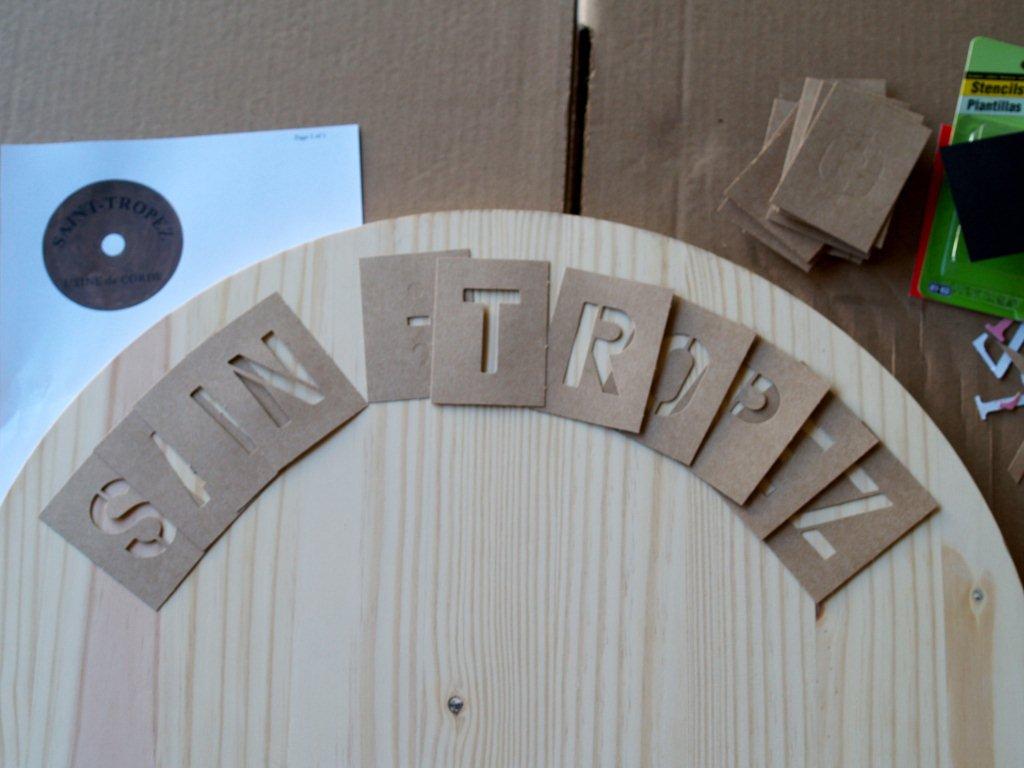
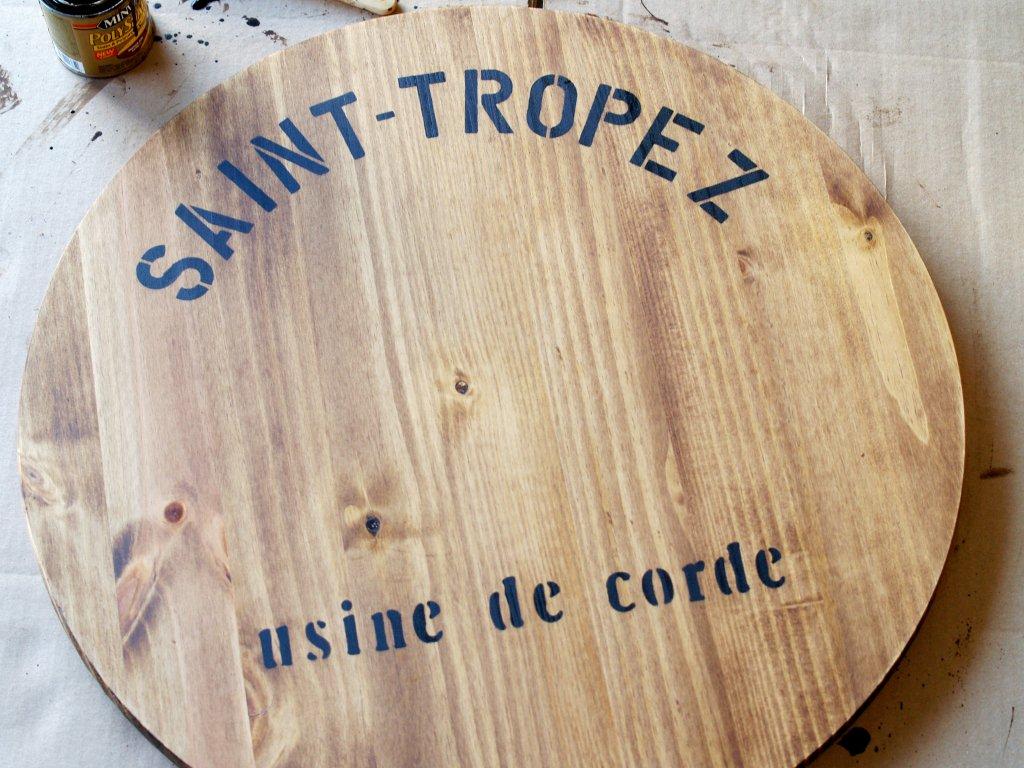
Start with tracing a curve for the top line of stenciling. I used a large bowl – that is apparently peeling on the bottom. Huh.

Get your stencils ready and lay them out on the arch to make sure the spacing is right.
Run back out to the store because the stinkin’ stencil pack you bought is missing letters E – L. Peachy.
Lay out the new letters.
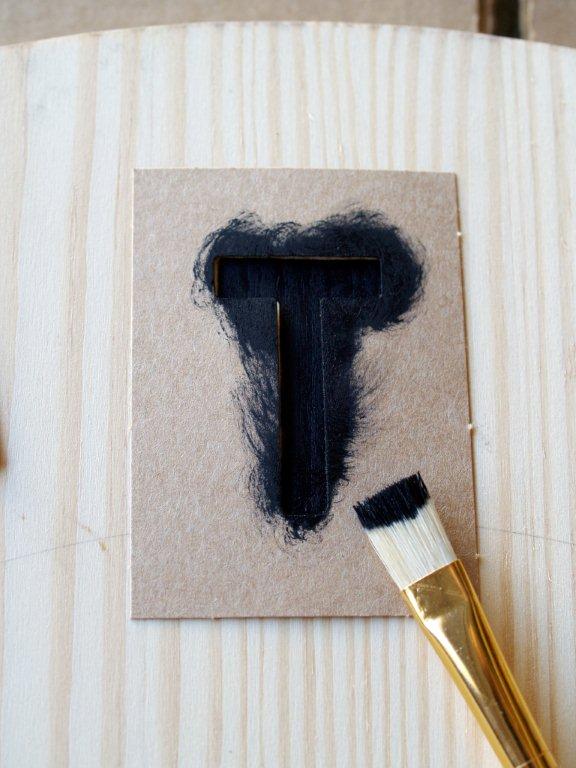
Start with the middle letter on the top and stencil it on. Put a little black paint on your brush and using a circular motion on a paper plate or paper towel, work the paint in to the bristles so that it’s not super wet.
Move the brush in a circular motion over the stencil, covering the open section well.
Work down the right side of the arch, then the left, stenciling on the other letters. Make sure the spacing in between letters is even.
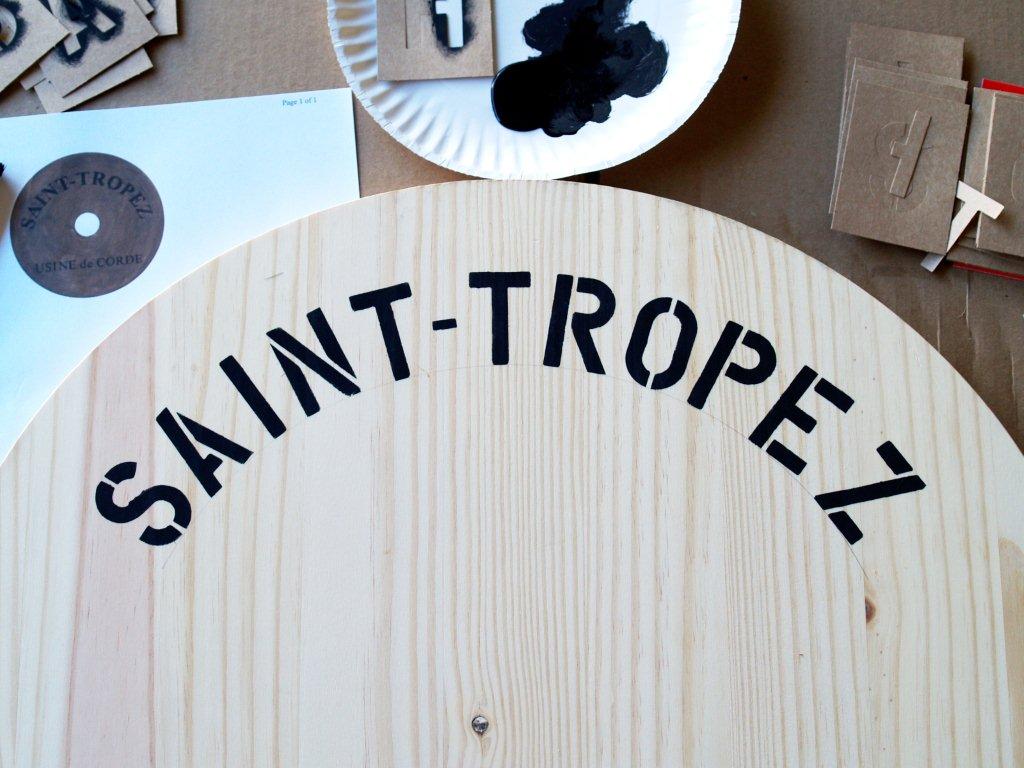
Repeat for the smaller letters at the bottom. I kept these in a straight line like Ballard’s. I also looked up usine de corde before I stencilled it on. I wanted to make sure it was something I’d actually want stencilled on a piece of furniture. It means “Rope Plant.” Ok then.
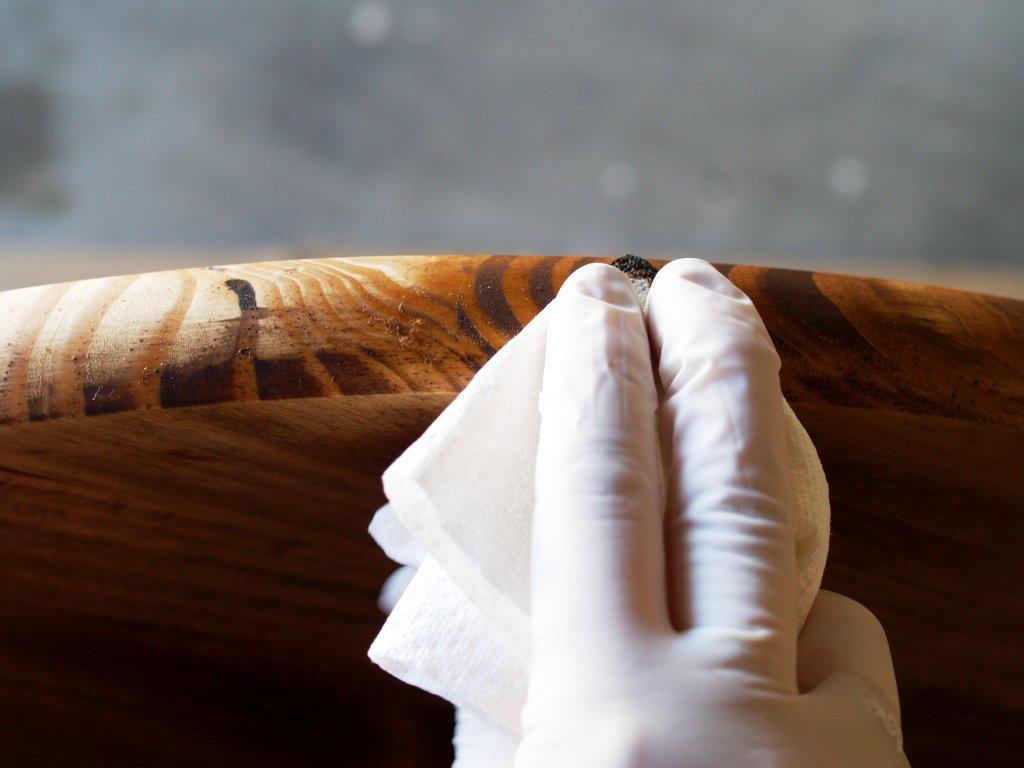
Begin staining your wood pieces. For the sides you can apply the stain with a paper towel. Just rub it on and then rub off any excess.
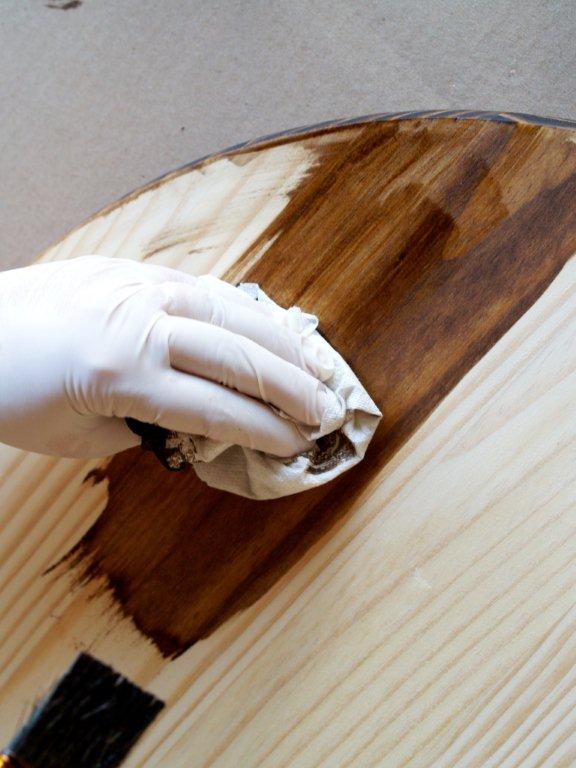
For the top flat parts, you can use a brush to apply the stain . . .
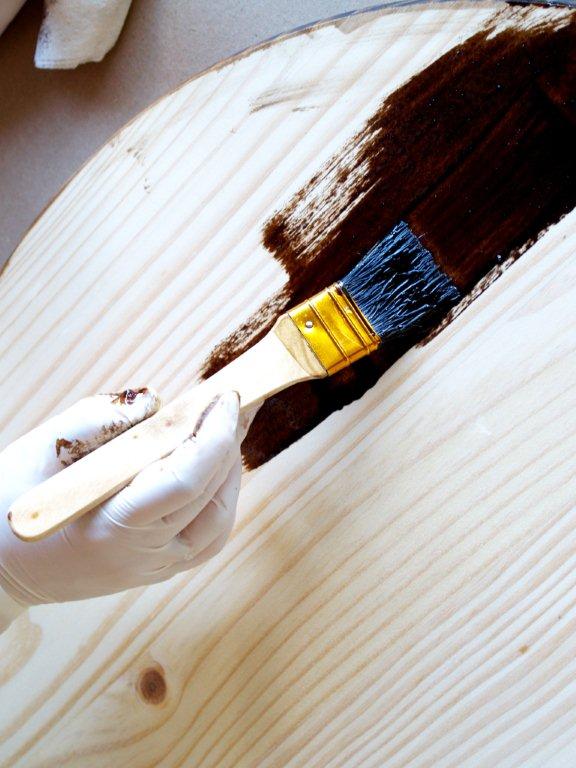
Then wipe off with a paper towel. The longer you leave the stain on, the darker it will be.
(Look. Gloves. Don’t ever say I don’t occasionally learn from my mistakes.)
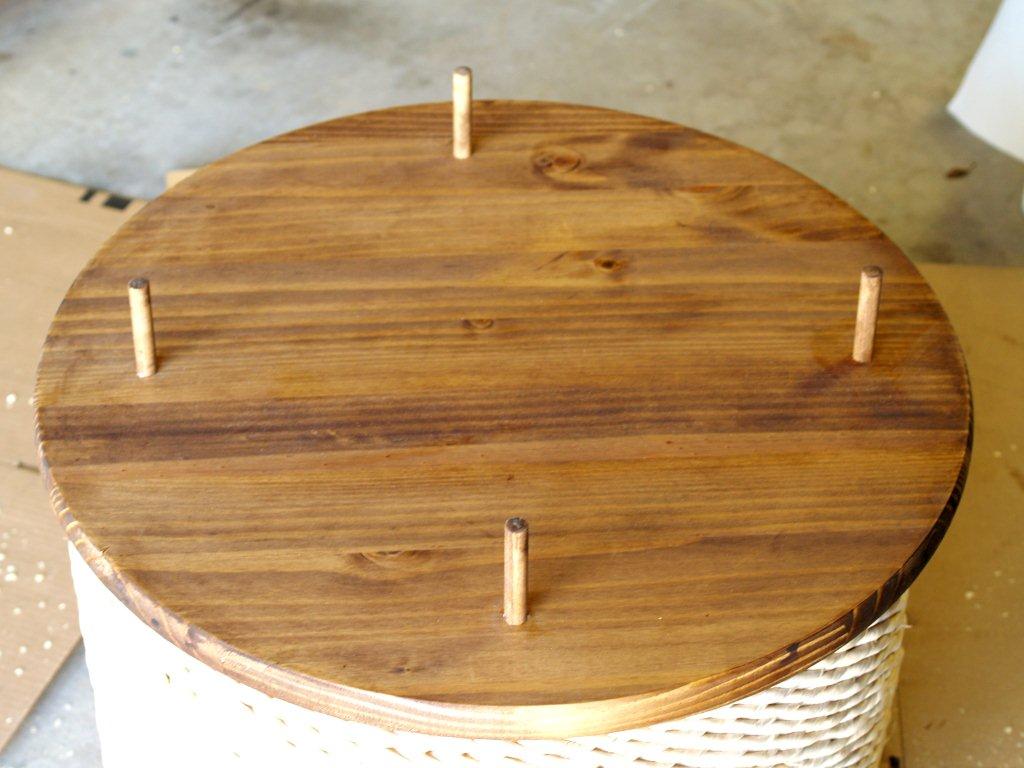
Stain all the round wood pieces.
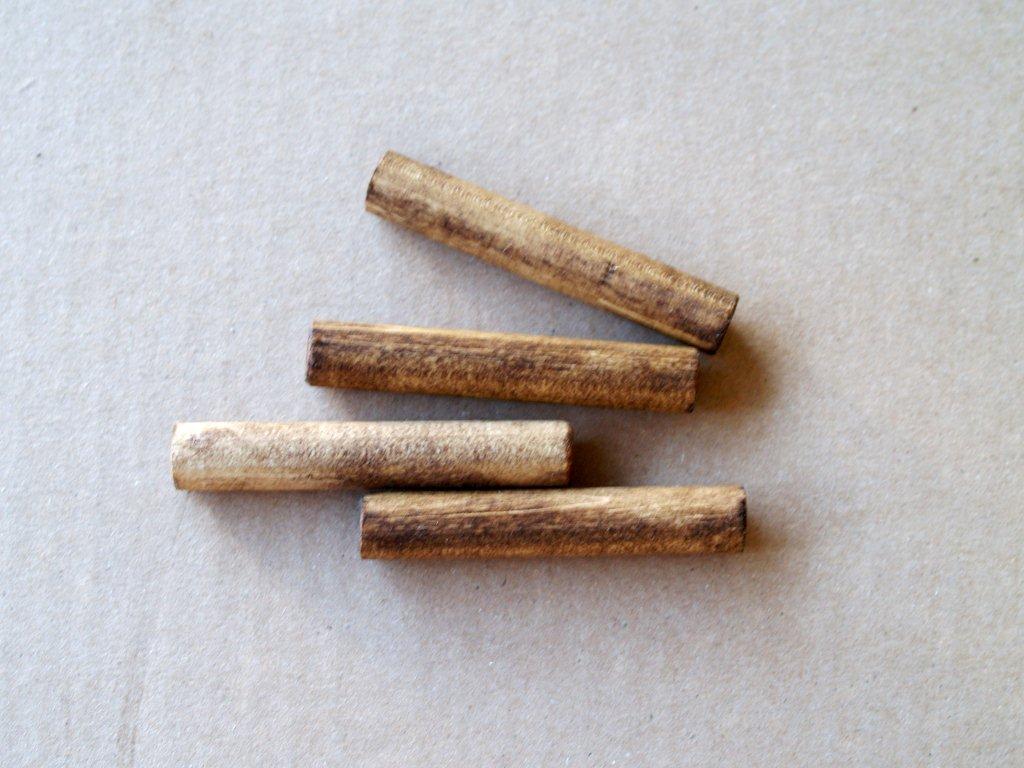
Cut the dowel into 4 inch pieces. These will be glued into the top to hold the top in place. Stain them also.
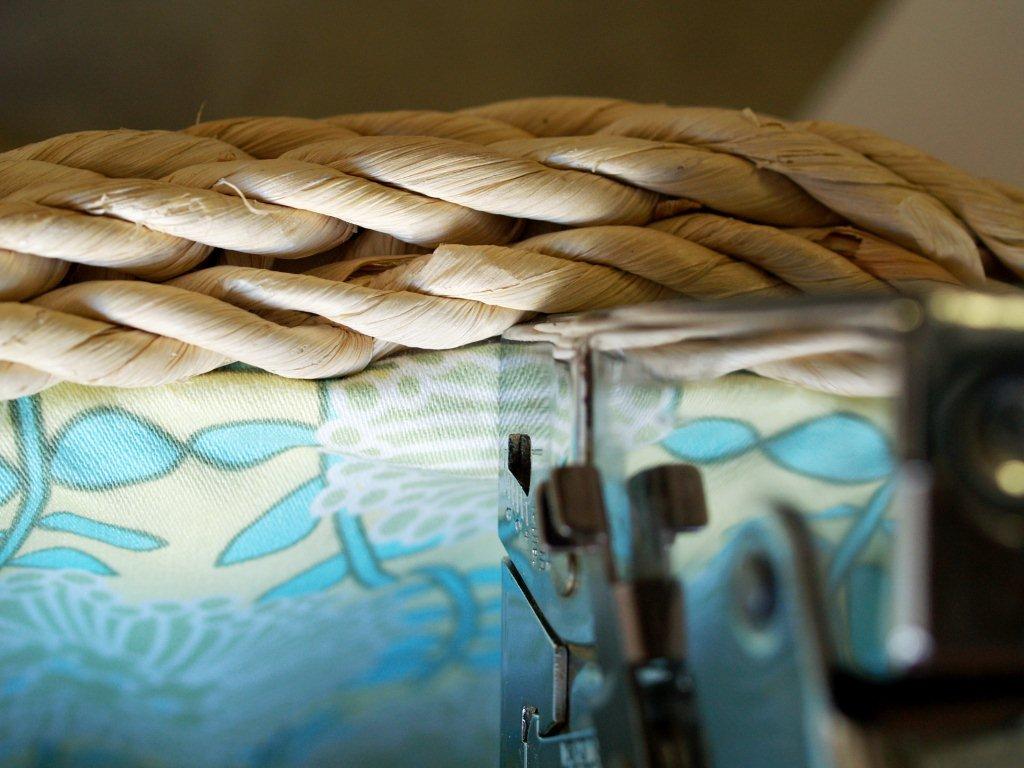
To determine the right size screw to hold the basket to the base, I drilled a hole through the base of the basket. I pushed a nail through to see how deep the base was.
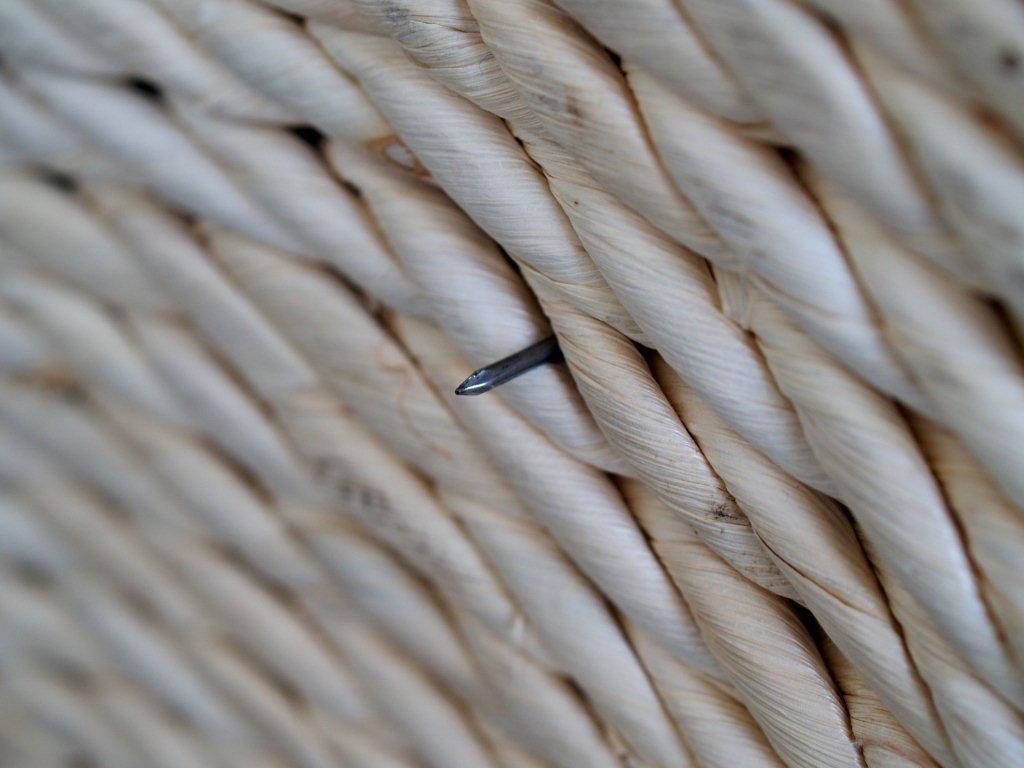
Then I could measure the nail and determine how far into the base I wanted the screw to go.
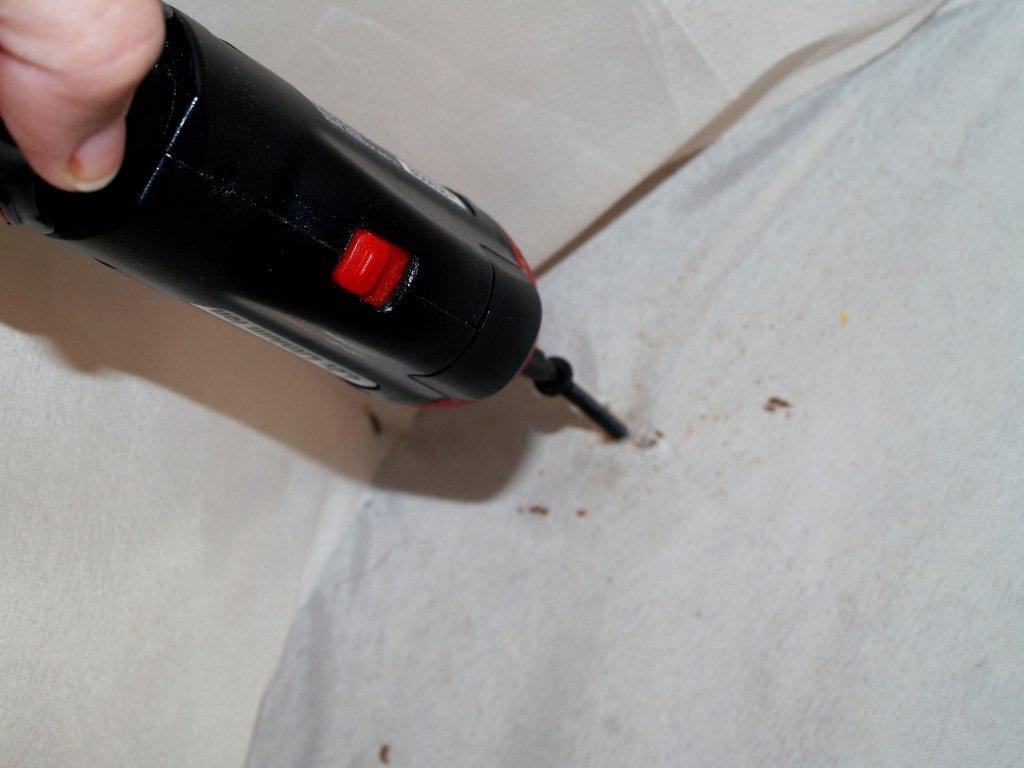
Drill through the base of the basket in four places.
Center the basket on the base. Screw the basket to the base.
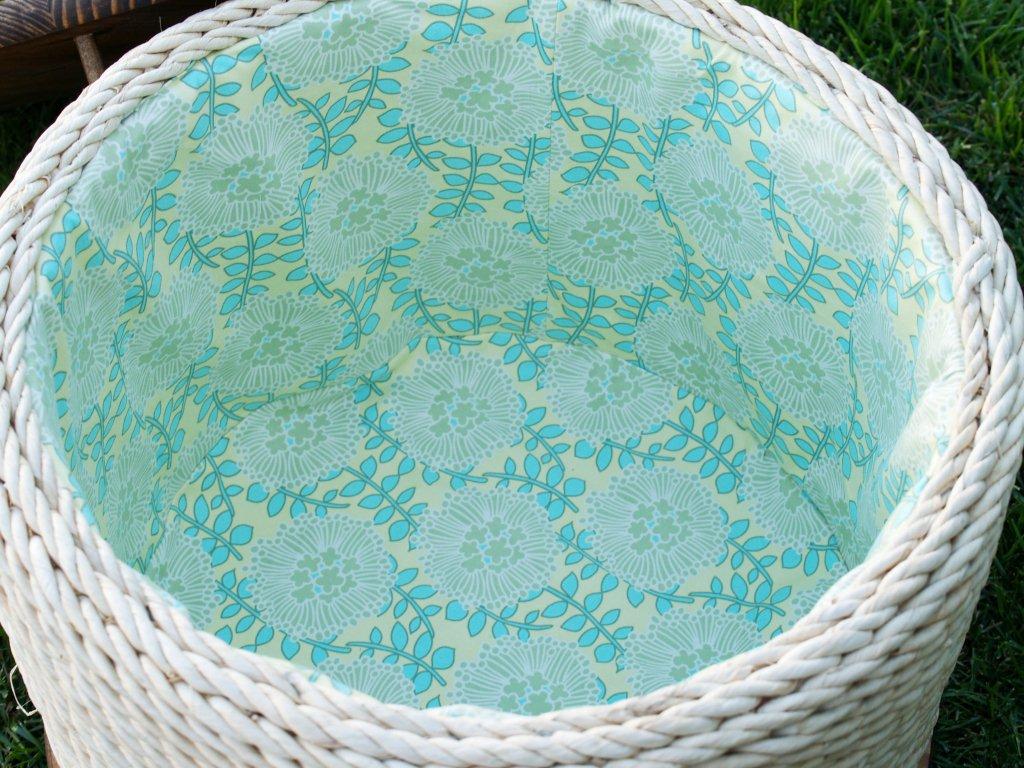
At this point I decided I wanted to cover up the thin nylon lining that came with the basket. I measured the existing lining and made a cuter one out of some Amy Butler fabric I had on hand.
I stapled in the new lining along the top edge under the rope.
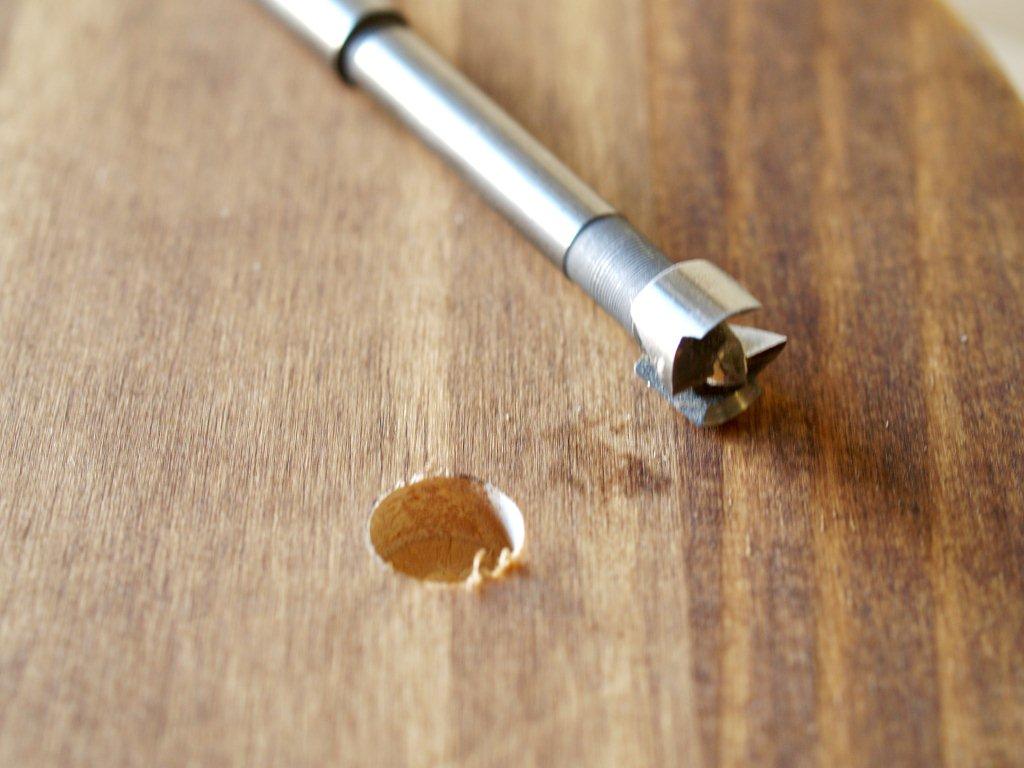
To add in the pegs for the top, I made a template on a scrap piece of wood.
Trace the hole onto the underside of the top. To drill the holes I used a bit called a Forstner bit. It made a nice circle, but if you don’t have one, you can use a regular bit.
Glue in the dowel pieces with Gorilla Glue. I used their all purpose glue.
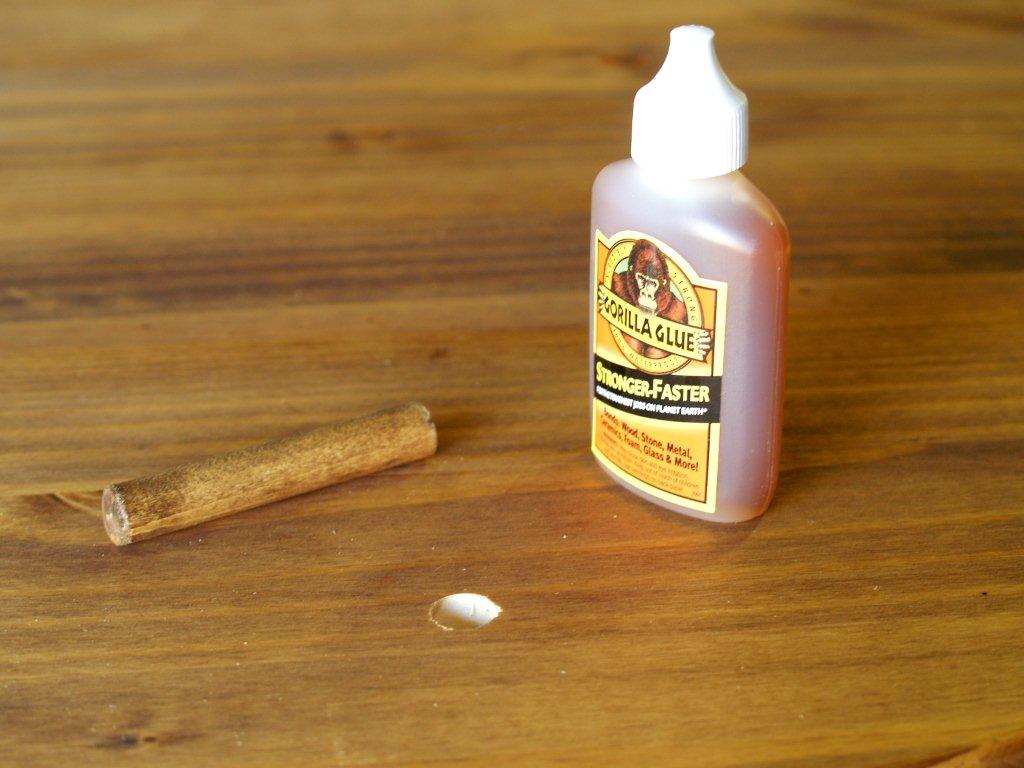
Glue all the pegs in the top. Tap them in with a mallet to make sure they’re in tight. Wipe off any excess glue with a damp rag.
All done!
I must say that while I did all the work on this table – I had significant technical advice from Mr. F.T. Thanks baby.
I’m seriously in love with this table. As is obvious from the bunch of pictures I’m going to make you scroll through. ;)


Did I mention I’m in love??
Post Sponsored By:
Post Sponsored By:
 Labels:
DIY,
Furniture,
Guest Projects,
Knock Offs,
Table
Labels:
DIY,
Furniture,
Guest Projects,
Knock Offs,
Table


7 comments:
You should be in love!! That turned out really really great!!!!
Love that table.....I really need to find some place to put it so I can make one! Great job on the copycat!
OMG! I LOVE yours so much better than the one from Ballard! FABULOUS job! Now I am SO on the outlook for same parts and pieces. Super gorgeous!
Better than Ballard. This table is awesome!
Yay, Bev! Still loving this knock-off. Definitely better than the original!
Thanks everyone!!
And thanks Cassity for featuring the table! You're the best. :)
That is one great table!! Love it ♥
Post a Comment