


Anthropologie Inspired Mirror Tutorial; Guest
23 July 2010
Beverly over at Flamingo Toes sent this great tutorial over to me. I had to feature it. It is such a great idea. The fabric she choose is very romantic and feminine like the original, but I think it would also work with a modern print fabric if that is what you love. Also, the fabric covered frame in itself, is I think, an interesting idea.... Check out her tutorial:
You all know we love a good Anthropologie knockoff around here – so a couple of days ago when I was browsing online I came across this mirror. Oh I definitely need that. Hold the presses – did that say $498??? Huh. We can do better than that. :)

So after scouring the thrift shops, cutting myself on mirror glass, and overcoming an unreasonable fear of Mod Podge, here is my version!
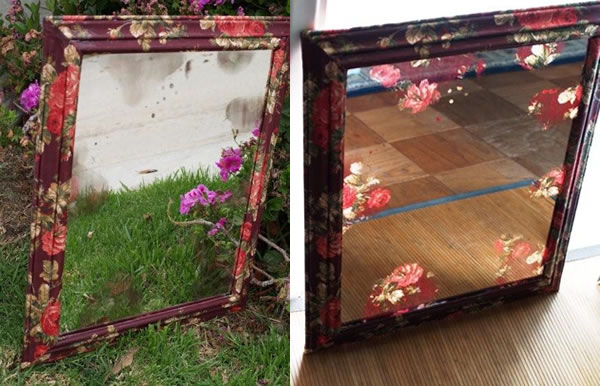
(Bear with me here – taking a picture of a mirror is a bit tricky. It’s difficult to get the right angle to show off the whole thing, without just taking a picture of yourself)
Ready for the tutorial? Here goes.
You’ll need:
- A Mirror
- Easy Off Oven Cleaner
- Fabric (enough to cover the frame and the back of the mirror)
- Mod Podge
- A Staple Gun or other framing tool
I went searching for a method to removing silvering and came across a great tutorial at Mitzi’s Collectibles. She did a similar project that is very cute. I’ll be honest in that I skimmed to see what she used and kind of ran with it my own way.
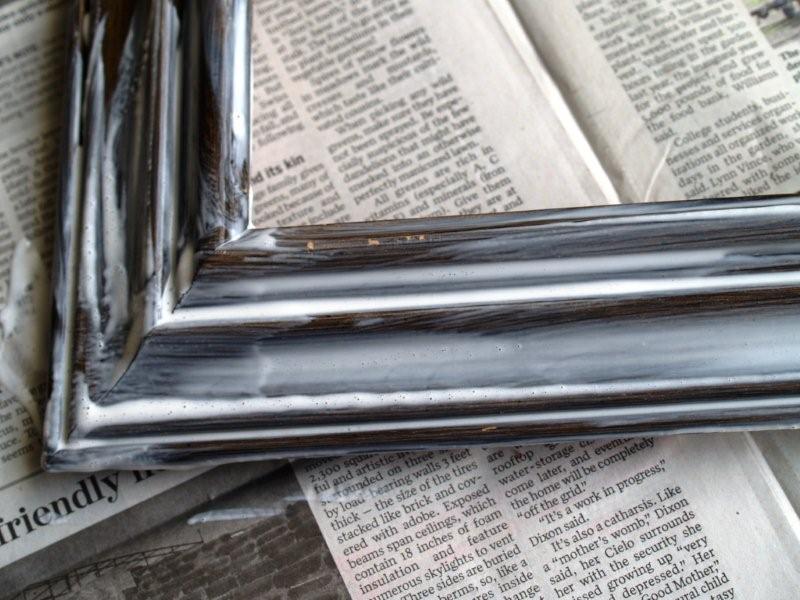
I started with a frame that I found at the thrift store.

Obviously not clean. But the look was exactly what I wanted and the price was right. See?
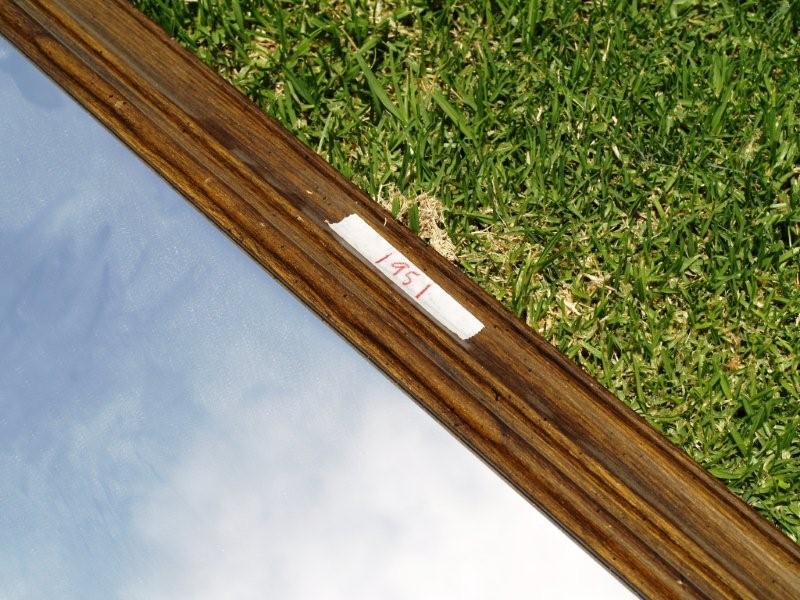
We actually had to ask on this one – because it just said 1951. $19.51 seemed way to high – and it was. This little baby was $1.95. That’s right. Sold!
Start by taking your mirror out of the frame. This one had a backing on the frame so that had to come off first.
Lay your mirror down on a protected surface.

Safety Alert ( in other words – learn from my mistakes) PLEASE be careful when handling the mirror. These things can bite. Especially if it is an older mirror – it would probably be even more likely to have rough edges. Helps with the rustic look but not with your hands.
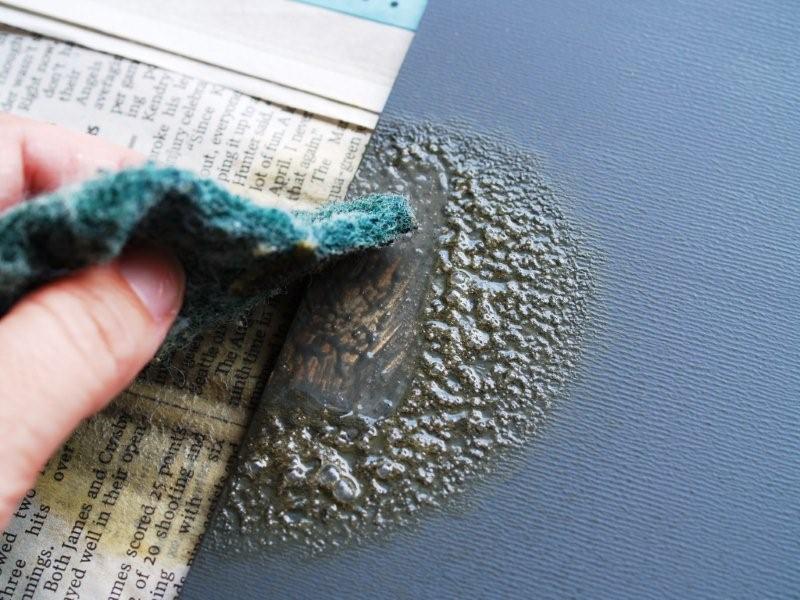
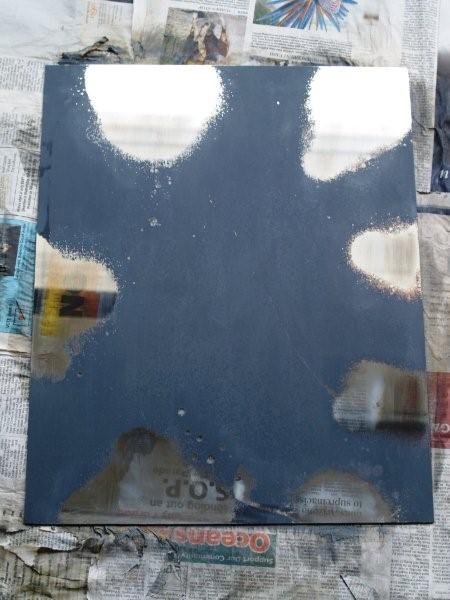
Grab your oven cleaner and spray a small place near the edge of the mirror. I recommend doing this test spray first so you can see how the silvering comes off and how you’d like to do your spray pattern.
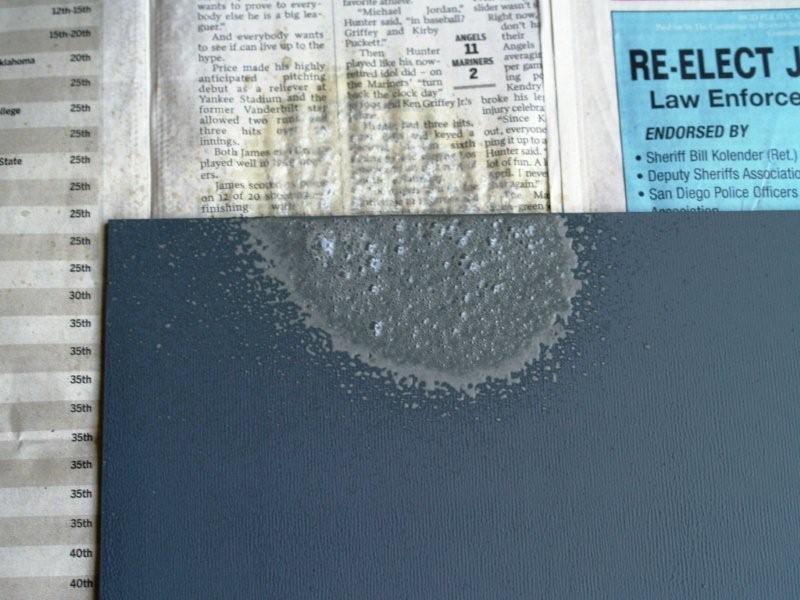
Now walk away. Let that sit for at least 5 minutes. Longer if you can stand it. It drove me nuts not messing with it, but I didn’t want to make the pattern look funky. And the longer you leave this stuff on there, the easier the removal is.
Since you’re being good and letting your mirror alone, you can start on your frame. Grab your fabric and Modpodge.
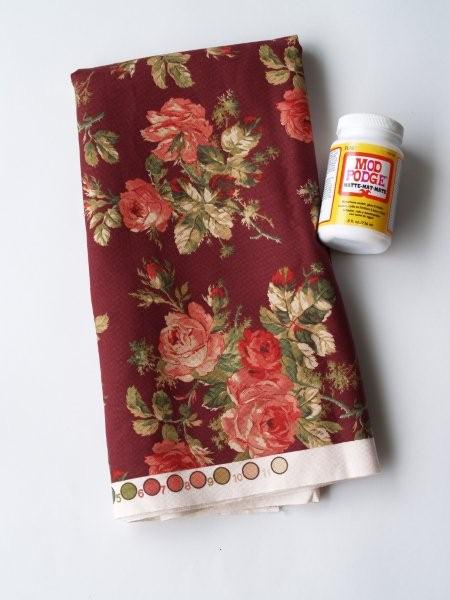
I have a secret to tell you. I have never used Mod Podge in my life. Never. I know, saying that could get me blacklisted from the Crafty Bloggers Association of America, but it’s true. I’ve always admired other projects – you can do some impressive stuff with it. But I’ll be honest – it has always intimidated me. What is it made of anyway? Is it just Elmers in a cool bottle? Some unidentifiable substance brought to the first crafter by the fairy godmother of home ec and camp craft time? Who knows. But one of the points of this blog is to try new things – so I’m divin’ in. And rambling. Let’s get going.
Cut a piece of fabric long enough to cover one end of the frame, with some overlap.
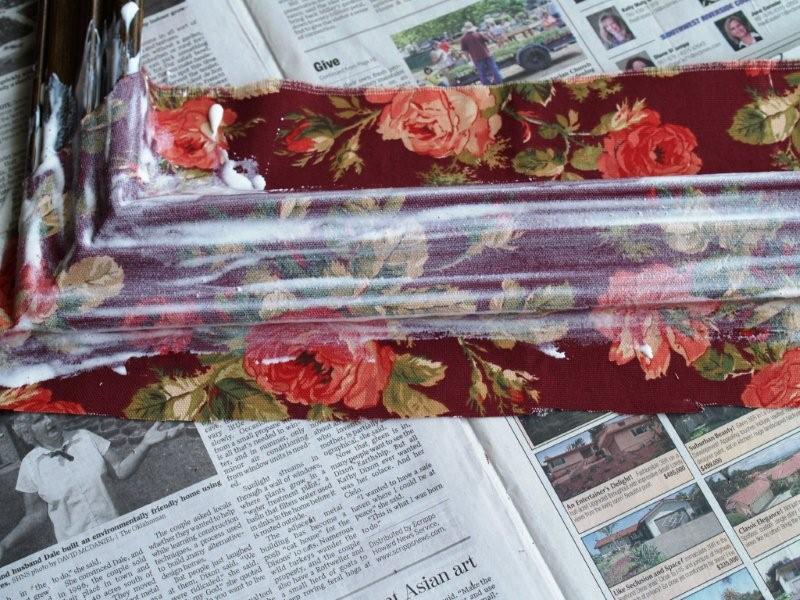
Spread the Mod Podge on the frame along the front side and a little ways up around the corners. If your frame has molding, make sure you get in all those little grooves.
Now lay your fabric on the frame and start covering the fabric with Mod Podge.
I clipped the fabric at the inside corners so it would fold around the frame.
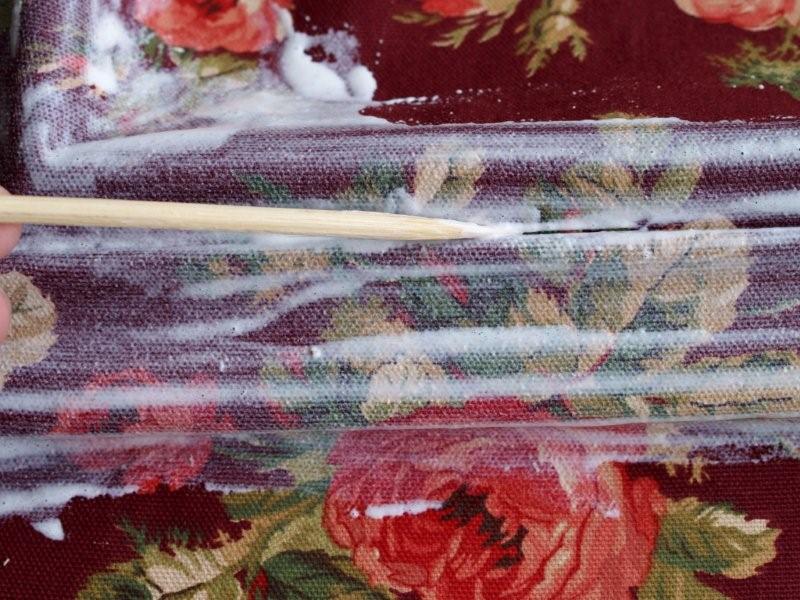
Press the fabric into the curves of the molding. Find something pointy to use in the very small grooves if you have them. I used a wooden skewer.
Continue covering the outside of the fabric in Mod Podge and wrap it around the back of the frame.
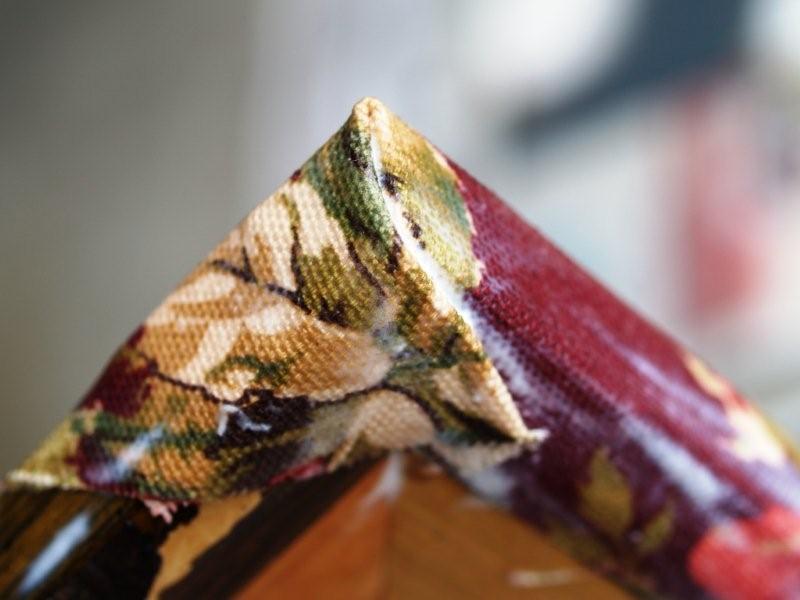
I got some great advice from you all when I asked for help on the corners of my Photo Canvas Wall Art – so I cut triangles out of the fabric at the corners to reduce the bulkiness and then folded the edges over.
You can do the opposite side as well at this time, then leave the frame to dry a bit. By now you should be thoroughly covered in Mod Podge. I was. ;)
Let’s go back and check on our mirror.
Start rubbing off the oven cleaner – the silvering should come off pretty easily. I used an old scrubby for this.
**Update** Make sure whatever you use isn’t too scratchy – you don’t want to scratch the glass.
Keep scrubbing.
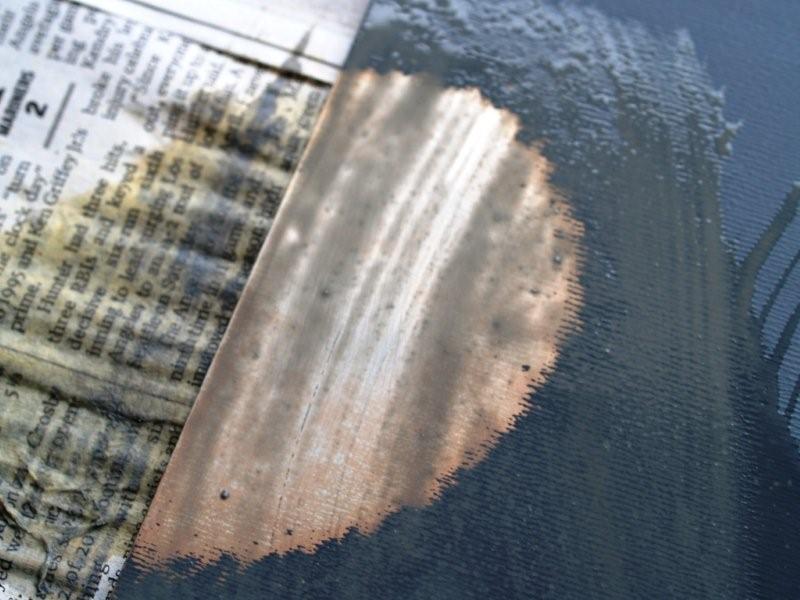
At this point the silvering should be gone, but on my mirror I still couldn’t see through it yet. I took a bit more scrubbing to get off whatever was still on there. Keep scrubbing until the mirror is as clear as you’d like.
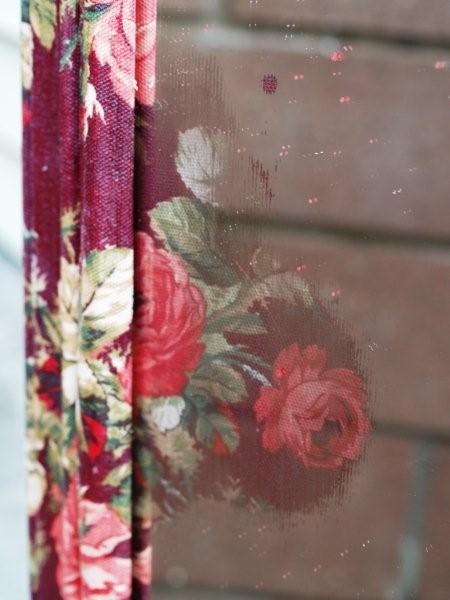
I wanted mine to be a little subtle – so that at different angles the fabric showed through lightly. I didn’t want it to be quite as clear as the Anthro version. (The beauty of making it ourselves – we get it the way we want it. haha)
Now that your test spray and removal has gone well, spray the rest of your mirror.
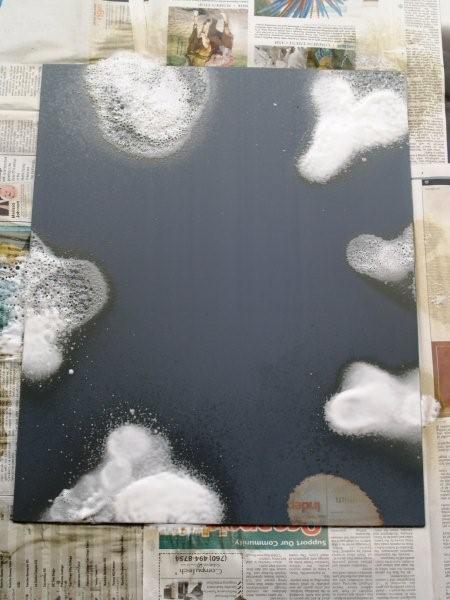
Leave that to dry a good long while. If your frame is dry, you can start the remaining sides.
Follow the same steps as before, but at the corners of your frame, fold your fabric down so there is a fold line running from the inner corner to the outer corner. Mod Podge this all down really well. Sorry, I forgot to take a picture at this point. I probably would have stuck to the camara anyway. Did I say this stuff was messy?
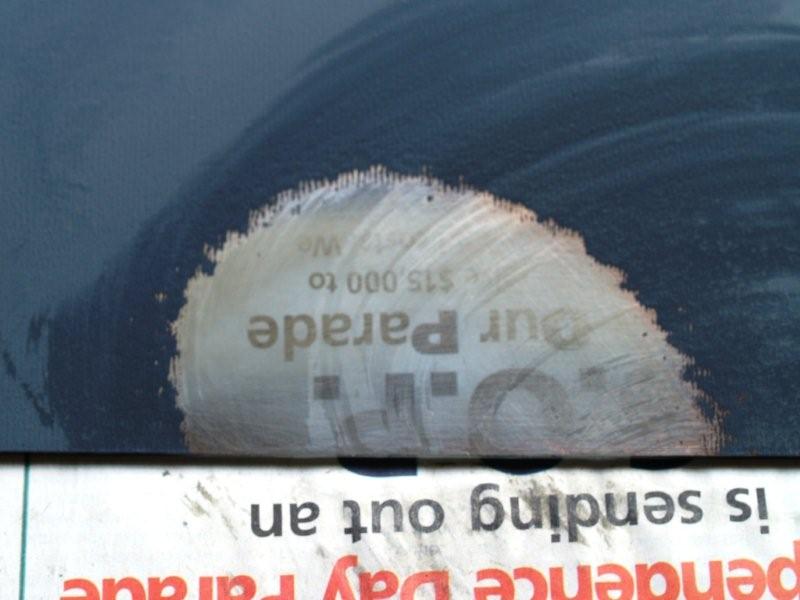
Head back to your mirror and work on all your spots. This will take a bit, just keep scrubbing until the glass is as clear as you want it.
Clean off the back of your mirror really well. It took me a couple rounds with Windex to make sure it was clean and not streaky.
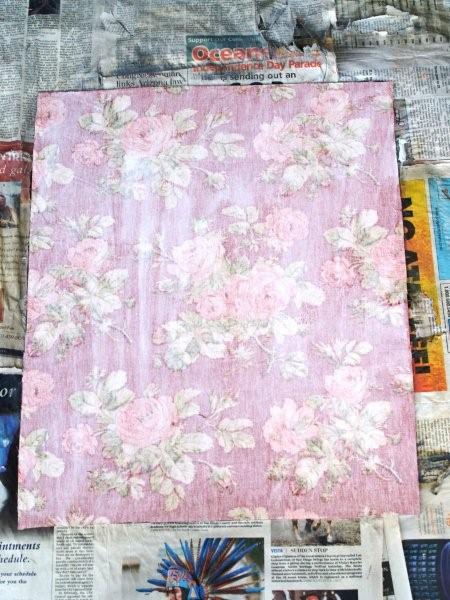
Cut your fabric the size of the mirror. Lay down a light coat of Mod Podge on the back of the mirror and lay your fabric on it. Make sure there are no air bubbles. Cover the back of the fabric with Mod Podge.
Once the mirror and frame are dry you can put them back together. Clean the front side of the mirror and lay it down in the frame. If you mirror was a tight fit to begin with, you might need to cut out some of the fabric. An exacto knife works great for this.
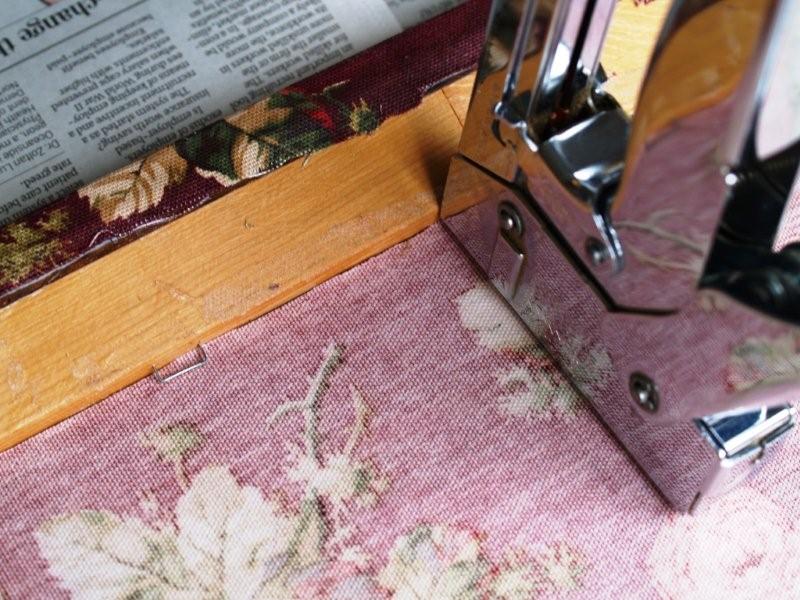
Use a staple gun to hold the mirror in place. Set your gun about a 1/4″ away from the side and staple. This will embed the staple in the frame but leave a little piece out to hold the mirror.
At this point your can put a backing on your frame if you want, and reattach your hardware if there was any. And you’re done!
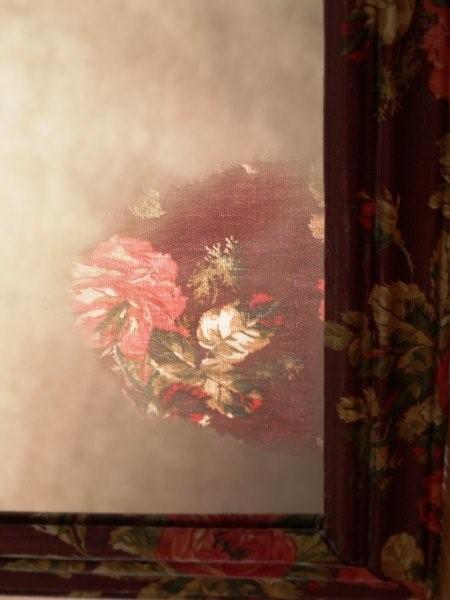
Here are some of my picture attempts. :)
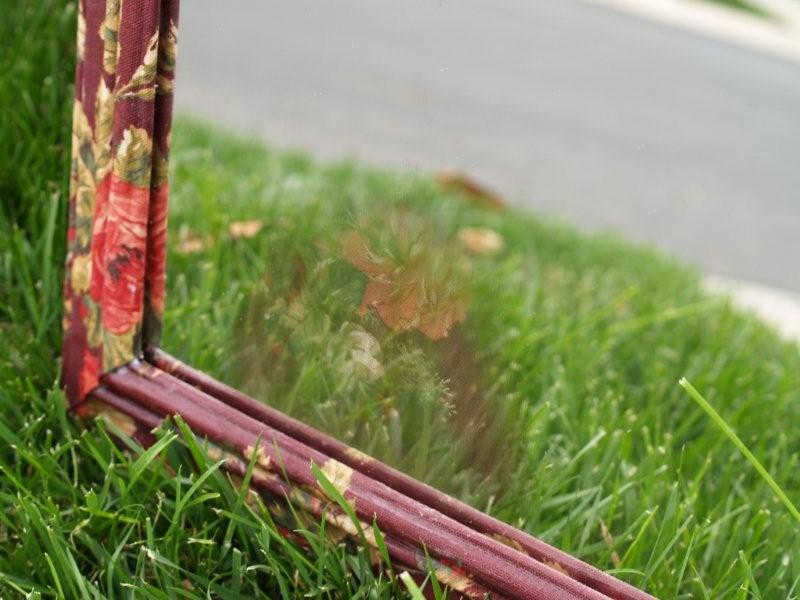

(You can see the frame well in this one but not the mirror so much.)
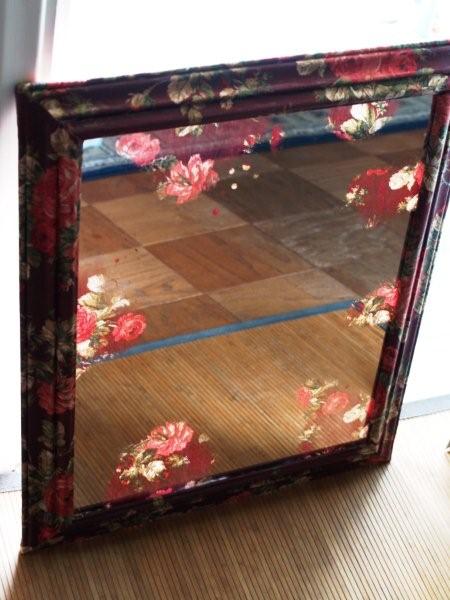
(This one you can see the mirror really well, and my floor, haha, but not the frame so much)
I hope you can get a good idea how it turned out.
So the Anthro frame was $498. Everything I used came from my stash except the frame. So technically I only spent $1.95. But even if you had to buy the materials – you’re probably only looking at $15-$20. Waaaaay better than $498. :) That makes me smile. A successful first Mod Podge project! woohoo! I’d love to hear what you think.
I love how the fabric peeks through the mirror.
What are your thoughts?
Is this a project you would consider trying out?
 Labels:
Art Display,
Guest Projects,
Mirrors,
Tutorials
Labels:
Art Display,
Guest Projects,
Mirrors,
Tutorials


13 comments:
pretty cool idea, turned out pretty neat!
i would have never, ever thought of oven cleaner! i love how this looks. May have to try for something in my abode...
but, admittedly, that freaks me out. that oven cleaner can take silvering off of mirrors. eeep.
love this idea! I'm going to have to give it a try!
What a fantastic way to create a unique conversation piece of functional home decor. This would make a wonderful housewarming gift!
This mirror is gorgeous!! It does not look that hard, mainly time consuming. But so well worth the effort. I would love to give it a try. Love & blessings from NC!
Oh my! I L.O.V.E. this!! Can't wait to try it! Thanks SO much for sharing!
I'm amazed at the cleverness of all the crafters out there. The mirror turned out great, just like the original! What a great project, I'd try it for one of my girl's rooms. Thanks for the tutorial!
XO
Heidi - Heart and Home
She's done it AGAIN! Beverly is SO creative:)
Thanks for sharing with us!!
Happy Weekend
Definately I would try this mirror project. I really like the look of it...great tutorial. I am now on a thrift shop search for the perfect mirror. Thanks for sharing...yours looks great!
Judi
PAH yours is SOOOO much better than anthros!!!!!!!!!!!! no kidding I would pay 500.00 for yours before I would theirs!! This will be my next project!!! Great job I love it
What a wonderful idea! Now I want to see what room you'll use her in.
What a wonderful tutorial! I will definitely be keeping an eye out for a cheap mirror to try it!
This looks amazing. I'm a follower of Beverly's blog and love what she does.
Post a Comment