


This Counter's the Tops! Tutorial from Anything Pretty
03 June 2010
Here is Jenny from Anything Pretty and her great contributor post!
There are many things I love about my “new” laundry room, and the counter is definitely in the top five. One of the reasons that I love it so much? It cost less than $50 and adds a modern pattern to a room of solids. The counter was actually the reason the project stalled in the first place. We got everything painted and new appliances but could not agree on a counter material and how to install it with the pesky outlets in the way. That dilemma took us more than 6 months to get over. Yeah. I am not sure what finally inspired us to use MDF (maybe the success with it on the craft desk?) but it met all the criteria: cheap, light (so that it could be supported around the outlets and the water hook-ups), and non-permanent so if our machines bite the dust our anger about that would not compounded of having to have to re-do an expensive counter as well. So like I promised here is the how-to:
 2. Cut the MDF to your desired size and screw it to the strips of lumber from the underside (make sure your screws are short enough so that they do not pop through the top).
 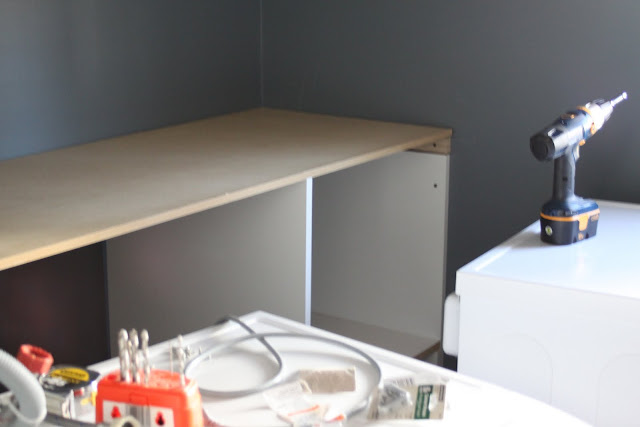 3.Add molding. We added molding in the front to cover the gap between the appliances and the counter since we had to hang it higher to accommodate the outlets. We also added a thin molding along the sides.
  4. Tape the walls and prime it! I used my favorite primer-Zinsser 123 because I love it (and because I already had half a can) 5. Apply two coats of white paint. For this project, no surprise but I used Ace cabinet and Trim paint in High-hiding white for the same reason of step 4. 6. I wanted the molding to remain white so I taped them so that design would end up being framed in white. 7. Now for the fun/frustrating part…putting down the pattern. I was inspired by this pattern by Three Men and a Lady and knew it would look perfect on the counter. Use a ruler to mark your desired grid size. For my counter I used 5 inches. Mark your measurement on one side of the tape.
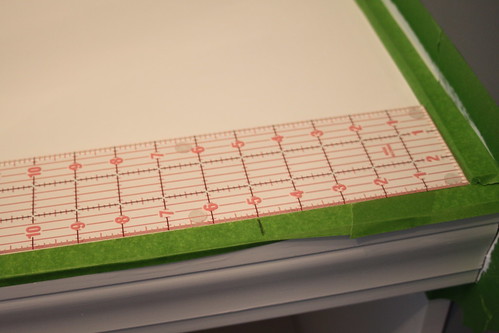 8. Then do the exact same thing on the opposite side.
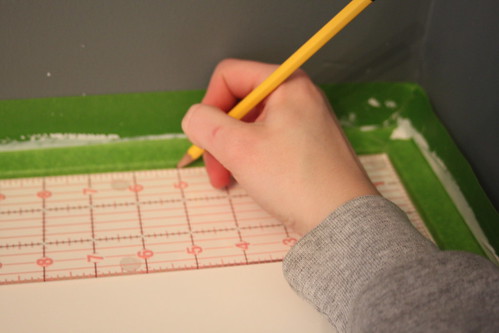 9. Use you laser level to set on the fixed setting (meaning it does not wiggle) line up the two marks and apply a piece of tape on the line.
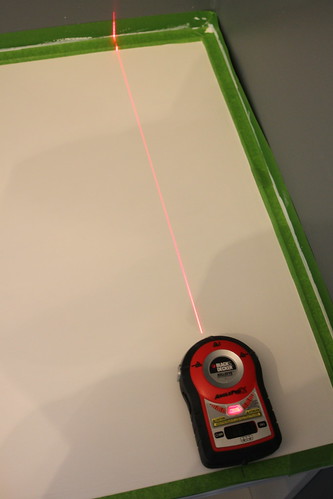 10. Re-measure and repeat step 9…..over and over as you move down the counter.
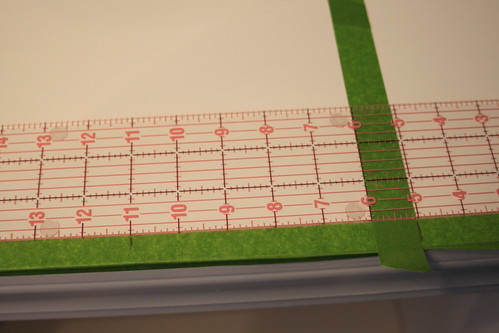 11. Now for the horizontal grid lines. Here is where I will show you what I did…and tell you to do it a different way. I started from the front and used the same measurement and the same technique.
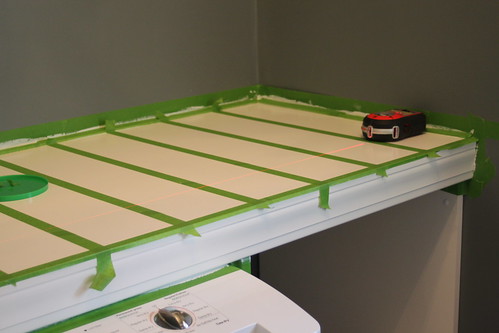 12. Then I realized that my final piece of tape would be right next to the back piece of tape. And that would look dumb.
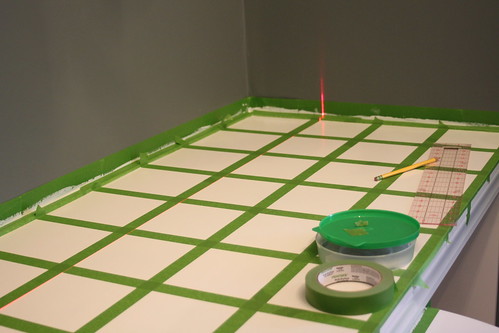 This is where the optional beverage comes in. So I may of said something and ripped off all the horizontal stripes that I just measured. I shifted the stripes slightly and put down new tape.
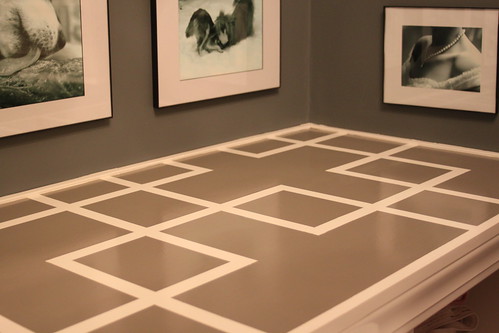
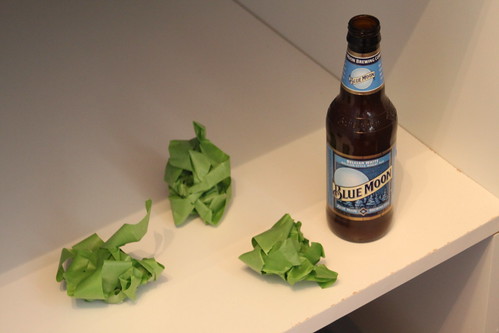 13. Now you have a grid pattern. I grabbed my inspiration picture and marked off sections that needed to be removed with the sharpie.
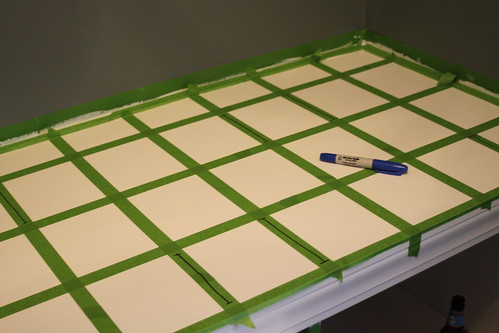 14. Then with the exacto knife and the ruler I removed the sections.
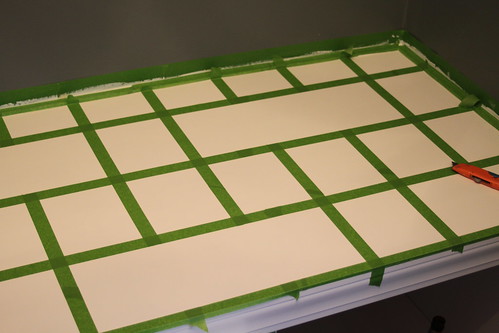 15. And then the finished design!
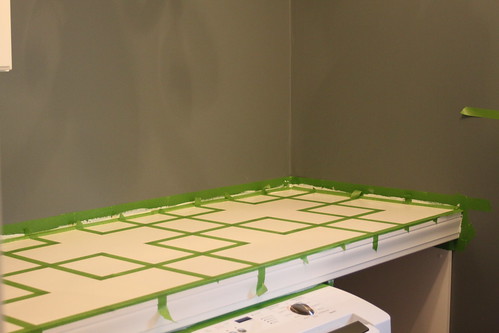 16. Apply two coats of your color. I used Dovetail by Sherwin Williams because we had it left over from the master bedroom and I thought the color would look great in there. The theme of this room-use what you have.
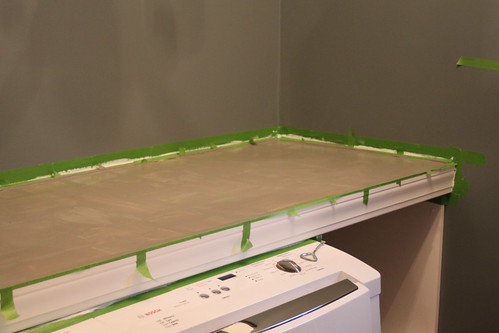 17. Remove the tape as soon as the second coat goes on (while the paint is still wet). I found this helps (along with using green frog tape) with bleeding. 18. Add polyurethane to protect the surface. Since there is the possibility of wet things being on the counter, I made sure to overdo it on the poly. I lost count, but I estimate that there are about 12 coats of poly on my counter. Luckily it dries quickly so you can add coats pretty quickly.
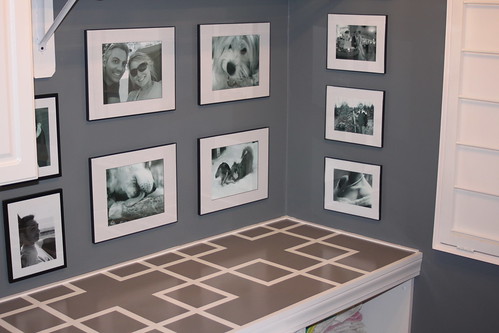
Materials-
Ruler MDF cut to the desired size Painter’s tape Laser level Primer Two colors of paint Screws Drill Molding Pencil Sharpie Exacto knife Polyurethane Alcoholic beverage (optional)How-To-
1. Install small strips of wood to support the counter. Make sure it is level and screw into the studs in the wall. 2. Cut the MDF to your desired size and screw it to the strips of lumber from the underside (make sure your screws are short enough so that they do not pop through the top).
  3.Add molding. We added molding in the front to cover the gap between the appliances and the counter since we had to hang it higher to accommodate the outlets. We also added a thin molding along the sides.
  4. Tape the walls and prime it! I used my favorite primer-Zinsser 123 because I love it (and because I already had half a can) 5. Apply two coats of white paint. For this project, no surprise but I used Ace cabinet and Trim paint in High-hiding white for the same reason of step 4. 6. I wanted the molding to remain white so I taped them so that design would end up being framed in white. 7. Now for the fun/frustrating part…putting down the pattern. I was inspired by this pattern by Three Men and a Lady and knew it would look perfect on the counter. Use a ruler to mark your desired grid size. For my counter I used 5 inches. Mark your measurement on one side of the tape. 8. Then do the exact same thing on the opposite side. 9. Use you laser level to set on the fixed setting (meaning it does not wiggle) line up the two marks and apply a piece of tape on the line. 10. Re-measure and repeat step 9…..over and over as you move down the counter. 11. Now for the horizontal grid lines. Here is where I will show you what I did…and tell you to do it a different way. I started from the front and used the same measurement and the same technique. 12. Then I realized that my final piece of tape would be right next to the back piece of tape. And that would look dumb. This is where the optional beverage comes in. So I may of said something and ripped off all the horizontal stripes that I just measured. I shifted the stripes slightly and put down new tape. 13. Now you have a grid pattern. I grabbed my inspiration picture and marked off sections that needed to be removed with the sharpie. 14. Then with the exacto knife and the ruler I removed the sections. 15. And then the finished design! 16. Apply two coats of your color. I used Dovetail by Sherwin Williams because we had it left over from the master bedroom and I thought the color would look great in there. The theme of this room-use what you have. 17. Remove the tape as soon as the second coat goes on (while the paint is still wet). I found this helps (along with using green frog tape) with bleeding. 18. Add polyurethane to protect the surface. Since there is the possibility of wet things being on the counter, I made sure to overdo it on the poly. I lost count, but I estimate that there are about 12 coats of poly on my counter. Luckily it dries quickly so you can add coats pretty quickly.
  Labels:
How To,
Laundry Rooms,
Painting,
Tutorials
Labels:
How To,
Laundry Rooms,
Painting,
Tutorials


7 comments:
Mr. Man says "that's a wimpy laser level."
I say, "Oooh! Pretty!!!!!!!!!"
SUPER COOL=0)
xoxo,
Carol
Now that is one good looking laundry room!
I am so loving the design on your counter and the color on your wall! :)
Oh wow! I love it. I might steal this idea to make a counter/folding table in our laundry room... so cool!
Thanks for the inspiration!
~Chelsea
Gorgeous! I've got some laundry-room envy going on now.
my goodness... that is so pretty. I hate my laundry room... it is open to the kitchen and it is one awkward space.... i love this idea! Brilliant...
By the way, I just found your blog... I have been reading it now for at least 45 min. Thanks for the inspirations!
Post a Comment