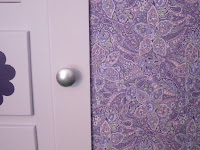
Dressing Up An Old Dresser Cabinet
28 March 2011
Remember waaaaaaaaaaay back here when I found this cabinet, last October?!?
Well Dave refused to even help get it outta my car and would not let me bring it inside..so it sat on our porch for a few days...seriously it did...then it started to rain and I snuck it inside while he was at work...but where do you hide something that BIG?!? I couldn't so I just jammed it in the laundry room (1 room he NEVER uses! HA HA) Then soon after it got moved out to the shed where all my large "sometime" projects and curb shopped items reside until I finally get moving on them, or rather he threatens to burn them! There is a paper tag on the back that reads "Montgomery Wards made for W. McMillan - Canandaigua NY - 1938" which is pretty cool if you ask me!
The playroom addition is almost done, just waiting on the carpet guy to come and install it, followed by a few more finishing touches. We couldn't afford to hire someone to finish the drywall so that's why its been so long since my last post on the secret room! The big reveal will be sometime soon I hope!! Since we are so close to "moving into" the new space I started to work on the cabinet this week since all along I intended it to house the girls dress up clothing! I was so excited to finally get it out and working on it that in just 3 days its DONE!!!


18 comments:
OOOH love the after! SO PRETTY!!!
http://www.iheartmygluegun.com
WOW! LIKE REALLY WOW! I wish I could do things like this. Maybe if I just try I might be surprised but the fear keeps bound! BUT really you did an AMAZING job!
I love it!!!! Your husband sounds like mine - "What are you bringing that into the house for" But - I hope you showed him that some things are worth keeping - great transformation!
That is awesome!!
That is awesome, so clean and pretty looking! Love it. Great Job!
WOW that's quite a transformation! I love the chalkboard flowers!
Really nicely done! I have an old vanity I'm looking to re-do and you have such inspirational ideas!
What a pretty piece of furniture! Love the lines. Your handiwork is awesome!
Huge transformation, looks great!
I am absolutely loving this dresser. Your girls are so lucky to have such a talented Mom.
That is fantastic work!
WOW! LOVE it!
Great redo! It looks great!
This turned out gorgeous :) Great job!!!
Love the redo ... but love the story even more! It's the story of my life -- grabbing stuff that I know can be reworked, hubby rolling his eyes, me squirreling it away and hopefully, eventually making it into something.
I have a rocking chair "hiding" in my dining room right now. Not sure he even knows it's there! (we've been eating in the kitchen all week).
Nice job!
~Tanya
www.necessarypleasures.blogspot.com
That is just incredible! The girls will love it! Even DH will have to concede to your brilliance! LOL!
Wow! I love seeig others trash to treasure! How did you cover the door panel with fabric? Glue?
What a transformation!!
Post a Comment