We’ve Moved!


If you aren’t redirected here is the link:


Remodelaholic!


THANKS!

Showing posts with label Tutorials. Show all posts

Upholstered Nail Head Trim Headboard Tutorial

17 October 2011

Upholstered Nail Head Trim Headboard Tutorial


Ahhh, sweet success!
My headboard is FINALLY COMPLETE!
Click if you wanna hear the planning details and the search for all my budget friendly materials cause this post is about the actual construction.

Read more...

Ombre Painted Chevron Curtains Tutorial

03 October 2011


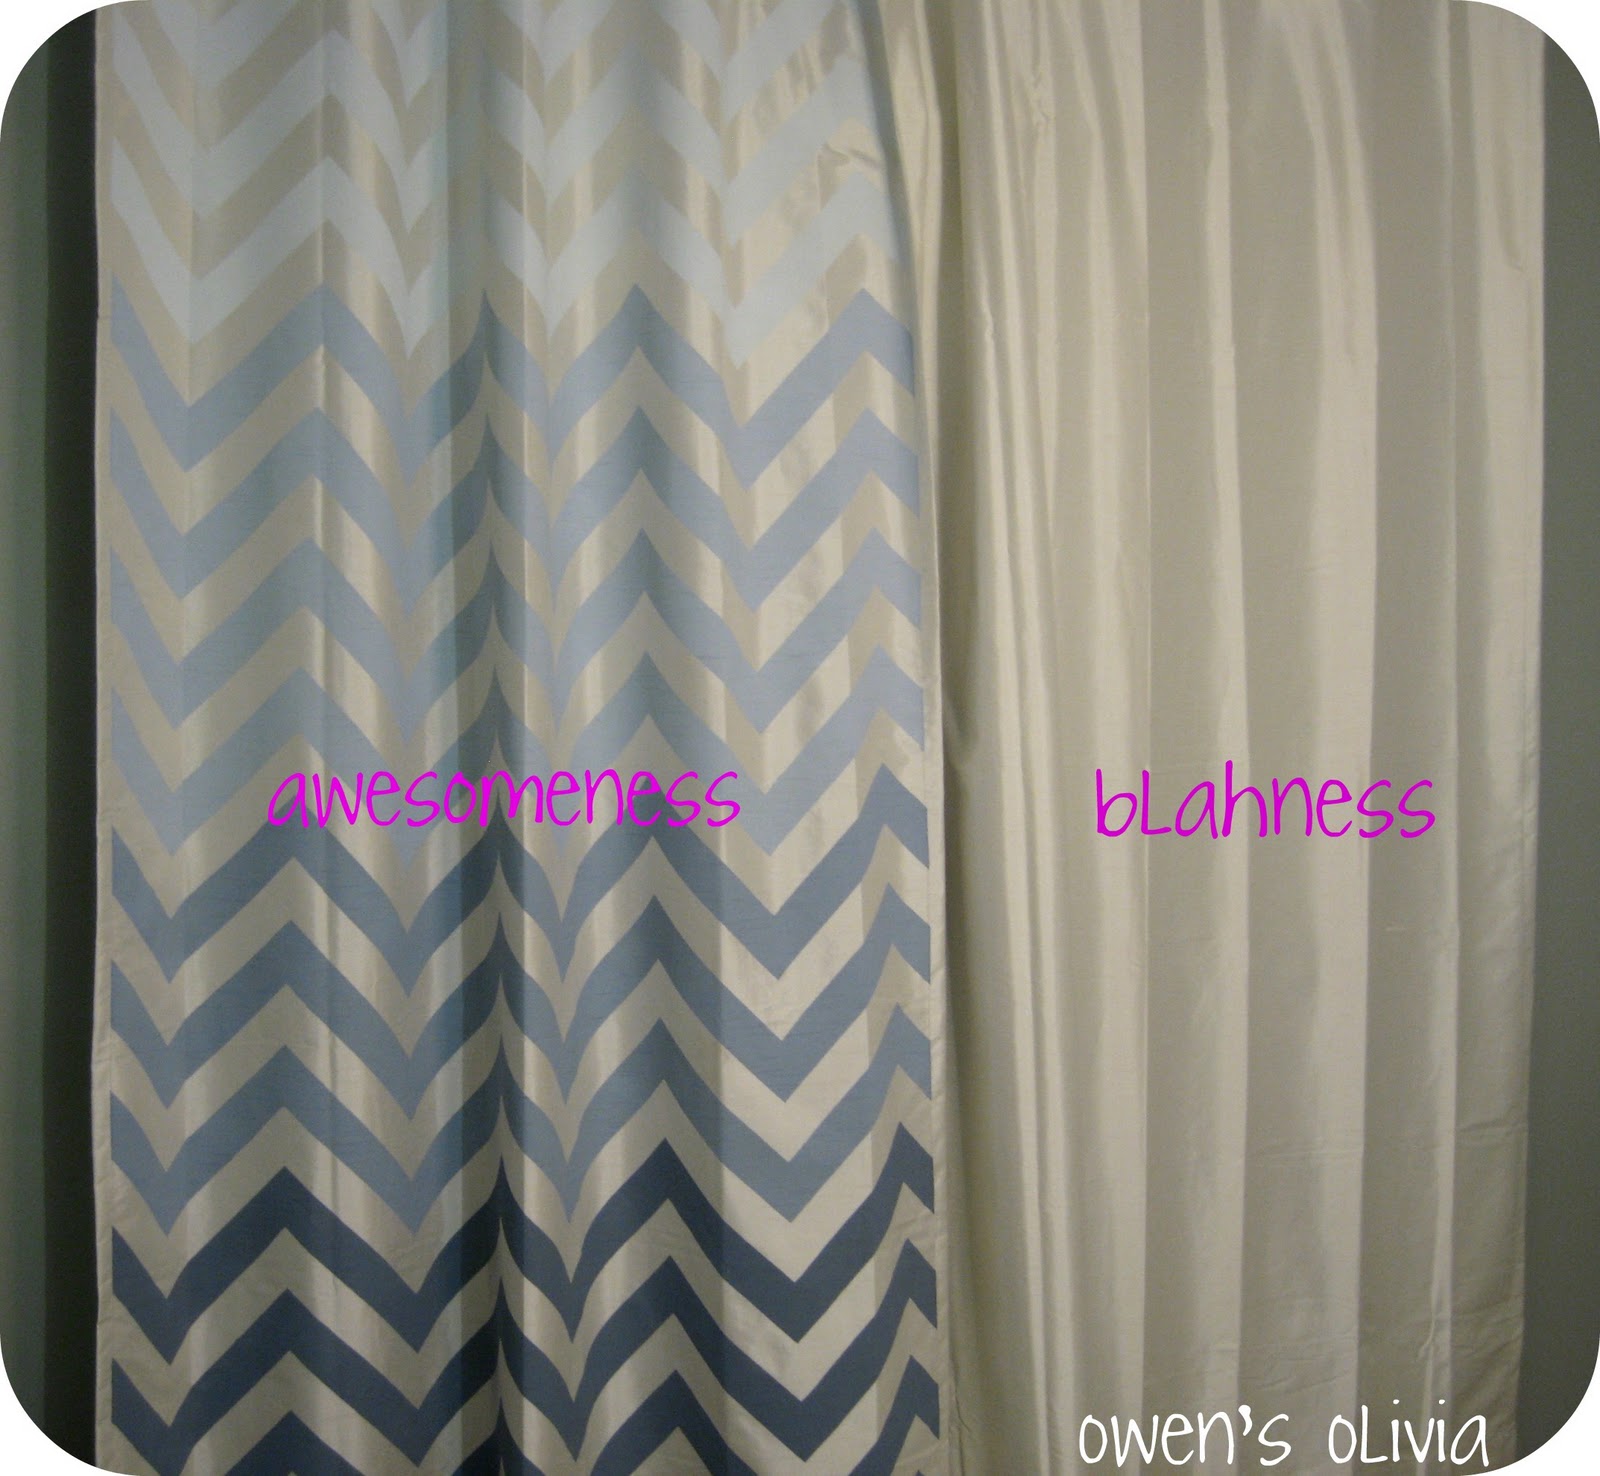
Ombre Painted Chevron Curtains Tutorial

Thank you so much Cassity for having me!  I am delighted to be here today.  I blog over at Owen's Olivia, where I focus on design, fabric, DIY, and anything else that catches my eye.  It has been a wonderful creative outlet for me, so it makes me happy that others are enjoying reading about my journey.  I have only been blogging for three months now, so I am truly honored that Remodelholic has noticed my work!  
My husband attends NCSU for electrical engineering (B-O-R-I-N-G :) while I stay at home with our son, Owen.  I am very blessed to be able to dabble in my creative affairs and tend to Owen while my husband is off doing all the dirty work.  He is awesome.

  It has been a sloooow process converting our guest bedroom into a room for Owen.  Seriously, he'll be 15 by the time I am done with it.  Curtains were the first thing on my to-do list.  I knew that I did not want to make curtains (though I do like to sew), and Ikea is not within driving distance.  I needed something fun and playful (but not too baby like) that blocked out light.
 
Hard work aside, painting these curtains are incredibly easy to do!!  ANYONE can paint these curtains and make them look custom.  You can even take this process and do a completely different design.  The sky is the limit.  Do not let all my pictures and steps trick you into thinking there is much to do or painting curtains is cumbersome.  I just take a lot of pictures, and I am literally walking you through every step!  If you are visual person like me, you can probably get by just by looking at the pictures.

Items needed for chevron curtains:

Curtain panels
Painter's tape ~ 1, 2 or 3 inch wide (my chevrons are 2 inches wide)

Speed square or some other form of a template (if making a template you will want your corner to be a perfect square or 90 degree angle)
Paint (I bought 4 sample cans from Lowe's)


Please note that there are many different ways to apply a chevron design to fabric.  This is a way that works best for me for this particular project.  You may find a faster way to apply the design. 

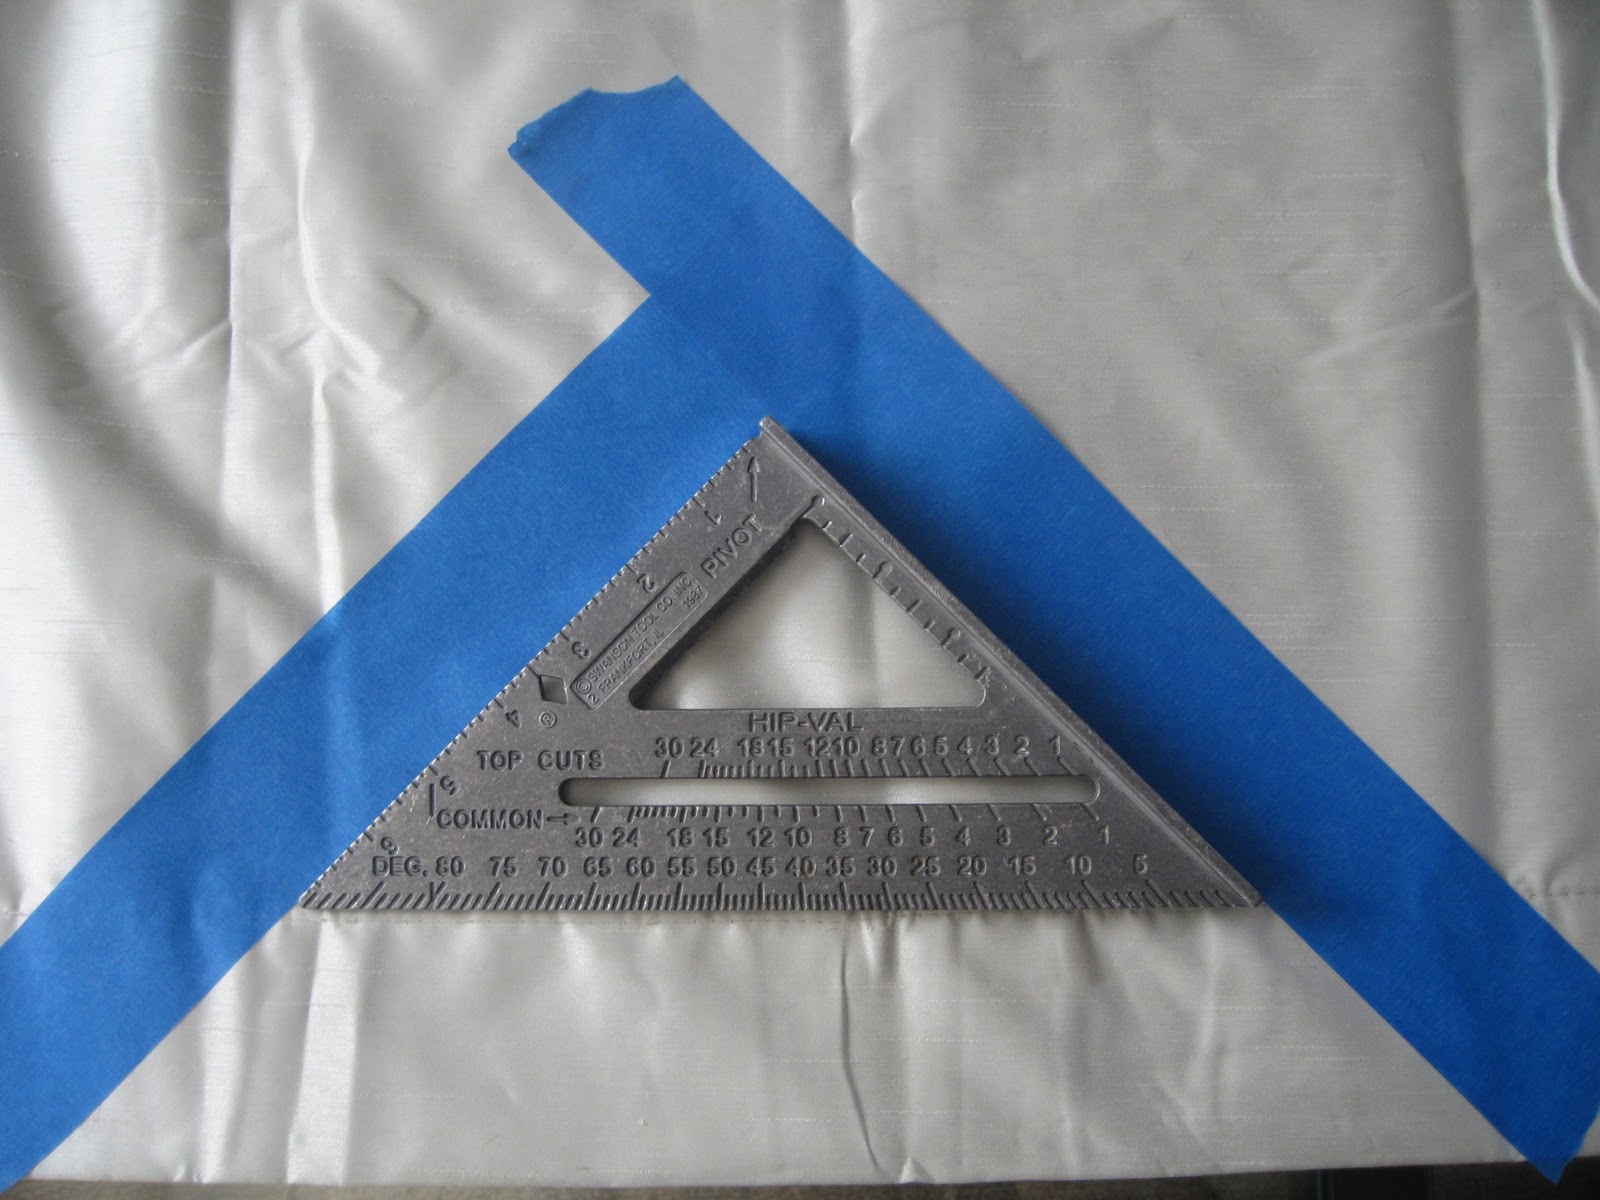
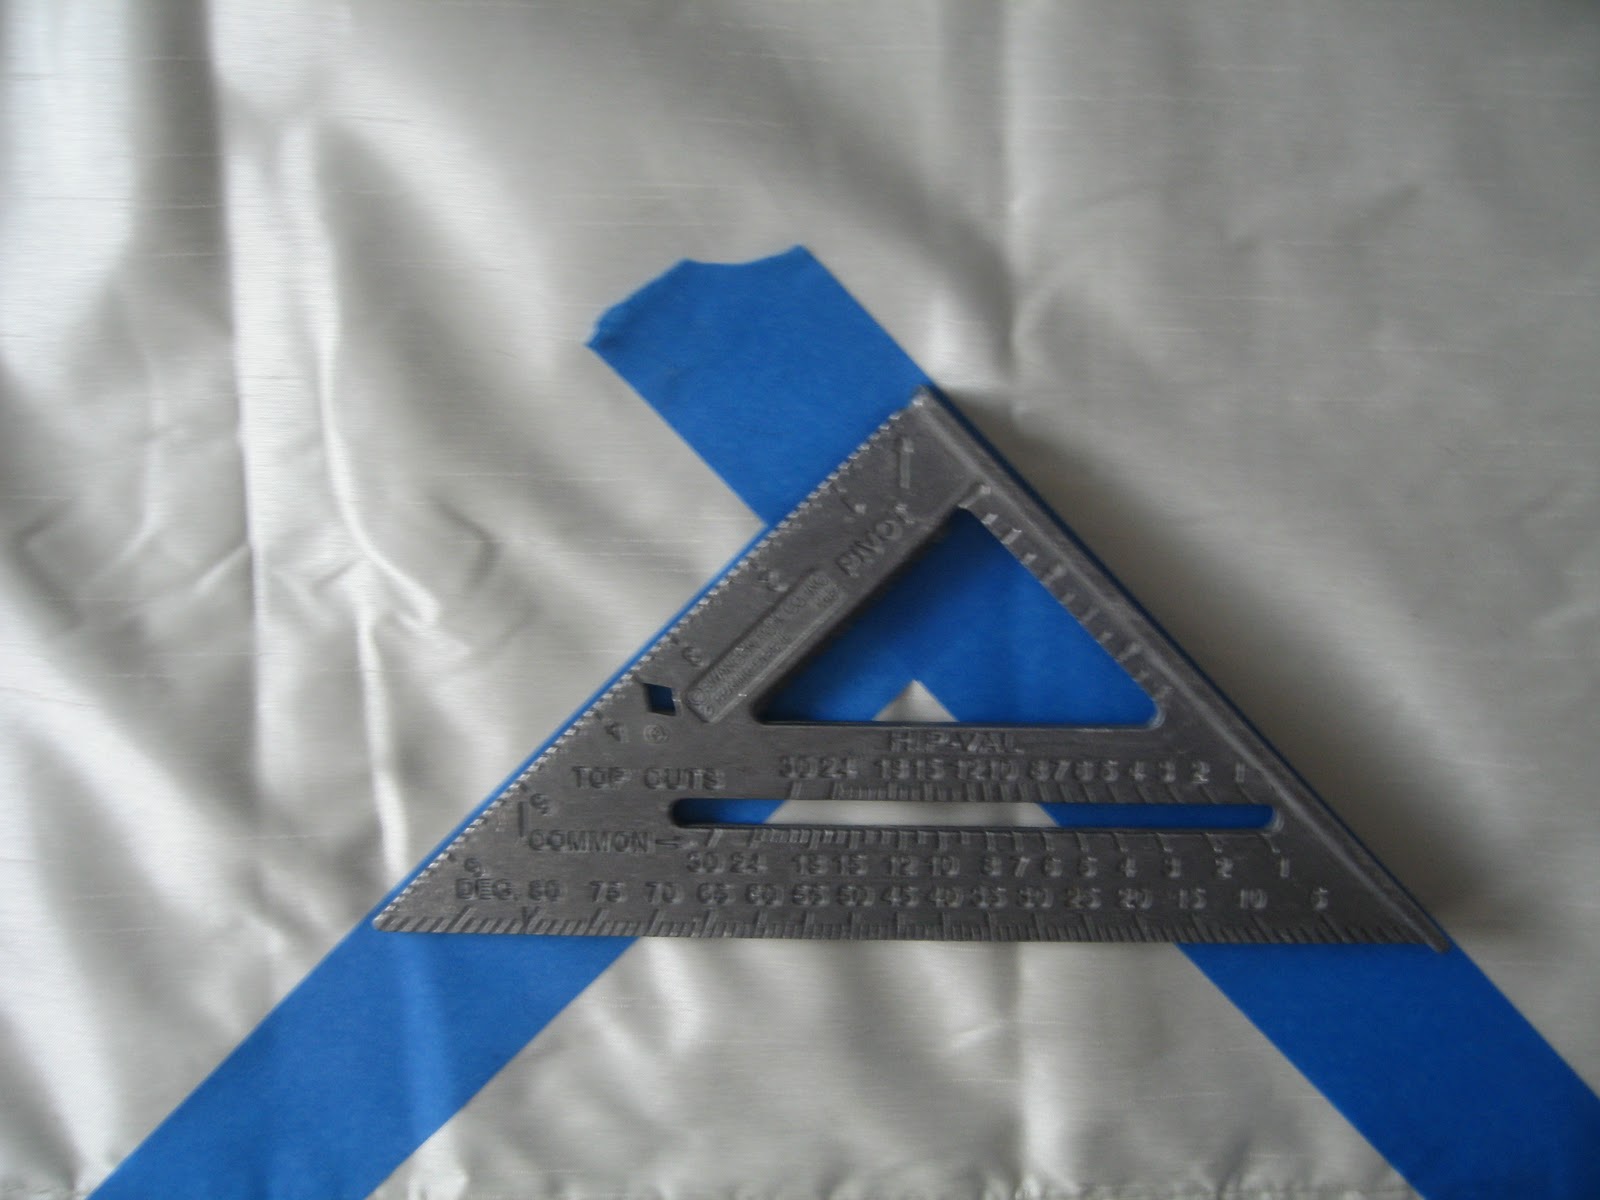
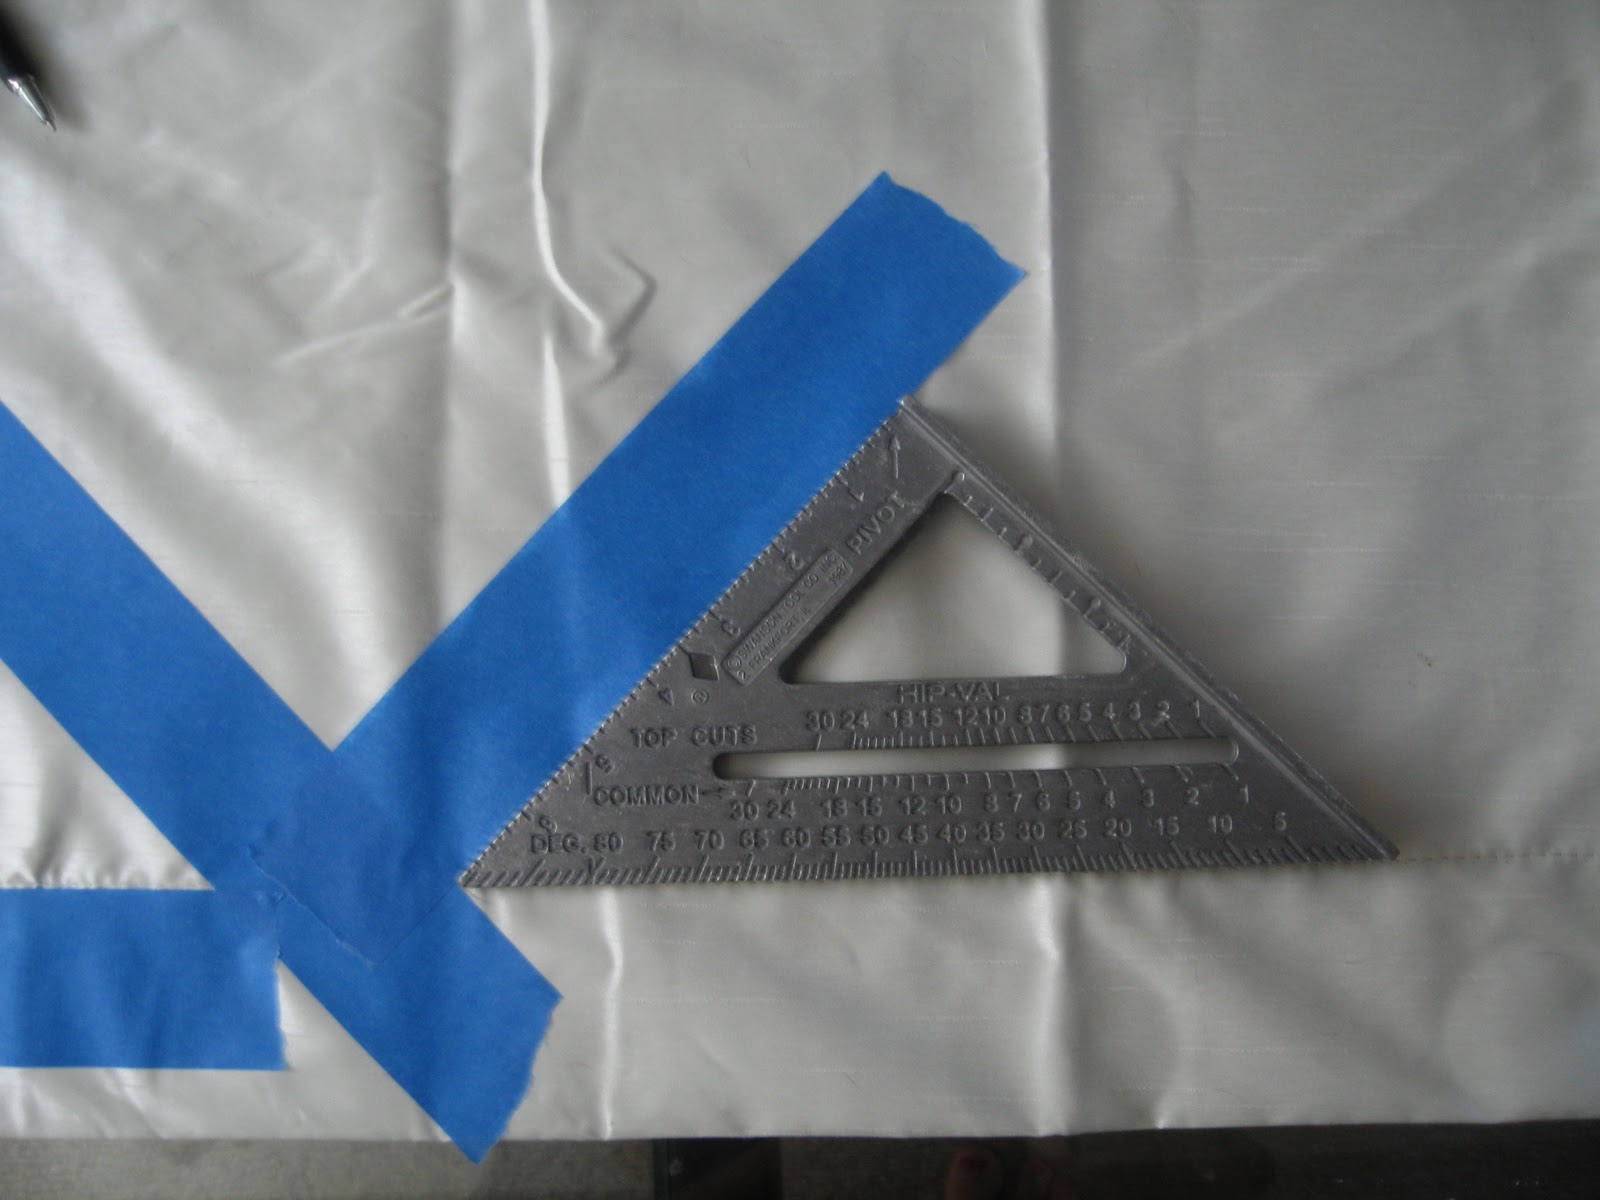
Step 1.  Place the speed square just above the curtain's hemline.  Tear off two pieces of tape, and place it along either side of the speed square. 


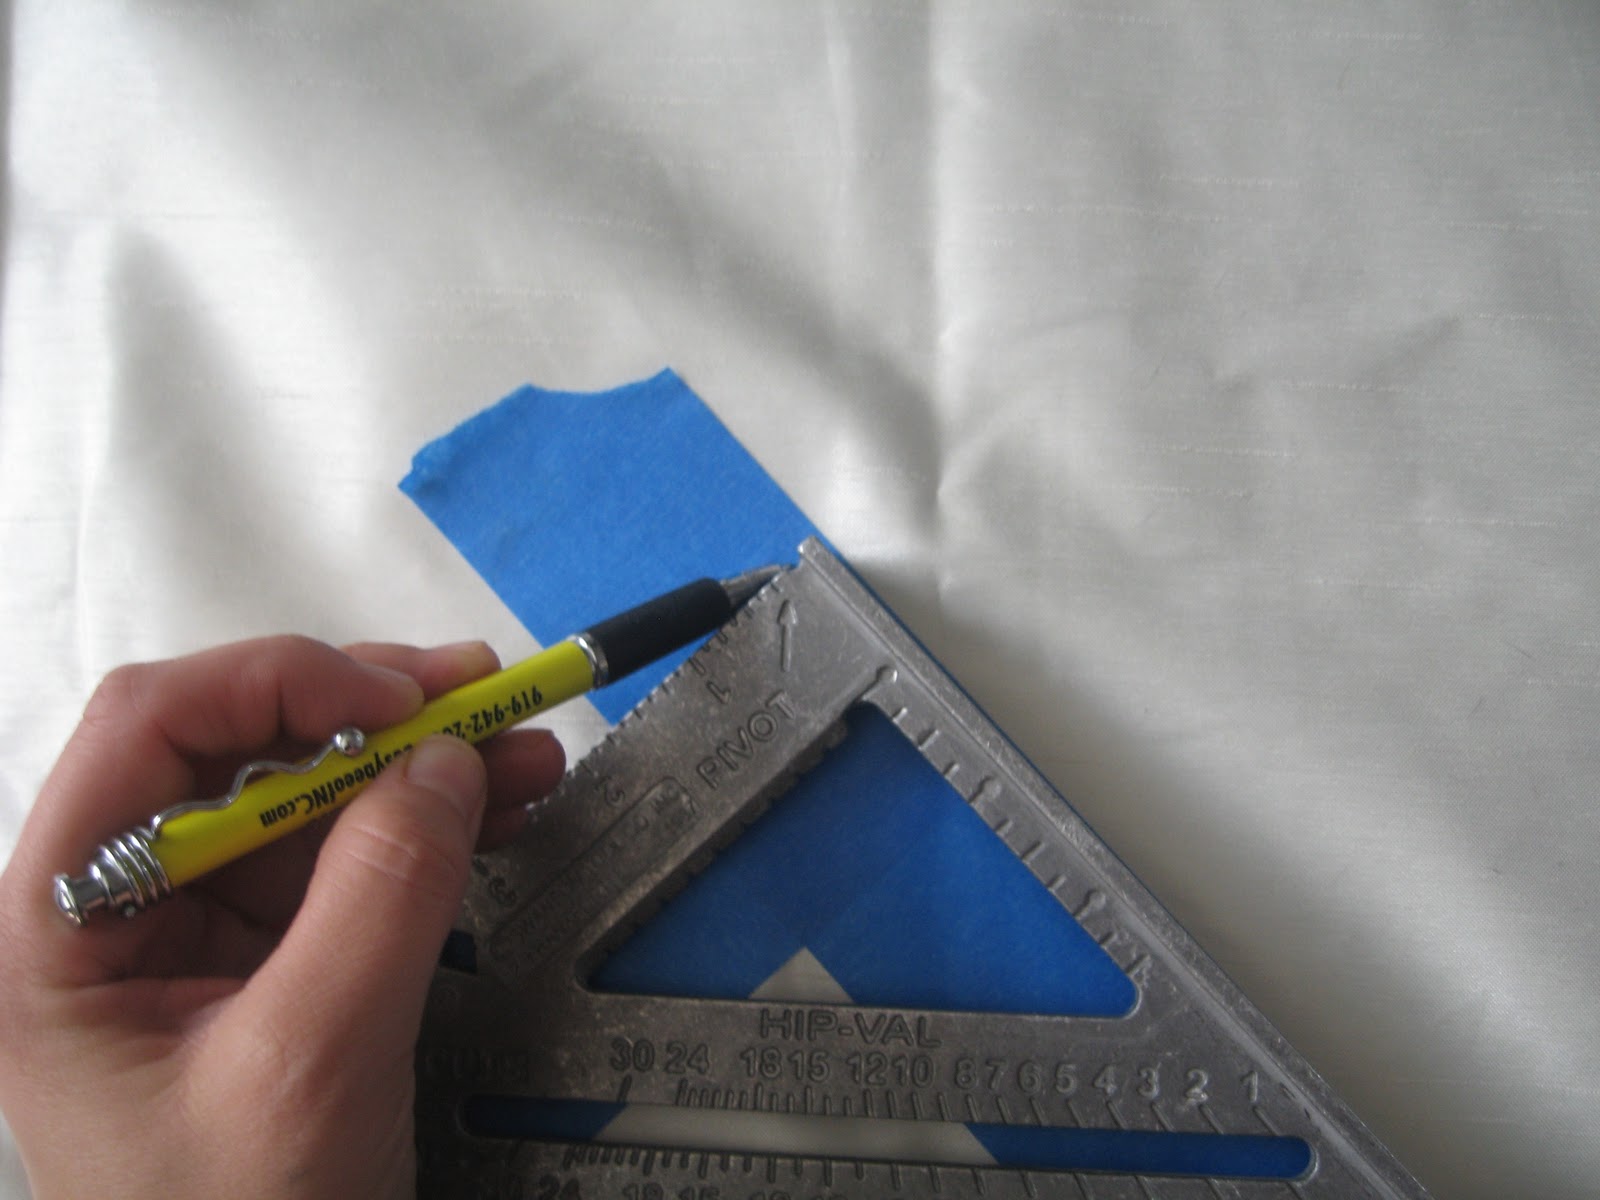
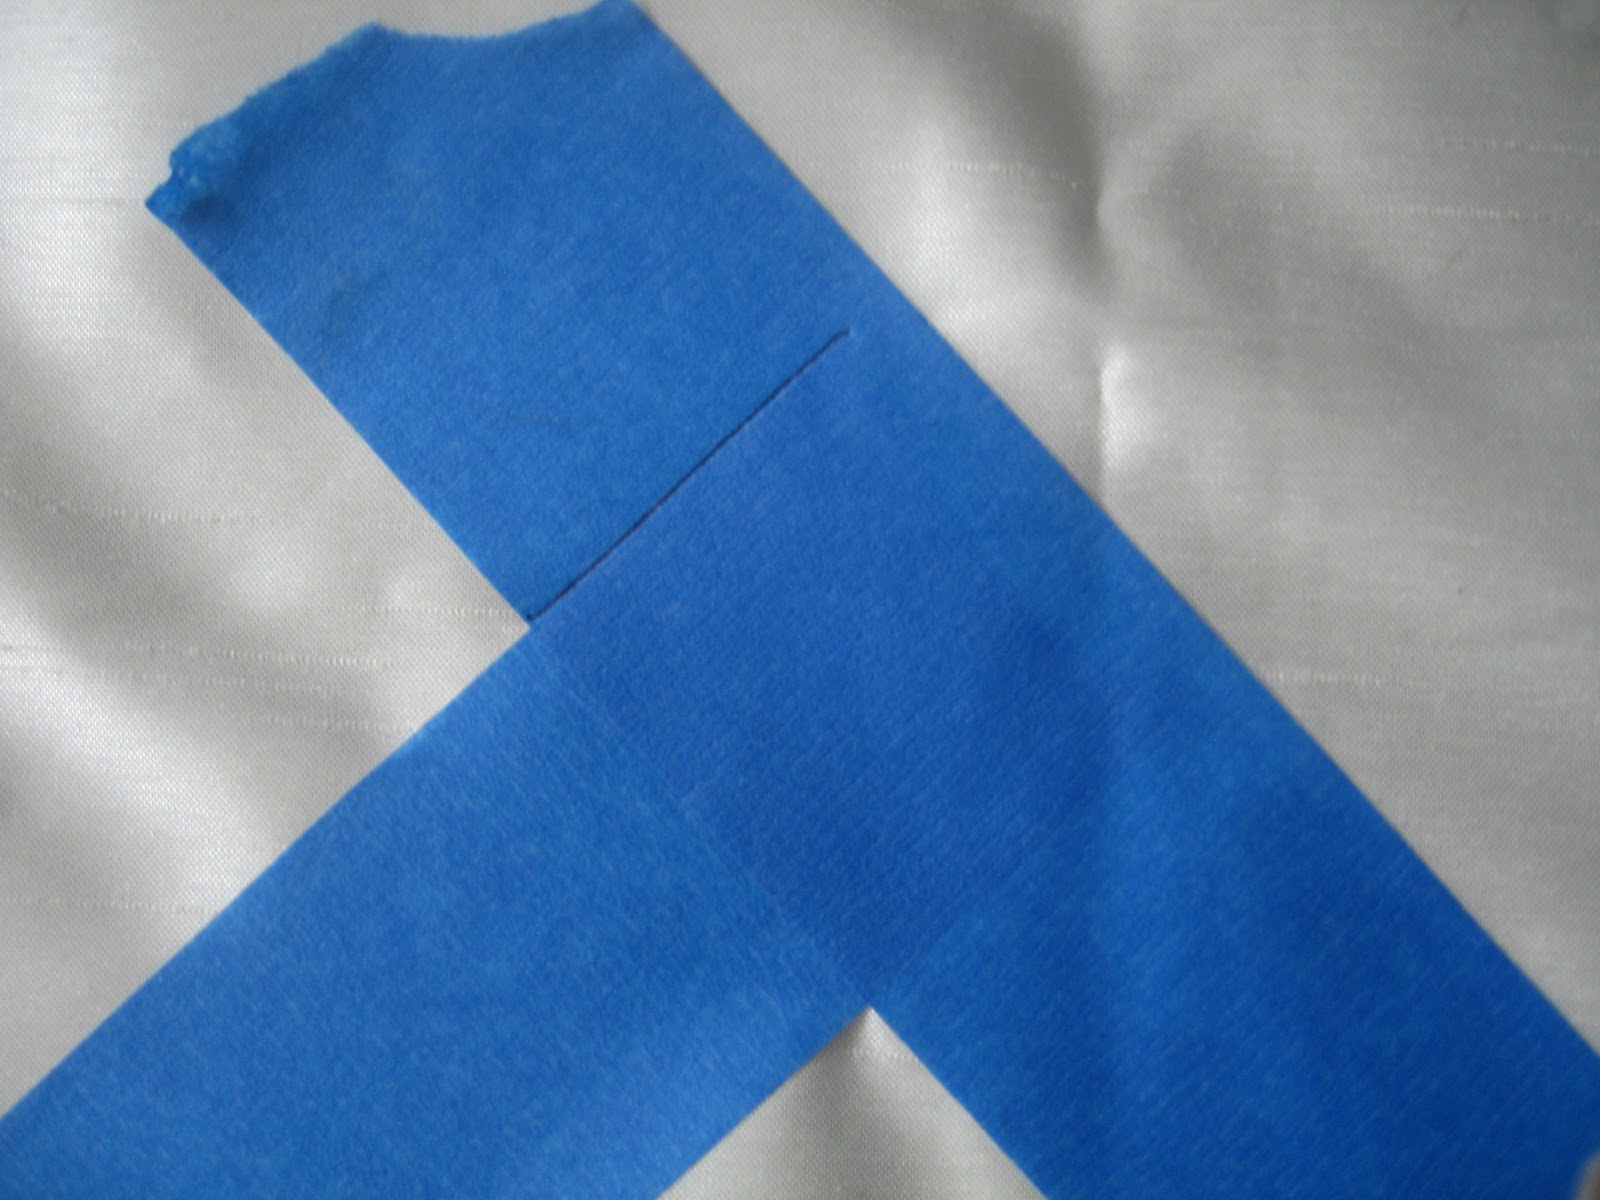
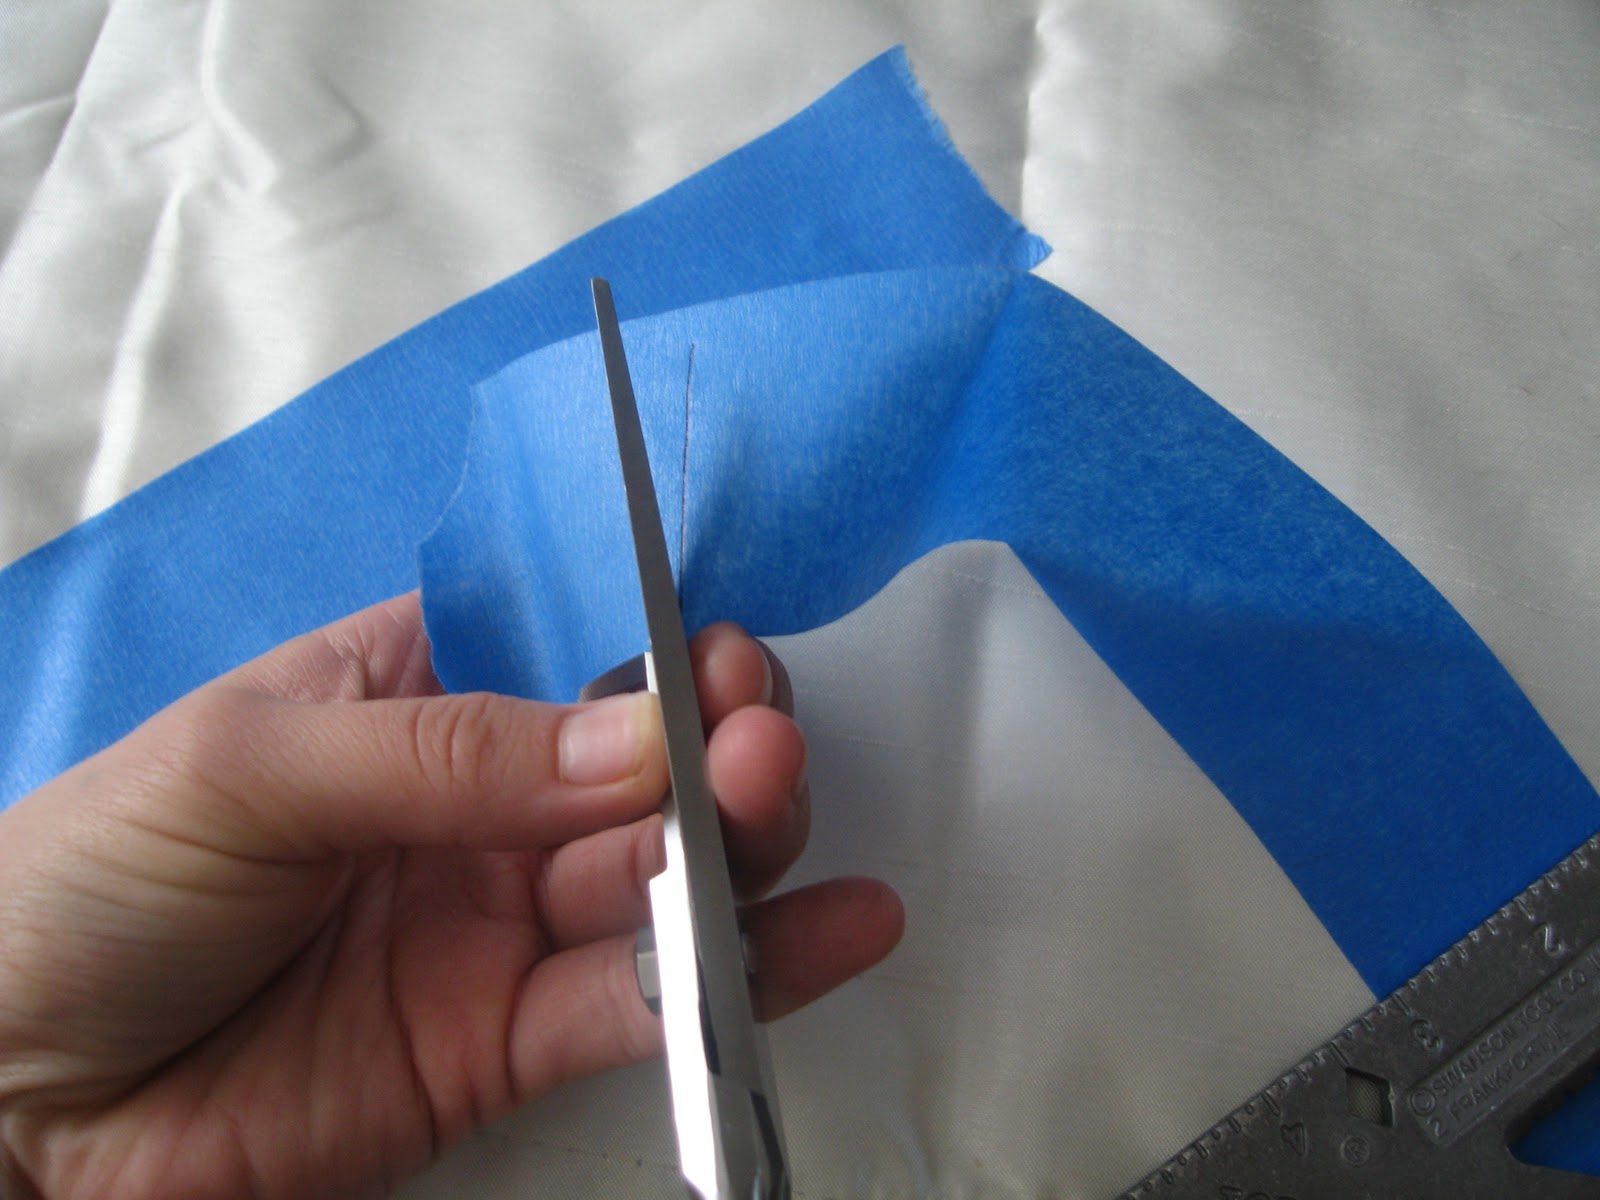
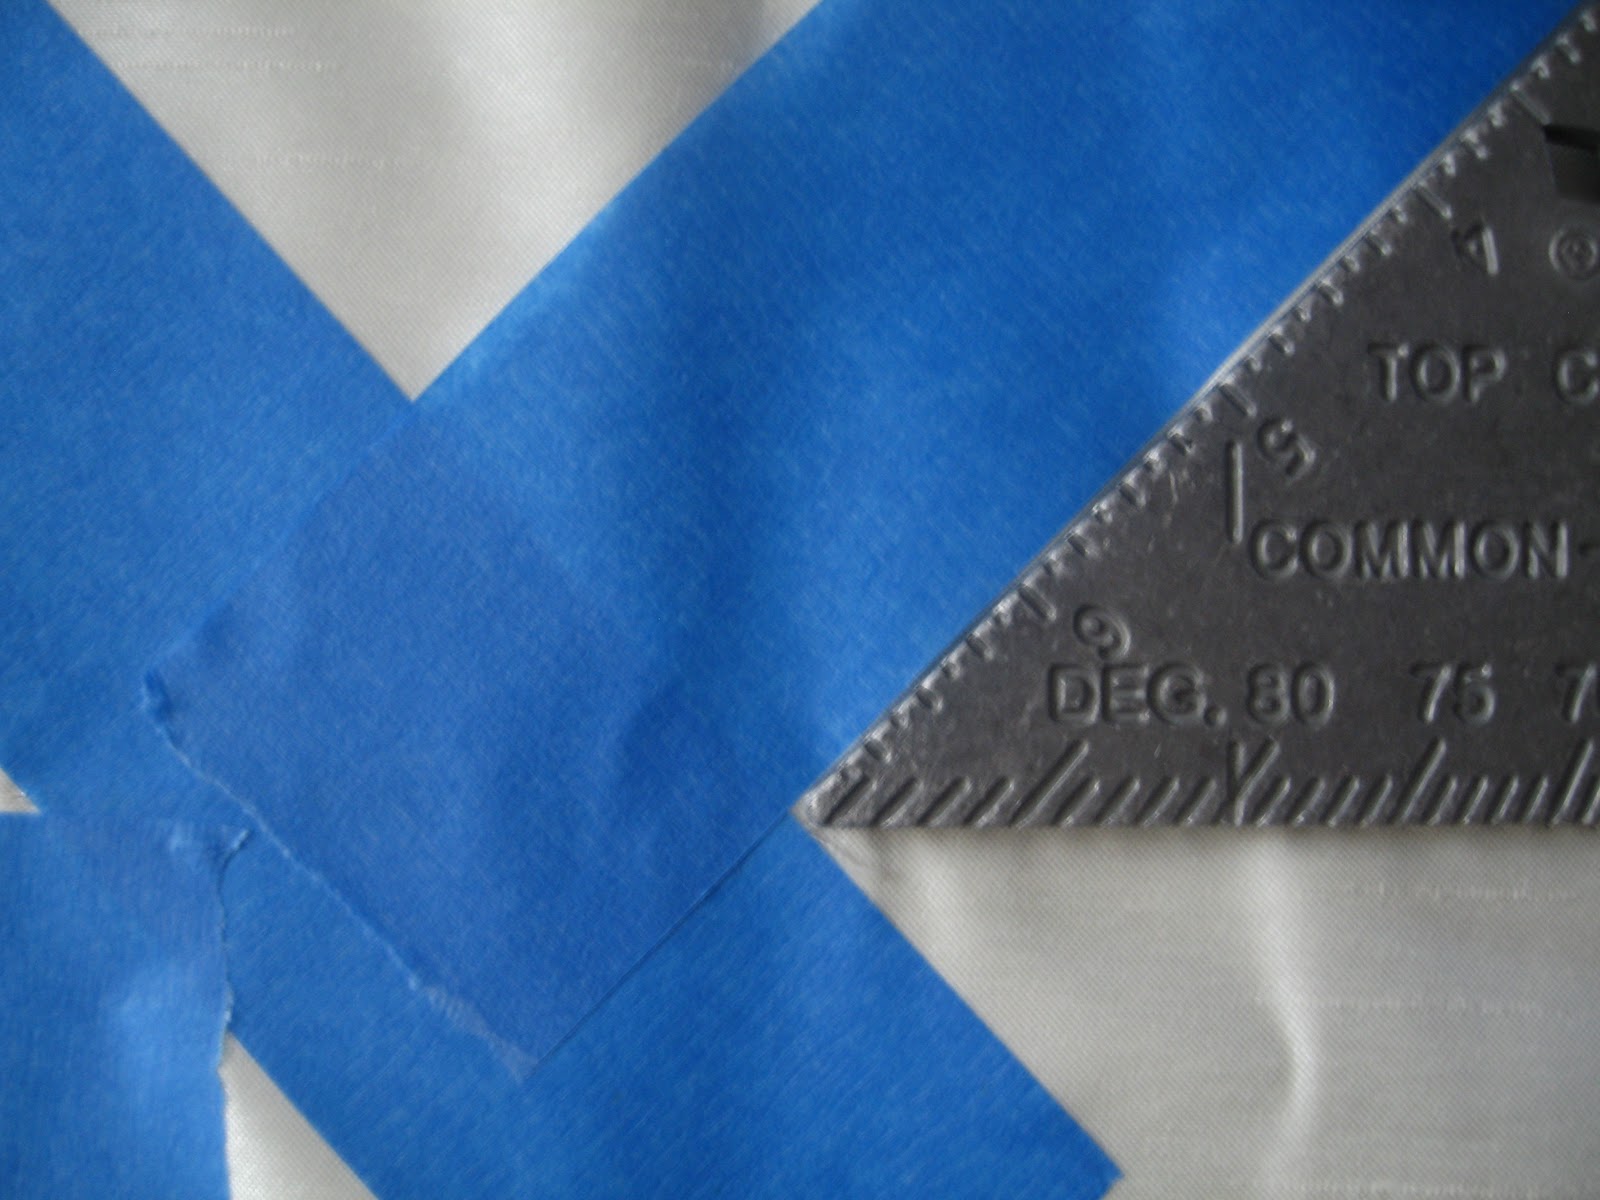
Step 2.  Place the speed square at the top of your chevron point.  Draw a line.  Cut the tape along that line, so you create a perfect tip for you chevron.


\


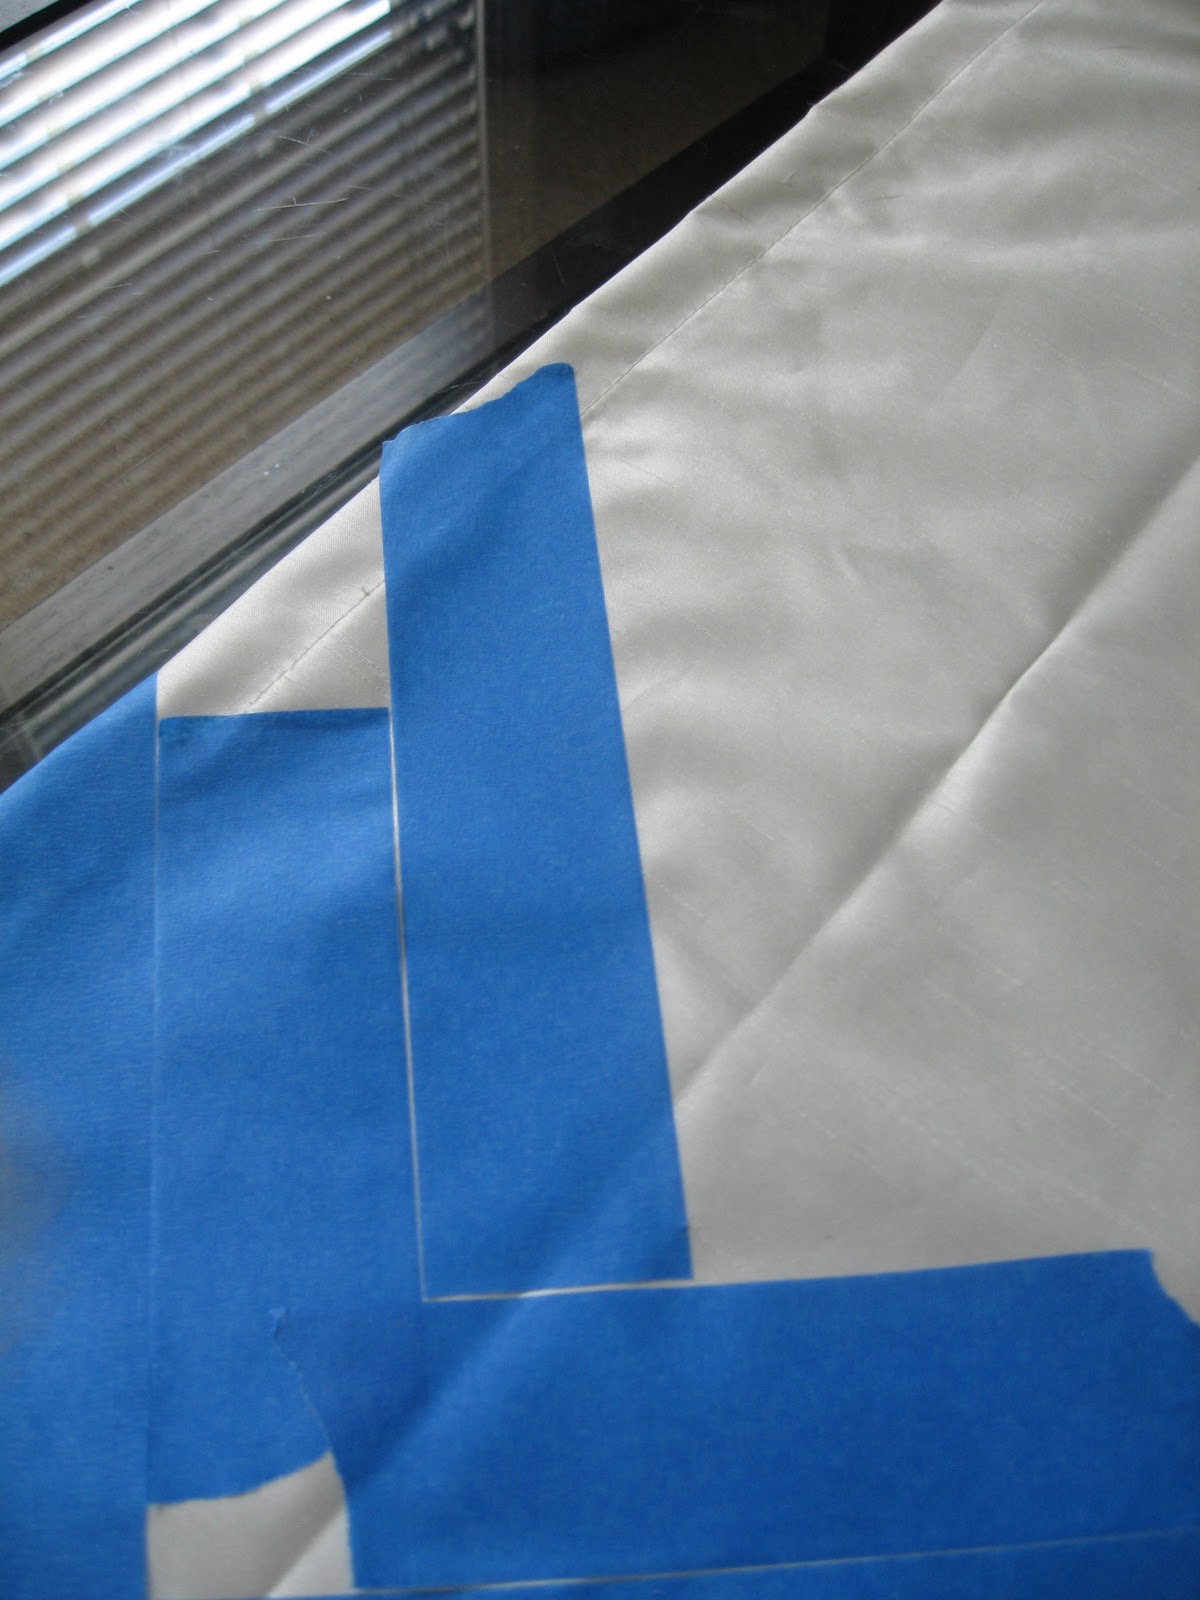
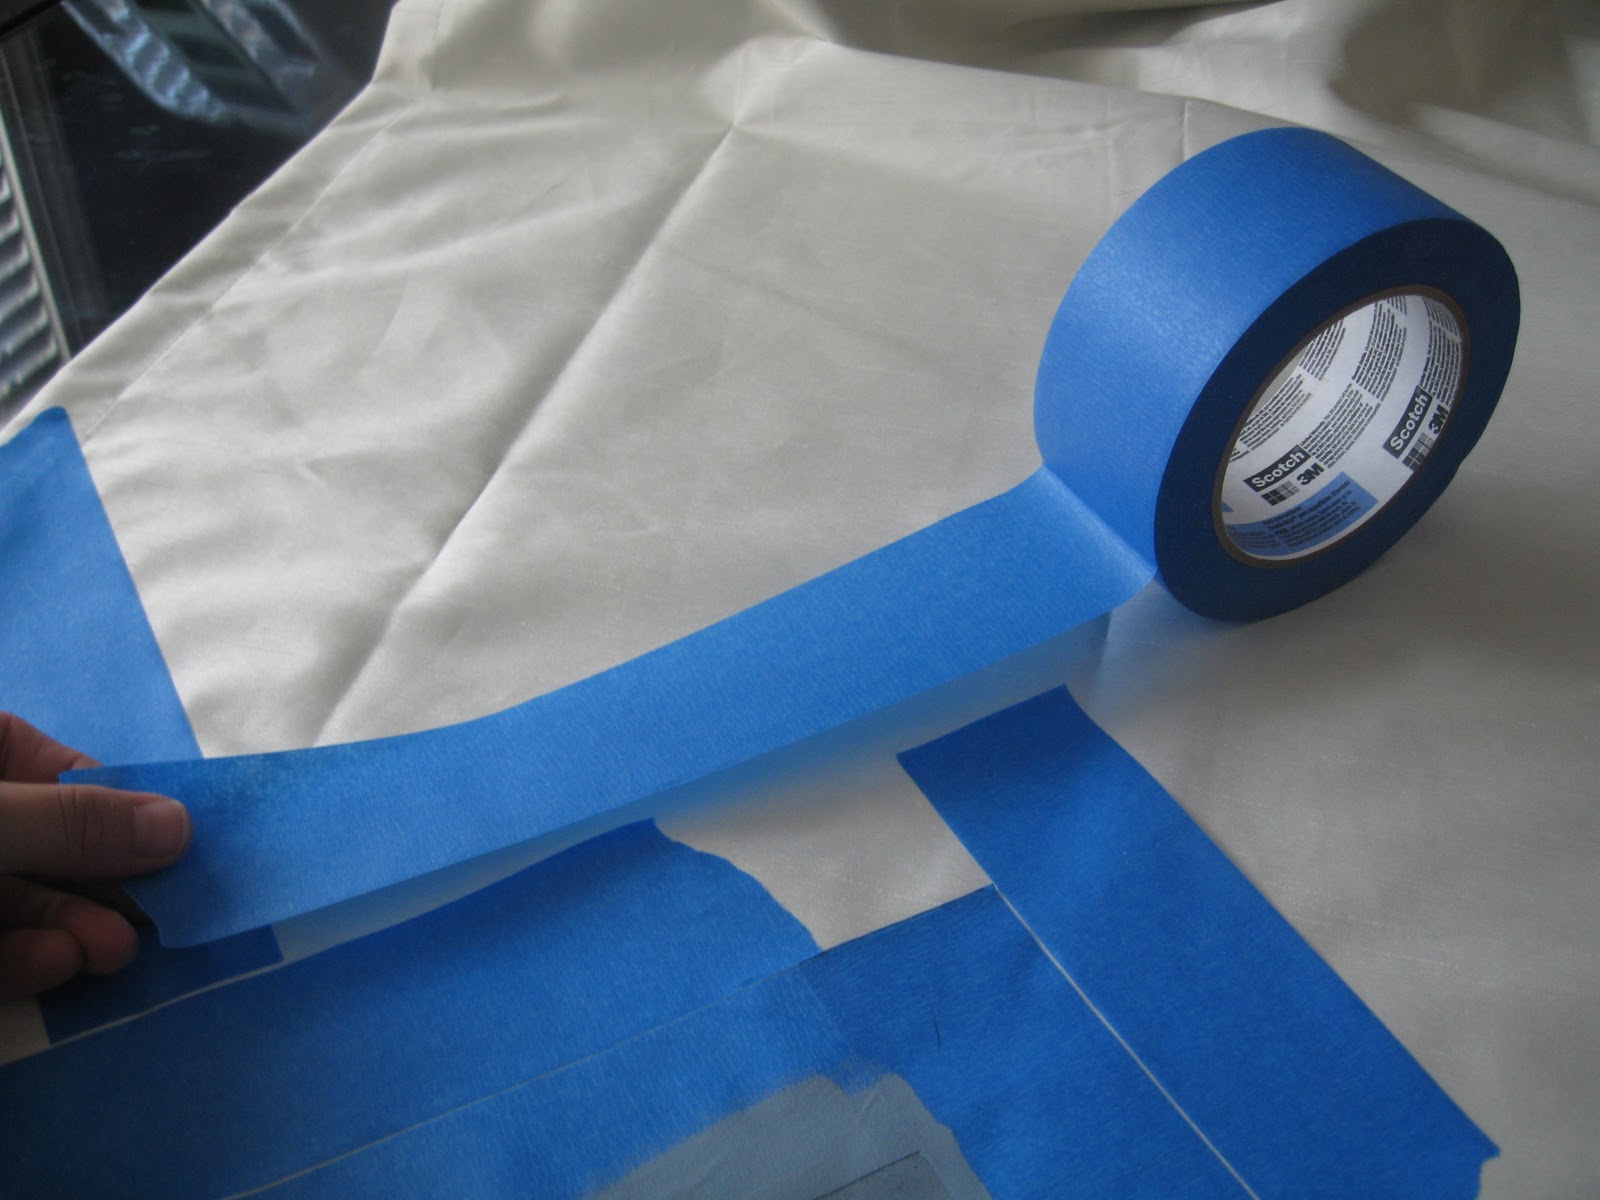
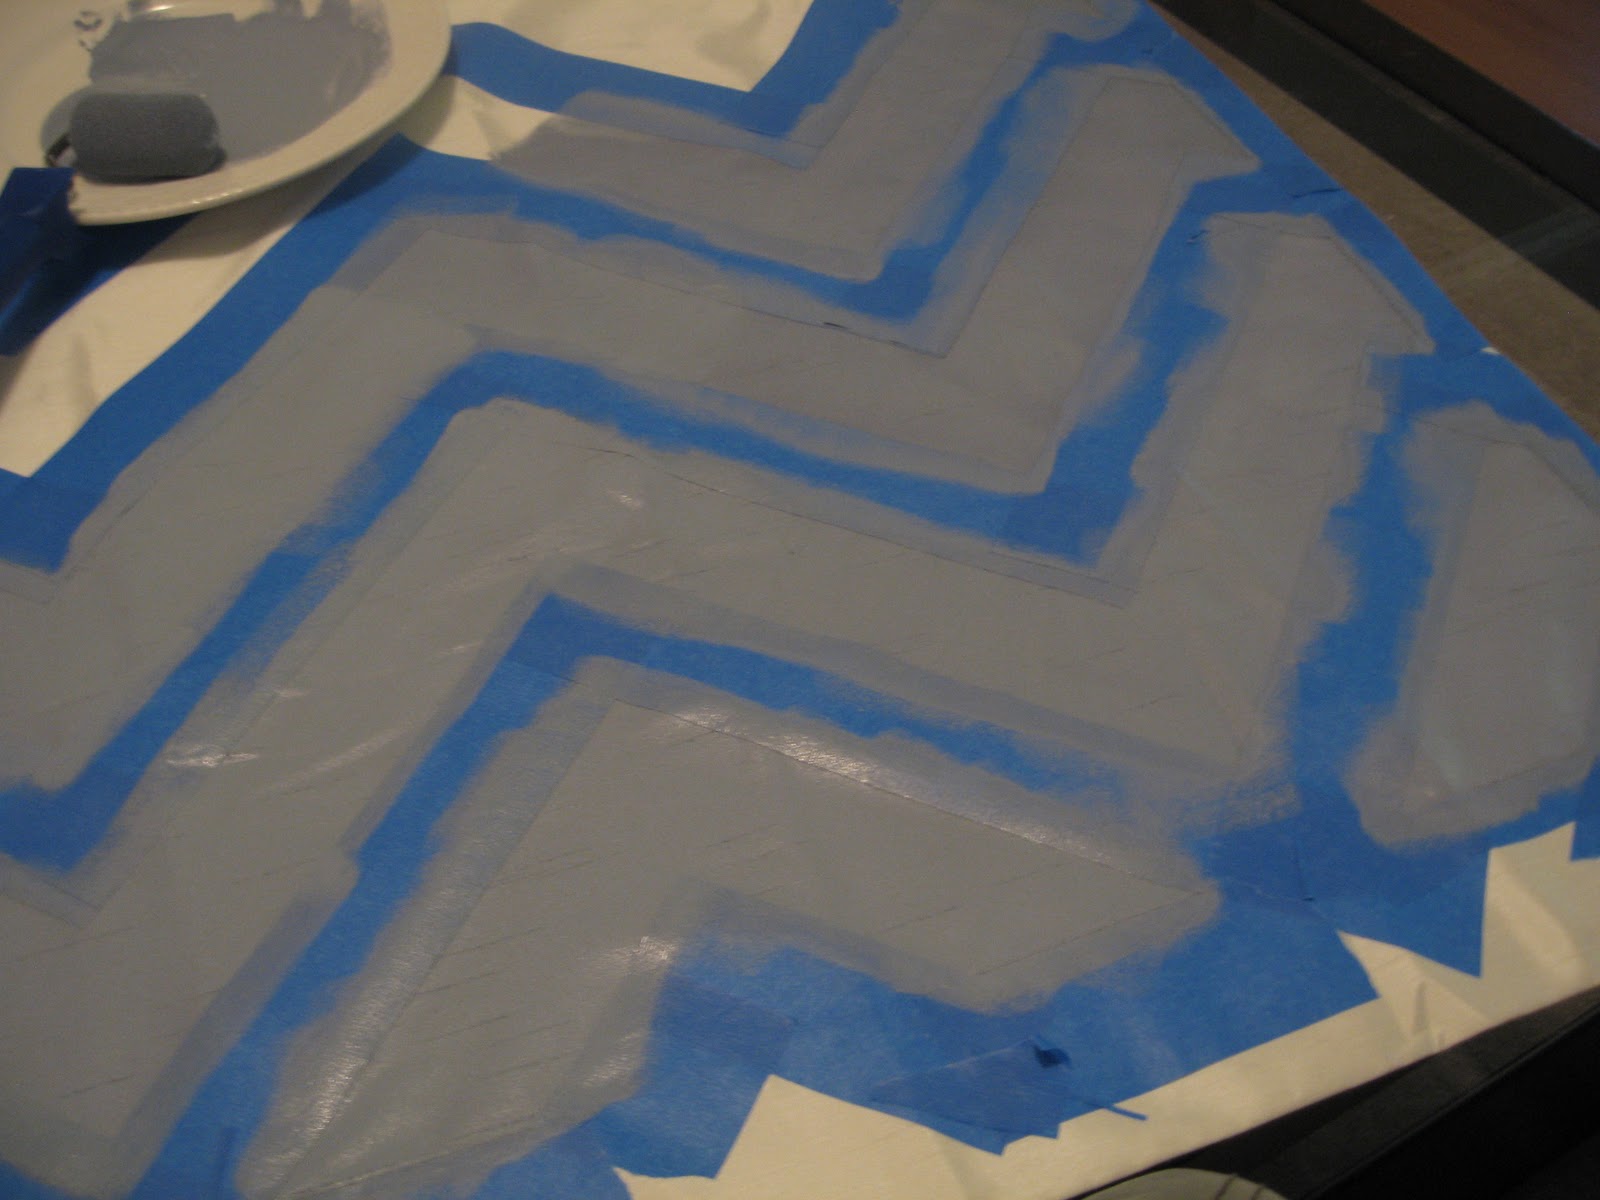
Step 3.  You will now use your tape as your template for length and width.  Because my tape is 2 inches wide, my chevrons will be 2 inches wide as well.  Place two pieces of tape next to the inside of your blue tape.


Okay, don't worry about that glob of curtain showing there in the corner.  Those two pieces of tape will be removed.  I just needed those in place to create a nice point and V.   Once those are taped down, repeat Step 3. 


I taped off where I do not want paint, so I placed tape along my hemline.
 

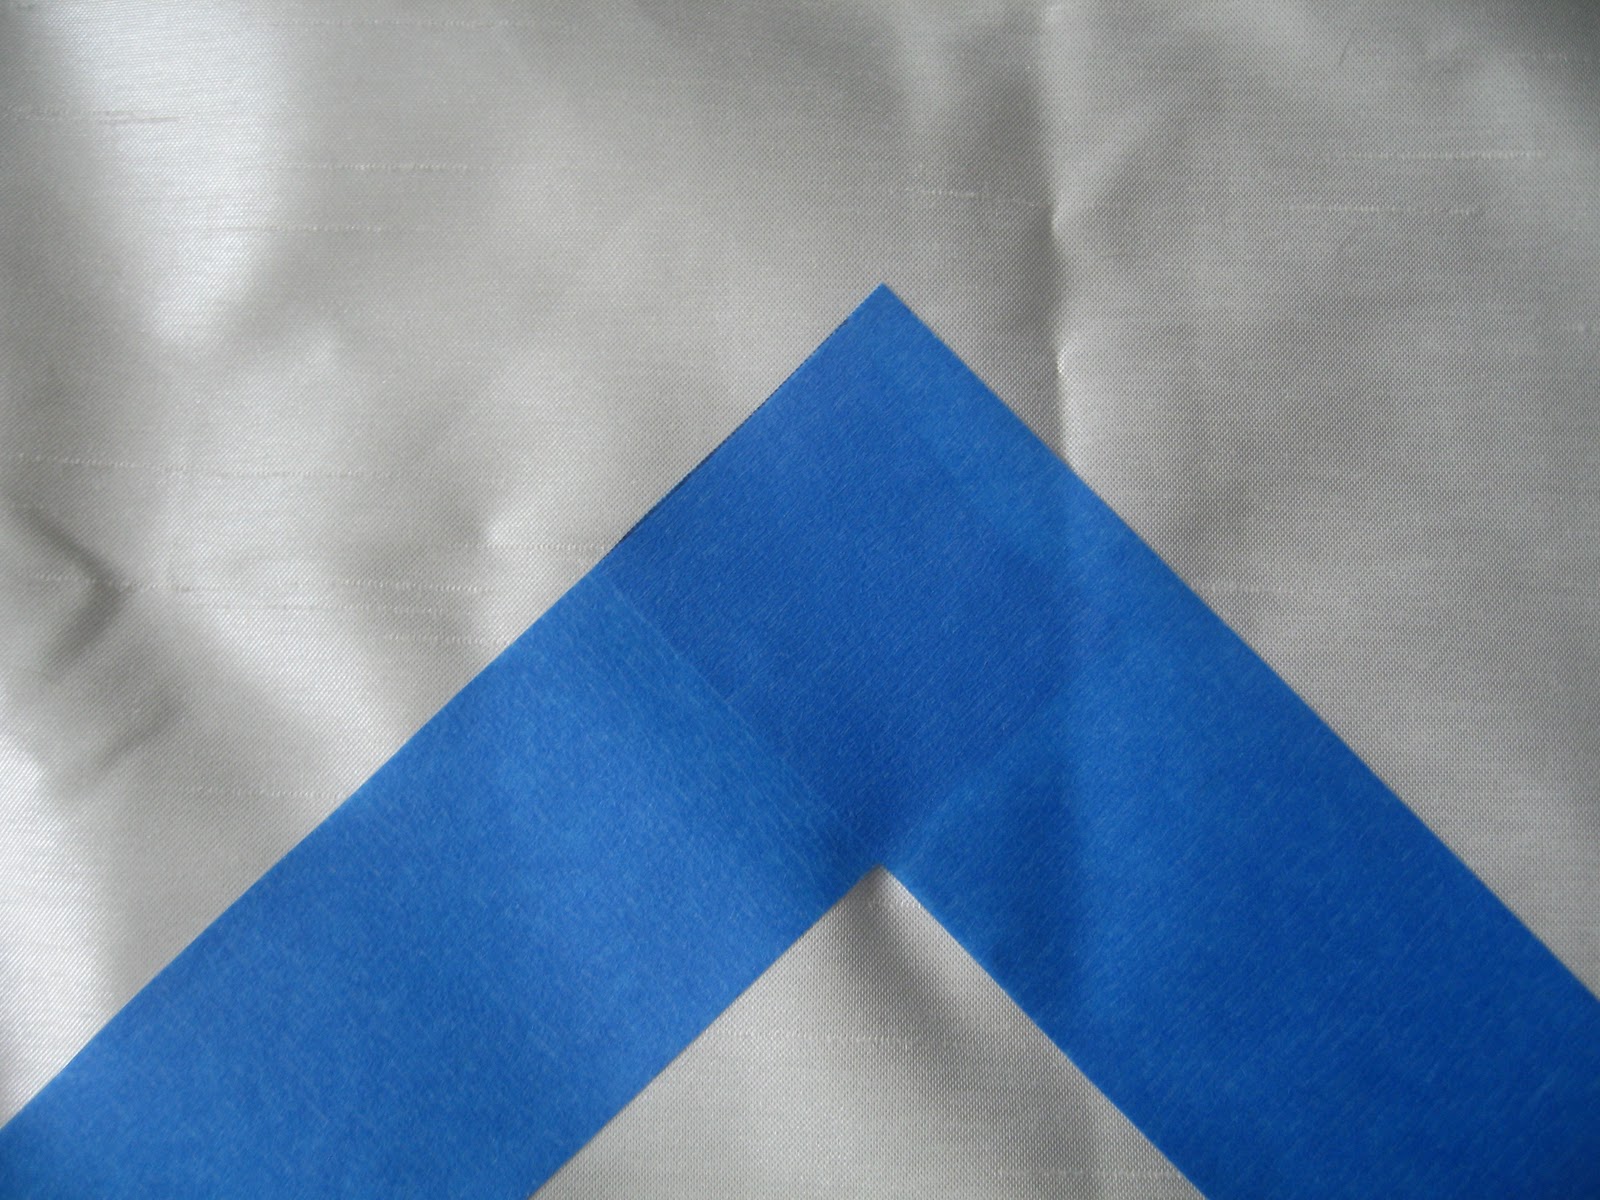
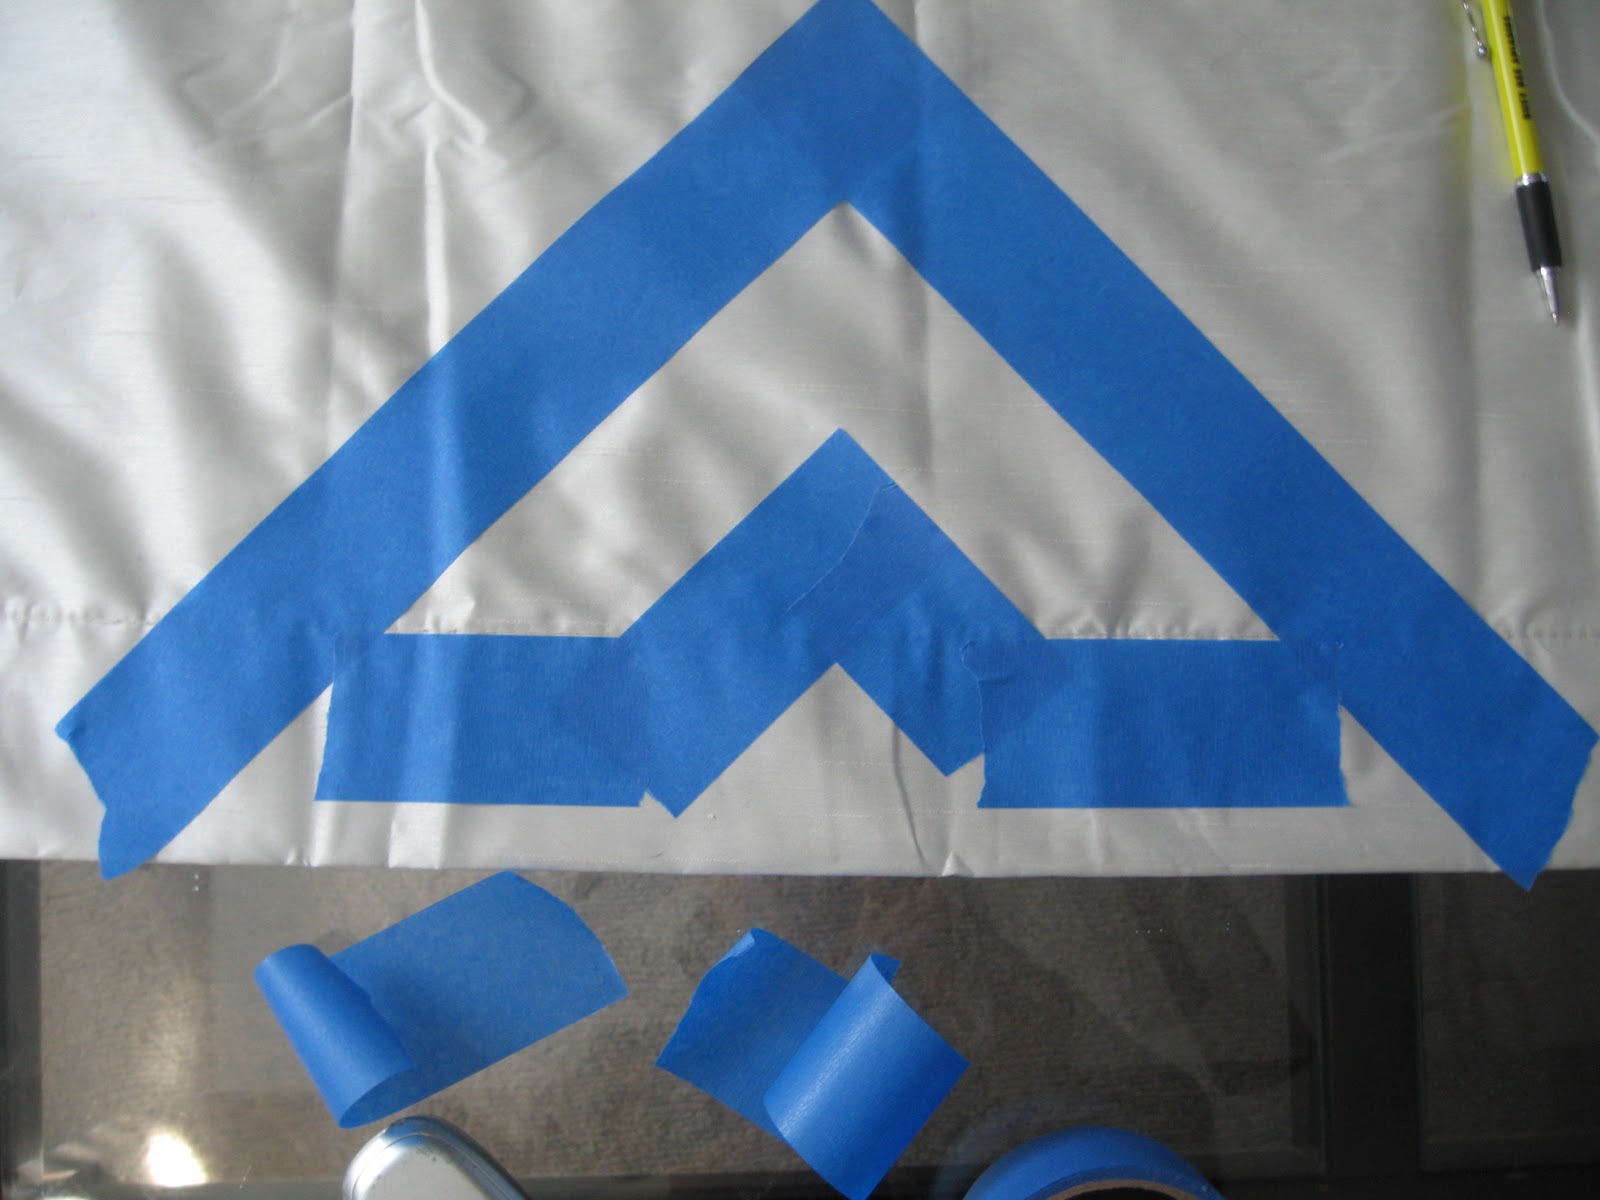
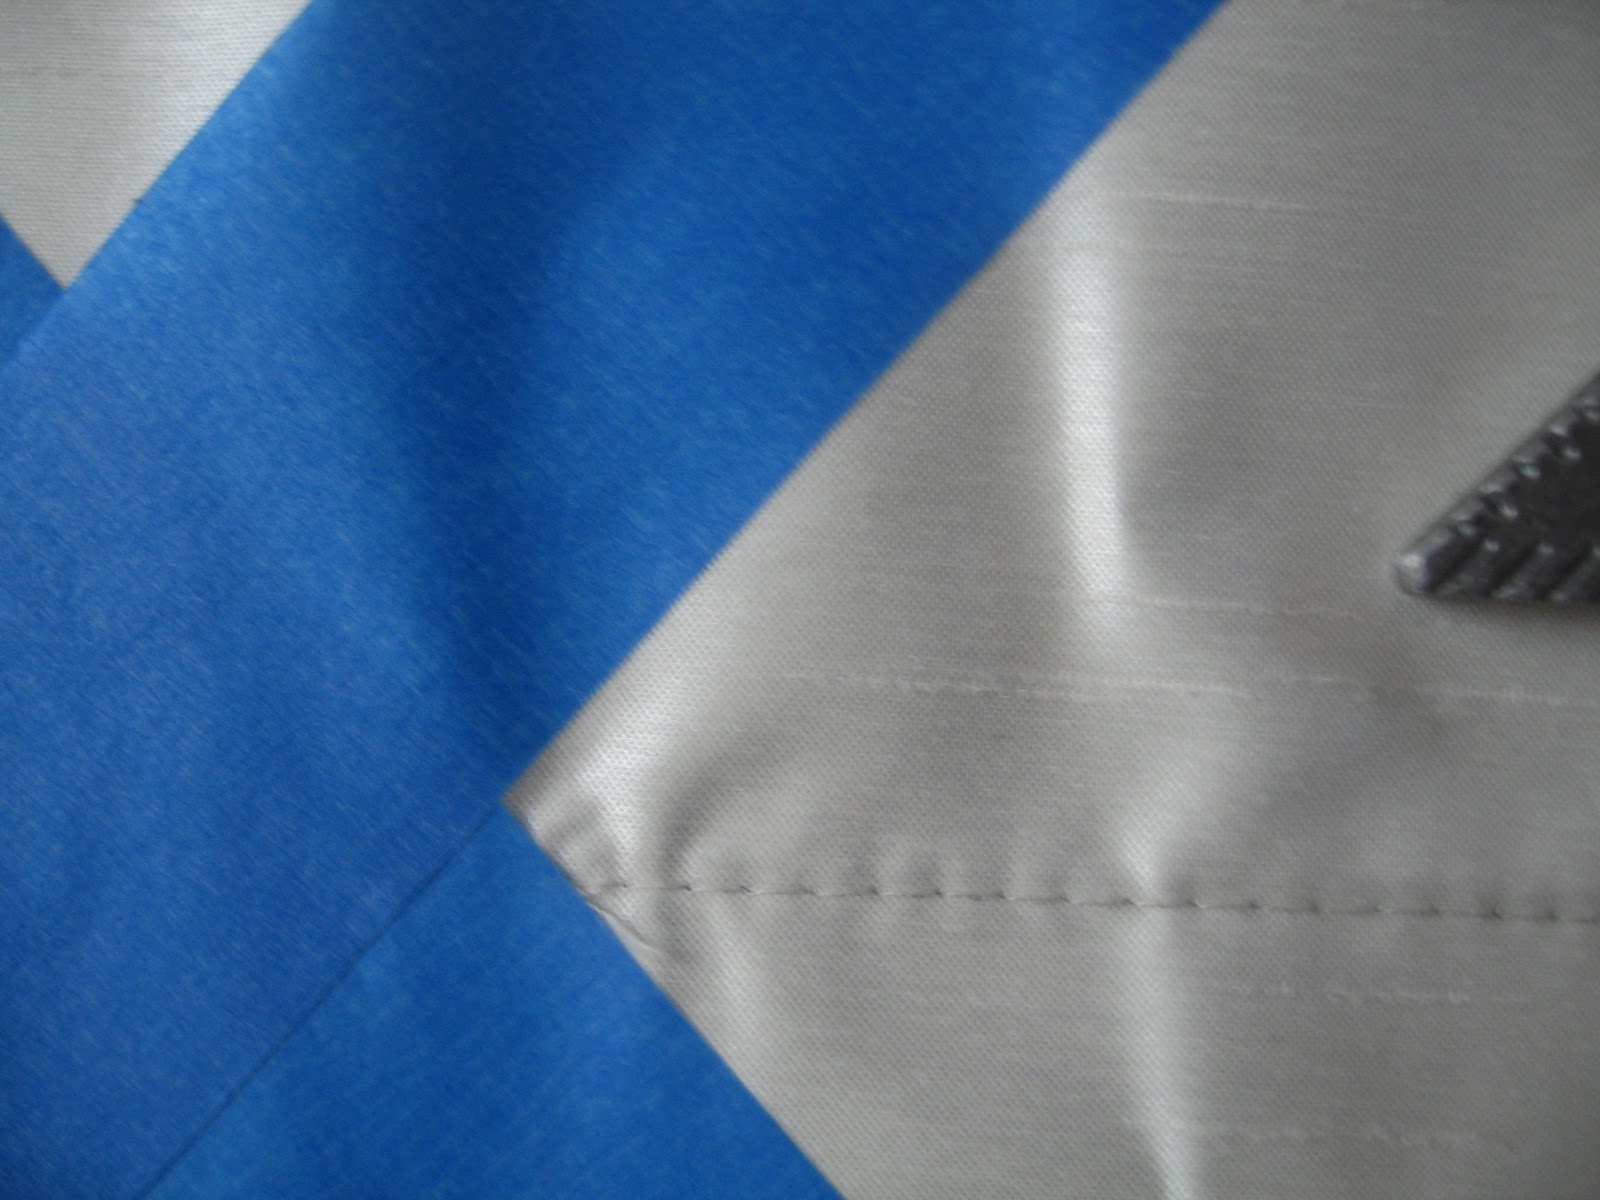
Step 4.  Move the speed square (or the template you made) over to create the next upside down V.  Make sure your tape will create a sharp point in the corners.  (Refer to photos below for better clarification.)


 You want your point to look like this!!!!


NOT THIS!!!!!


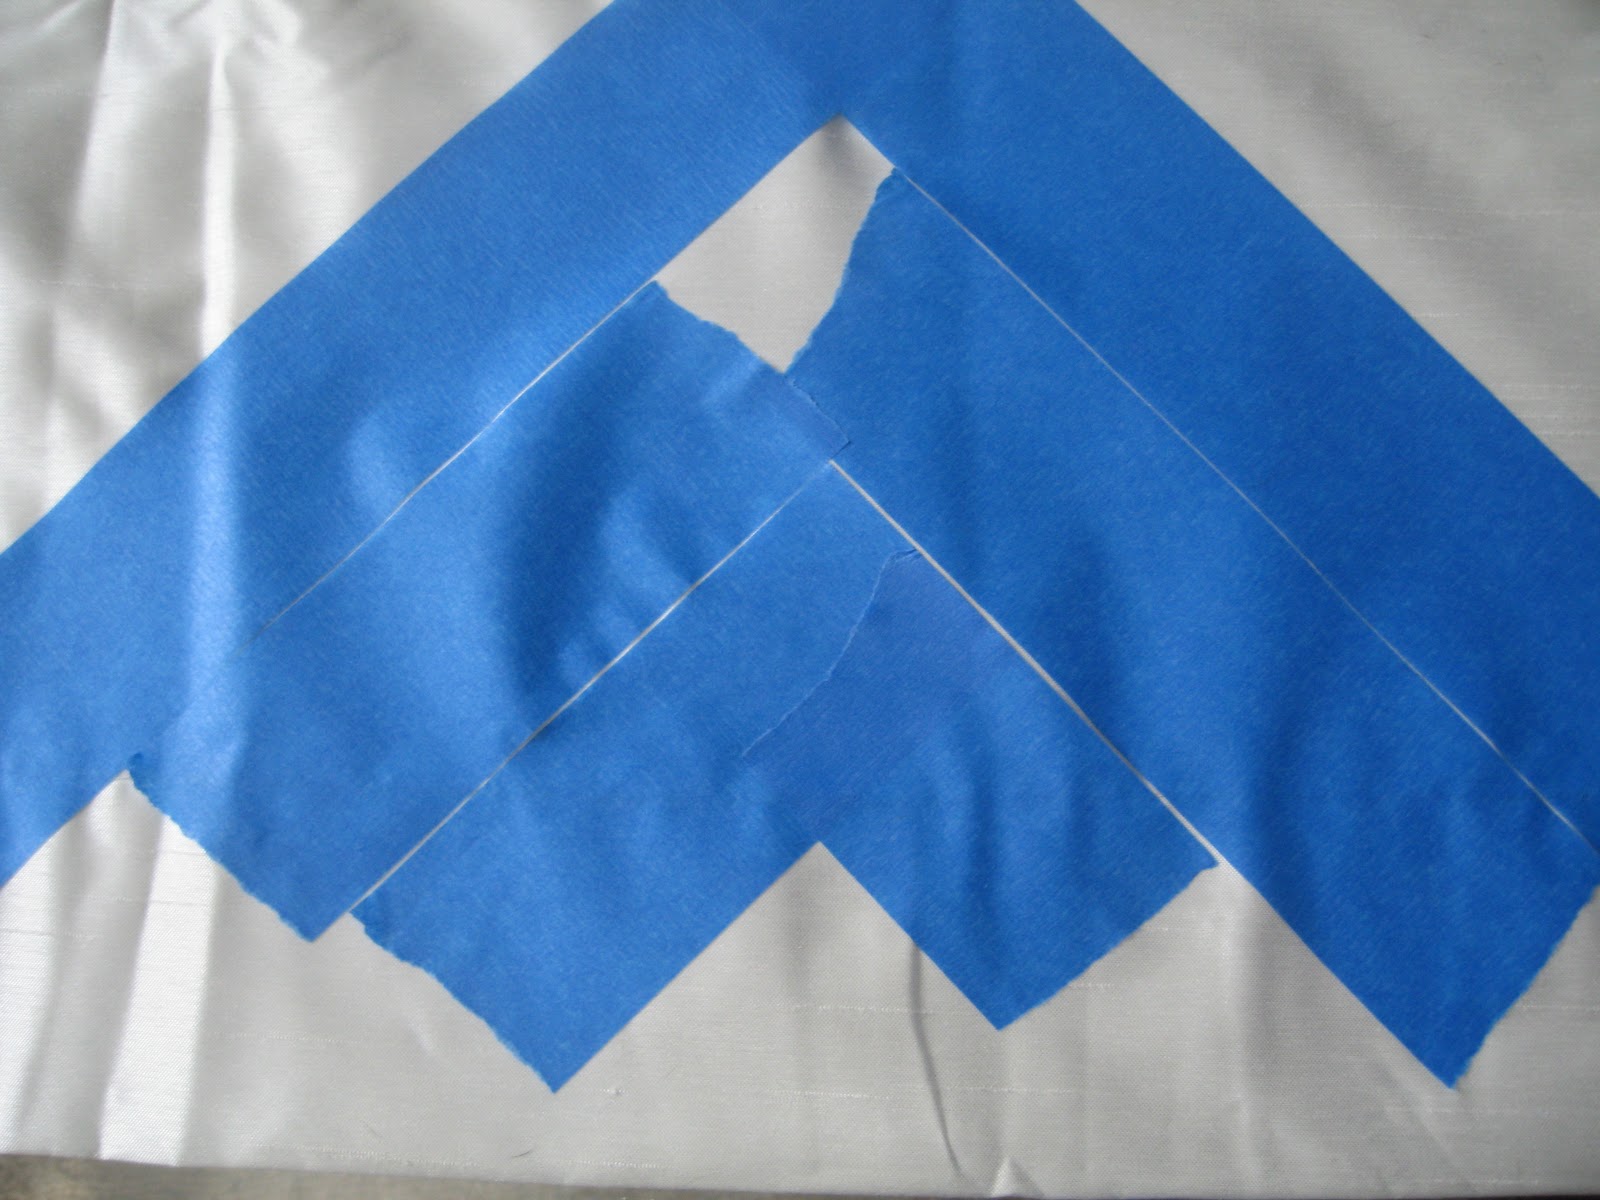
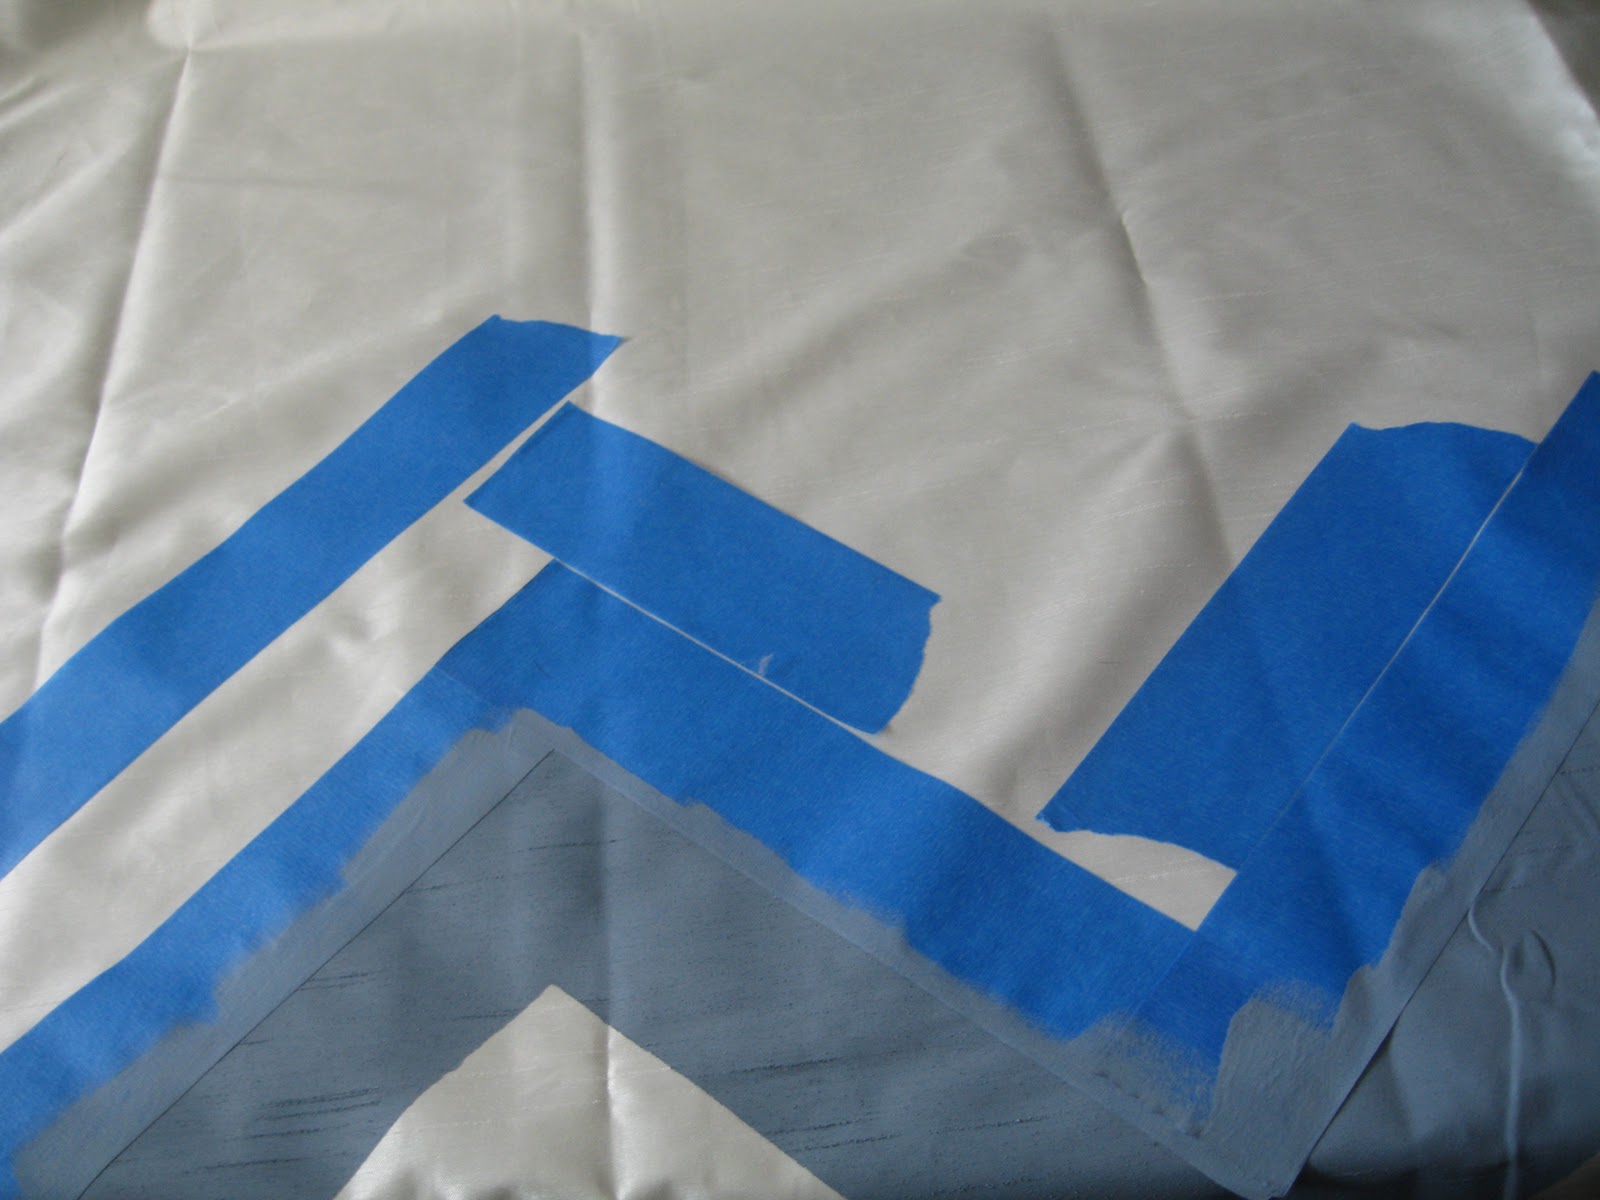
Step 5.  Repeat steps 2-4 until you have your first row of chevrons. For these next few photos ignore the paint that I already applied.  To make your next row of chevrons, you will not need your speed square except for marking straight lines.

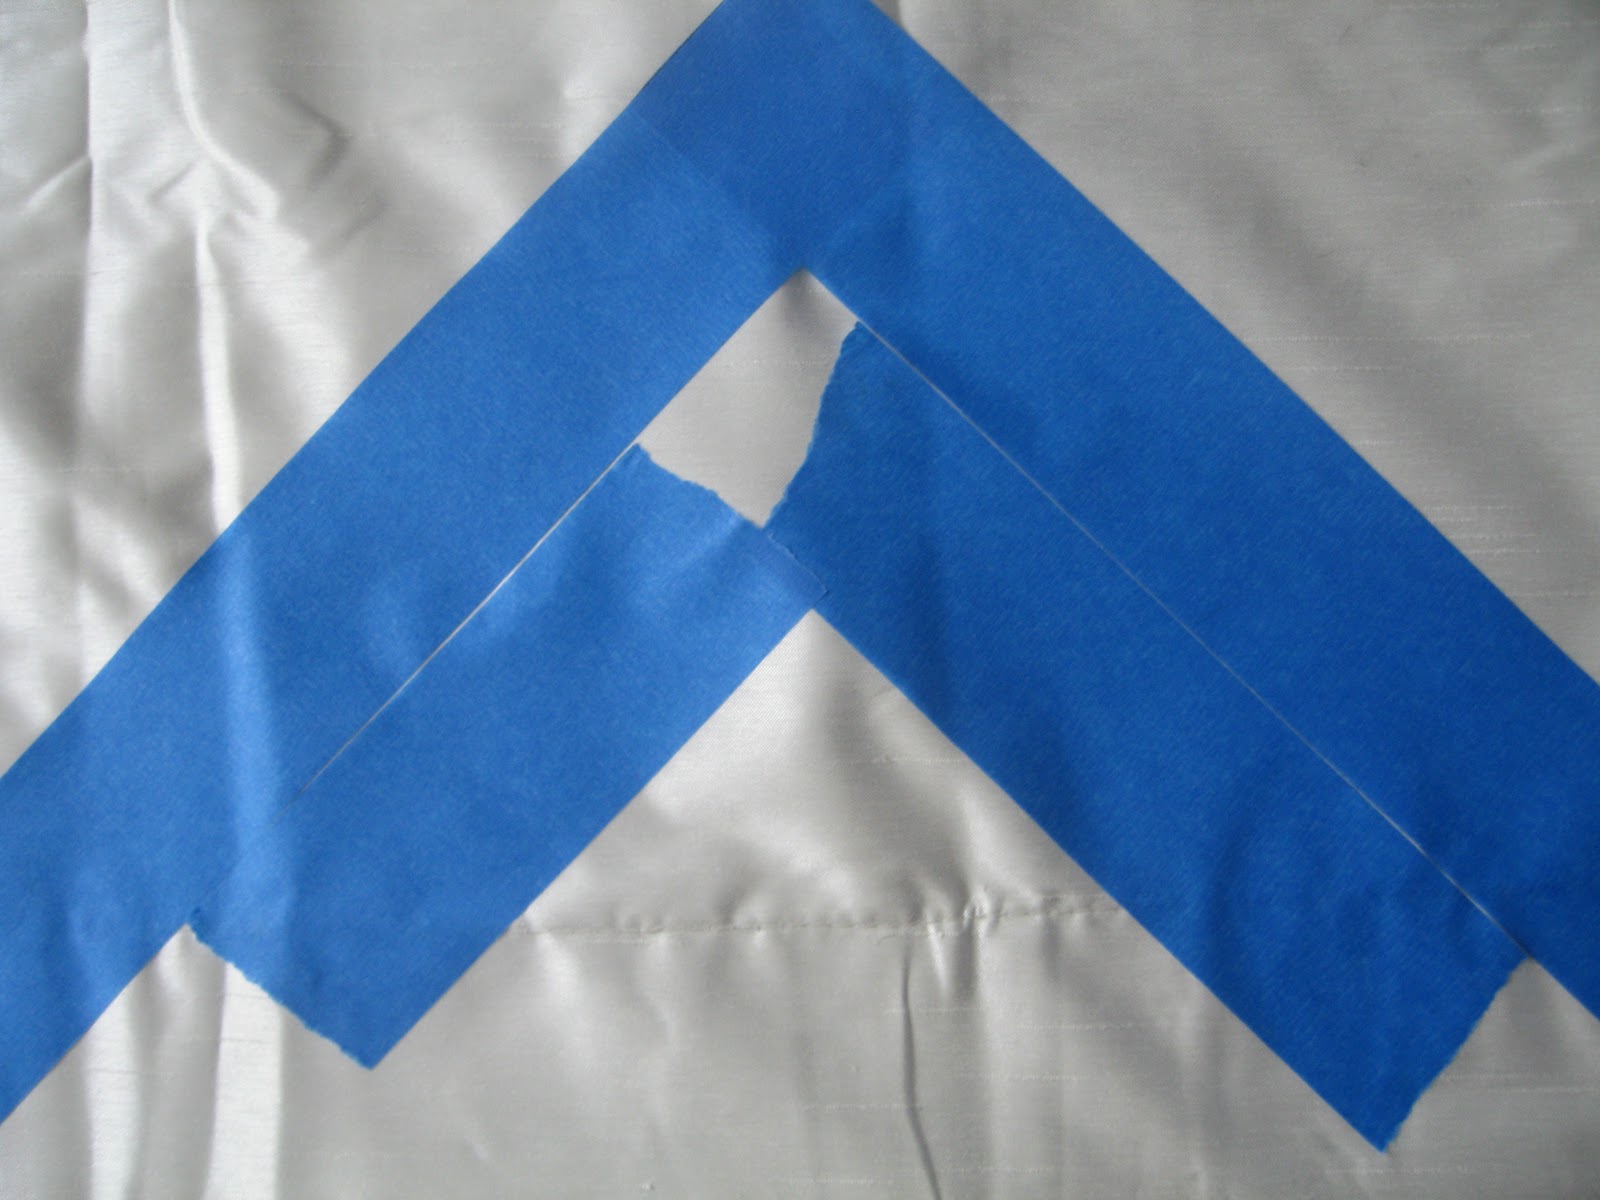
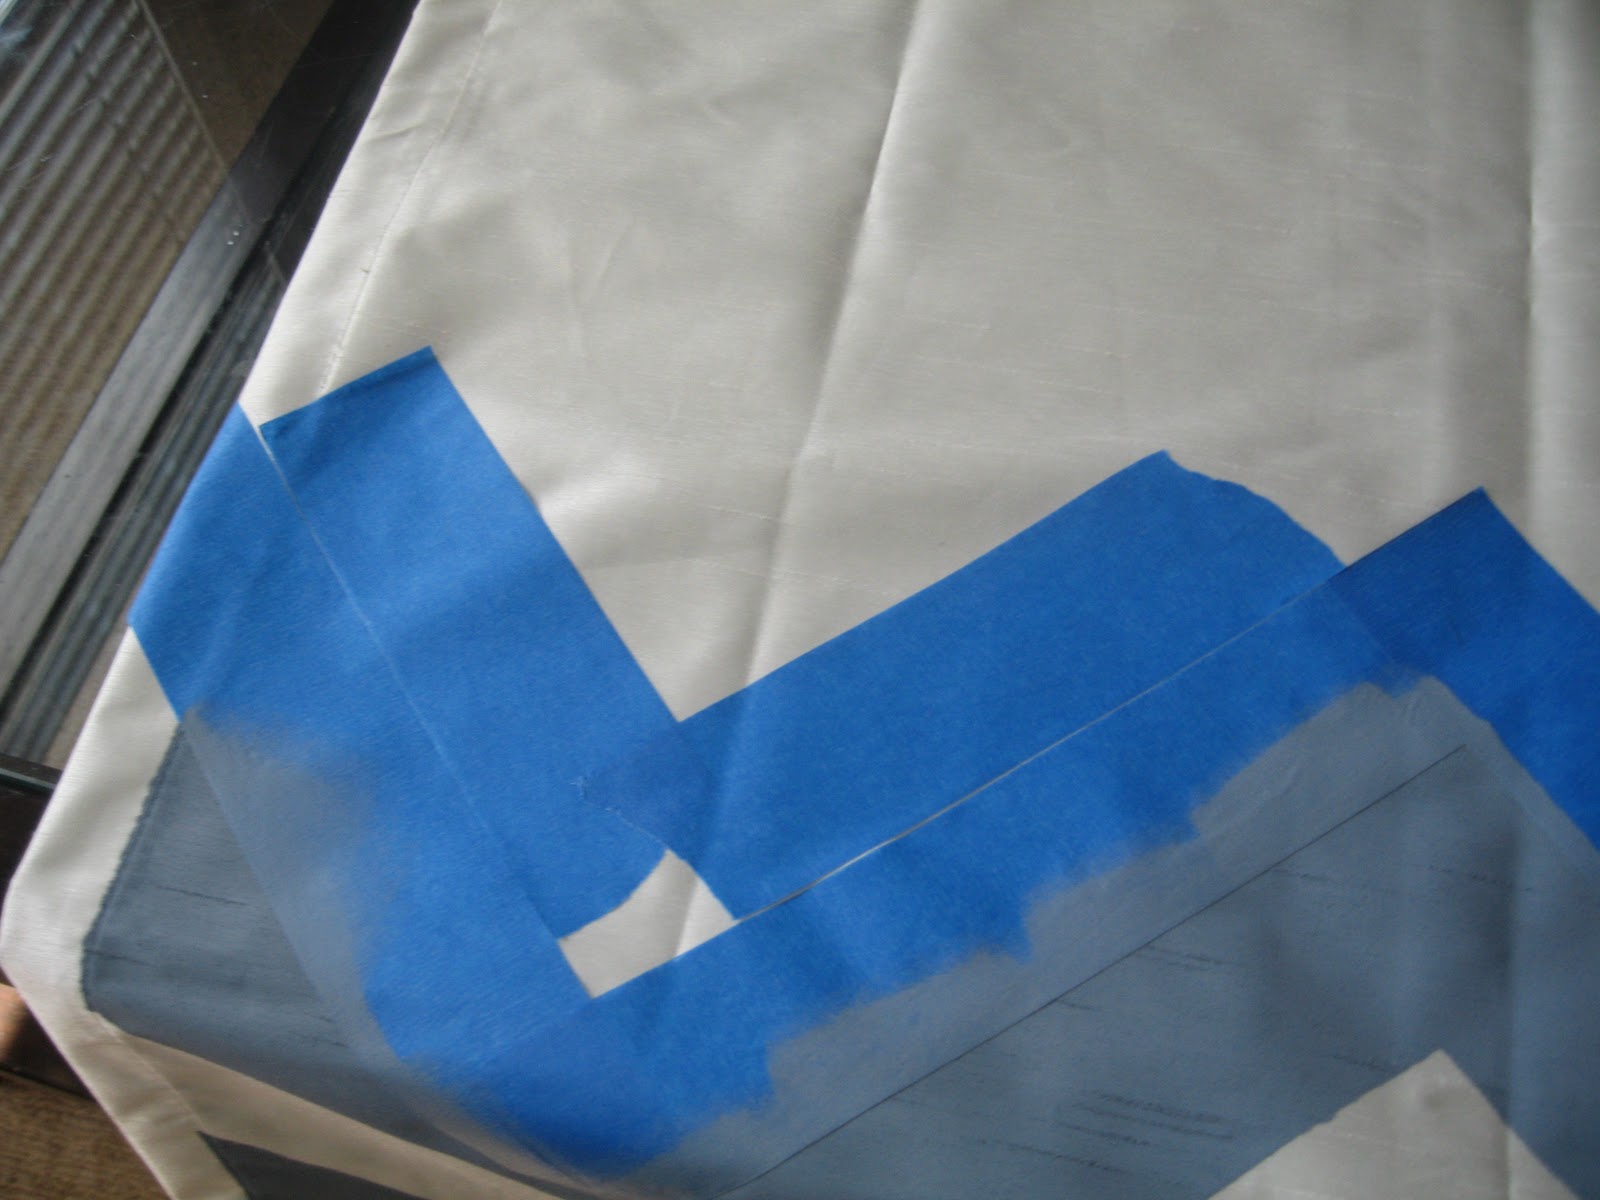
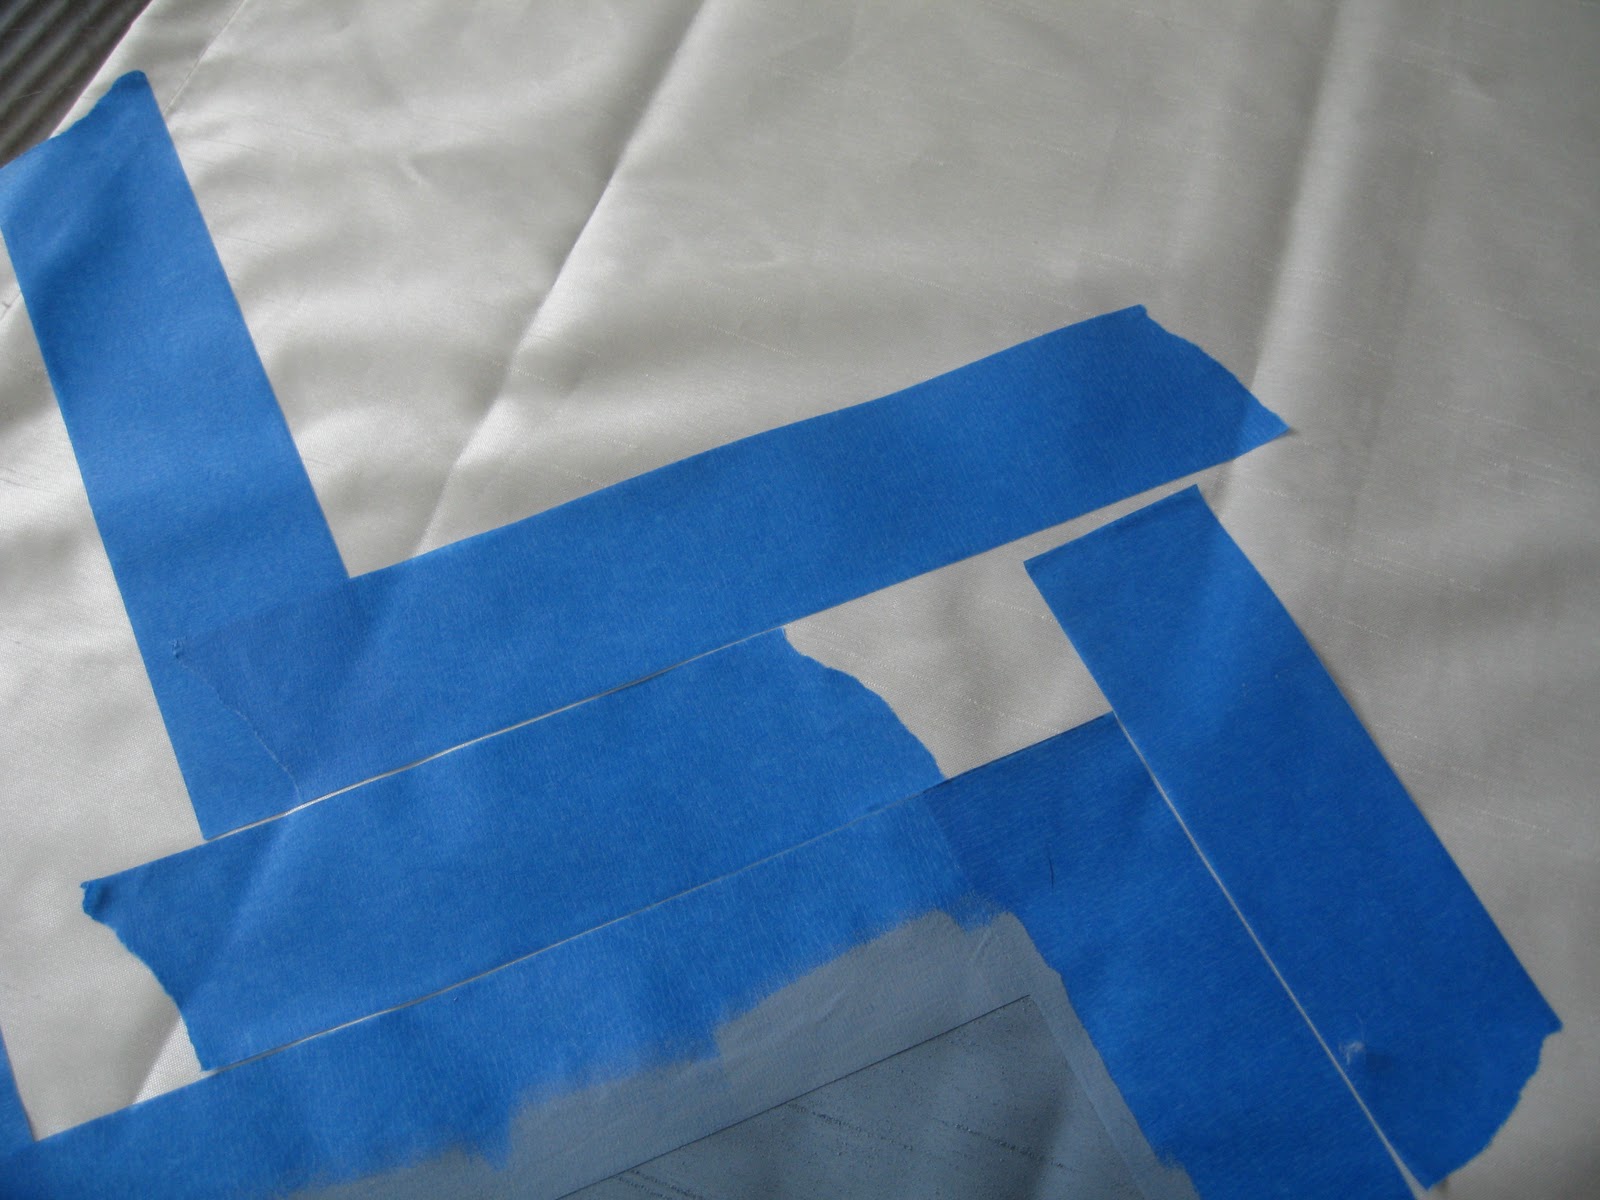
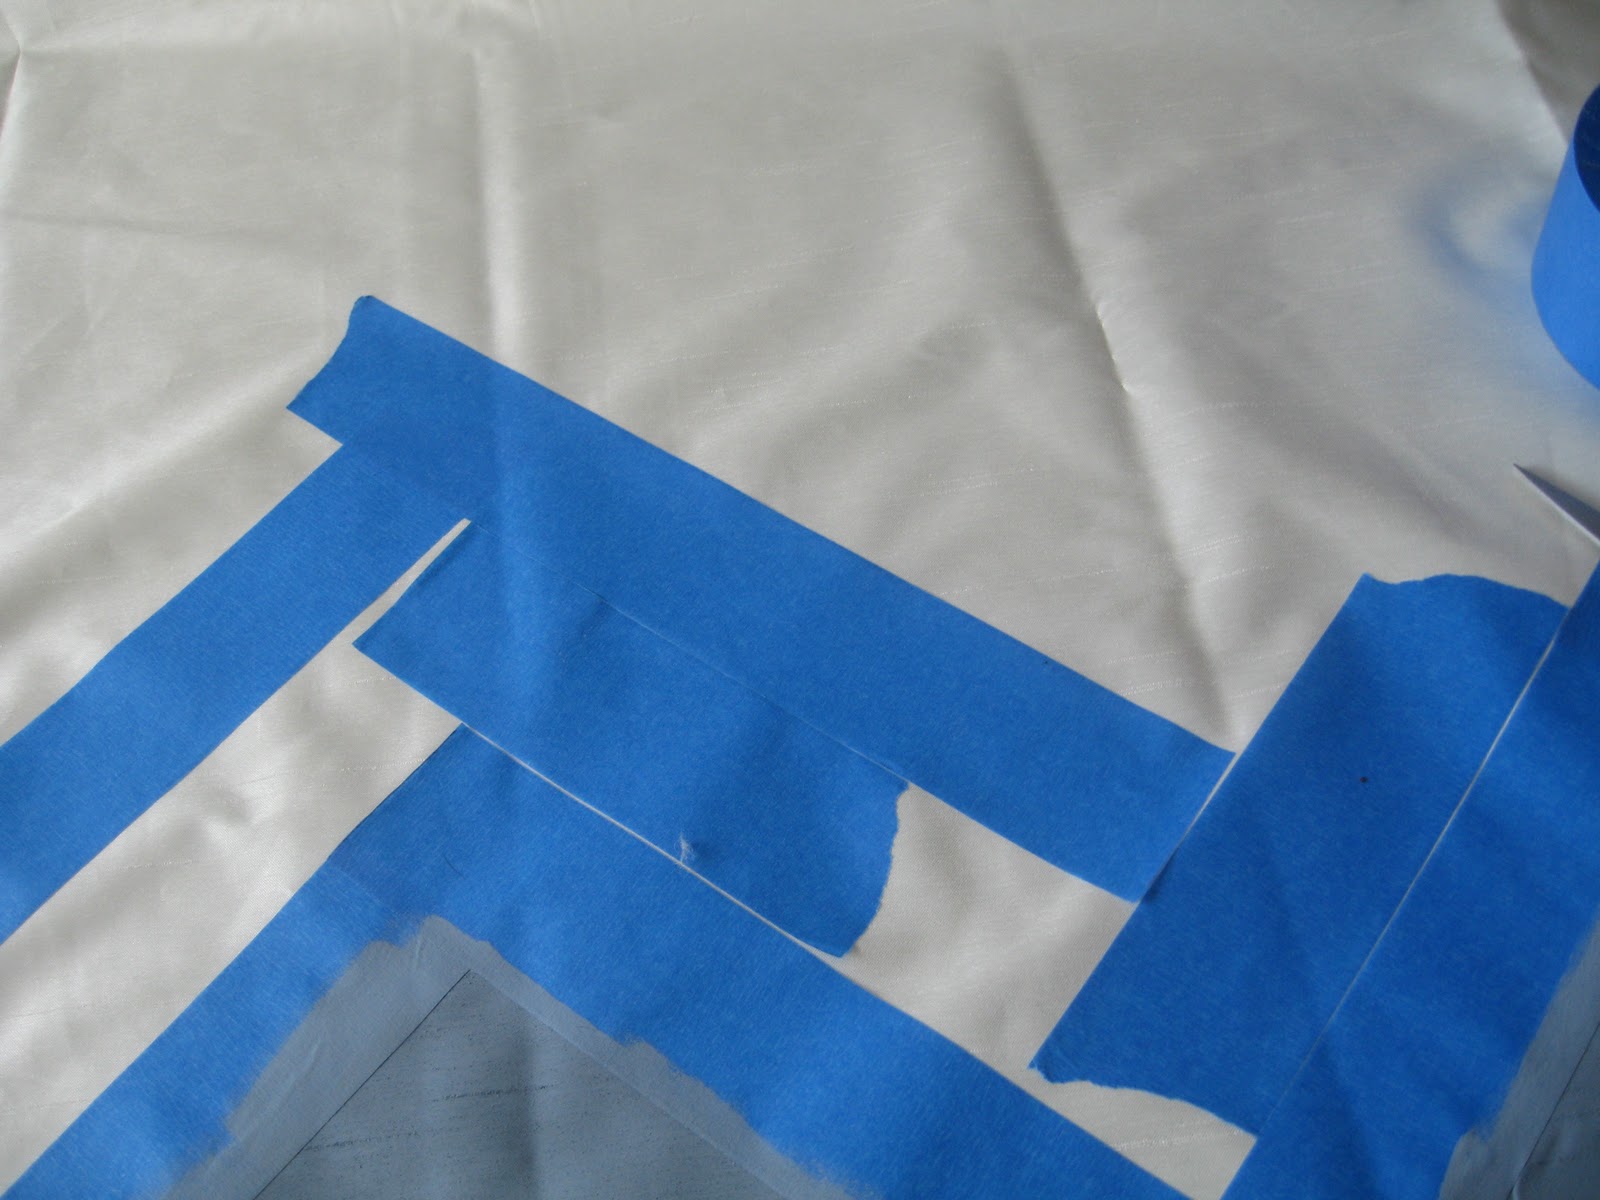
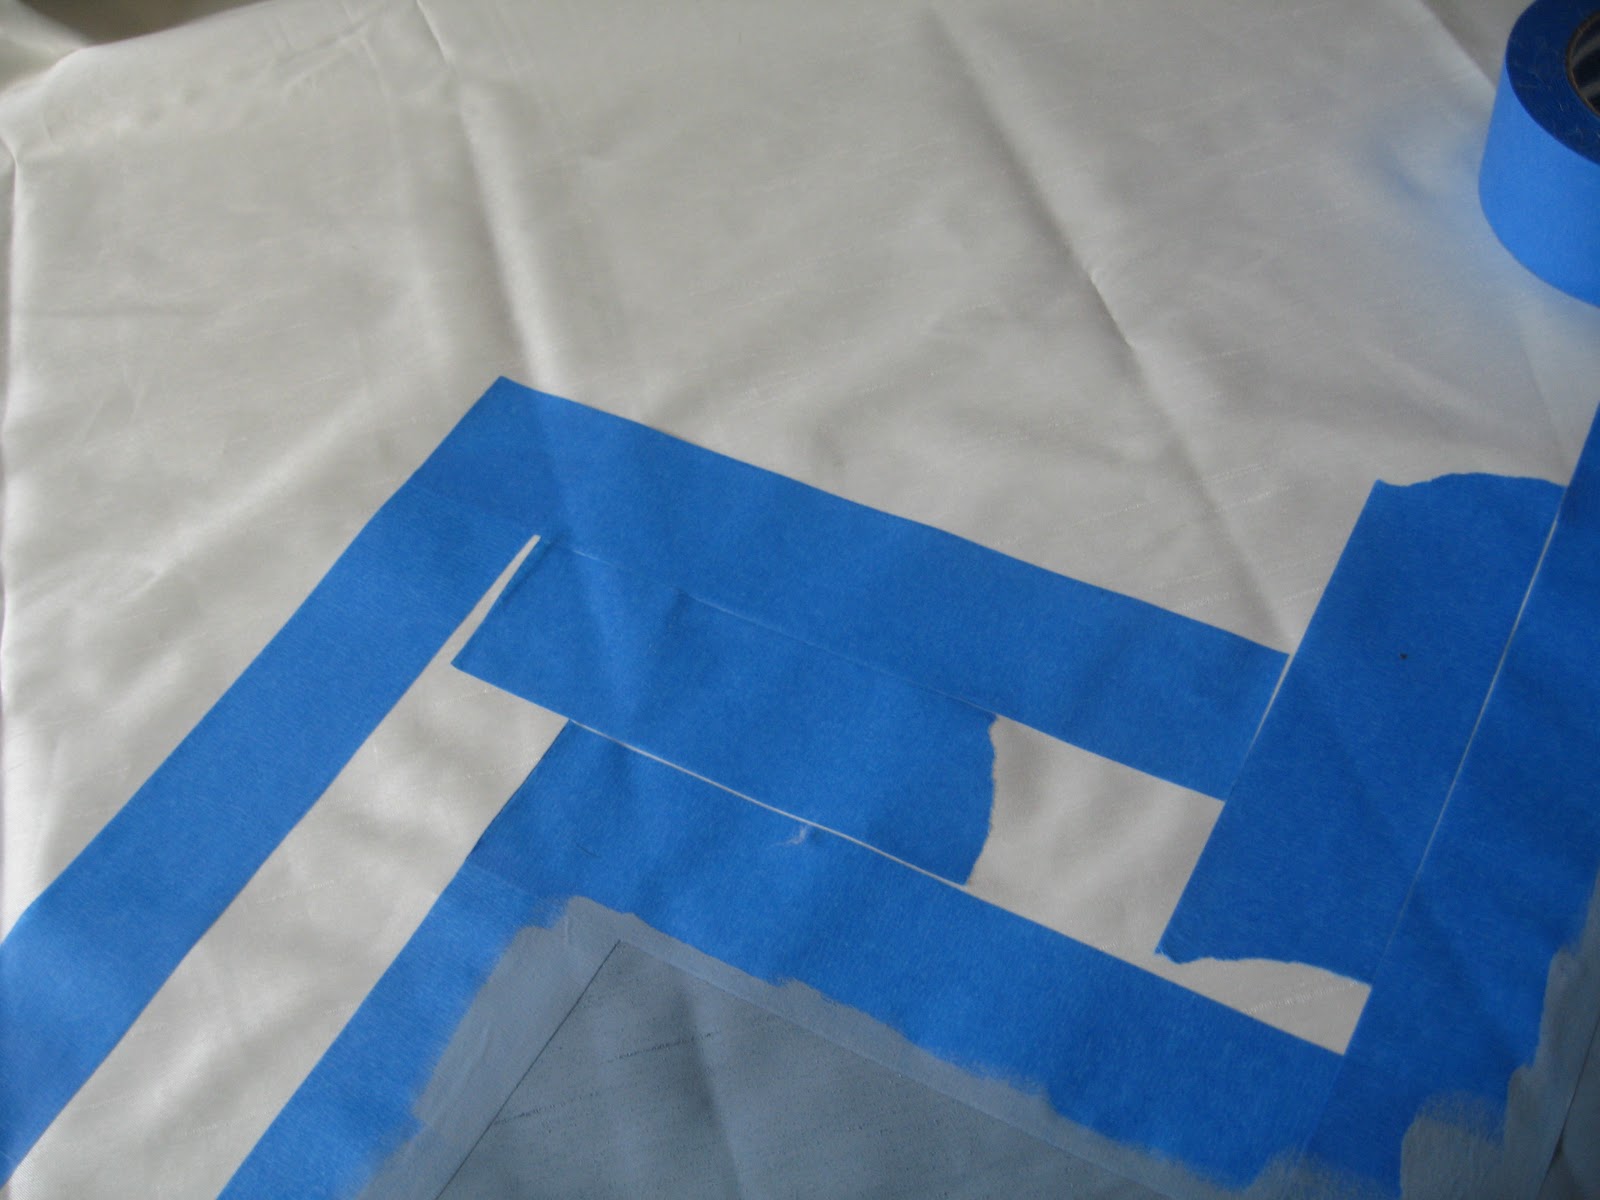
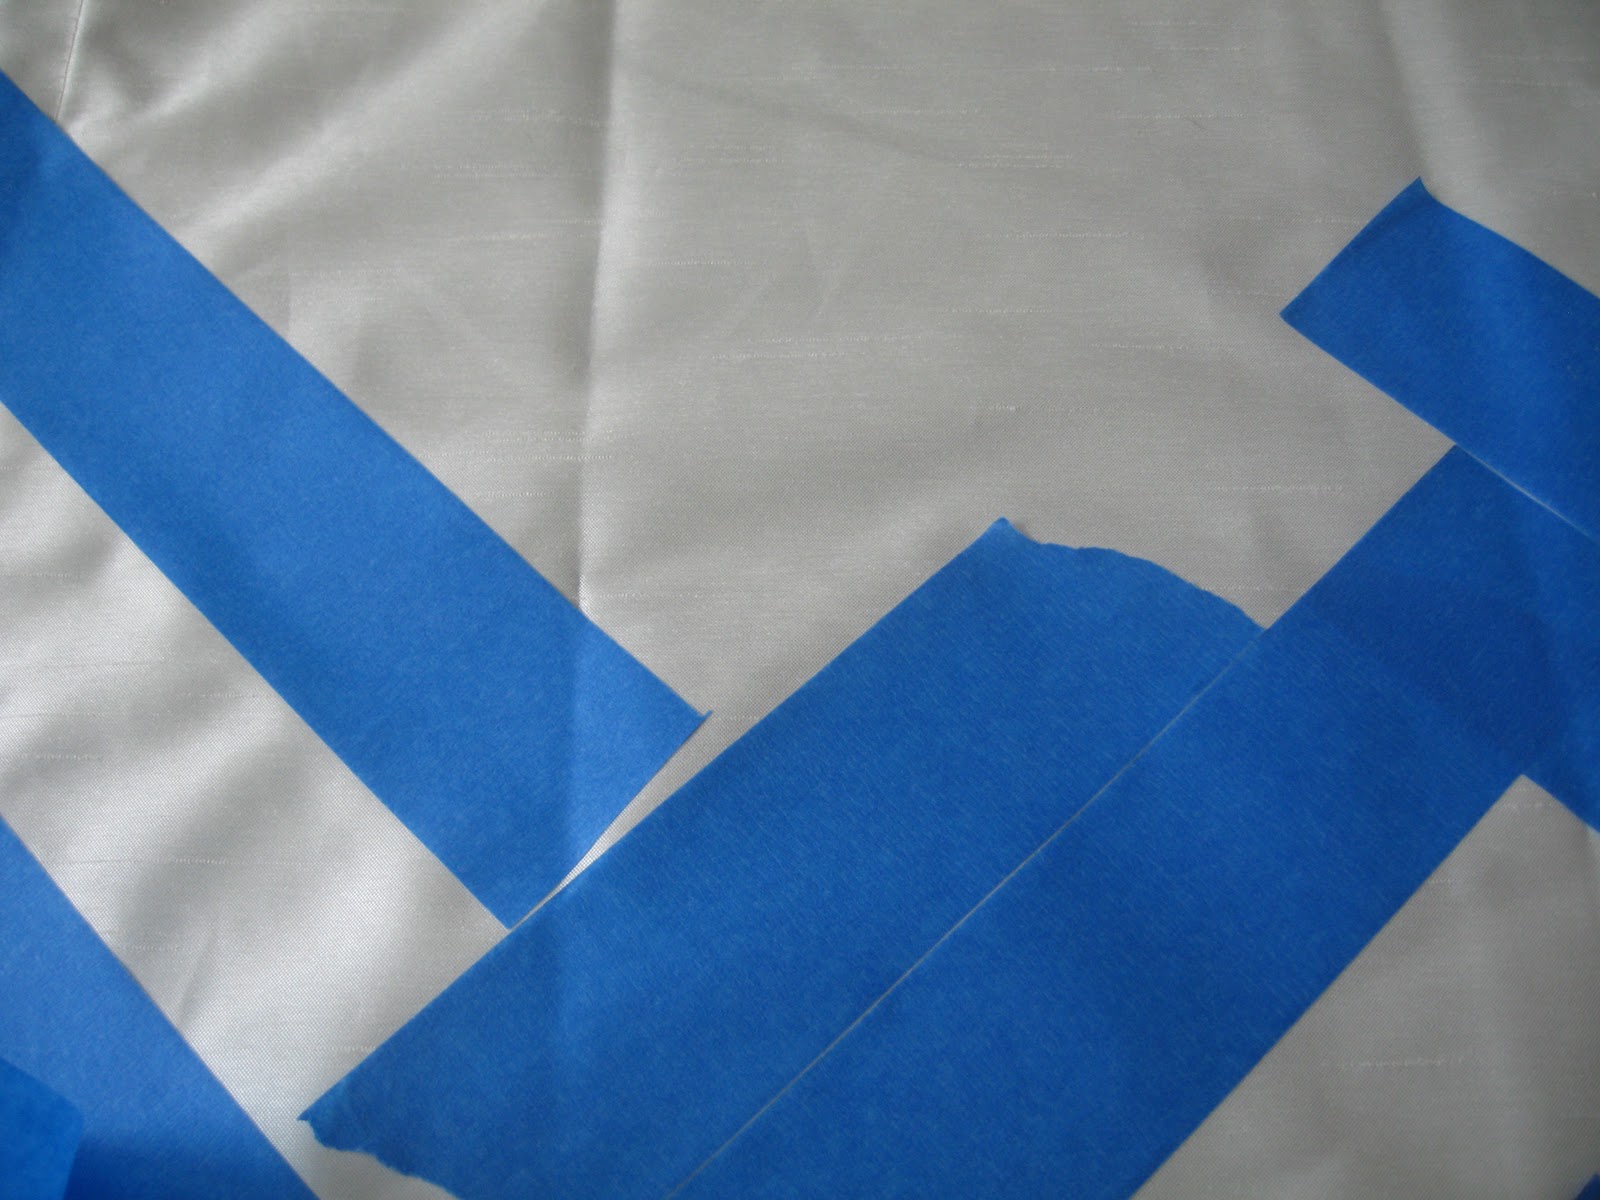
Step 6.  From here and on out, you are basically repeating steps 2 and 3.  Place two pieces of tape along the sides of your chevron.  Notice that glob of curtain again?? :)


Step 7.   Place another piece of tape, and cut it so it is straight.


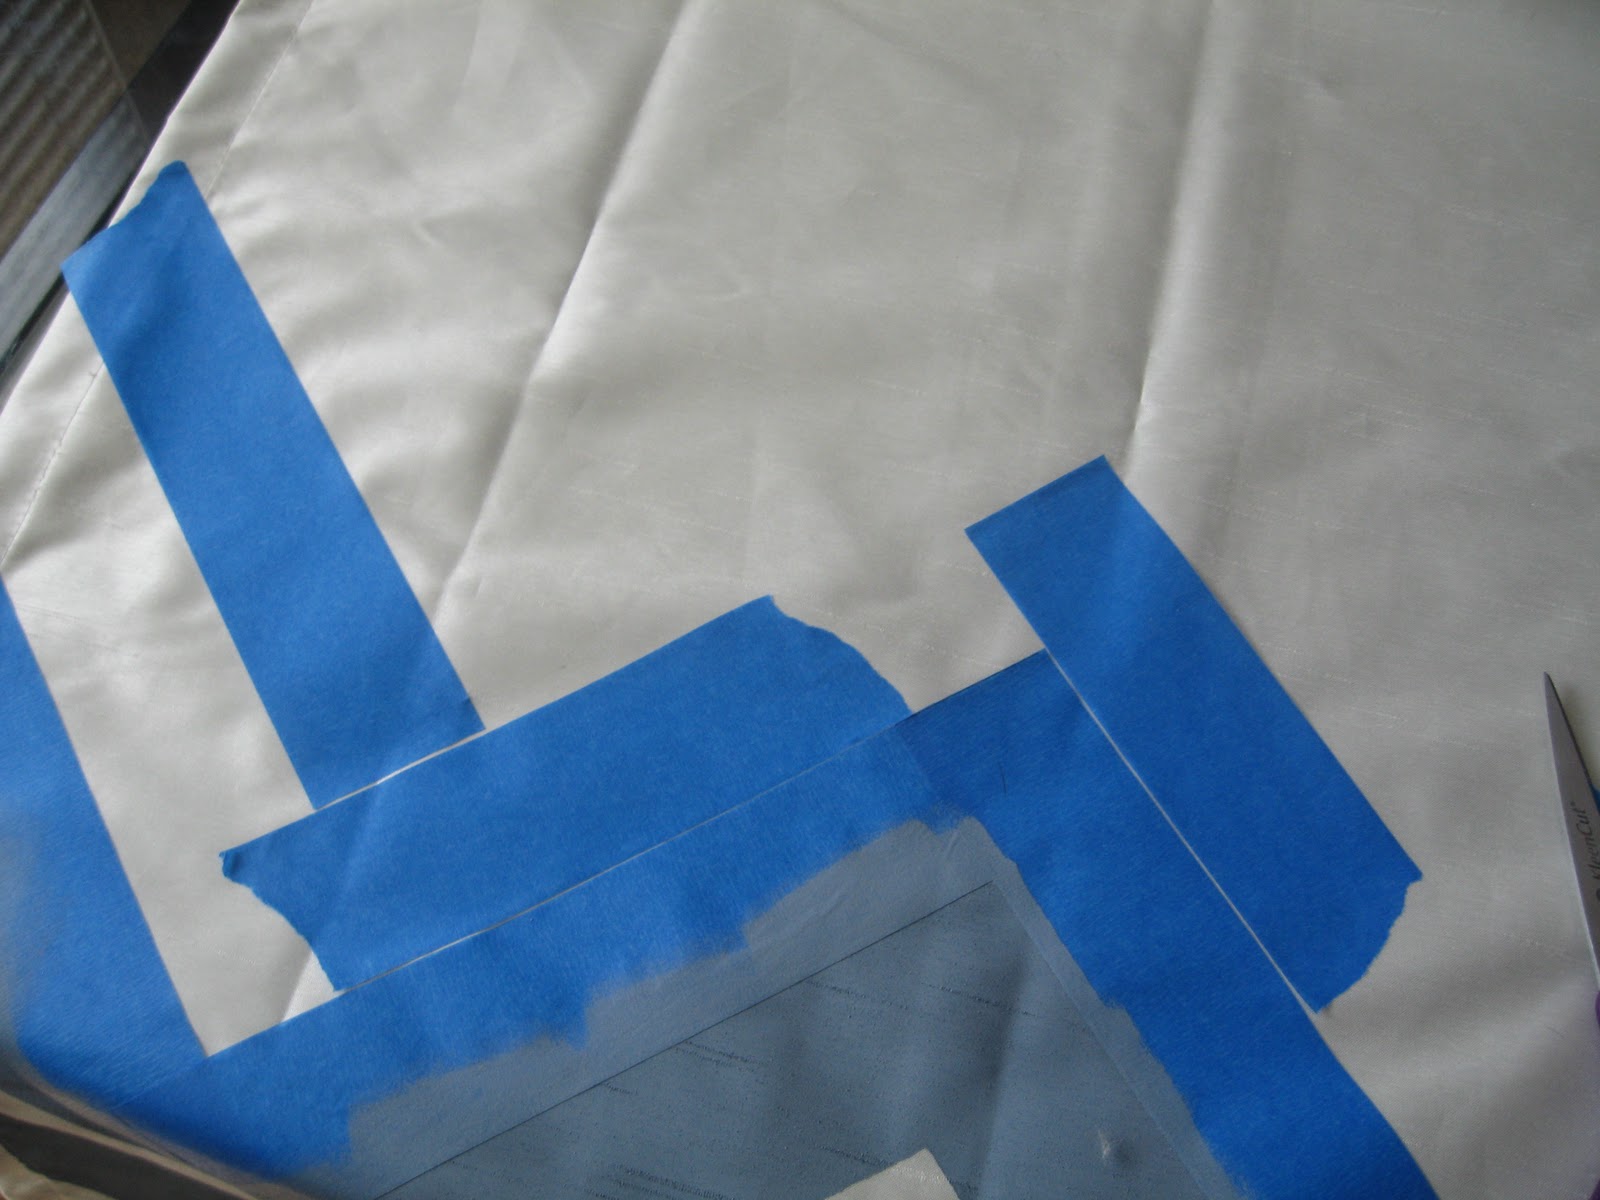
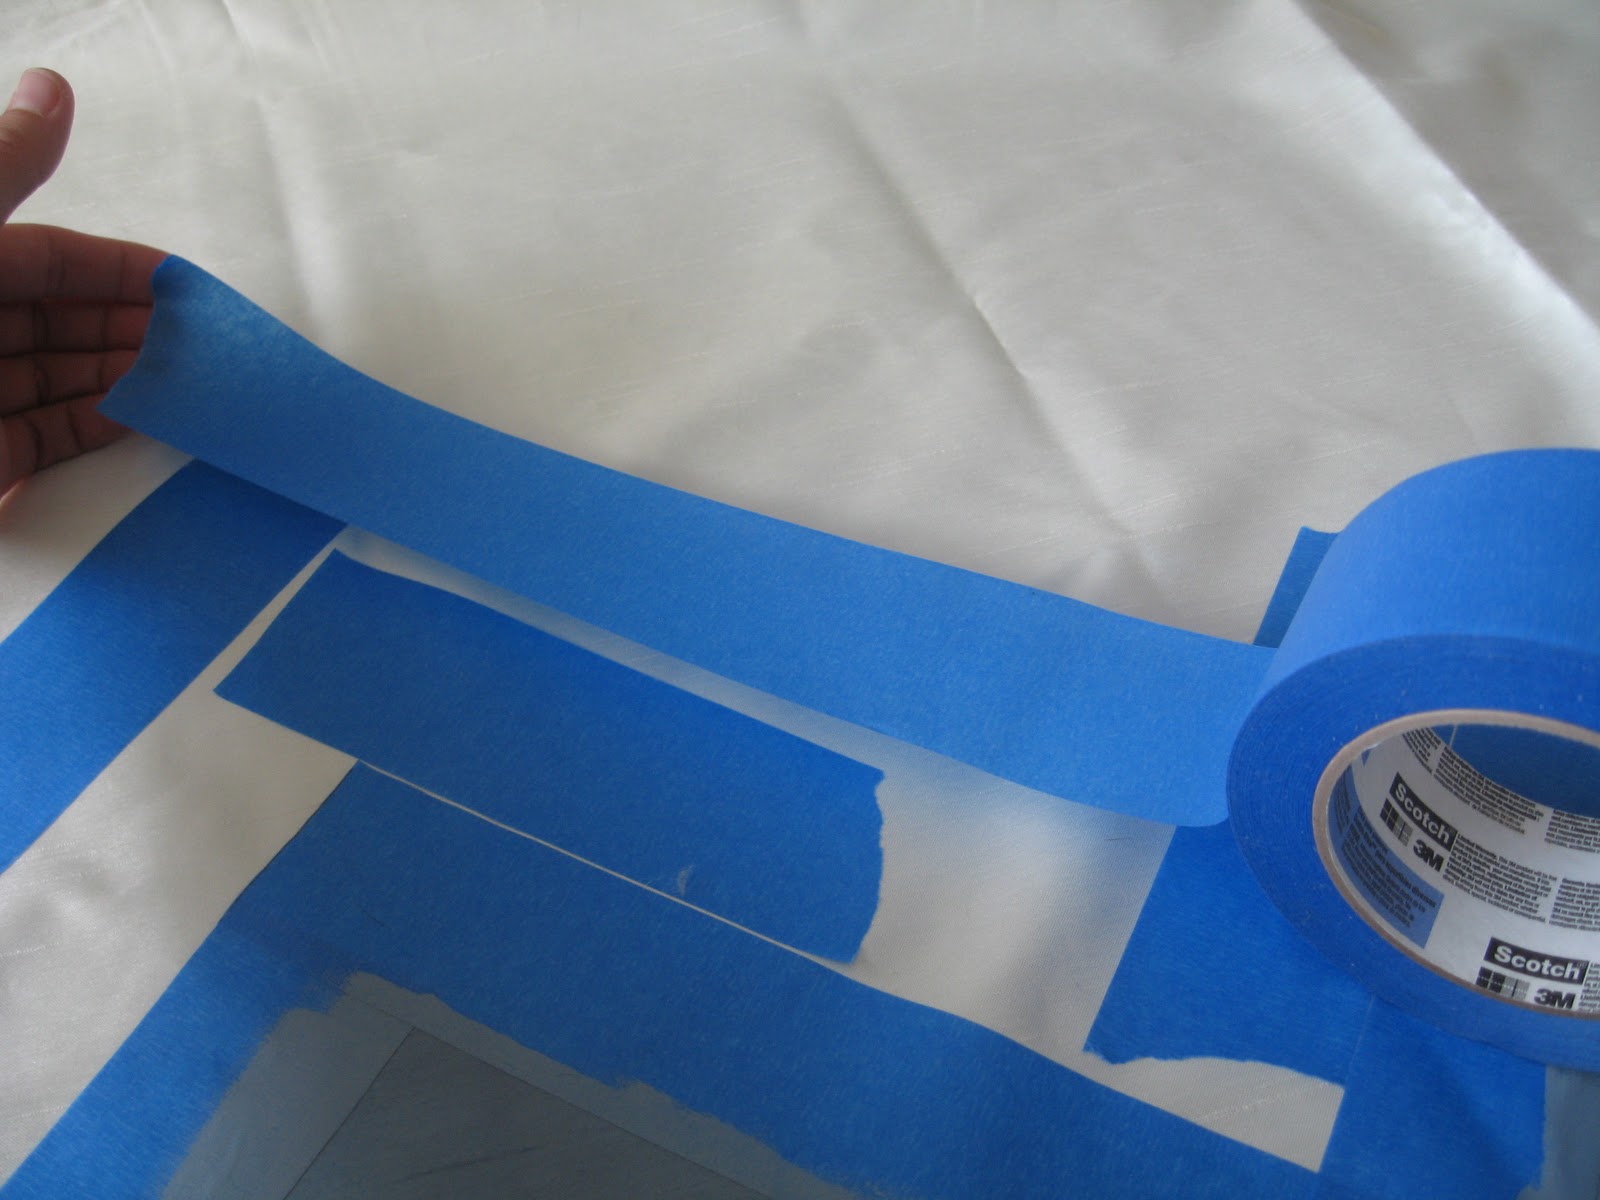
Notice below how the left piece of tape is gone?  I moved it over to the next chevron, so I knew how long of a piece I needed. Basically, I used the same two pieces of tape throughout the project as my "template."  Still confused?  Don't worry!  Hopefully, these pictures will help explain it better!

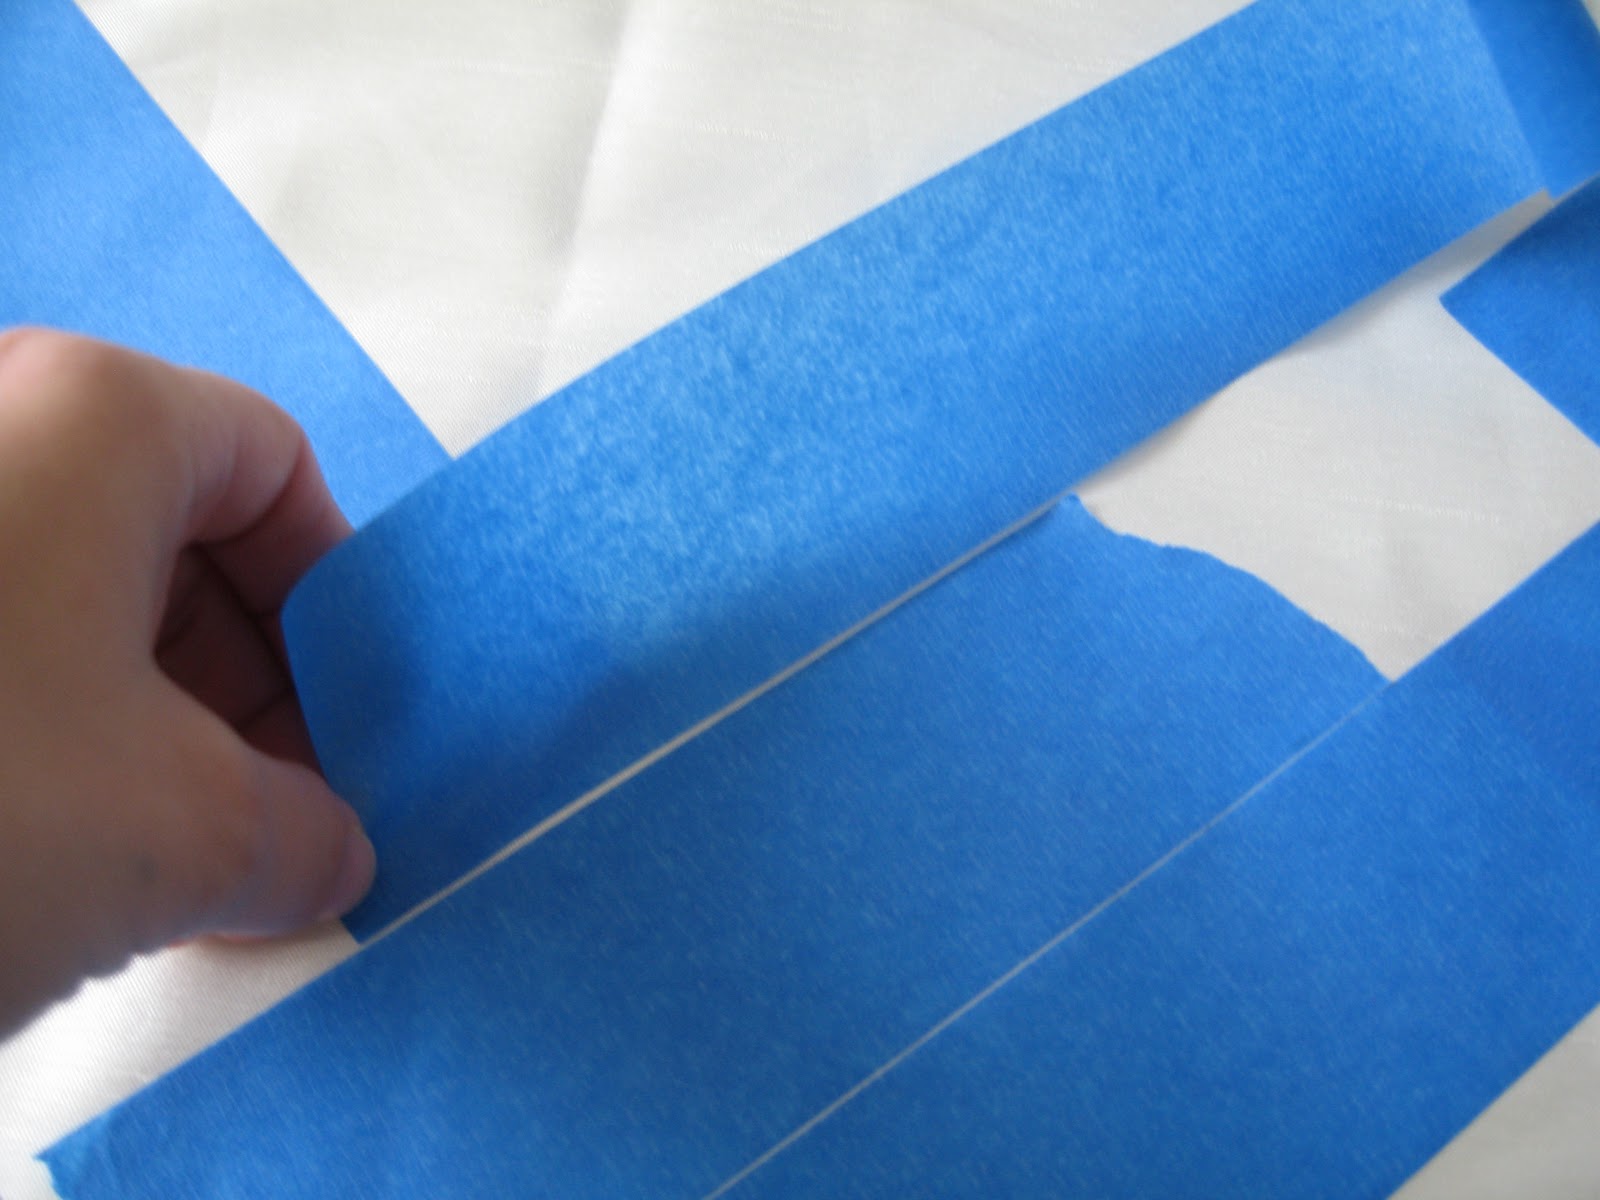
Here I am checking the length of tape, so I do not waste my expensive blue tape. :)


The torn piece of tape to the left is about to move over . . .


 to the far right.
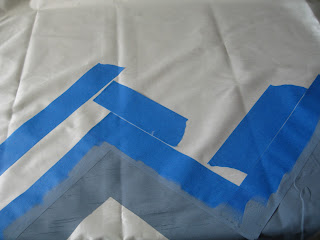
  
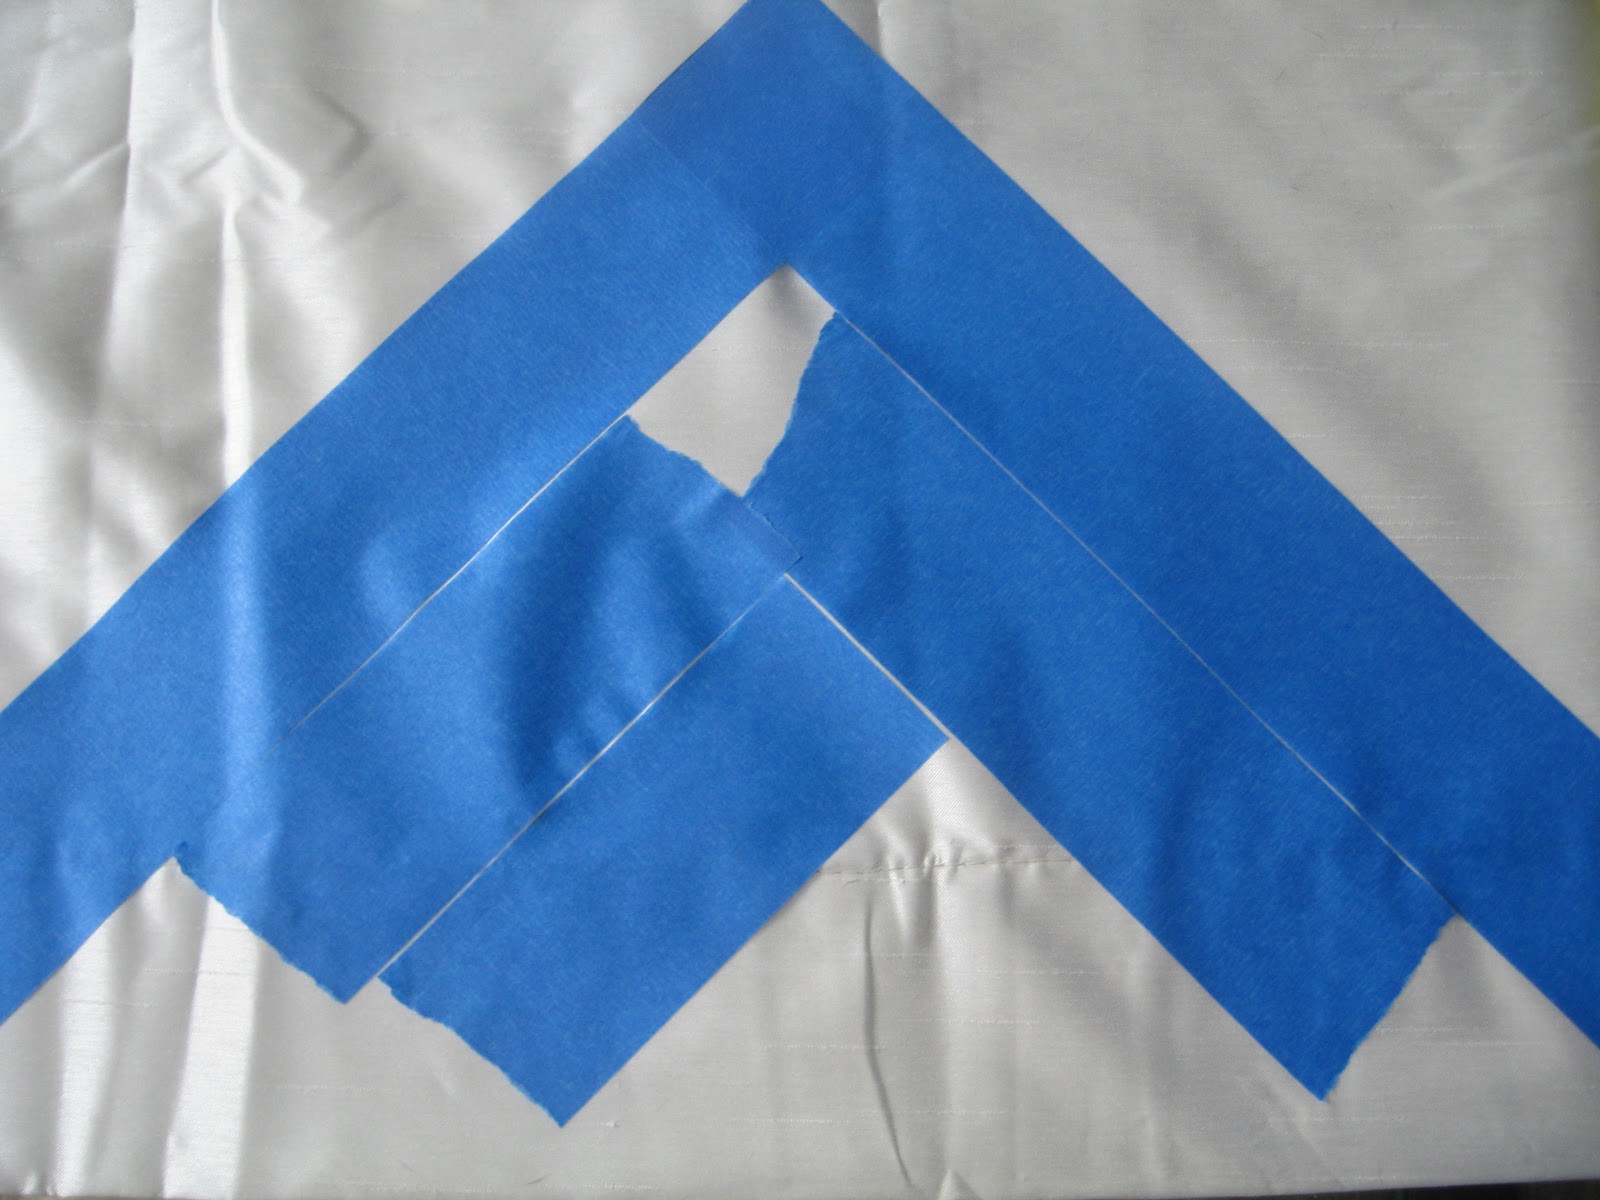
I cut a straight line with the next piece of tape, which will be my bottom point.  The top of the tape (where my fingers are touching), I just tore it off.  For that torn part, you are repeating step 2 by using your speed square to a mark a straight line for you to cut. 


If you end up cutting your tape crooked throughout the project, do not worry about it!

Use your second piece of tape to make it straight again.

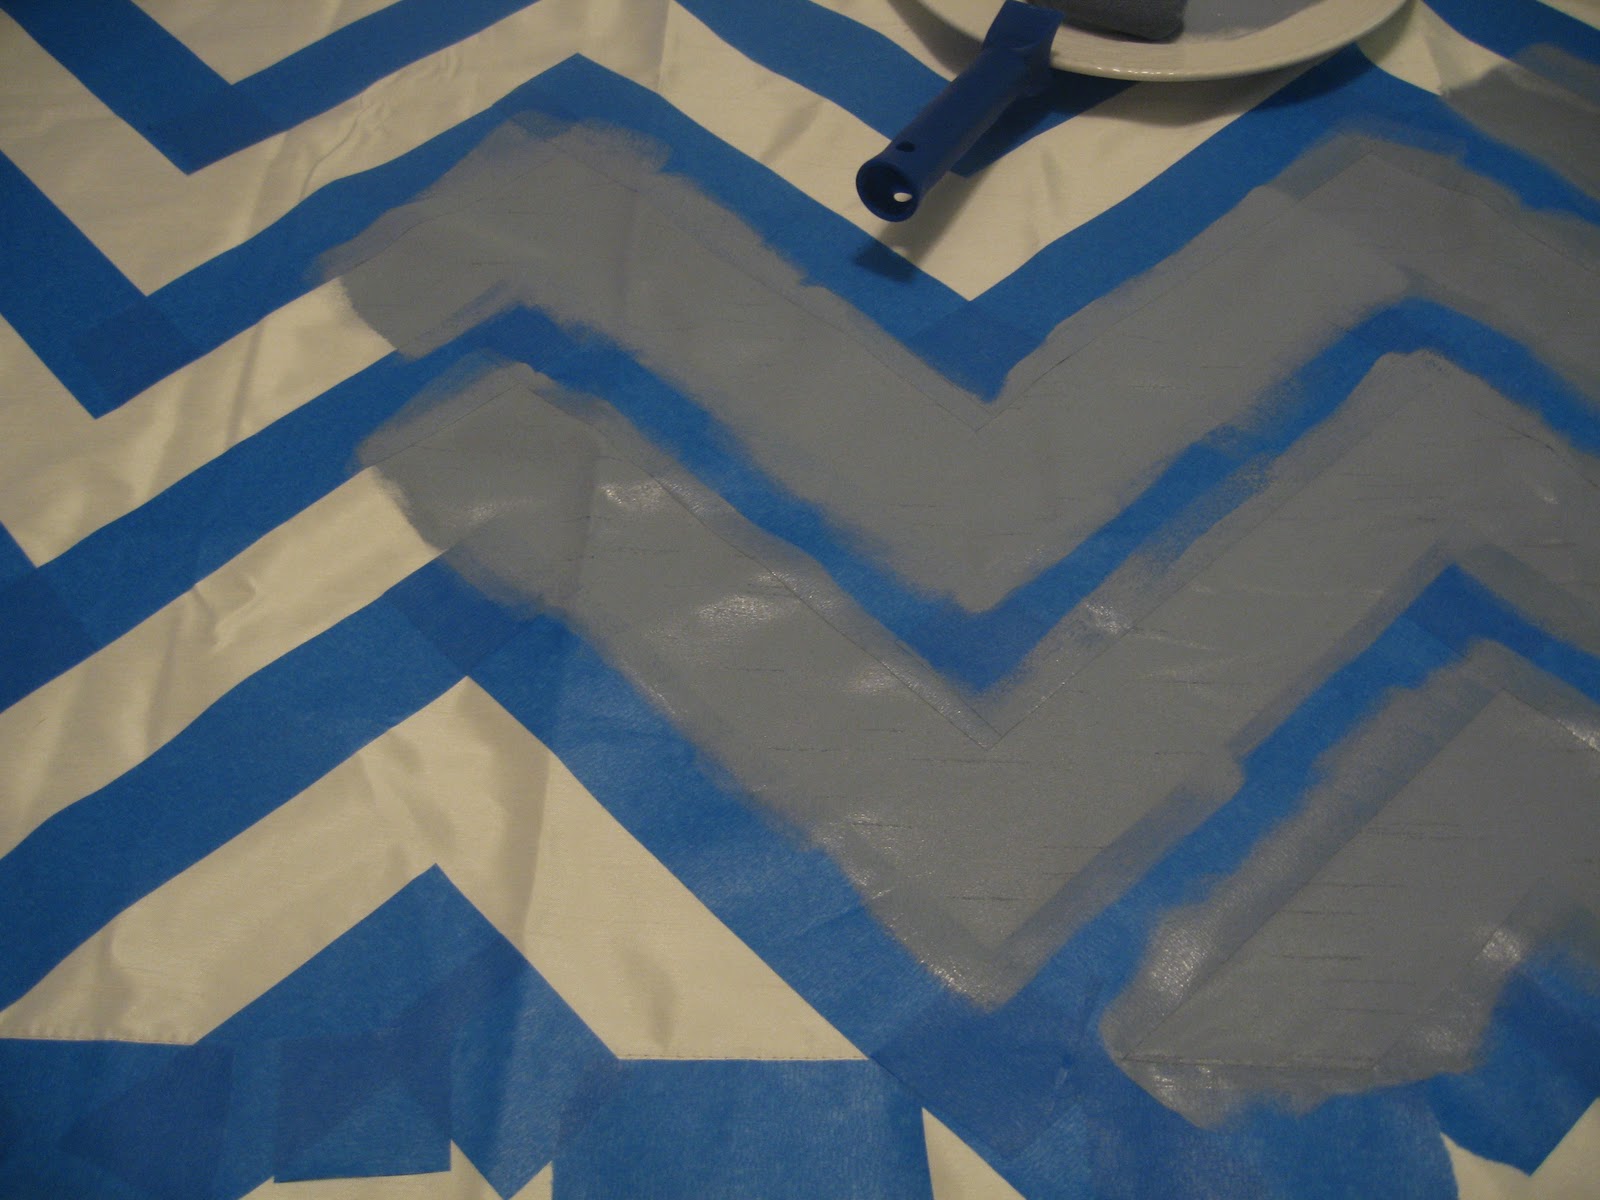
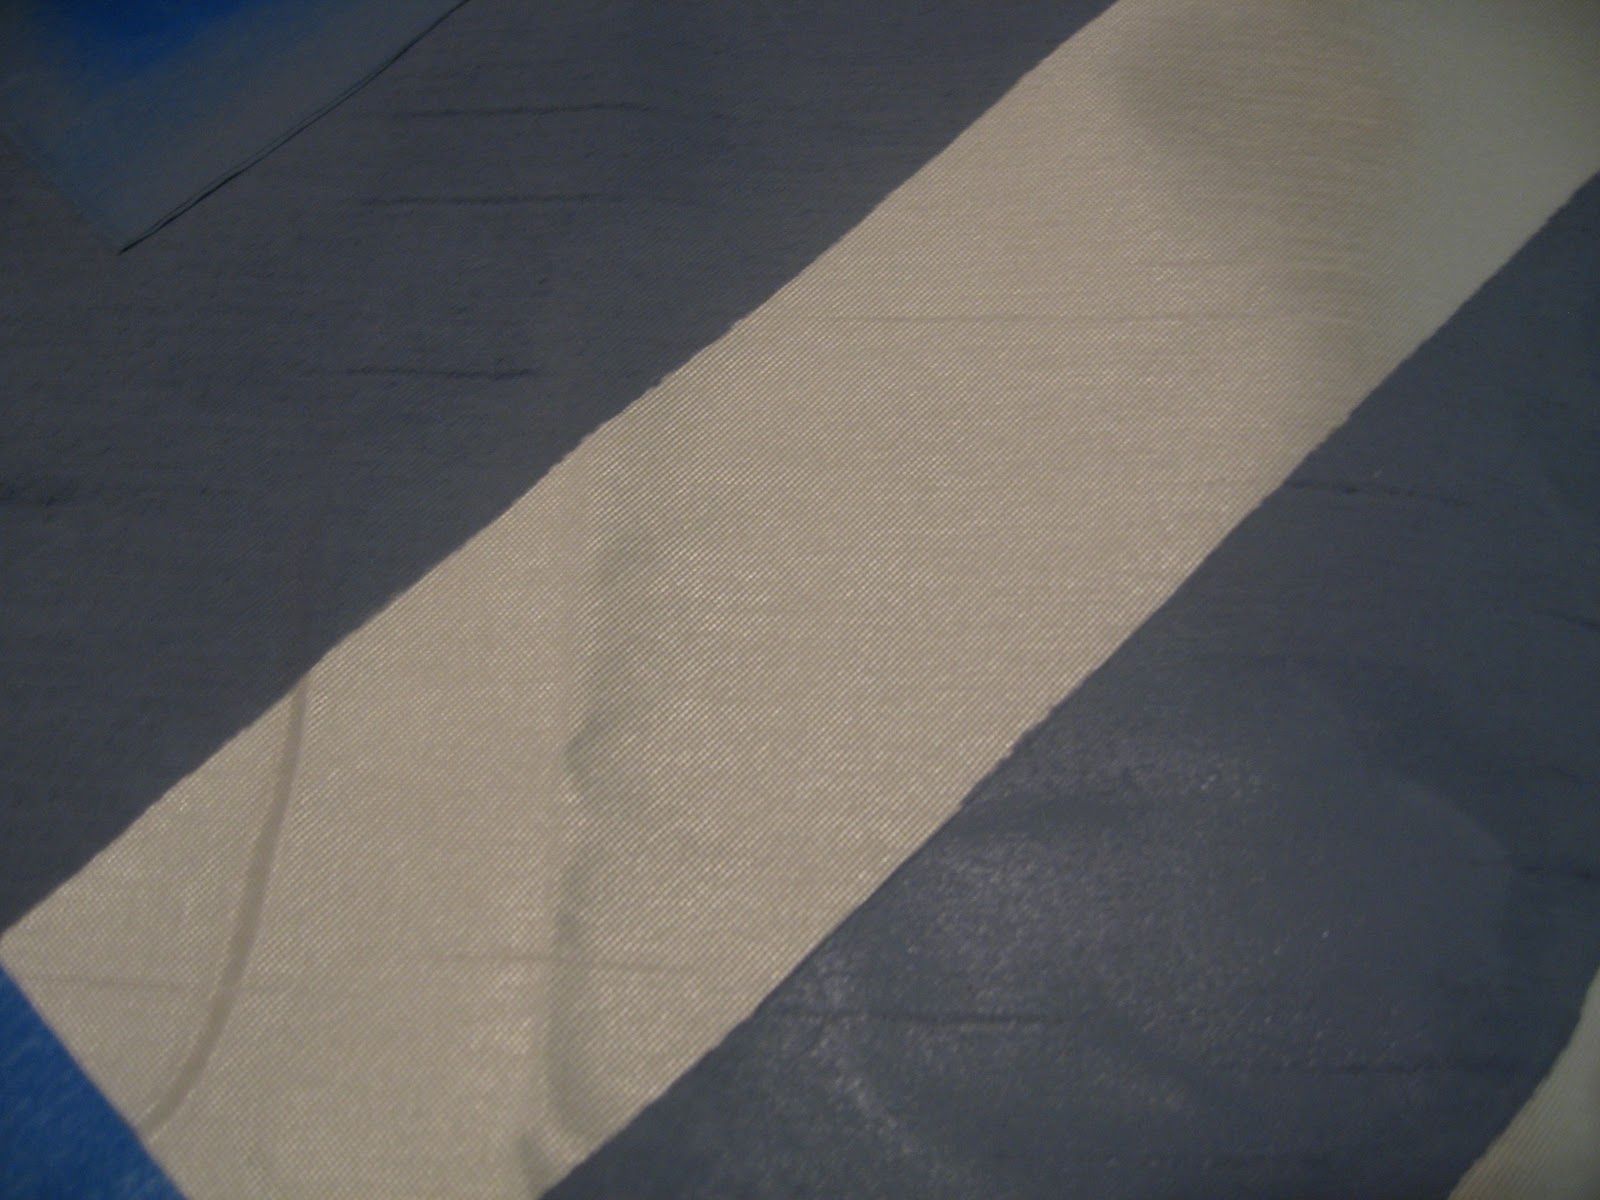
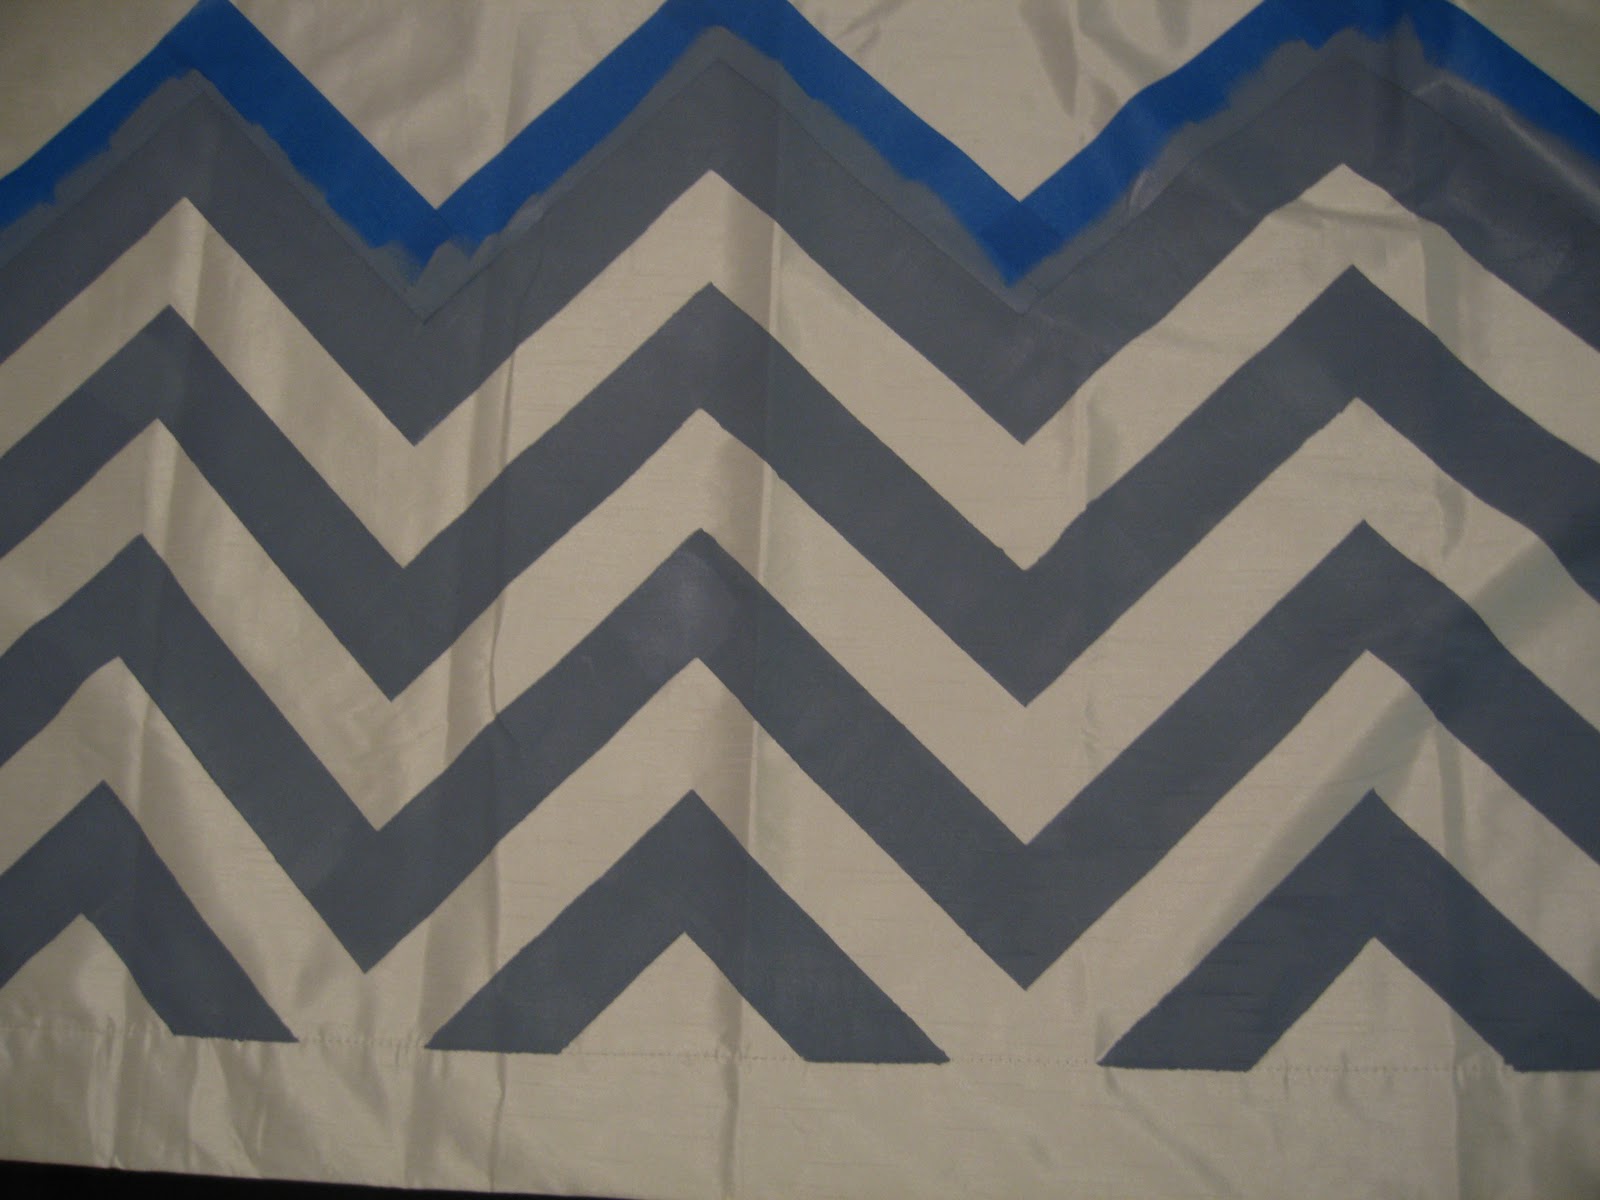
Step 8.  Paint!  I divided my curtain into four parts, so I would tape my first part and paint it before moving onto my second part.  Make sure you press along your tape really well in the area you are painting.  You want good adhesion so paint will not leak underneath.


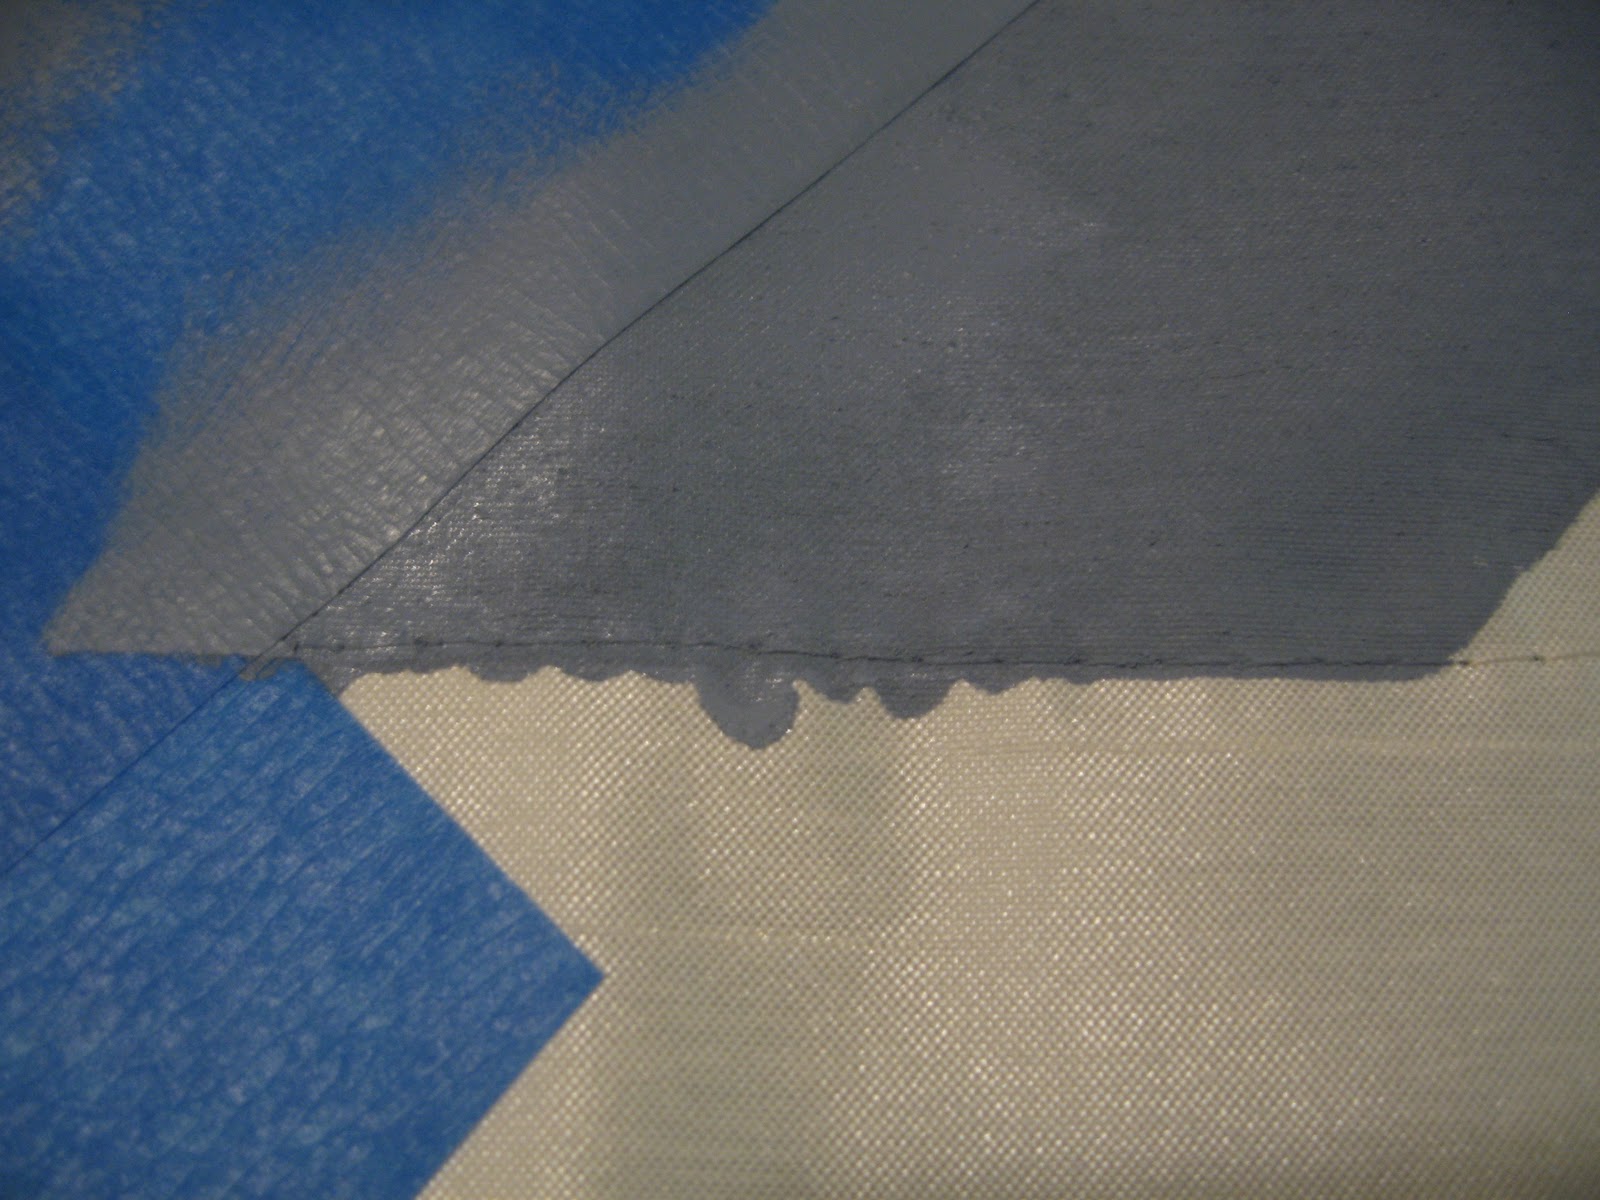
One thing I learned from this is to not include the stitching in the design.  I should have painted just above the hemline, but thank goodness this did not happen at everywhere on my curtains.  Overall, I am very pleased with the end result!


So let's take one last trip down memory lane . . .


Now, just sit back and admire the new curtains!


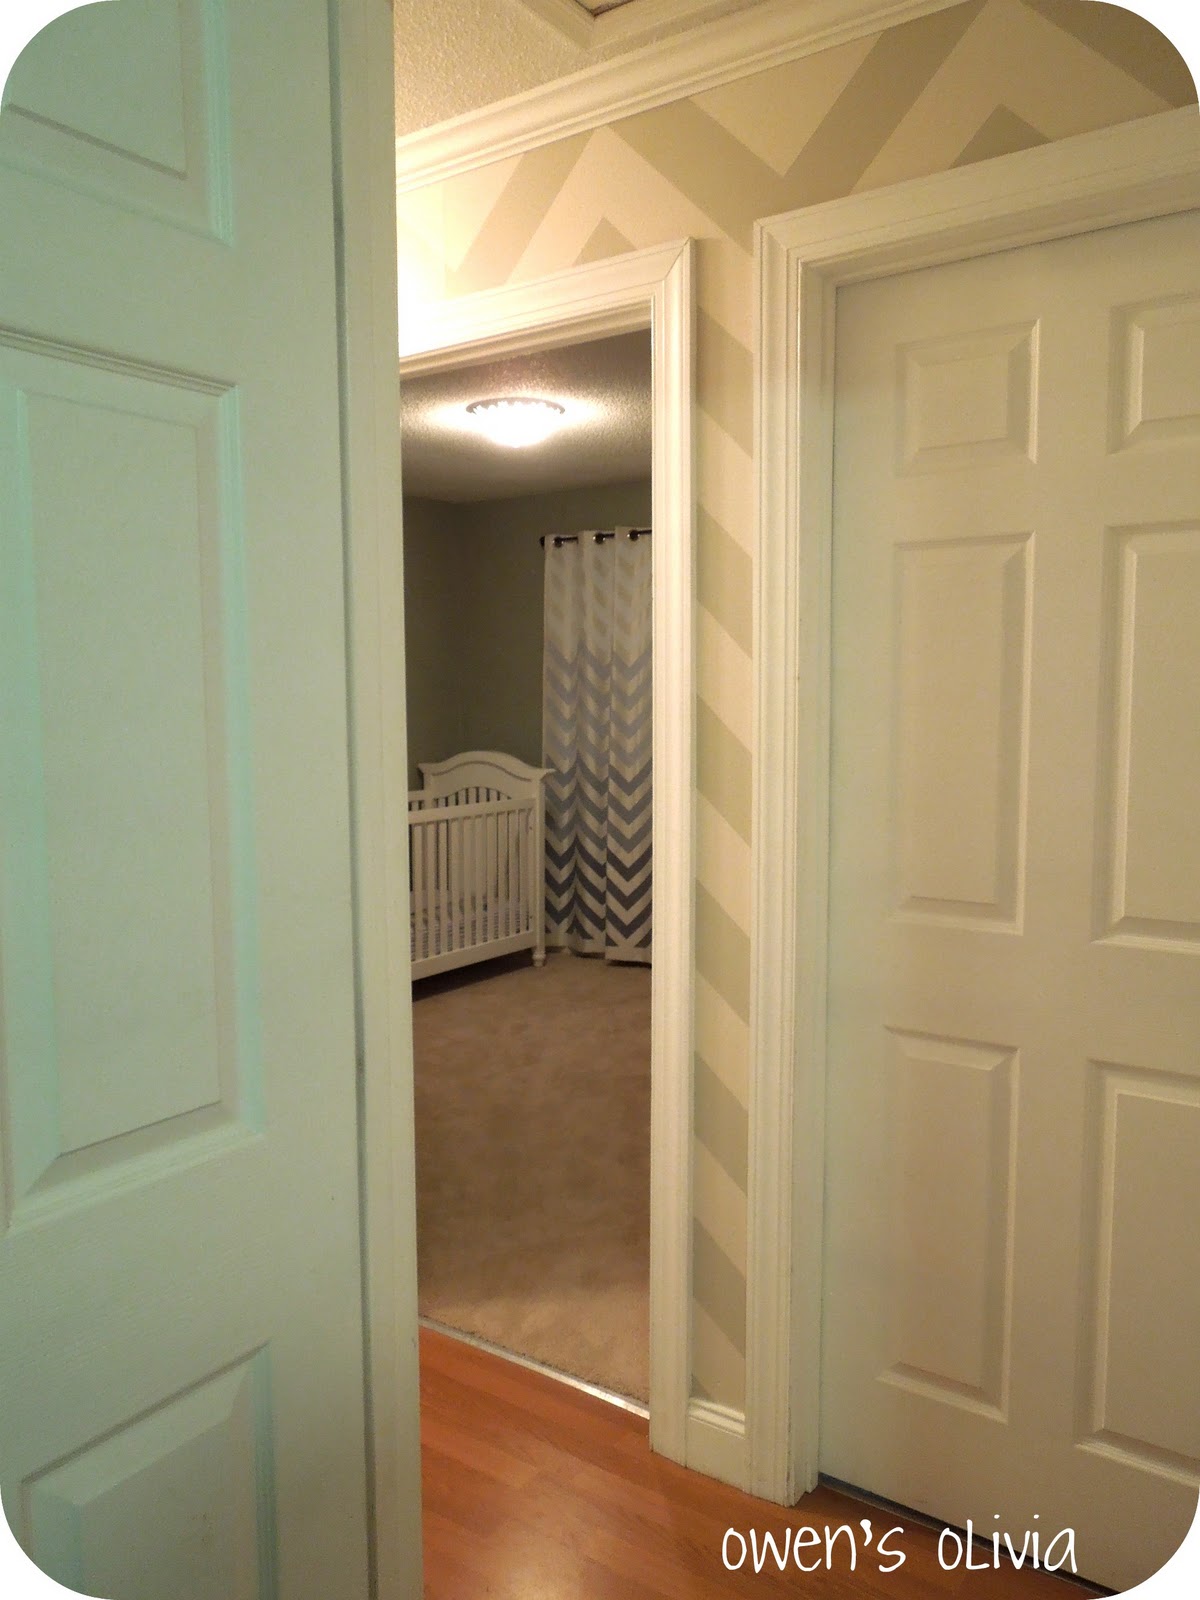
And this is what I get to see from my room.  (Yes, my hallway is chevron (painted by me 40 weeks pregnant), but I told myself no more chevron in my home.  Okay, maybe a little pillow or something down the road. :)


This project was contributed by one of our fabulous readers! We love to share your projects with this great blogging community. So, if you have projects from kitchen renovation ideas to small bathroom remodels, overhauled and repurposed furniture, spray paint updates you name it please send it in! Thanks for reading Remodelaholic!

Read more...

Fun Striped Art Tutorial

29 September 2011


DIY Stripe Art


Hi! I'm Alison from Classy Columbus Designs, and I am so honored to be guest posting today at Remodelaholic!! Cassity was so sweet to ask me! Thank you!

Read more...

Cute Ballerina Girl's Hair Clip Holder

09 August 2011


I hope you all remember the room Roeshel and I designed for Shaw.  Well while I was there I met Ethan from One Project Closer.  And I am excited to have him here showing us a simple project that and he and his wife made!  


Hello, my name is Ethan, and I'm one of the editors at One Project Closer- a site all about home improvement. Every day we're sharing posts about what we've been working on and the tools we used to do it. Check us out for everything from fixing a leaky faucet to our favorite impact drivers.
Even though I'm writing today's post, it's really my wife, Jocie who gets all the credit. She can be a very crafty person- not in the scheming sort of way but in the making something from scratch sort of way. It's the same craftiness that she tapped into for our new zebra print dining room chairs, and when she mentioned making some fun barrette holders, I immediately grabbed my camera.
Jocie started by drawing the cutout for the bodice on some paper. After a couple tries, she had an outline she was happy with, and she traced it on some 1/2" plywood. I grabbed my jigsaw and minutes later we had two (mostly) identical bodices.

The jigsaw left some rough edges and the plywood needed sanding anyway. We used a course grit sandpaper to help remove any leftover marker and a fine sandpaper to make everything nice and smooth.


That looks much better.

Next we applied a simple base coat of paint, and even had some help from my two year old daughter (the ballerina). She used some extra craft acrylic paint left over from a previous project, but you could also use primer.

After they dried, Jocie painted one pink and one purple,

and she added some artistic swirls- all free hand. A good, easy alternative would be flowers, polka dots, or stripes.


No project is complete until you've used a staple gun. We used our heavy-duty staple gun to attach some tulle along the bottom edge of the cutout so it would not be seen.

The vertical ribbons are where you can clip barrettes, and Jocie used her second favorite tool, the glue gun, to hold them in place.

And more ribbon across the body for decoration.

We had some silk flowers handy, and she decided to glue them on the upper portion of the bodice.

Lastly, Jocie tied some ribbon in a bow for hanging the barrette holder.

Ta da!


So far, Jocie has made three of these and plans on making several more for friends. They make for great, low-cost gifts and room decor. Most the materials are easy to find at craft stores, and things like 1/4" heavy-duty staples and plywood are available at home improvement centers. Be sure to use a Lowes coupon or Home Depot coupon before you buy. All together each cost about $10 to make.
A big thanks to Cassity and Justin for letting me share our story. Hopefully you feel inspired and can follow these steps to make your own barrette holder!

This project was contributed by one of our fabulous readers! We love to share your projects with this great blogging community. So, if you have projects from kitchen renovation ideas to small bathroom remodels, overhauled and repurposed furniture, spray paint updates you name it please send it in! Thanks for reading Remodelaholic!


If you like this project please check out these past features:

Read more...
Related Posts with Thumbnails
Emealz - Easy Meals for Busy People!
Home & Garden Blogs Home & Garden Blogs - Blog Rankings

Blogging  tips, tutorials and SEO
From Here to Eternity

  © Blogger template On The Road by Ourblogtemplates.com 2009

Back to TOP