
French Twist- Giving a table a vintage French Look! by Korrie
I write a little blog called Red Hen Home. Why "Red Hen"? Well, my husband thinks I have a little bit of a "red hen" complex--that is, I have a "Well, then I'll do it MYSELF!" kind of attitude.
I don't really disagree with him. ;-)
I started blogging close to a year ago so I would have someone to share my little projects (mostly furniture, a little decorating, and even sometimes...knitting) with...my husband tries, but he just isn't able to generate a lot of enthusiasm for my obsession!I have a definite love for typography...letters, numbers, symbols, whatever! When I saw a beautiful piece of clip art at The Graphics Fairy, I used it to turn this table:

into this table!


You can see the whole "how-to" in my post A Little French Chocolate.
It was such a fun (although back-breaking) project
that I wanted to see if I could do it again!
Shall we see??
I found this little table at Deseret Industries (that's Utah's "Goodwill"). It was only $5! Do you see those legs?? I love that barley twist!that I wanted to see if I could do it again!
Shall we see??

Oh...here's why it's only $5...the finish on the top is shot, and one of the planks is completely unglued.

I couldn't be happier!
The first order of business was to sand down the table top to remove the old finish--but I didn't worry about any dings or scratches. That's just character!I re-glued the plank back with it's brothers. This is the first time Liquid Nails has failed me. Gorilla Glue came to the rescue!

Then I spent a happy couple of hours searching for just the right graphic at the Graphics Fairy again. This is the one I chose.
 And no, I have no idea what it means! I even tried an on-line translator, and all I can tell you is that it may have something to do with hardware, and the last line says "of all kinds & all styles."
Works for me!
After printing my image, I took it to Office Max and had it copied onto overhead transparency film. Using a borrowed overhead projector, I set up shop on my kitchen floor after my little ones had been sent to bed!
A smart person, a wiser person, a less-impatient person, would have figured out how to raise this setup off of the floor after the first table.
I...am not that person.
So I planted myself on the floor with my little bottle of acrylic paint and a brush, and spent the next couple of hours in all sorts of contortions on the floor.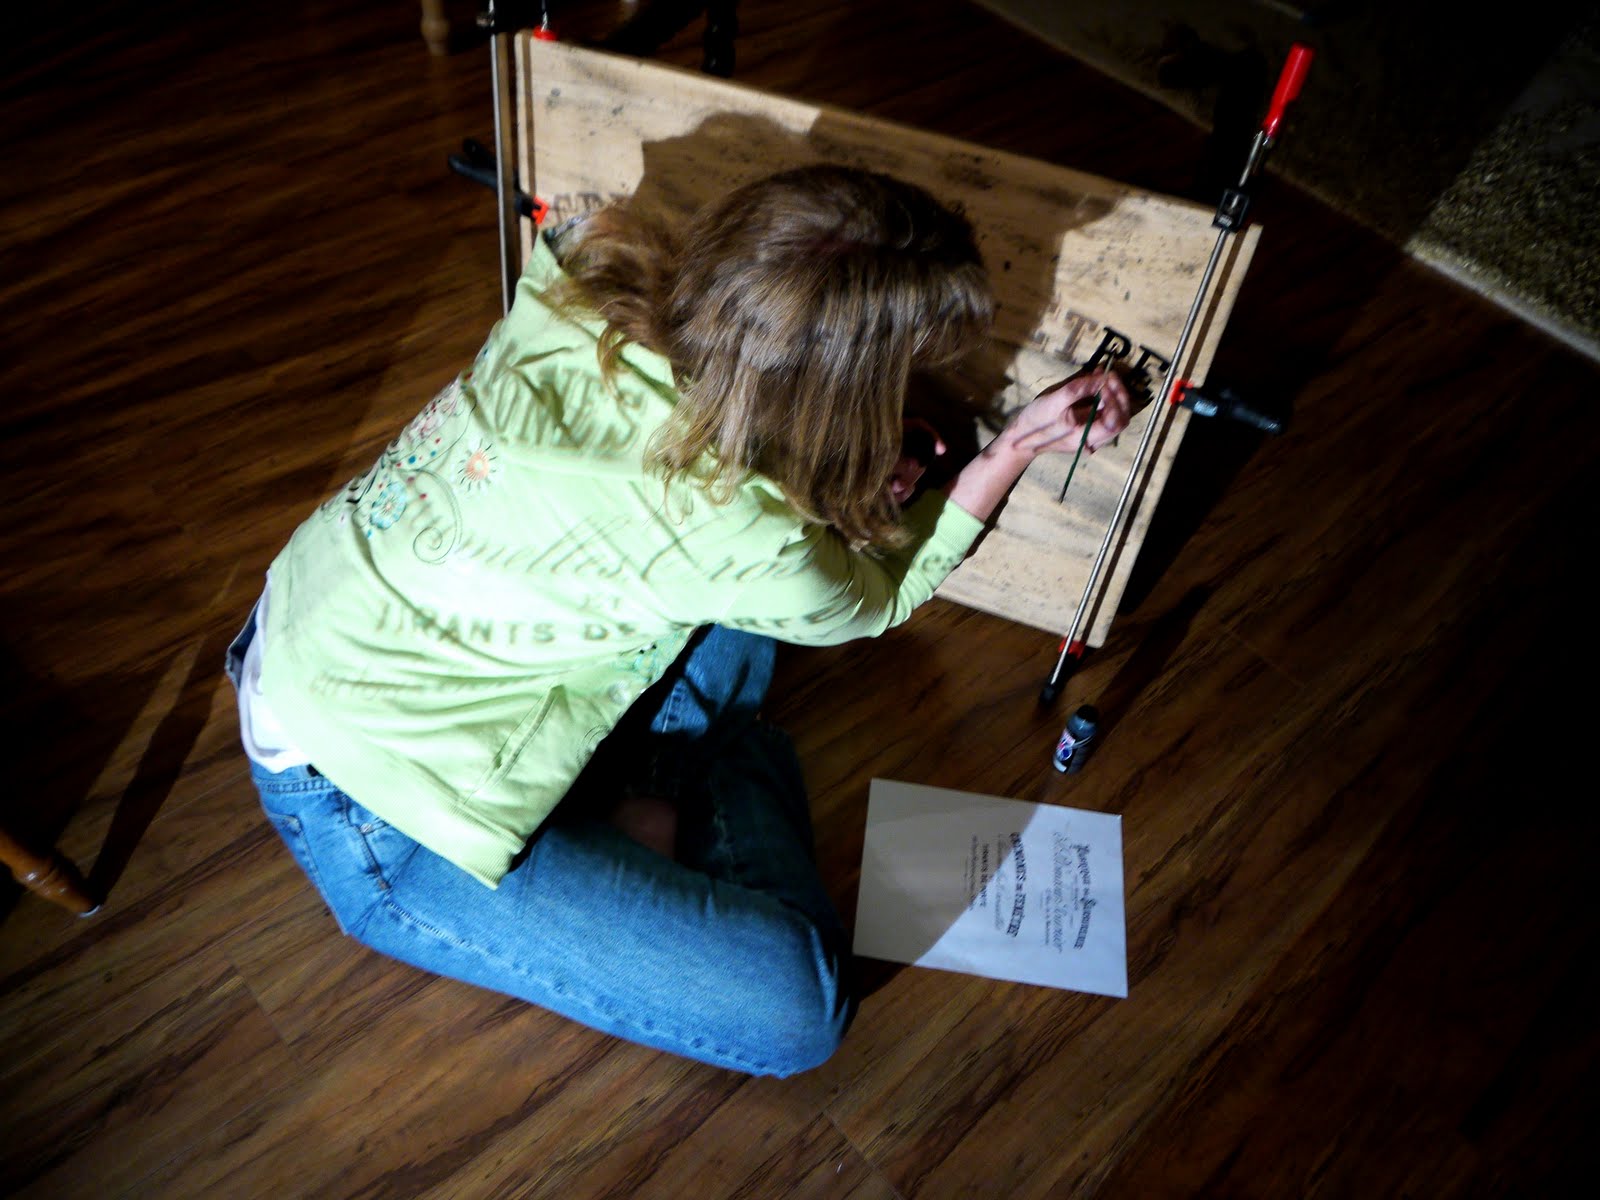


It's another sign of impatience that I painted with the clamps still on!
Here's the initial result:

Next day I painted the bottom with Sherwin Williams Creamy paint, distressed the black lettering on top of the table, and applied a coat of Minwax Antique Walnut with an old rag.

Later I distressed the paint and glazed the table legs with Minwax Jacobean stain.
And here's what it looks like now!


I moved the table into my front room to get some additional shots. I have two arm chairs in there with one of the first tables I ever painted in between them (painted in the days before I knew about distressing or glazing). I moved the old table (that looks newer) out, and put the new table (that looks older) in...


Social Retargeting by Chango
Those are SUPER cute! I may need to put this on my to-do list! :) Sounds REALLY time intensive though!!
ReplyDeleteI love these tables...something I am going to put on the must try list. That barley twist table was a total score even w/ the damaged top. Love how you got your blog name!
ReplyDeleteLove it! Cannot believe you found that table for $5....amazing. I find broken furniture at Goodwill and it's still at least $25. Those barley twist legs are to die for.
ReplyDeleteLove it! The price, the legs and the graphics are perfect! Well done.
ReplyDeleteThank you for allowing me to guest post, Cassity!
ReplyDeleteWow! That looks amazing, all of your hard work paid off! Just beautiful
ReplyDeleteI love this table and the table you did before! I actually like the second table without the stain on top a little better. I love how you did it on the floor, classic! Great job.
ReplyDeleteIt turned out great! I love the legs on the table too. Another great table.
ReplyDeleteThis is beautiful :).
ReplyDeleteIt turned out beautiful!!! I'm loving every detail including the price!
ReplyDeleteBeautiful! The top looks like a panel from a vintage crate. And by the way, it's an ad for window casements and, yes, hardware. :)
ReplyDeleteIt looks perfect! Bravo!!!
ReplyDeleteMy friend speaks French, she said: basically it means window screws, cross hinges and door handles in all types and styles.
ReplyDeleteFabulous, you did again!!! They both look amazing!!
ReplyDeleteThis is beautiful! I just made something similar out of an old dumpy ottoman--here is the link: http://www.honeybearlane.com/2011/06/ottoman-to-side-table-transformation.html
ReplyDeleteI love your table though and you pulled it off perfectly!
Absolutely STUNNING, girlfriend. You are sooo good at this.
ReplyDeleteThe table turned out great!!! You did a fantastic job ;-)
ReplyDeleteSo beautiful, you have me hooked, now I have to try it on an old table I have....thanks
ReplyDeleteOh my goodness....those tables are IN.CRED.IBLE. Would I be crazy to do this to my dining room table? My husband may go nutto but I may have to try...it's just so beautiful. Terrific work!!! :-)
ReplyDeleteLove it! I wonder if you could use a permanent marker (like a Sharpie) instead of the paint. It might be faster. Hmmmmm.....
ReplyDelete